Third-party Apps and Plugins
204 files
-

Community Theme Creator
By y2guru
Manuals / How to
Refer to my YouTube channel or visit Faeran's Theme Creator Workshop videos to better understand the new features.
Dave Paterson - YouTube
Development Live Streams - YouTube
COMMUNITY Theme Creator - Patreon
11,248 downloads
- bigbox
- custom bigbox themes
- (and 1 more)
-

Mame No-Nag Updated Monthly, Current Version:
By MadK9
**This removes the nag screen that informs you if a rom doesn't work correctly, or if at all, if you use this no nag, then please do NOT go to the mame support site with issues with games, please only use if you understand that there will be no help from anyone at mamedev as you are using a modified version of mame.
Contents: mame.exe - Normal Mame with Nags removed. (Note mame no longer carries the 64 in its exe name changed by Devs in 0.229)
It's advisable to download the full mame official pack and install it, then just overwrite the exe with the replacement, this covers any changes the mame devs may have made to the support files.
After you have done this, make sure you copy the folders artwork, ctrlr, cheat, hlsl, ini, folders and the ini files from the root of your original mame folder, and move/copy them to the new install.
If you are using your own installed/setup of mame then make sure you also set in the mame.ini 'Skip_gameinfo 1'
If you got Launchbox to setup mame for you when asked, you only need to replace the exe and play.
As some are not sure about False Positives, and report a virus was detected, As goes for all versions i upload, they are all ran through virustotal before i upload, and if by any chance something did end up with an issue it would be noticed very quickly after upload and would be removed/restricted.
0.264 - https://www.virustotal.com/gui/file/b7d301c777152a4ffe5402d7dee1c800d28691a7ffbbace5529b62e9bb1546ec?nocache=1
All NEW versions of the No-Nag will be posted in this download thread only, if you wish to get the new releases every month, either follow myself or the thread, As the download section will not show any new releases.
14,163 downloads
-
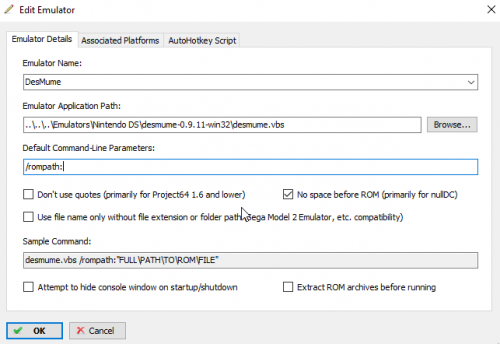
Script To launch DesMume in fullscreen automatically with LaunchBox.
By Sdentau92
Hi,
I made this script to start DeSmuMe (Stand-alone. Not RetroArch) in fullscreen automatically.
These are the steps for using the script:
1) Extract the attached file "desmume.zip" in the folder where you have the executable of the emulator.
2) Open "desmume.vbs" with a text editor and replace "DeSmuME_0.9.11_x86.exe" with your executable file name. Save the file "desmume.vbs"
3) On launchbox go to Tools / Manage Emulators, select your DeSmuMe emulator and click Edit.
4) In "Emulator Application Path" select "desmume.vbs" file (Filter All Files in Browse) instead of the emulator executable.
In "Default command-line parameters" enter "/rompath:"
Check the option "No space before ROM"
Click ok
4) Play Little Red Riding Hood's Zombie BBQ (If you bought it )
I'm a noob in vbscript, if you know an easier way to solve this problem, tips are welcome.
(Sorry for bad Great Britainnnish)
252 downloads
(2 reviews)0 comments
Updated
-
Mame HLSL Settings
By Lordmonkus
Here are the Mame HLSL settings I use. HLSL has the advantage of working for both horizontal and vertical games.
These settings are for use in Mame version 0.172 or later. Older versions will not look right, there were changes made in Mame 0.172 that made HLSL a much better shader choice.
There are 3 text files inside, one is a readme with simple instructions. As always when making edits and changes make a backup of your files you are about ti edit first just in case you do not like the changes.
Copy the text from "mameini.txt" and paste it into the mame.ini file replacing the block of text that is already in it. Don't simply add it to the end.
Copy the text from rasterini.txt into the "raster.ini" file located in the /ini/presets folder in the Mame folder. Overwrite everything that is there.
As always with shader settings they may look better or worse on your monitor depending on size, resolution and calibration. These settings I think look really good on my monitor which is a 27" 1440 resolution TN panel from Asus.
1,864 downloads
-
NeoGeo Rom Copy
By Lordmonkus
These bat files are used to copy or move the NeoGeo rom set out of a Mame rom set to have a separate collection of just NeoGeo roms if you have not obtained a separate NeoGeo rom set already.
In this zip file you will find 4 bat files, use the one for the job you wish to do whether it is move or copy and if your rom set is in .zip or .7z files.
Simply drop the appropriate bat file into the folder where your Mame roms are located. Run the bat file and it will create a folder in that folder called NeoGeo and then copy / move all the files located in that folder over to the folder that was created. It will copy / move all the game roms and the bios files.
I generated this list of roms from my "full" NeoGeo rom set I had downloaded. It should be complete but I cannot guarantee with 100% certainty that its completely accurate.
If you find any problems please let me know on the Launchbox forums.
526 downloads
-
All Killer No Filler Mame Rom Copy
By Lordmonkus
These bat files will copy all the roms and bios files from a split rom set as of Mame v.170 rom set. Using this on a rom set not 170 you may have missing roms so use with care if your set is different.
First off I did not create this at all, I am merely packaging this into one file for easy download and distribution. I got these files from http://forum.arcadecontrols.com/index.php/topic,149708.msg1563036.html#msg1563036 and they were created by the user BadMouth and he deserves all the credit for these files and the work put into them.
In this package you will find bat files and txt files of the same name, these are exactly the same files but with different extentions. Open the txt files if you wish to view exactly what the bat files are going to do.
To use these files simply copy the bat files into your Mame rom folder and run each bat file. Each bat file will then create a folder with a name matching the bat file and copy the roms from your Mame roms into the corresponding folder for easy organization. It does not move your files so you will still have an intact full Mame rom set.
If you do not wish to have separate folders simply use the _NoFiller.bat to copy them all in one shot into a folder created by the bat file.
630 games including those commented out. The batch file may contain more than this since I included multiple versions of a few games so the user could pick which works best for them. (2 or 4 player version, Budweiser Tapper or Root Beer Tapper, etc)
I'm using split sets, these numbers may vary depending on type of set and compression method.
2,920 downloads
-
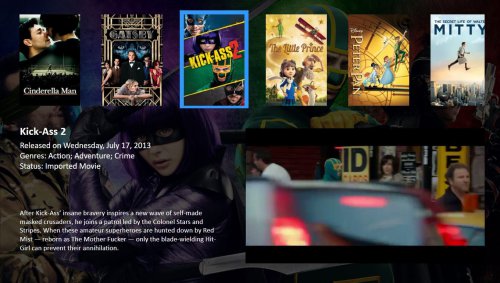
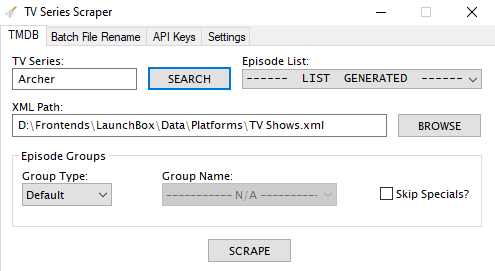
LaunchBoxMedia
By Brian
A tool to import movies and tv show episodes into LaunchBox.
You'll need to apply for a TMDb API v3 key in order to use the application.
Trailers for movies and theme songs for tv shows can optionally be downloaded in case a YouTube Data API key is supplied.
Features:
finds all the movie files in the given directory + subdirectories fetches the movie title + year based on the filename queries TMDb for the release date, synopsis, actual title and a backdrop and poster image automatically generates / fills an .xml-file in the launchbox/data/platforms folder downloads images to the 'Box - Front' and 'Fanart - Background' folders optional trailer download (all the required and optional keys are freely available)
https://github.com/jsBrian/LaunchBoxMedia
527 downloads
-
Archive Cache Manager
By fraganator
A LaunchBox plugin which caches extracted ROM archives, letting you play games faster. Also allows launching individual files from archives, and loading preferred file types from an archive.
New in v2.16
New M3U name option - "Disc 1 Filename" Always use the filename of the first disc of a multi-disc game for the m3u file, regardless of which disc was launched Allows better support for The Bezel Project config files, which use config files based on the ROM name New batch caching option to pause on caching errors (default is to skip and continue) Minor config window tweaks Description
When a compressed ROM (zip, 7z, rar, gz, chd, rvz, etc.) is first extracted, it is stored in the archive cache. The next time it is played, the game is loaded directly from the cache, virtually eliminating wait time.
As the cache size approaches the maximum size, the oldest played games are deleted from the cache, making room for new games.
Features
Skip the extraction wait time for recently played games. Configurable cache size and location. Configurable minimum archive size (don't cache small archives). Option to extract all discs in a multi-disc game, and generate M3U file. Option to copy ROM files to cache without extraction. Option to keep select ROMs cached and ready to play. Select and play individual ROMs from a merged ROM archive. Batch cache feature for extracting or copying multiple games to cache at once. Filename and extension priorities per emulator and platform (cue, bin, iso, etc). Support for additional archive formats (chd, rvz, etc) Support for Xbox iso to xiso conversion Badge to indicate cached games Example Use Cases
Why use Archive Cache Manager? Here's some example use cases.
ROMs located on NAS or external storage, where disk read or transfer time is slow. ROM library maintained as accurately ripped/dumped collections, where specialised compression formats not an option. Extract and play archives from location other than LaunchBox\ThirdParty\7-Zip\Temp, such as platform specific folder (for RetroArch Content Directory settings). Playing ripped PS2 games with PCSX2 where the disc image is bin/cue format, avoiding the "CDVD plugin failed to open" error message. Playing zipped MSU versions of games, where need to launch the rom file instead of the cue file from the archive. The library contains GoodMerged sets, and you want a quick way to play individual ROMs. Installation
Download the latest release from https://forums.launchbox-app.com/files/file/234-archive-cache-manager/ or https://github.com/fraganator/archive-cache-manager/releases Unblock the download if necessary (right-click file -> Properties -> Unblock) Extract this archive to your LaunchBox\Plugins folder, then run LaunchBox / BigBox. Within LaunchBox, ensure the emulator or emulator platform has the "Extract ROM archives before running" option checked. Uninstallation
Quit LaunchBox / BigBox, then navigate to the LaunchBox\Plugins folder and delete ArchiveCacheManager. Delete the archive cache folder (default is LaunchBox\ArchiveCache). Usage
Extracting and Caching
Archive Cache Manager runs transparently to the user. All that is required is the emulator or emulator platform has the "Extract ROM archives before running" option checked. Extraction and cache management is carried out automatically when a game is launched.
Cache and extraction behaviour can be modified in plugin's configuration window.
Multi-Disc Games
To use the multi-disc cache feature, check the "Multi-disc Support" option in the Archive Cache Manager config window. The next time a multi-disc game is launched, all the discs from the game will be extracted to the cache and a corresponding M3U file generated.
If the emulator \ platform supports M3U files (as configured in LaunchBox), the generated M3U file will be used when launching the game. Otherwise a single disc will be launched, and swapping between cached discs can be done manually in the emulator.
Batch Caching Games
Multiple games can be cached at once using the Batch Cache Games window. Select one or more games in LaunchBox, then right-click a game and choose the "Batch Cache Games..." option.
A window will popup displaying the list of games, and begin checking the extracted ROM sizes. Once the checks are complete, click the Cache Games button to begin caching.
Games are cached according to the plugin's emulator and platform settings. A game may be extracted, copied, or no action taken if it doesn't match a caching rule, or it's already cached.
Each game's caching progress will be displayed in the Status column, and a progress bar at the bottom of the game list shows the overall caching progress. If an error occurs during caching, it will be flagged in the Status column and caching will skip to the next game. If the "Pause Caching On Error" is checked, an error message is displayed with the option to continue or stop.
Tip: For games stored on a NAS or an external drive, use Batch Cache Games to cache a selection of them locally. Enable the plugin's Always Bypass LaunchBox Path Check option to allow the cached game to be launched directly, even if the network or external drive is disconnected!
Selecting and Playing Individual ROMs From an Archive
To play an individual ROM from an archive containing multiple ROMs (different regions, hacks, or discs), right-click it and choose "Select ROM In Archive...".
A window will popup with a full listing of the archive contents. Select the desired ROM file, then click Play. That ROM will now launch with the configured emulator.
The next time the game is launched via the normal Play option, the previous ROM selection will be automatically applied. To select another ROM, use the same "Select ROM In Archive..." menu.
The same menu is also available in BigBox, though currently only supports keyboard input.
Keeping Games Cached
Games can be marked 'Keep' so they stay cached and ready to play. To keep a game cached, open the plugin configuration window from the Tools->Archive Cache Manager menu. From there a list of games in the cache is shown. Check the Keep box next to the game, then click OK.
Badge
The plugin includes a badge to indicate if a game is currently in the cache. It is available under the Badges->Plugin Badges->Enable Archive Cached menu. There are additional Simple White and Neon style badges, which can be found in the LaunchBox\Plugins\ArchiveCacheManager\Badges folder. Copy your preferred icon to the LaunchBox\Images\Badges folder and rename it Archive Cached.png.
Configuration
Configuration can be accessed from the Tools->Archive Cache Manager menu. An overview of each of the configuration screens and options is below.
Cache Settings
This page shows a summary of the cache storage and currently cached items, and provides options for cache configuration.
Configure Cache
Clicking the Configure Cache... button opens the cache configuration window.
Configure Cache - Cache Path
This is the path of the cache on disk. The path can be absolute or relative, where relative paths are to the LaunchBox root folder.
Default: ArchiveCache
If the cache path is set to an invalid location (LaunchBox root for example), an error message will be displayed when clicking OK.
If the cache path is set to an existing path that already contains files or folders, a warning will be displayed when clicking OK. Click Yes to proceed, or No to go back and change the path.
Configure Cache - Cache Size
This is the maximum cache size on disk in megabytes. The oldest played games will be deleted from the cache when it reaches this size.
Default: 20,000 MB (20 GB)
Configure Cache - Minimum Archive Size
This is the minimum size in megabytes of an uncompressed archive before it will be added to the cache. Archives smaller than this won't be added to the cache.
Default: 100 MB
Keep
A Keep flag can be applied to a cached item. When set, the item will be excluded from cache management and not be removed from the cache. This is useful for less frequently played games which need to load without waiting (very large games, party games, favourites, children's games, etc).
Default: Disabled
Open In Explorer
Clicking the Open In Explorer button will open the configured cache path in Windows Explorer. This button is disabled if the cache path does not exist.
Refresh
Refreshes the cache summary and list of cached items from disk.
Delete
Clicking on the Delete button will remove the selected items from the cache (including items with the Keep setting).
Delete All
Clicking on the Delete All button will delete everything from the cache (including items with the Keep setting).
Extraction Settings
This page provides settings for archive extraction and launch behviour. Each row in the table applies to the specified emulator \ platform pair. If a game is launched which doesn't match an emulator \ platform, the settings in All \ All will be used.
Emulator \ Platform
The specific emulator and platform for the settings to be applied to. Add a new emulator and platform row using the Add... button. Remove an emulator \ platform row using the Delete button.
When a new row is added its settings will be copied from the All \ All entry, except for Priority which will be blank.
Priority
Files from an archive can be prioritized in the case where an emulator requires a certain filename or file type. This setting defines the filename or extension priority for the specified emulator and platform combination.
The priorities are a comma delimited list, where the highest priority is the first entry, the next highest priority is the second entry, and so on. If a match is not found in the archive when a game is loaded, the priority in All \ All is used.
A wildcard (*) can be used to perform partial filename matches. Examples include:
bin, iso - Files ending with bin, then files ending in iso, then all other files. eboot.bin - Files named eboot.bin, then all other files. *(*E*)*[!].*, *(*U*)*[!].*, *[!].* - GoodMerged style, prioritizing European 'good' ROM dumps, then USA 'good' ROM dumps, then other region 'good' ROM dumps, then all other files. Note that the priority is applied to all archives, even if they are not cached.
The fallback All \ All priority is the basis for the contents of the multi-disc M3U file generation. Be careful removing entries such as cue, unless a specific emulator \ platform is used to handle cue and similar file types.
Default:
All \ All | mds, gdi, cue, eboot.bin PCSX2 \ Sony Playstation 2 | bin, iso Action
The action to take when processing a ROM file.
Extract - Extract an archive to the cache. Non-archive files will be passed directly to the emulator. Copy - Copy the game file to the cache. Archive files will copied, but not extracted. Extract or Copy - If the game file is an archive, extract it to the cache. Otherwise copy the game file to the cache. Default: Extract
Launch Path
The path within the cache to launch the game from. Useful for managing common settings in RetroArch which are based on the game's folder.
Default - The archive folder in the cache, which is in the form <Filename> - <MD5 Hash> Title - The game's title set in LaunchBox (e.g. Final Fantasy VII) Platform - The game's platform set in LaunchBox (e.g. Sony Playstation) Emulator - The emulator title set in LaunchBox (e.g. RetroArch) Games will always be extracted \ copied to the <Filename> - <MD5 Hash> location. If the Launch Path is set to something other than Default, the corresponding folder will be created within the cache, and NTFS hardlinks will be created which point to the extracted \ copied files.
Default: Default
Multi-Disc
Check this option to enable multi-disc support. When enabled, the following actions occur when playing a multi-disc game:
All discs from a multi-disc game will be extracted \ copied and added to the archive cache. M3U files will be generated, with the name based on the M3U Name setting. The M3U contents will list the absolute path to one cached file per disc, where the file is chosen based on the emulator \ platform file priority, or the special All \ All priority. If the emulator \ platform supports M3U files, the generated M3U file will be used when launching the game. Default: Enabled
M3U Name
The name of the M3U file created when launching a multi-disc game, and Multi-Disc is enabled. The M3U file name is used by some emulators to create a save file and match settings.
Game ID - The unique ID for a game, generated by LaunchBox. This is the same M3U naming convention used by LaunchBox (e.g. 2828d969-4362-49d5-b080-c2b7cc6f7d59.m3u) Title + Version - The game's title and version combined, with (Disc N) removed from the version (e.g. Final Fantasy VII (Europe).m3u) Disc 1 Filename - Use the filename of the first disc as the name of the M3U, regardless of which disc was launched (e.g. Final Fantasy VII (Europe) (Disc 1).m3u). Allows for The Bezel Project support, while maintaining a consistent name for emulators to manage save files across multiple discs. Default: Game ID
Smart Extract
Check this option to enable smart extraction, which will only extract a single file from an archive if a number of rules are met. See the Smart Extract Settings section for details.
Default: Enabled
chdman
Check this option to extract a chd file to cue+bin files using chdman. The executable chdman.exe must be copied to the folder LaunchBox\Plugins\ArchiveCacheManager\Extractors.
Default Disabled
DolphinTool
Check this option to extract rvz, wia, and gcz files to iso files using DolphinTool. The executable DolphinTool.exe must be copied to the folder LaunchBox\Plugins\ArchiveCacheManager\Extractors.
Default Disabled
extract-xiso
Check this option to extract and convert full iso files to Xbox iso files using extract-xiso. Supports both zipped and stand-alone iso files. The executable extract-xiso.exe must be copied to the folder LaunchBox\Plugins\ArchiveCacheManager\Extractors.
Default Disabled
Smart Extract Settings
When enabled, the Smart Extract option will check if it's possible to extract only a single file from an archive. For merged archives containing multiple ROM versions and hacks, this avoids the need to extract a potentially large number of files to play a single game.
Smart Extract will extract and launch a single file from an archive if the following conditions are met:
All of the file types in an archive are the same, excluding files with Metadata Extensions.
OR
All of the file types in an archive are Stand-alone ROMs, excluding files with Metadata Extensions.
The file to extract will be (in priority order):
The individual file selected through the "Select ROM in Archive..." right-click menu. The first file which matches a configured Priority. The first file in the archive. Stand-alone ROM Extensions
A comma delimited list of file extensions which can run stand-alone (no dependencies on other files).
Default: gb, gbc, gba, agb, nes, fds, smc, sfc, n64, z64, v64, ndd, md, smd, gen, iso, chd, gg, gcm, 32x, bin
Metadata Extensions
A comma delimited list of file extensions which indicate ROM metadata, and aren't required to play a ROM file.
Default: nfo, txt, dat, xml, json
Plugin Settings
Always Bypass LaunchBox Path Check
When enabled, bypasses LaunchBox's check that a game's application path (ROM file) exists before launch. If a game is cached and the source ROM storage is slow or unavailable, the game will still launch immediately.
The bypass check happens automatically if the extract action is Copy, or the file is not zip, 7z, or rar.
Default: Disabled
Check For Updates On Startup
Enable this option to check for plugin updates when LaunchBox starts up. This is a simple version check of the latest release on github, and nothing is automatically downloaded or installed. If a new update is found a message box will appear shortly after LaunchBox is started, with the option to open the download page in a browser.
Default: On first run, a message box will appear asking the user if they'd like to enable the update check.
Source Code
This plugin is open source, and can be found on github: https://github.com/fraganator/archive-cache-manager
1,238 downloads
-
No Filler Mame Rom Copy 182
By Lordmonkus
These bat files will copy all the roms and bios files from a split rom set as of Mame v.182 rom set. Using this on a rom set not 182 you may have missing roms so use with care if your set is different.
This is an updated version of the older No Filler batch file for romset 170 I uploaded here:
Thanks to @ckpfor taking the time to update this batch file for the newer set.
In the download zip file you will find 2 files, one .txt and one .bat file. The .txt file is just there so you can look inside and see what is being done by the .bat file.
To use this simply copy the _NoFiller.bat file to the folder containing your 182 rom set and run it like any other program. It will create a folder called _NoFiller and copy all the roms from your rom collection into the _NoFiller folder. From there you can then move that folder out to a location of your choosing for storage and then import those roms into Launchbox and you will have a nicer streamlined set of games.
231 downloads
(2 reviews)0 comments
Submitted
-

AutoHideMouseCursor
By goblindriver
I found a great, simple and free app that hides your mouse cursor after a specified amount of time.
I have the application start when I start Windows and have specified a 5 second interval.
Its perfect for Big Box and HTPC users.
credit to: http://softwareok.com/ for an elegant solution.
288 downloads
(1 review)0 comments
Updated
-
Pre-configured SumatraPDF + JoyToKey to view PDF's with a controller in LaunchBox
By teeedubb
This is a pre-configured SumatraPDF and JoyToKey to use for viewing PDF manuals in LaunchBox with a controller. It was setup with a DS3 using ScpTools Reloaded so it should also be compatible with a Xbox 360 controller. I have not tested it with any other controllers.
The zip file contains SumatraPDF, JoyToKey and a AHK script that will launch JoyToKey in a hidden state, then SumatraPDF and when SumatraPDF is closed it will kill JoyToKey. For it to display PDF's in LaunchBox you need to configure the Windows default PDF viewer as 'SumatraPDF-JoyToKey.exe'. You can update either SumatraPDF or JoyToKey by placing the contents of the portable installs in the root directory.
Script usage outside of LB is: "c:\path\to\SumatraPDF-JoyToKey.exe" "c:\path\to\pdf\file.pdf"
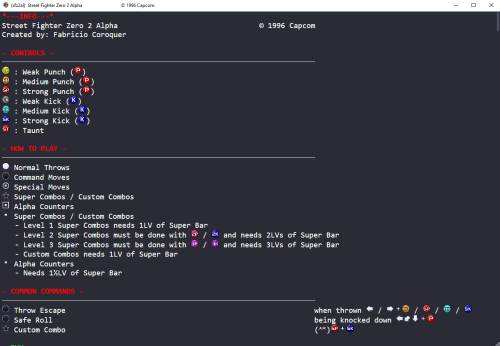
Controls:
D-Pad/Left analog stick: Up Down Left Right
Right analog stick Up+Down/L+R triggers: Zoom in/out
L+R bumpers: Go to First/Last page
Cross (Green A on 360): Next page
Square (Blue X on 360): Rotate image 90'
Triangle (Yellow Y on 360): Cycle through zoom/fit to screen modes (reset zoom)
Circle (Red B on 360): Exit SumatraPDF
Forum thread
Credits:
JoyToKey
SumatraPDF
AutoHotKey
301 downloads
- controller
- (and 3 more)
(3 reviews)0 comments
Updated
-
MAME to Demul Rom Copier (MAME .184 & demul07a_180816)
By SentaiBrad
So Derek (@DOS76), originally posted these scripts, and I saw that they were not copying over all of the files for these systems, and that there were now some errors thrown in. So I updated all of the scripts to include name changes, newly added games, and now the Naomi GD and Naomi GD2 scripts also copy over CHD files.
Required Files:
1. These scripts obviously.
2. MAME .184b and demul07a_180816
2. A MAME .184 split or non-merged rom set. Searching mame dome of pleasure helps. (Non-merged is suggested for the best compatibility, even though it's much larger).
3. A MAME .184 CHD pack. This is optional, but the Naomi GD and Naomi GD2 games will either not run correctly or at all. The CHD pack only comes as "merged".
How to Use:
1.Download the zip
2. Extract the contents of the zip to a folder (like your Demul folder).
3. Move the scripts (.bat) files to your MAME .184 roms folder.
4. Run each of the scripts 1 by 1, and when the script is done it will ask you to press a button to close the Windows Command Prompt.
5. It will create new folders, sorted to the top of your current view; These folders begin with _ so they move to the top.
6. Move those folders to a location of your choosing so that you can import them in to LaunchBox.
6.5 Make sure to set the "Scrape As" option for these platforms all to Arcade (Will automatically pop up during import when you type in a non-default System name) and check the box "Force using MAME Metadata" (That box is on the final screen with the rest of those check boxes). Remember, these are all Arcade MAME Games, so all of their metadata will be in there.
7. Make sure to also tell Demul where your MAME roms are located for parent and dependency reasons. You can add this in the Plugins and Bioses options menu in Deuml, pictured below.
The Systems this script will copy games for:
Naomi
NaomiGD
Naomi 2
Naomi 2 GD
Sammy Atomiswave
Hikaru
Gaelco
This script uses 2 commands, copy and xcopy, and I can only promise that it will work on Operating Systems that LaunchBox supports (Windows 7, Windows 8 / 8.1 and Windows 10 currently).
If you have any questions, leave a comment on the download page or the thread. I will also post Derek's original script for the version of MAME he edited them for. To clarify, his scripts work on a older version of MAME and Demul.
532 downloads
-
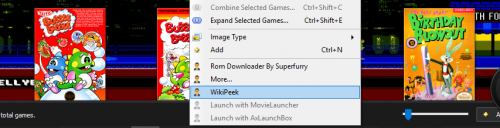
WikiPeek by Superfurry
By superfurry
WikiPeek v1.00 by Superfurry
A very simple plugin that will launch the full Wikipedia page of the game you have selected.
1.Extract into plugin folder.
2.Reload Launchbox or Bigbox.
3.Right click game and choose WikiPeek.
Superfurry
197 downloads
-
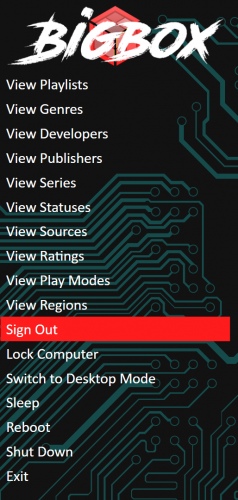
SignOut
By NJDave71
Overview
Instead of Shutting Down or Restarting Windows when exiting Big Box perhaps you just want to Sign Out / Log off.
This handy plugin gets that job done. (Great if you have a profile just for launching Big Box)
Instructions
Unzip SignOut and copy to your plugins folder in Launchbox.
What it does
Adds Sign Out to the Main root menu in BigBox
Adds Sign Out to the Tools Menu in Launchbox
Link in Forum to Source
Happy Gaming
56 downloads
-
Neko Project II HDD Runner
By Fayne Aldan
Anyone who has tried to use LaunchBox with NEC PC-9801 would know that Neko Project II, the most well known PC-98 emulator, does not accept HDI (Hard Drive Image) files via command prompt, which is what LaunchBox has to do to provide emulators with ROMs. This is especially a problem as all 5 of the first Touhou games, the most well known games on the system, use the HDI file format.
Here, I have created a solution. The zip download contains two files: runner.exe and runner.ahk
To run the program, you need to extract runner.exe into the same folder as Neko Project II, and set the emulator application path in LaunchBox to runner.exe
All this program does is it receives the ROM location from LaunchBox and stores it in Neko Project II's configuration file if the ROM is HDI format then runs Project Neko II. If the file is not HDI, Project Neko II is simply run with the ROM location.
If you want to see the source code for the program, open runner.ahk in Notepad. The program is written using AutoHotkey.
205 downloads
-
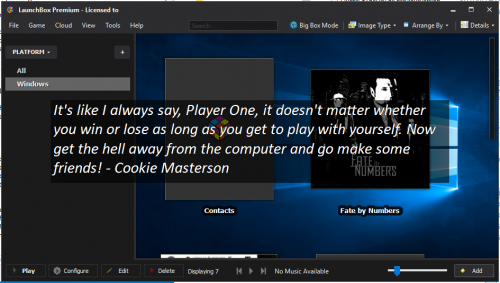
Quote Of The Day
By pdavis
LaunchBox plugin to display a Quote or Bible Verse on application start
To install from zip file, just unzip into your LaunchoBox\Plugins folder. Once installed you should have a LaunchBox\Plugins\QuoteOfTheDay folder.
Once installed when you launch LaunchBox or BigBox you will be presented with a quote as soon as the application starts. The quote will stay on the screen for several seconds before disappearing. Clicking on the quote or hitting a key will dismiss it immediatly. Under the LaunchBox Tools you will find a "Quote Of The Day Settings" option. This will allow you to configure and test several options including colors, how long the quote is shown, and what type of quote to show.
48 downloads
(1 review)0 comments
Submitted
-
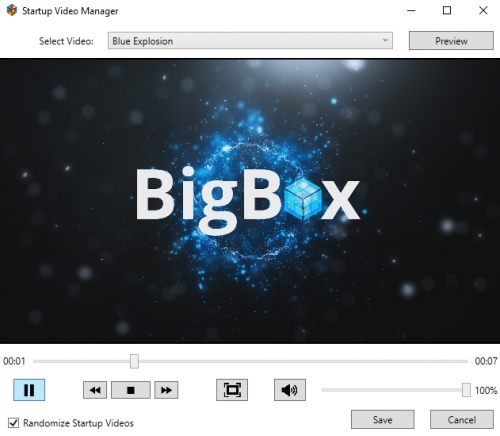
Startup Video Manager
By UnderwoodNC
***** Now Supporting Random Startup Videos *****
Startup Video Manager: A plugin to manage Startup videos for the user through a clean, simple interface.
About the Plugin
This plugin provides a menu item that will open a window to allow users to manage their startup videos, and optionally, to activate random startup videos. Random startup videos will be switched out as LaunchBox closes and Big Box opens.
New and Returning Features:
Reads from a "Startups" folder in LaunchBox\Videos to let the user select their desired startup video. Clicking "Preview" will let the user preview the selected Startup video through a custom VLC player with options for play/pause/stop, forward and backward, volume control and full-screen viewing. Double-clicking the video will also take you to and from fullscreen viewing. Pressing Esc while in fullscreen will also take you back to the normal view. Another way to get back while in fullscreen is to move the mouse to the bottom of the screen where a menu with the video name and a back button will appear. Copies the selected video in LaunchBox\VIdeos\Startups to LaunchBox\Videos and renames it to startup.mp4 so that BigBox will recognize it. Before replacing your existing startup.mp4 file, it checks to see whether or not your current startup.mp4 exists in the Startups folder. If not, it will copy your current startup.mp4 to the Startups folder, adding the Unix timestamp to the filename, to make sure you do not lose any startup video you may not have backed up. New in 2.0.0: Optionally lets the user select Randomize Startup Videos to have the plugin randomly select a startup video and adjust the minimum startup duration each time Big Box is started from LaunchBox. New in 2.0.0: With my system, I found that I needed to slightly tweak the minimum startup time from the actual length of the video. If you find you need to do this as well, in PluginConfig.xml for this that will be covered below. New in 2.1.0: Optionally lets the user update a configuration setting to match their actual load time of Big Box so that random videos will be limited to videos that are at least that long (no looping video on startup). Installation Instructions
If you have the old version, BigBoxStartupSelector, delete that folder and unzip the new folder into the LaunchBox\Plugins folder. Create a folder named Startups in the LaunchBox\Videos folder and move all of your startup videos there. You may rename the startup videos in this folder to whatever name you prefer to help you remember each video. Optional Configuration
These optional configuration settings can be applied by opening the included PluginConfig.xml in your favorite text editor and changing the appropriate number.
StartupTimeOffsetInSeconds: In my case, I found that when setting the Minimum Startup Video Duration to the actual length of the video, even for longer videos, caused the video to start to loop for about a couple seconds. To accommodate this, you can tweak the number of seconds being set as the minimum startup duration for videos through this configuration setting. I had to adjust mine by -2 seconds, but this is 0 by default, which will set the minimum startup duration to the actual length of the video. If you notice that after setting a video through this tool, the video either stops early or starts to loop, you can set this time to adjust all videos accordingly.
ActualStartupTimeInSeconds: This setting only applies to randomly-selected videos. If you set this to something other than the default of 0, only videos with at least this startup time will be considered for random selection. How to find out your actual startup time? Get the stopwatch app on your phone ready, go into the Big Box options and set Minimum Startup Video Duration to "No Delay". Now go back to LaunchBox, and as soon as you click to switch back to Big Box mode, start the stopwatch. Stop the stopwatch as soon as Big Box has finished loading. That time, rounded to the nearest second, is the value you should put as your actual startup time. But again, this only applies to randomly-selected videos. If you leave it as the default of 0, all videos will be considered for randomization, but you may have looping if the randomly-selected video is shorter than your actual load time.
Usage Instructions
Open LaunchBox or BigBox and browse to the Startup Video Manager plugin. Choose the Startup Video you would like to set, then if desired, click Preview to watch the video and make sure that's the one you want. If you'd like random startup videos going forward, make sure to check Randomize Startup Videos in the bottom-left corner. Note: the random selection setting saves as soon as you check or uncheck it. You can click Cancel or close the window from there. The Save button is only if you want to manually select a video to set as your startup video. Once you've decided on a video, click Save and the magic will happen. Otherwise, click Cancel. Enjoy! Please let me know if you run into any issues. Special thanks to angelobodetti for the random startup video idea!
Thanks, Jason, for providing your amazing software and thanks again to Jason, the LaunchBox staff and the community for your support in developing this plugin.
868 downloads
- plugin
- startup video
- (and 1 more)
-
ghoulsu.thumb.png.da61d2c6b6541902e25d67e18acc5096.png)
Mame HLSL ver 2
By Lordmonkus
This is a new version of HLSL settings I have been using recently and I find them much more "accurate" than my previous settings found here:
To use this simply enable HLSL in your mame.ini by setting hlsl_enable to 1 instead of 0 and dropping this raster.ini file into your \Mame\ini\presets folder. Backup your old one first just in case you do not like this one.
I do not take any credit for these settings at all. I got these from the youtube channel Big Blue Frontend and his custom 186 version of Mame he uploaded.
As always with shaders there are several factors that have an effect in how they look such as display type (TN vs IPS) size and resolution and of course personal preference.
2,884 downloads
-
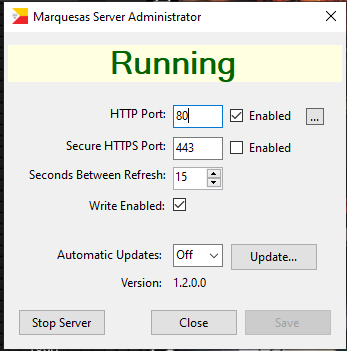
Marquesas HTTP Server
By pdavis
Small Footprint HTTP Server Plugin for LaunchBox.
Example Uses
* Display the current game marque full screen on a seperate system such as a tablet or smart phone.
* View the current game manual on a seperate system such as a tablet, laptop, smart phone.
* Retrieve LaunchBox and game information through a standard HTTP JSON API.
Installation
To install unzip and copy the MarquesasServer folder into your LaunchBox/Plugins folder.
The server will begin running whenever LaunchBox is started. The first time you run
it with the plugin a Windows security dialog will pop up asking if you want to allow
it to connect to the network. You will need to select one of the two options presented,
the option "Private networks, such as my home or work network will suffice". Once in
LaunchBox you will see a new "Marquesas Server Admin" option under the Tools menu to
manage the server. The server can then be accessed from any computer, phone, or tablet
located on (or with access to) the same network as the machine running LaunchBox/BigBox.
Requires .NET Framework Version 4.8 from https://dotnet.microsoft.com/download/dotnet-framework/net48
See the default index (LaunchBox->Tools->Marquesas Server Admin->Ellipses Button)
for a comprehensive list of dynamically generated direct links and detailed information.
Auto Refreshing Web Pages
These pages (specifically the Marque page) were designed to be brought up on a separate
computer such as an old tablet to display the marque of the game currently being played
in BigBox. It is recommended that the page be loaded and then the browser set to full
screen (kiosk) mode. In most browser on Windows you can toggle kiosk mode by hitting F11
when in your browser. Each page will refresh automatically every few seconds to insure
that the game being played will be reflected in the browser.
Works via a standard HTTP interface allowing the retrieval of HTML pages for the current
game. Any *ImagePath property can be retrieved from the IGame object
(Unbroken.LaunchBox.Plugins.Data.IGame.*) by specifying /Image/ followed by the Image
descriptor (the part preceeding ImagePath)
* /Image/Back
* /Image/Background
* /Image/Box3D
* /Image/Cart3D
* /Image/CartBack
* /Image/CartFront
* /Image/ClearLogo
* /Image/Front
* /Image/Marque
* /Image/PlatformClearLogo
* /Image/Screenshot
* /Manual
JSON API for retrieving
* /StateManager (Unbroken.LaunchBox.Plugins.PluginHelper.StateManager)
* /StateManager/IsInGame
* /StateManager/* (Unbroken.LaunchBox.Plugins.PluginHelper.StateManager.*)
* /SelectedGames (Unbroken.LaunchBox.Plugins.Data.IGame)
* /SelectedGames/* (Unbroken.LaunchBox.Plugins.Data.IGame.*)
JSON API for retrieving raw binaries
* /Binary/ScreenshotImage
* /Binary/FrontImage
* /Binary/MarqueeImage
* /Binary/BackImage
* /Binary/Box3DImage
* /Binary/BackgroundImage
* /Binary/Cart3DImage
* /Binary/CartFrontImage
* /Binary/CartBackImage
* /Binary/ClearLogoImage
* /Binary/PlatformClearLogoImage
* /Binary/Application
* /Binary/Configuration
* /Binary/DosBoxConfiguration
* /Binary/Manual
* /Binary/Music
* /Binary/ScummVmGameDataFolder
* /Binary/Video
* /Binary/ThemeVideo
See the default index (LaunchBox->Tools->Marquesas Server Admin->Ellipses) for direct links and detailed information.
Source: https://github.com/fpdavis/MarquesasServer
107 downloads
-
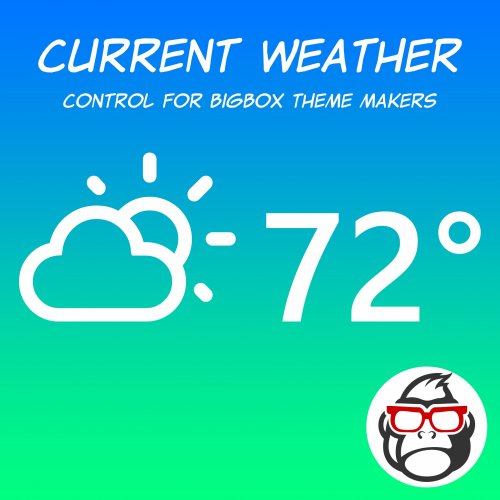
Current Weather Control for BigBox
By Grila
Yahoo killed their YQL API on January 3rd 2019, which this plugin uses to get the weather data, so it no longer works. Until I have time to switch it to a different weather API it will remain broken.
Grila's BigBox Weather Control v1.0.2
BigBox Control/Plugin
1/3/2018
Description
This control will periodically retrieve the current weather conditions, displayed as a relevant icon, and temperature for the location you choose and display them in a BigBox theme. The location and display units (C or F) are end-user configurable. What this means is this: anyone who uses a theme that incorporates this control can set their location and display units to either Celsius or Fahrenheit by a simple edit of a config file (thank you @eatkinola for the help with that). I'm not sure if there is any want for this kind of information in BigBox (the idea came from looking at my phone's home screen), but the more options for theme's the better.
Changelog
v1.0.2 (1/3/2018)
Added ShowTemp bool Added ShowConditions bool v1.0.1 (1/2/2018):
Added ShowUnits bool Added ShowLocation bool Added ItemSpacing property v1.0.0 (11/8/2017):
Initial release
Notes
This isn't a plugin that can just be dropped into the plugin's folder, it's a user control that theme makers (or anyone with enough knowledge for that matter) can incorporate into their themes much like my other controls for controller status, battery percent, etc. I've included instructions (with pictures) on how to get this into a theme.
Screenshot (upper right corner)
195 downloads
-
HelperControl
By NJDave71
This HelperControl has been integrated into LB 9.4. I have included a link with steps to help reference the library within big box. Thank you to everyone that has used this plugin and thank you to @Jason Carr for integrating it into the latest release.
HelperControlv4.0
This XAML User Control is provided as is and without warranty and should only be used by Theme Developers.
The purpose of this control is to add scrolling Horizontal text as done in the Aeon Nox theme.
Returns total game count for platforms and playlist
* Please read the PDF file explaining how it's used.
** Total Game Count works in all languages
130 downloads
- scrolling marquee
- user control
- (and 1 more)
-
ultrastik360 UltraMap UGC Files (9200+)
By dbinott
Here is a list of UGC files I created with a script I wrote to parse the MAME 0.195 XML file and scrape out the controls information.
There over 9200 UGC files. You may not have all the games, but since they are tiny files, they don't take up much space. Or just delete what you don't want. For those anal people.
Here is the contents of the ReadMe.txt file that is included.
213 downloads
-
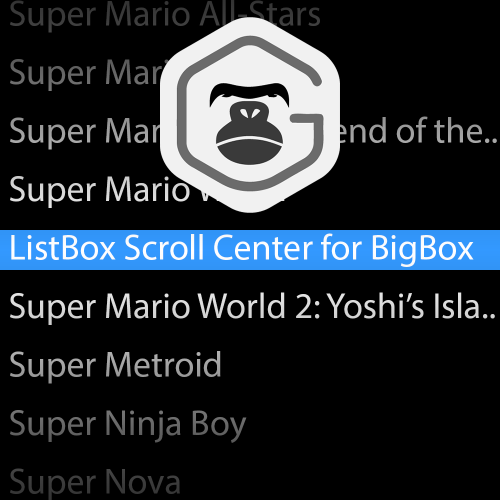
ListBox Scroll Center for BigBox
By Grila
This control will make the selected item in the list views stay in the center of the list as the user scrolls if the list is indeed scrollable according to the IScrollInfo.
Please read the included docs and view the example pictures for each step! If you are inserting this into a theme where the author has modified any of the required views, make sure to only replace whats outlined in the docs.
Any troubles implementing it let me know and I will make the modifications when I have time.
Major thanks to @Jason Carr for holding my hand on this one
314 downloads
-
Mame NoFiller Version 2
By Lordmonkus
Requirements:
A complete Mame Non Merged rom set for the version you are downloading. You must have this downloaded to your hard drive to use the batch file. If you have a seedbox you can use the included NoFiller v2 - *.txt file to copy / paste to a filter and only download those files if you don't want to use your own internet bandwidth downloaded a complete Non Merged rom set.
What is this ?
This is a batch file for people who only want to have a clean and streamlined set of games in their Arcade platform. It will copy out a curated set of roms from a full Mame rom set. The list of games selected was based off of input from people here on the forums, discord and my own personal experience playing these games growing up in the arcades back in the 80s and 90s. There are 434 rom files that will be copied out but there are some duplicates of a few games that have 2 or 4 player versions such as TMNT or Gauntlet for example, you can pick which one you want to use in your setup. (see below)
This is not the end all be all set of games of course but it is a good solid base to build your own personal set from rather than trying to pare down a complete set of roms. I tried not to include games that had really funky controls or light gun games though I did include some trackball and spinner games.
Included in the zip file you will find a batch file, spreadsheet document and 2 text files (1 list of roms and 1 list of games). The spreadsheet will allow people an easy way to maintain and add games as required. The rom list will make it easy to download only those files if you use a seedbox to get your roms from a torrent and the games list will let you compare what you have imported into Launchbox to see if anything is missing.
How to use this:
First you will need to download the Non-Merged rom set that the batch file was made with, using a different set than the bat file was intended for may or may not cause incompatibilities in roms. Then simply copy the batch file into the folder with all of the roms and double click the bat file, it will make a new folder within that folder and copy all of the roms into that newly created folder. From there you can copy that new folder of roms to anywhere you like and import them into Launchbox, be sure to update your rom path in your mame.ini to point this rom set location. You can now do whatever you like with your full set you downloaded, it is no longer needed for the NoFiller set to function, though you may want to keep a backup just in case.
Extra Notes:
Games that have problems importing into LB, will need to be imported individually.
Akai Katana - akatana.zip
Crossed Swords 2 - crswd2bl.zip
KaGeKi - kagekiu.zip
Sailormoon - sailormnnu.zip
Wrestlefest - wwfwfestu.zip
Games that have more than 1 rom file for 2 player or split screen variant.
darius2 (3 screen)
darius2d (2 screen)
gauntlet (4 player)
gauntlet2p (2 player)
ssriders (4 player)
ssridersabd (2 player)
tmnt (4 player)
tmnt2pj (2 player)
xmen (4 player, 1 screen, pick any character)
xmen6pu (6 player, 2 screen, coin slot determines character)
List of games in this batch file.
1,288 downloads
-

Steam Scraper
By srxz
Plugin that scrapes Steam Information, banner, screenshots and video to a selected game.
Requirements: Launchbox 8.8+
Install: Extract the content of zip file to : Launchbox/plugins/SteamScraper
Source code: Github (feel free to make a pull request )
Thanks to:
@fawkesyeah for the extensive testing
@CriticalCid for Ideas.
EDIT
If you have trouble running the plugin and crashing due CAS error, please right click on the DLL's , properties and then unblock.
Usage:
Just paste the Steam URL from the game that you need to scrape information.
Video Tutorial:
If you want to add Additional Custom fields and Tags please edit the properties.json :
Note: This will generate a LOT of tags, I advise to hide it if you are going to use it. (Legacy Settings -> Game Details -> Disable Custom Fields)
Also if you have the SteamDB or SteamSpy Link only you can use it to get the Steam metadata as well, the regex works just remind to put the / on the final url just like this:
BUT THIS WONT GET INFO FROM THE RESPECTIVELY WEBSITES, IT WILL GO TO STEAM ANYWAYS.
1,710 downloads
.thumb.png.0143038bf35d857bbdebee35c3dc47b2.png)


.thumb.png.7e3e30a8a12a702e05af7309eb087e82.png)