

darkseekerliu
-
Posts
56 -
Joined
-
Last visited
Content Type
Profiles
Forums
Articles
Downloads
Gallery
Blogs
Everything posted by darkseekerliu
-
I am using Reshade with Dolphin with no issues, but I am using Open GL backend, not vulkan.
-
You can get the files from the Github, here is the direct link to it: https://github.com/AtomFry/LaunchBoxReShadeManager/releases Once you open the link, click on "Assets" then on "ReShadeManager.v0.0.7.zip" The .dll file is inside the zip file at ReShadeManager\LaunchBox\Plugins
-
Here is a small guide I did to use per game shaders using reshade and ReshadeManager plugin. The guide was made based on Citra Emulator, but the logic is the same. Give it a try. game_specific_bezels_in_Reshade.pdf
-
I was away from my computer yesterday when I replied to you. Now I'm in front of it. The TeknoParrotUi executable is only the user interface, it is not the real executable for the game. So in order to Reshade work, you have to install it to the game executable. Let's use as an example the game Sonic Dash Extreme. When you launch the TeknoparrotUi, scroll down to the Sonic Dash Extreme entry in the list then click on Game Settings. There you will find the real executable that is launched by Teknoparrot. AS you can see, the executable is located at: R:\Arcade PC\Sega Ring Edge\Sonic Dash Extreme\exe\SonicDash_R_Ring.exe Run reshade setup again and point to the real game executable and it will create the reshade-shaders\Textures folder. Then place your bezel.png inside the folder and it should appear. By the way, what game are you trying to run with bezels?

-
Try this: https://www.sindenwiki.org/wiki/Reshade#Applying_Bezel_Art_Using_ReShade_Layer.fx
-
Hello! Yes, you need to install Reshade. In my case, I just downloaded the latest version from Reshade Official website then: 1) Run reshade executable 2) During the setup point reshade installation to the executable file (in my case it was citra.exe - in yours should be teknoparrot.exe) that you want apply Reshade 3) When the setup finished installing reshade, there will be a folder called reshade-shaders inside the teknoparrot.exe directory. Inside teh reshade-shaders folder, there will be another folder called "textures" 4) Put your bezel.png file (it must be named bezel.png) inside the folder textures and when you launch a game in teknoparrot, the bezel should appear.
-
Hi Guys, just would like to thank you for Reshade Manager. I managed to get it working and the bezels per game works very well. Thank you. Hope this plugin can still be maintened. By thew way, I used the latest reshade from official site and it works fine (only applied bezels).
-
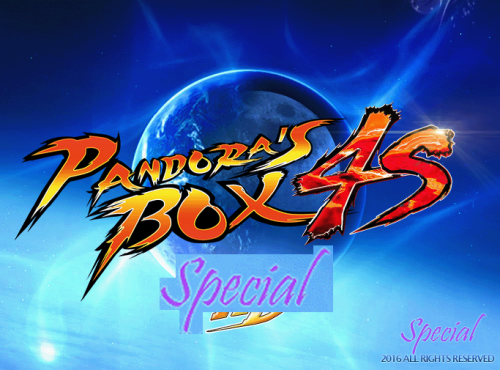 Thank you! Pandora's theme is a great adition to Bigbox. For all of you that could not make the theme work properly (missing images) the name of the folder for the theme must be: Pandora Box Special So the full path should be like this: (\Launchbox\Themes\Pandora Box Special)
 -
 Hello! I am using my theme for a long time and I've got almost 35000 games in my setup and it runs fast no slowdowns. My games are stored in 03 8TB External Seagate drives. Maybe you should check your drive speed or update your Launchbox/Bigbox. Try another theme and if the problem persists it is mostly like due to your drive.
 -
Glad you are enjoying the theme, please just ignore these other files. These are files for a future update. They are not used by the current version of the theme.
-
Hello, the logic of background wallpaper name is to match your platform name. If your Capcom Play System Platform is named for example as CPS, you should name the background wallpaper as CPS.jpg otherwise it will bring the default wallpaper (that only shows when the system does not found the wallpaper to that specific platform).
-
Great. Enjoy! Hope you like the theme.
-
By your pictures, you are still using the default theme. Please do the following to use the theme: Installation: * To install/use the theme, just unzip it in the folder Launchbox\Themes and set it in Bigbox. * Go to Bigbox Menu > Manage Themes > Installed - All > Hypermax Refried > Apply as Main Theme Changing Views: * Go to Bigbox Menu (press esc) > Manage Theme Specific Options > Hypermax Refried > Views > and Select your Desired "Platforms List View" and "Games List View" - or * If you are using a joystick, press down L3 (Left analog stick) to access the Views menu and change the view (when you press down L3 on platform view you will be able to change "Platforms List View" and when you press Down L3 on Games View, you will be able to change "Games List View")
-
T They also do, it depends on the logo size/format, if you keep scrolling, you will notice that some are not cut and some are, due to their sizes and logo designs.
-
When I was developing the theme I also did not like the way it was cutting the edge. I have even messaged @y2guru about this - here You will see that his reply is "Increase the wheel width then reduce item size to compensate "
-
This is tricky and not easy to solve and there is not an option to "adjust" this within BIgbox, I've tried to make the best way possible because the fix would be to reduce/increase the items size and adjust wheel position....but they would not look good for me... As you can see, mine is also a little bit cut when the wheel is on the left: and in the right: But, you can download Community Theme creator and download the theme CTC files and try by yourself and customize the way you want.
-
Hi, thank you. Yes I use Hypermax Theme Version 8+. Indeed it has so many views, I just included the ones I think are the most beautiful and added some details like the console, changed the position of some items and added a few others. I am studying to make a version with more game details and later on update the wheel to be more like Emulationstation when the feature gets added by Bigbox Team and CTC.
-
I plan on releasing the CTC files so you can use Community theme creator and customize the theme the way you desire.
-
Mini Console Nostalgia - Form over Function (WIP)
darkseekerliu replied to Saieno's topic in Big Box Custom Themes
It is amazing to see how you are motivated Saieno. Very impressive what you have made so far. As I said, I am looking forward to test your theme. -
Mini Console Nostalgia - Form over Function (WIP)
darkseekerliu replied to Saieno's topic in Big Box Custom Themes
I do really appreciate the effort to replicate the original menu for the systems. Wii U looks fantastic and brings back a lot of good memories for me. Regarding the view for obscure platforms, I suggest you to take a look on the theme Flat and Classic Mini by exodus_cl 1.5. His theme also has a similar approach to create a mini console view for systems that don't have a mini yet. His default view is pretty decent. -
Unfortunately no, that's the way the theme is setup - regarding the zoom in/out. Abut the Pointers, they are like this. You can create your own and replace the ones you do not like. Just to go Media Folder Pointer Left and change for the ones you like.
-
Platform Videos used/shown in the Youtube theme video can be downloaded here: https://www.mediafire.com/folder/uxxbc2bxu3pbb/Hypermax_Videos (Access the above link and choose the platform video you wish and download it)
-
You can change the views like this: * Go to Bigbox Menu (press esc) > Manage Theme Specific Options > Hypermax Refried > Views > and Select your Desired "Platforms List View" and "Games List View" - or * If you are using a joystick, press down L3 (Left analog stick) to access the Views menu and change the view (when you press down L3 on platform view you will be able to change "Platforms List View" and when you press Down L3 on Games View, you will be able to change "Games List View")
-
After installing the theme, go to bigbox menu and set the theme as Hypermax refried. If you use a joystick, by pressing down L3 (left analog stick) will allow you to change the view.
-
Videos were gathered from many sources. I will upload them somewhere and share it here when I update the theme.


