

EvoluZion3
-
Posts
26 -
Joined
-
Last visited
Content Type
Profiles
Forums
Articles
Downloads
Gallery
Blogs
File Comments posted by EvoluZion3
-
-
I'm sure there'll be differing opinions on this and definitely no right/wrong answer but my personal preference is for RetroArch to be vanilla and kind of a slave to LaunchBox. So for me, RetroArch has no preferences set at all other than the style of the menu (PS2) and almost all options set to the defaults, and the CLI from LB to RA dictates the shader to use, and the overlay (the RetroLust overlay) to use. This way I can set the overlay to use on a platform-by-platform basis (not a core-by-core basis). But each to their own for sure.
Definitely take a copy of your retroarch.cfg file (if it's not already too late), as when I was messing about trying to get the overlays to work I mucked up my cfg file and had to recover it from a backup.
-
57 minutes ago, ThaKingRa444 said:
Hi I am new to adding these bezels to Launchbox/Retroarch. Can someone please tell me how to get these working through Launchbox?
I'm not sure what others do but in LaunchBox I select Tools > Manage > Emulators > RetroArch > Associated Platforms, then for each platform in the "Extra Command-Line Parameters" text boxes I input:
-f --appendconfig "location_of_your_overlay.cfg" --set-shader "location_of_your_shader.slangp"
The overlay is the Mr. RetroLust config file (although for some reason I had to play with the x/y/w/h co-ords of each one to get the emulated screen to fit inside the TV image - I'm sure it's something I'd done wrong) and in the default RetroArch config file I had to add: config_save_on_exit = "false" so that all the above appendconfig didn't spam your config file. The shader is your choice of shader if you want one - the RetroArch defaults are plenty for my personal preferences.
-
Just wanted to echo the comments over the months and years and say thank you so much for these amazing overlays!! They really do bring the consoles to life
")
-
 1
1
-
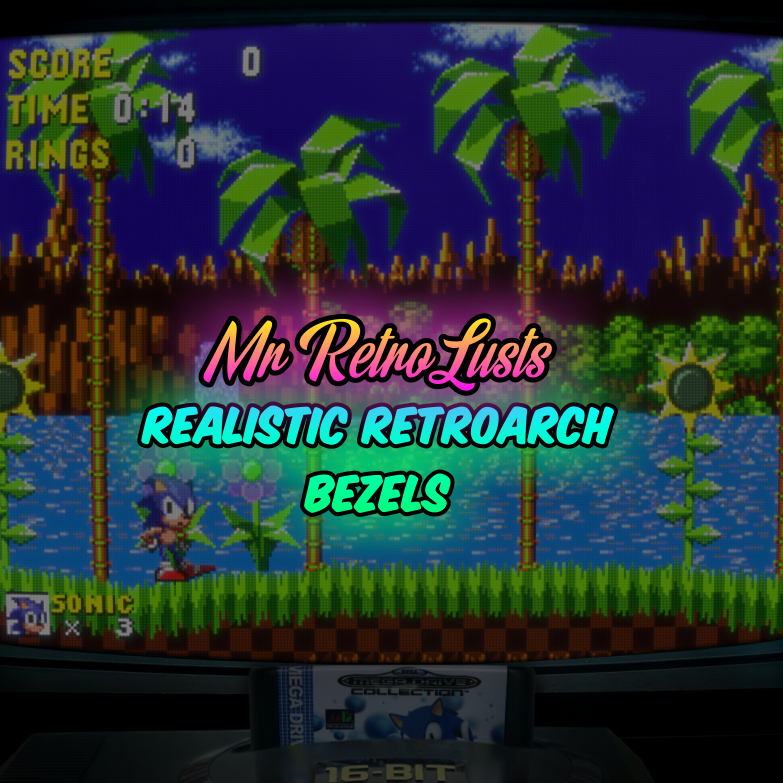
Mr. RetroLust's Lights Out! Retroarch Bezels
in Platform Bezels/Overlays
Posted
@deuxcolors I don't have a walkthrough but I can put a bit more detail here. This is what I do personally for my LB system:
i) Take a backup copy of your retroarch.cfg file, then open the original one and make sure: config_save_on_exit = "false". I don't think I made any other changes to this. This means that when you exit RA after playing around, no changes you made via the UI will be saved (unless you manually Save it). I did this because my work-around for getting per-platform overlays and shaders involves temporarily appending specific extra lines to the RA config.
ii) In LB, go to Tools > Manage > Emulators... > RetroArch > Associated Platforms. For the platform you want to get set up, make sure the Extra Command-Line Parameters looks like this (here's my Atari 2600 line):
-f --appendconfig "overlays\Atari 2600.cfg" --set-shader "Atari 2600.slangp"iii) In the RetroArch\overlays folder, I have created one config file per platform (regardless of core). For example, my Atari 2600.cfg looks like this:
aspect_ratio_index = "23"
video_scale_integer = "false"
custom_viewport_height = "1150"
custom_viewport_width = "1360"
custom_viewport_x = "420"
custom_viewport_y = "100"
input_overlay = ":\overlays\_MR.RETROLUST\Bezel_Atari_2600_Night_Mr_RetroLust.cfg"
input_overlay_enable = "true"
video_windowed_fullscreen = "true"
For each of the config files I have, one per platform, most of the above is identical. The only difference is the input_overlay, which points to the appropriately-named config file in the _MR.RETROLUST subfolder (I didn't change anything in this folder), and the custom viewport X, Y, Width and Height. (for info, this _MR.RETROLUST folder I think is just what was downloaded from here and has just the overlay PNG images, and some other config files - one per platform). Unfortunately getting the X/Y/W/H correct was trial and error (running a game, then adjusting the co-ords, then rerunning again, until the emulated game screen appeared correctly within the Overlay's TV screen image) "right a bit, up a bit, left a bit, a bit wider, a bit shorter, right a bit more, etc.". I'm sure these would have been set up correctly by the big man himself but for some reason they were incorrect (I maybe did something wrong) so for each system I had to go through this. Actually it would only take about 2-3 minutes to get each one correct and was kind of fun.
iv) In the RetroArch\shaders folder, I have also created one config file per platform (regardless of core). They are all .slangp files, and each one simply points to an existing RA preset which I liked for the platform. For example, my Atari 2600.slangp looks like this:
#reference "shaders_slang\crt\newpixie-crt.slangp"...whereas my Nintendo GameCube.slangp looks like this:
#reference "shaders_slang\crt\crt-frutbunn.slangp"The top few lines of my Associated Platforms therefore looks like this:
That's all I did, from what I can remember, and it works perfectly. If there's anything I've forgotten then it'll be in the retroarch.cfg file. In case it helps, here are the video lines in my retroarch.cfg:
video_adaptive_vsync = "false"
video_allow_rotate = "true"
video_aspect_ratio = "1.333300"
video_aspect_ratio_auto = "false"
video_autoswitch_pal_threshold = "54.500000"
video_autoswitch_refresh_rate = "0"
video_black_frame_insertion = "0"
video_context_driver = ""
video_crop_overscan = "true"
video_ctx_scaling = "false"
video_disable_composition = "false"
video_driver = "vulkan"
video_filter = ""
video_filter_dir = ":\filters\video"
video_font_enable = "false"
video_font_path = ""
video_font_size = "32.000000"
video_force_aspect = "true"
video_force_srgb_disable = "false"
video_frame_delay = "0"
video_frame_delay_auto = "false"
video_fullscreen = "false"
video_fullscreen_x = "0"
video_fullscreen_y = "0"
video_gpu_record = "false"
video_gpu_screenshot = "true"
video_hard_sync = "false"
video_hard_sync_frames = "0"
video_hdr_display_contrast = "5.000000"
video_hdr_enable = "false"
video_hdr_expand_gamut = "true"
video_hdr_max_nits = "1000.000000"
video_hdr_paper_white_nits = "200.000000"
video_layout_directory = ":\layouts"
video_layout_enable = "true"
video_layout_path = ""
video_layout_selected_view = "0"
video_max_frame_latency = "1"
video_max_swapchain_images = "3"
video_message_color = "ffff00"
video_message_pos_x = "0.050000"
video_message_pos_y = "0.050000"
video_monitor_index = "0"
video_msg_bgcolor_blue = "0"
video_msg_bgcolor_enable = "false"
video_msg_bgcolor_green = "0"
video_msg_bgcolor_opacity = "1.000000"
video_msg_bgcolor_red = "0"
video_notch_write_over_enable = "false"
video_post_filter_record = "false"
video_record_config = ""
video_record_quality = "2"
video_record_scale_factor = "1"
video_record_threads = "2"
video_refresh_rate = "0.000000"
video_rotation = "0"
video_scale = "3"
video_scale_integer = "false"
video_scale_integer_overscale = "false"
video_shader_delay = "0"
video_shader_dir = ":\shaders"
video_shader_enable = "true"
video_shader_preset_save_reference_enable = "true"
video_shader_remember_last_dir = "true"
video_shader_watch_files = "false"
video_shared_context = "false"
video_smooth = "false"
video_stream_config = ""
video_stream_quality = "11"
video_stream_scale_factor = "1"
video_stream_url = ""
video_swap_interval = "1"
video_threaded = "false"
video_vsync = "true"
video_waitable_swapchains = "true"
video_window_auto_height_max = "1080"
video_window_auto_width_max = "1920"
video_window_custom_size_enable = "false"
video_window_opacity = "100"
video_window_save_positions = "false"
video_window_show_decorations = "true"
video_windowed_fullscreen = "true"
video_windowed_position_height = "720"
video_windowed_position_width = "1280"
video_windowed_position_x = "0"
video_windowed_position_y = "0"