Sbaby
-
Posts
615 -
Joined
-
Last visited
Sbaby's Achievements
")
-

Visual Pinball X – Top Scores (hiscore) Viewer
Sbaby commented on JoeViking245's file in Third-party Apps and Plugins
 The score should update immediately. If it doesn’t, it means something isn’t working correctly. The first thing to try is using a different browser, or checking directly from your phone, so you can understand whether the issue depends on your device, a missing update, or something else.
 -
Hi! I saw the videos of your BigBox theme and I really loved it. You did an amazing job. I wanted to ask you, f it’s not a problem, would it be possible to get a download link or any version you could share? I’d really like to try it on my setup. Thanks in advance, and great work again!
-
Hi everyone, I wanted to report a strange issue I'm experiencing with the latest version of Citron, 0.12.25. If I launch the emulator normally (without any frontend), everything works perfectly. The problem appears when I run it through LaunchBox: the emulator starts, goes fullscreen, all the settings are correct as described in the previous post… but the game always freezes during the loading phase. To avoid any doubt, I ran a few more tests: • if I launch Citron without LaunchBox, no issues at all; • if I launch it from the command line (cmd), I get the exact same freeze; • if I reinstall the previous version of the emulator, everything works again. At this point it really seems like something introduced in version 0.12.25, unless it's happening only to me. Has anyone else run into the same problem or has an idea of what might be causing it? Thanks in advance!
-
Problems with savestates in the pause menu and OpenMSX emulator
Sbaby replied to Sbaby's topic in Troubleshooting
You're right, I made a mistake because I wasn't paying attention 🫢 Thank you very much. -
Hello everyone, I am trying to configure shortcut keys to save state during BigBox pause. I have made settings similar to those I would use with RetroArch and BlueMsx core, which works great, but it does not work with OpenMSX. Since the default controls in OpenMsx are Alt-F8 for saving state, I tried Send {!F8 down} Sleep 50 Send {!F8 up} I also tried other similar things, but nothing worked: ControlSend,, !{F8 down}, ahk_exe openmsx.exe Sleep 50 ControlSend,, !{F8 up}, ahk_exe openmsx.exe But this doesn't work either. What do you think is the reason? Does BigBox block commands in some specific way with OpenMSX? Note that when using the emulator without LB/BB, savestate works fine with pressing ALT-F8. Thank you very much for any suggestions or similar experiences!
-
Honestly, I don't have any problems. I also installed the new version 12.5 and am using the same configuration that I entered here last year:
-
 Is it possible to start a game with a non-default emulator via the command line? That is, what Launchbox does with RUN AS.
 -
Thanks for introducing this new feature! I’d like to ask if the recent fixes also address the issue mentioned in this old post specifically, the video sound continuing to play after launching a game. Can we finally do without the workaround strategies and custom scripts? I'm asking because it's a random situation and I would have to try several times.
-
Better Support for Low-Resolution '80s Arcade Cabinets
Sbaby replied to Sbaby's topic in Troubleshooting
Thank you. Can you recommend any other existing themes with a resolution of 640x480? I tried searching the forum but couldn't find anything. -
Better Support for Low-Resolution '80s Arcade Cabinets
Sbaby replied to Sbaby's topic in Troubleshooting
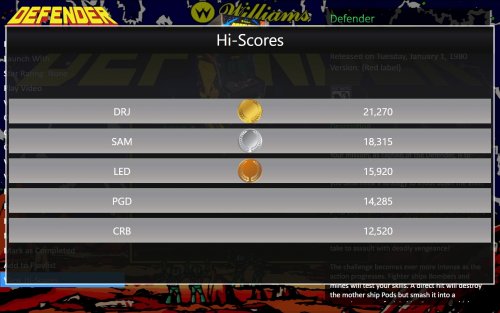
Thanks for reply ! I’m using the official RetroCRT theme and I really like it. It fits my setup perfectly and works great overall, except when I try to view the hiscores Can anyone help me figure out how to fix this? Do I have the option to edit the theme myself, or should I ask someone else to do it? If so, who? -
Emulators and Their Games / Platforms and Their Emulators
Sbaby commented on JoeViking245's file in Third-party Apps and Plugins
 Thank you for trying, but as far as I'm concerned, nothing has changed. It's the same as before.I don't see any games in that category.
 -
Emulators and Their Games / Platforms and Their Emulators
Sbaby commented on JoeViking245's file in Third-party Apps and Plugins
I want to see which games are not assigned emulators that I have in the current configuration. But I'll do it manually one by one, don't worry, thanks anyway. -
I’m still experiencing the same issue: my scores upload online correctly for all supported games, except for Krull. I’ve never been able to figure out why.
-
Emulators and Their Games / Platforms and Their Emulators
Sbaby commented on JoeViking245's file in Third-party Apps and Plugins
I was just saying something similar.: LaunchBox probably remembers an old emulator that no longer exists or has a different name That's why I asked: I have several games in this situation, on different platforms, and I specifically downloaded the plugin to run the check and be able to find these orphaned games without having to go through them all one by one. I understand that this is not a bug, but I was wondering if it would be possible to add a feature that would allow the game to be marked as “no emulator” in this case as well. I have already assigned many of these games, so I can't really do what you suggested, but if it's not possible, don't worry, it was just a question. Thanks anyway! -
MAME Hi-Score Display - A plugin for BigBox
Sbaby commented on JoeViking245's file in Third-party Apps and Plugins
 I think there is a problem because I have just sent you another new one.