About This File
Visual Pinball X VideoSnap Creator (Playfield Recorder)
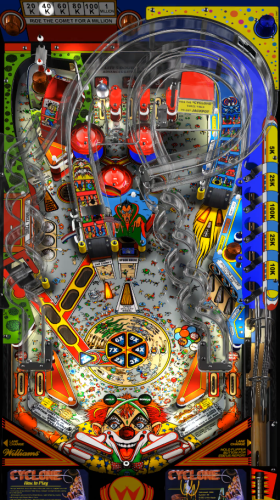
Use this plugin to create videosnaps of the Visual Pinball X tables on your PC/Cab.
This will record any VPX table at any orientation and from any monitor.
Why record your own?
There already exists a lot of video snaps of most every Visual Pinball Table. You can even find vertically oriented (portrait) ones for your pincab. The issue is they may not be recordings of the actual version of the table you use. Or you simply can’t find one for a particular Original. Or you just don’t like the one(s) you found.
Features:
- This will automatically ‘find’ your table’s playfield view so there’s no need to set up which monitor to look at or set any scale, resolution or aspect ratio. Your VPX default monitor settings will be displayed for your reference.
- (new v2.0) Record the backglass at the same time as the playfield. (optional)
- (new v2.0) Record the DMD (3rd screen) at the same time as the playfield. (optional)
- (new v2.0) Record the tables gameplay sounds along with the playfield video. (optional)
- (new v2.1) Add the tables Clear Logo to the end of the video. (optional)
-
Included is an AutoHotkey script that the plugin uses to quickly bypass the VPinMAME window when loading a table. (Should reduce loading time by approximately 4 seconds per table) (This also works well if added to your Running AutoHotkey Script tab for your VPX emulator
 )
)
- Record durations can be set between 5 seconds and 3 minutes.
- If your playfield is in portrait mode, the saved output video can be rotated for proper viewing. (Options are 0º (default), 90º, 180º, -90º)
-
You can set the video to record at 60 FPS(Depreciated v2.1) All video will be recorded at 30 FPS - Videos are automatically saved to the default folder (/Plugins/VPXVideoCreator/CreatedVideos/) or you can change it to be placed directly into your /LaunchBox/Videos/Visual Pinball/ folder.
Installing:
- Download and unblock the zip file. (right click the file, select properties and check the Unblock check box and click OK)
- Copy the VPXVideoCreator folder (from inside the zip) into your /LaunchBox/Plugins/ folder.
- If updating to 2.0, overwrite the existing file.
Quick Start:
- Start LaunchBox (always a good place to start)
- Right click one of the tables in your Visual Pinball platform and select Create VPX video.
- Set how long you want your final recording to be.
- Click Capture Video.
The default save location is in the plugins’ subfolder, “CreatedVideos”.
Setting up to record audio: (new v2.0) (optional)
You will need to register “audio_sniffer-x64.dll”** (included with the plugin) with Windows. Basically what this does is makes all your audio output accessible in one place. Think of it as a Frontend for all your audio output devices. ![]() This “frontend” will be labeled “virtual-audio-capturer”.
This “frontend” will be labeled “virtual-audio-capturer”.
2 ways to register/unregister audio_sniffer are:
The easy way: Run the included batch file (located in the plugins AudioSniffer subfolder). You need to run this as administrator. The batch file can also be used to unregister it. Follow the prompts.
Old school: Open the command prompt [as administrator] in the “AudioSniffer” subfolder.
To Register: type in then press enter:
regsvr32 audio_sniffer-x64.dll.1
To Unregister: type in then press enter:
regsvr32 /u audio_sniffer-x64.dll.1
**NOTE: The file is named "audio_sniffer-x64.dll.1" (with a “.1” at the end). Otherwise LaunchBox will try to load it as a plugin, which will cause errors. Source code for audio_sniffer can be found here: https://github.com/rdp/virtual-audio-capture-grabber-device
Using the plugin:
Set Delay:
This is the delay time between clicking Capture Video and the video actually starting to record. Set to bypass (in the recording) the VPX editor loading the table. Default is 12 seconds. Options are from 5 to 30 seconds.
Record Duration:
Set to how long you want your video snaps to be. Default is 30 seconds. Options are from 5 to 180 seconds (3 minutes).
Video Rotation:
If you play on a rotated monitor (or TV), you will want to set this to the direction your monitor/TV is rotated. Default is 0º. Options are 0º, 90º, 180º and -90º.
Include Audio: (new v2.0)
Check this box to include the tables playfield sounds with the recording (needs to be configured).
Record Backglass: (new v2.0)
Check this box to record the Backglass at the same time as recording the Playfield. This will be saved to a separate file that is saved in the “/VPXVideoCreator/CreatedVideos/Backglass/” folder.
The backglass is typically on a 2nd monitor, but (if setup) will get recorded separately no matter which monitor it’s on (single or otherwise). The file will be saved as [the-games_Title]_BG.mp4
Record DMD: (new v2.0)
Check this box to record the Dot Matrix Display (DMD) at the same time as recording the Playfield. This will be saved to a separate file that is saved in the “/VPXVideoCreator/CreatedVideos/Backglass/” folder alongside the backglass video.
The DMD is typically on a 3nd monitor, but (if setup) will get recorded separately no matter which monitor it’s on (single or otherwise). The file will be saved as [the-games_Title]_DMD.mp4
Add Clear Logo to the end of the video: (new v2.1)
Check this box to add the tables Clear Logo (if one exists) to the end of the video. The logo will fade in as the video fades out during the last 2 seconds of the recording. This feature is automatically disabled if no Clear Logo for that table exists.
60 FPS Option removed (v2.1)
Experimental. Check this box to record at 60 frames per second. Default is 30 FPS (un-checked).
Depending on your video card (and probably some other factors too), this may or may not even be worthwhile.
Change Save Location:
The default save location is in /LaunchBox/Plugins/VPXVideoCreator/CreatedVideos/. The video filename will be saved as the ‘games’ Title in LaunchBox with .mp4 file extension. You can save them anywhere you want.
Reset to Default:
This will reset the Save Location, Delay, Duration and Rotation to their default values.
Save Settings:
This will save the Save Location, Delay, Duration and Rotation values you set and will load these next time you run the plugin.
Save settings before video capture
This is checked by default and will save any changes made when you click Capture Video and before launching VPX.
Capture Video:
This will launch the table you selected to open the plugin with. At the same time, the AutoHotkey script “vpxBypassPinMAME.ahk” will start. This runs in the background and waits for the VPinMAME popup window to appear and then ‘hits the spacebar’ to make it go away (sooner). The script will exit after it see the popup, or 15 seconds. Whichever comes first.
After the amount of Delay time has passed, recording will begin and will continue for the set Duration. When done, VPX closes and the video gets converted.
The video is saved to “_tempVideo.mkv” (in the CreatedVideos subfolder) and then gets converted to an mp4 file. After conversion, _tempVideo.mkv will be deleted.
Keep temp video when done:
By default, “_tempVideo.mkv” will be deleted after the video has been converted. If you want to see what the video looks like before converting, check this box. After your video is complete, go to the CreatedVideos folder to view it. Note: this file gets overwritten each time you click Create Video if you have the checkbox checked.
View Saved Video
Click this to view the converted video. This is the video file shown in Saved Video Location.
VPX Playfield
This shows the default playfield monitor settings you have setup for your Visual Pinball installation. These get read from your Registry settings:
HKEY_CURRENT_USER\SOFTWARE\Visual Pinball\VP10\Player\Display
The Monitor # listed may not be the same as what your Windows Display Settings says. So if it’s “wrong”, ignore it. The Image Scale (W and H) shown will be correct.
If the VPX display settings cannot be retrieved from the registry, monitor #1’s information will be displayed with an asterisk (*) after the monitor number. (Monitor #: 1*)
Some notes:
When you click Capture Video, probably don’t click anything else until recording is complete. However once the table is loaded, feel free to drop in a coin, hit start and play until ‘your time is up’. Just don’t click on another window.
Backglass and DMD recordings only work with B2S Backglass Server (which is what most of them are). PinUPPlayer windows are not supported.
Designed for LaunchBox v11.3 and higher.
Special Thanks!
Special thanks to gtxjoe’s PBX Recorder on VPForums and Carny_Priest’s post on GameEx Forum for paving the way to figuring out an excellent approach to creating your own Visual Pinball table videosnaps.
Huge thanks to @sundogak for convincing me (though it didn't take much once I saw it in action) and showing me how to add video fade and attaching Clear Logos to the videos. Also for all the testing done and invaluable insight!
Future releases and enhancements:
If there’s enough interest in this plugin (as in, it’s actually useful and would get used), I will look at adding:
-
Option to record the table’s audio in with the video.(added v2.0) - Ability to select multiple tables for ‘bulk recording’.
-
Record backglass videos???(added v2.0) -
Any REASONABLE request.

As always, any and all feedback is welcome!
Edited by JoeViking245
What's New in Version 2.1.0 See changelog
Released
- New Feature Video will now have a 1 second fade-in at the beginning and a 2 second fade-out end of the finalized video(s)
- New Feature (optional) Add a Clear Logo overlay at the end of the video (if Clear Logo exists)
- Clean up Cleaned up log file output
Removed option for 60 FPS. Videos will record at 30 FPS
VPX edit window is now minimized during video capture
- Fixed Now handles Titles with "illegal characters" in them when saving as the video filename
UltraDMD, PinUpDisplay and PinUPPlayer windows will now properly close (if your table uses them) when recording is complete
- Change Increased maximum delay start time to 3 minutes
- Other Click (almost anywhere in the window) and drag to move window around
.thumb.png.c9faf450e4d2b690a819048b18173f61.png)


Recommended Comments
Join the conversation
You can post now and register later. If you have an account, sign in now to post with your account.