
.png.d63b88dc3d5c6db8803dfbd996ce65fc.png)
JoeViking245
-
Posts
5,270 -
Joined
-
Last visited
-
Days Won
38
Content Type
Profiles
Forums
Articles
Downloads
Gallery
Blogs
Files posted by JoeViking245
-
MAME Tools
By JoeViking245 in Third-party Apps and Plugins
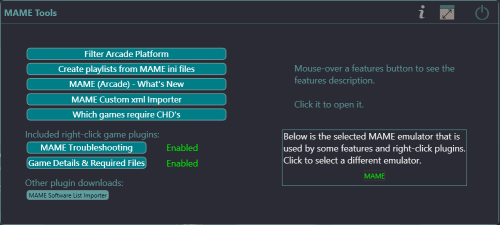
MAME Tools - a JoeViking plugin conglomeration
7 plugins combined into one. This is a one-stop-shop collection of several of my MAME related plugins, plus a couple that have never officially been released.
Admittedly, these are mostly one-off plugins. But they do fully serve their intended purpose when needed.
Plugins included from the main menu:
Filter Arcade Platform - A post 'MAME Arcade Full Set Import Wizard' clean up tool Create Playlists from MAME ini Files MAME (Arcade) - What's New MAME Custom XML Importer (first official release) Which MAME Machines Require CHDs (new) Included Right-click game plugins:
MAME Troubleshooting Dependency Files and Details Viewer Bulk Add ADB Additional App (new v1.0.2)
Requirements:
LaunchBox version 13.19 or newer mame.exe installed as an emulator If you have previously installed any one of these individual plugins, remove them from the Plugins folder before proceeding.
Installing:
Exit LaunchBox
Download and extract the contents of the zip file to /LaunchBox/Plugins/
e.g. D:\LaunchBox\Plugins\MAMEtools\MAMEtools.dll
Using:
On first launch, the plugin will attempt to get your installed MAME emulator. If you have multiple copies/versions installed, you can change which one to use by clicking it and selecting a different one.
Go to the Tools menu and select MAME Tools Mouse-over the plugin buttons for a brief description Click a plugin button to start that plugin When in a plugin, mouse-over the ? at top for more details For the right-click plugins, click the button to enable/disable that plugin When enabled, the plugin will then be available in the menu when right-clicking a game
Plugin Descriptions:
Filter Arcade Platform - A post 'MAME Arcade Full Set Import Wizard' clean up tool
(initial release: April 24, 2024)
Used the MAME Arcade Full Set Import Wizard?
Discovered that maybe you shouldn't have unchecked some of the Game Types and Filters?
Rather than deleting your Arcade platform and re-running the wizard, use this to bulk remove one or more of those types or filters from your collection.
Create Playlists from MAME ini Files
(initial release: February 17, 2021)
Generate Playlists in LaunchBox from MAME's .ini files. The same ones MAME uses in its UI to apply filters used to categorize viewing of your games.
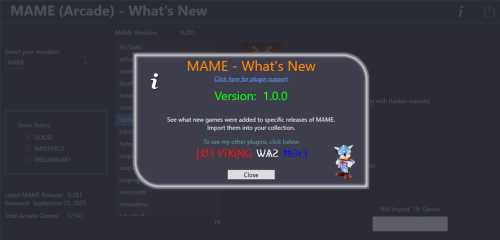
MAME (Arcade) - What's New
(initial release: October 30, 2025)
See what new Arcade machines (games) were added to a specific MAME release.
Import some or all of those games from your updated MAME ROM set, into your LaunchBox collection.
MAME Custom XML Importer
(initial implementation: November 29, 2020)
Import games from a custom xml file into any Platform (new or existing) and set the Emulator for the imported games to whatever you want, regardless of the Platforms default Emulator (if importing to an existing one).
Which MAME Machines Require CHD's
(initial release: just now)
The intent is to give you an overview of all the games that require a CHD and their emulation status.
Right-click game plugins:
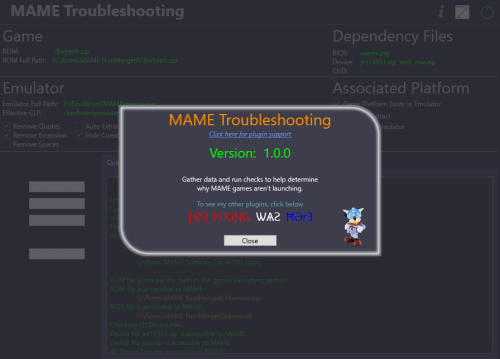
MAME Troubleshooting
(initial release: June 25, 2025)
Launch an Arcade game using stand-alone MAME, all you see is a flicker of a black screen and it goes right back to LaunchBox?
Use this plugin to help figure out why it isn't launching from LaunchBox.
Dependency Files and Details Viewer
(initial release: June 17, 2025)
The intent of this plugin is to show what files (other than the game's ROM) are required for the game to run and to give some details about the original Arcade machine.
Bulk Add ADB Additional App
(1st release 6/17/2026)
Adds an Additional App to the selected game(s) that is a direct link to the machine on the Arcade Database website.
The link will appear in the Game Details panel near the icon link(s) to the Games Database, Wikipedia, YouTube etc.
Enable it in MAME Tools settings.
Select one or more games that use MAME ROMs. Right-click and select Bulk Add ADB Additional App.
Special Thanks:
The MAME Development Team for... well... MAME! https://www.mamedev.org/
motoschifo and his Arcade Database (ADB) website and API https://adb.arcadeitalia.net
As always, all thoughts, views, suggestions, comments and accolades are welcome.
112 downloads
- mame
- troubleshooting
- (and 6 more)
-
Bulk Remove Custom Fields
By JoeViking245 in Third-party Apps and Plugins
Bulk clear Custom Fields Values or remove the Custom Field entirely from LaunchBox.
Inspired in part by this BitBucket ticket (and the rest out of boredom)
https://bitbucket.org/jasondavidcarr/launchbox/issues/8475/mass-delete-remove-custom-fields
Notes about Custom Fields:
Custom Fileds are comprised of a Name and a Value. When you edit a game and look in the Custom Fields section, every Custom Field [Name] in your entire LaunchBox collection will be available. Whether a Value is assigned to it for that game, or not.
Only Custom Fields that have a Value assigned to it somewhere in your LaunchBox collection will actually exist.
aka, if you're seeing a Custom Field Name, something somewhere in your collection has a Value assigned to it.
Installing:
Download and unblock the zip file. Copy the contents of the zip into /LaunchBox/Plugins/ i.e. D:\LauncBox\Plugins\BulkRemoveCustomFields\BulkRemoveCustomFields.dll
How to use:
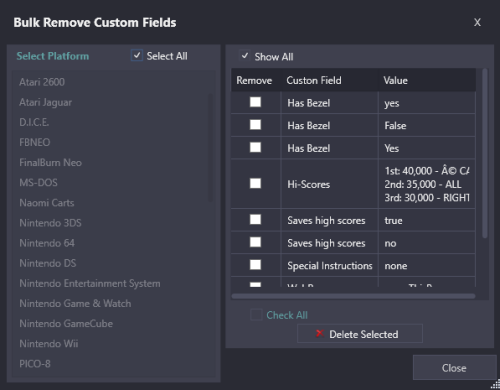
Start LaunchBox, click Tools and select Bulk Remove Custom Fields
Select a Platform to get a list of all Custom Fields [that have an associated Value] for that platform.
Or check Select All to get a list of all Custom Fields from all Platforms.
Example #1:
To remove all Custom Fields whose Name is "Has Bezel" and their Value is "yes" (lowercase "y")
Check Show All [to show ALL distinct Custom Field Names and Values]
Check the box next to "Has Bezel" "yes"
Click Delete Selected
Example #2:
To remove all Custom Fields whose Name is "Has Bezel", regardless of their Value
Un-Check Show All [to show ONLY the Custom Field Name]
Check the box next to "Has Bezel"
Click Delete Selected
To remove a Custom Field entirely from LaunchBox, check Select All and follow Example #2.
Options:
Select All
Show all Custom Fields for every Platform
Show All
Show Custom Fields Names and Values
CAUTION: If you click Delete Selected and then click Yes, those selected are now GONE!
Reprise: If you had LaunchBox's Automatic Backup feature enabled, you can use the Restore Data Backup to bring them back.
Q: Why is it listing the same Custom Field more than once?
A: It's not. Custom Fields are CasE sENsiTiVe. A Custom Field with the Name Saves High Scores is different from Saves high scores. Same goes for Custom Field Values. True is not the same as true.
109 downloads
-
DemulShooter Auto-Launcher
By JoeViking245 in Third-party Apps and Plugins
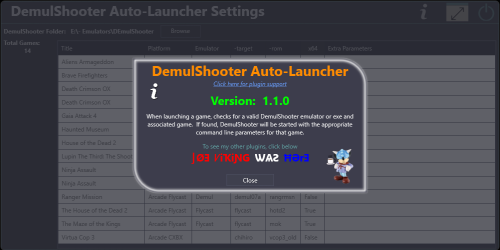
Automatically start DemulShooter when launching a game.
When launching a game, this plugin will check for a valid DemulShooter emulator or exe and associated game. If found, DemulShooter will be started with the appropriate command line parameters for that game.
This reduces the need for customized Additional Apps, batch files or AutoHotkey scripts to run DemulShooter. (See Notes)
NEW: v1.1.0 Self launching exe's (e.g. 'Windows' games) are now supported.
If you don't have a lightgun or have never setup DemulShooter, there's really nothing more to see here.
Requirements:
LaunchBox v13.19 or newer DemulShooter installed and setup** The plugin file (RunDemulShooter.dll) "settings.txt" in the plugin's folder and edited/saved (see below) **See DemulShooter documentation for setting it up and its supported emulators & ROMs.
https://github.com/argonlefou/DemulShooter/wiki
Installing and Using:
Extract the contents of the zip file to the /Plugins/ folder e.g. D:\LaunchBox\Plugins\RunDemulShooter\RunDemulShooter.dll In that plugins folder, create a new "settings.txt" file. In the file, add "demulshooter = full/path/to/DemulShooterFolder" (without quotes) e.g. demulshooter = E:\My LightGun Files\DemulShooter The path can be a relative path to LaunchBox. Start LaunchBox (optional: Start QMamehook or MAME Hooker or your alternative Hook flavor of choice) Launch a valid DemulShooter emulator/game.
Adding Custom Command-line Parameters per-game: (new v1.1.0)
To add custom parameters per-game, go to the Tools Menu and select "DemulShooter Auto-Launcher Settings"
This will load all supported games found in your collection.
Here you can set the folder for your DemulShooter.
The folder value will be saved to an xml file [RDSsettings.xml] (along with any game-specific custom command-line parameters).
The folder path will be saved as a relative path (to LaunchBox) to keep things portable.
Double-click on a game to view and modify the command-line parameters passed to DemulShooter for that game.
Make your changes and click Save to save them.
Default Parameters:
If the game's emulator is TeknoParrotUI, -noinput will be added to the parameters System 357 games will also have -pname=rpcs3.exe added to the parameters
How it works - What it does
When a game is launched, the plugin will...
(A) Check if the game is an exe (no emulator) The games Title will be checked against "the list" (B) Check the game's emulator against a list of supported emulators Check the game's ROM file against a list of supported games for that emulator Check if DemulShooter.exe (or DemulShooterX64.exe) is inadvertently already running and then kill the process Check for custom command-line parameters Start DemulShooter.exe (or DemulShooterX64.exe) with the corresponding parameters Examples:
Game: Silent Hill: The Arcade
ROM file: SilentHill.xml
Emulator: TeknoParrot
Launches: DemulShooter.exe -target=ttx -rom=sha -noinput
Game: Ninja Assault (US)
ROM file: ninjasltu.zip
Emulator: Flycast
Launches: DemulShooterX64.exe -target=flycast -rom=ninjasltu
Game: Manic Panic Ghosts
ROM file: manicpnc.zip
Emulator: Demul
Launches: DemulShooter.exe -target=demul07a -rom=manicpnc
Game: Razing Storm
ROM file: RazingStorm.xml
Emulator: TeknoParrot
Launches: DemulShooterX64.exe -target=rpcs3 -rom=razstorm -pname=rpcs3.exe -noinput
Support emulators:
Demul (Demul 07a or newer) Model2 Emulator emulator.exe emulator_multicpu.exe Flycast TeknoParrot Linux Loader (new v1.2.0)
Notes:
TeknoParrot games must use TP as the emulator (TeknoParrotUI.exe) and the ROM must point to the game's xml file. The xml file must be named for the games ROM (as TP names them). e.g. for Luigi's Mansion Arcade, "LuigisMansion.xml" Games that are standalone executables are not recognized by this plugin. (v1.1.0) Checks for all games DemulShooter supports. When launching a game, a check is done to see if DemulShooter is already running (e.g. if it didn't shut itself down from a previous launch). If it is, it will kill the existing process. This avoids the "Dude! You can't start DemulShoorter because it's already running".
Big special thanks to @magicray1028!! Without Ray's support, guidance and testing, I most likely would have never created this.
As always, all thoughts, views, suggestions, comments are welcome.
70 downloads
-
MAME Machine Dependency Files and Data Viewer
By JoeViking245 in Third-party Apps and Plugins
May 2026
This plugin has been moved into the MAME Tools plugin along with several other on my MAME related plugins.
Install and use MAME Tools instead of this plugin for continued support.
Thanks for looking.
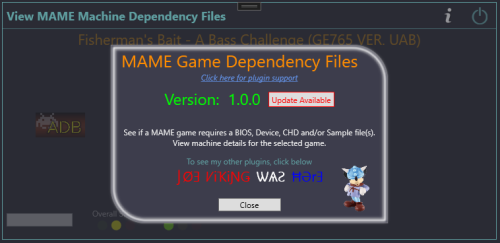
The original intent of this plugin was to have a way to check if a specific MAME machine required 'other' files to be able to run. The only way I knew how to find this was to navigate to the Arcade Database (ADB), look up the game and then check the MAME Required Files section. (I've yet to see another source with this information spelled out.)
After doing some investigation into the available MAME parameters and outputs they provide, I was able to deduce this info and threw it into this plugin. I also wanted to give users quick access to the machine (game) on ADB. Pursuing this I found that they had a couple API calls available and so added the Machine Details section. Unfortunately, none of the calls gave the 'required files' data.
Really, this isn't very practical unless you have an incomplete curated set of Merged ROMs and need to see what else is needed for "the game" to run. Or... you're just curious to see details about a machine and want to know "what makes it tick".
Features:
Shows files other than the main ROM that are required to run the game (if any). BIOS, Device and CHD and [optional - not required] Sample See the games' Overall and Emulation status. (Good, Imperfect, Preliminary) If it's not "Good", see why. e.g. "sound - unemulated" "graphics - imperfect" Direct link to the machine on the Arcade Database (ADB) View details about the machine. ROM Genre
Title Players
Short Title nPlayers
Clone of Language
Manufacturer Input Controls
Series Input Buttons
Year Screen Orientation
Status Screen Resolution Works in platforms whose ROMs are MAME, but the emulator is not. e.g. platform emulator = DEMul, SuperModel, FBNeo, Model2 etc.
Requirements:
LaunchBox 13.19 (or newer) MAME Arcade machines only. Will not work with MAME's Software Lists. The game(s) being checked must be using MAME ROMs. (e.g. filenames generally 2 to 13 characters with no spaces) The MAME emulator (or variant [e.g. mameui.exe]) installed in LaunchBox If the games' emulator is not MAME or one of its variants, the plugin will attempt to scan your installed emulators for one that is. RetroArch (with any MAME cores) does NOT count as a MAME emulator nor variant. An internet connection to view the Machine Details and navigate to Arcade Database.
Installing:
Extract the contents of the download to /LaunchBox/Plugins/ e.g. D:\LaunchBox\Plugins\MameRequiredFiles\MameRequiredFiles.dll
Using:
Right-click an Arcade game and select MAME Machine Dependency Files View which dependency files are required to run the game (if any) Click the Arcade Database logo (ADB) to navigate directly to the game on the ADB website Hover the mouse over Status to see why the LEDs are Yellow (Imperfect) or Red (Preliminary) Click Machine Details to view details about the machine (mostly duplicative of what you should already have/know)
Acknowledgements:
The MAME Development Team for... well... MAME!
https://www.mamedev.org/
Information in the Machine Details section is scraped from
Arcade Database by motoschifo
http://adb.arcadeitalia.net/
58 downloads
(0 reviews)0 comments
Updated
-
Arcade Games Won't Launch (stand-alone MAME) - Troubleshooting
By JoeViking245 in Third-party Apps and Plugins
May 2026
This plugin has been moved into the MAME Tools plugin along with several other on my MAME related plugins.
Install and use MAME Tools instead of this plugin for continued support.
Thanks for looking.
Question: "When I try to launch an Arcade game using stand-alone MAME, all I see is a flicker of a black screen then it goes right back to LaunchBox. Why?"
Answer: "Because something is wrong with your ROMs and/or something is wrong in your settings."
This plugin gathers data and provides checks to help you determine what that something may be.
Features:
Shows the required dependency files needed (if any) Launches the game in MAME and captures the command window output that you never see. (Potentially useful 'Why the game isn't launching' data) View the emulators Running Script. (Typically never contains "the issue". But doesn't hurt to look.) Verifies ROM and dependency (BIOS & Device) file(s) exists and are accessible to the emulator when launching**. If found, checks and verifies the zip file contents (all inner files exist and CRC32's match). If a CHD is required, this only verifies the file exists and is accessible to the emulator when launching**. ** "accessible to the emulator when launching" The plugin looks for the "rompath" setting per MAME's order of prescience. This dictates which folders MAME will scan for ROMs and dependency files.
This will NOT "fix it" for you. But should tell you everything you need to deduce "why" you can't launch a MAME game via LaunchBox. Once you know why, all you need to do is fix that part of the equation.
Requirements:
Requires LaunchBox 13.19 or newer Requires the games emulator to be mame.exe Only works with MAME Arcade machines. No software lists Only works with ROMs that are .zip (Not .7z)
Since MAME is generally an all-or-nothing type of thing, this is essentially a one-off plugin. But if needed, it should provide sufficient information in a one-stop-shop to resolve your MAME launching issues.
Installing:
Extract the contents of the downloaded zip file into your /LaunchBox/Plugins/ folder. e.g. D:\LaunchBox\Plugins\MAMEtroubleshooting\MAMEtroubleshooting.dll
Using:
Start LaunchBox Right-click an Arcade game and select MAME Troubleshooting.
Read through the Quick Analysis tab Click Test Game to capture and see MAME's command window Output If it indicates the game launches fine and you know it doesn't, click it again to see if it tells you a different story. Note: clicking a 3rd time won't change the answer it showed the 2nd time. Click Running Script to view the emulators Running Script. This usually is never the issue. But doesn't hurt to look. Click Check ROM(s) to scan the contents of the games ROM and Dependency (if any are required) zip files. This verifies the contents of the zip files and cross-checks those contents' CRC32 value against what MAME says they should be. (Works with both Merged and Non-Merged sets) For games requiring CHD files, it will only check that they are accessible to MAME and provide the files size. It won't do a hash check. Click Save Report to create a text file of all the produced data that you can share with your friends and family. Files are saved to /Plugins/MAMEtroubleshooting/Reports/[rom_name].txt (or /Reports/[rom_name] (Clone of [parent_rom]).txt) Once created, 2 icons will appear to open the txt file or open the /Reports/ folder. Once you've studied all the data and see "the issue", fix it and play games. 😎
103 downloads
- mame
- black screen
- (and 1 more)
-
MAME (Arcade) - What's New
By JoeViking245 in Third-party Apps and Plugins
May 2026
This plugin has been moved into the MAME Tools plugin along with several other on my MAME related plugins.
Install and use MAME Tools instead of this plugin for continued support.
Thanks for looking.
See what new Arcade machines (games) were added for a specific MAME release.
Import some or all of those games from your updated MAME ROM set, into your LaunchBox collection.
The intent of this plugin is to be able to see what new Arcade machines were added in the latest release of MAME.
Then, along with your updated ROM set, provide a means of importing just those new machines into your LaunchBox collection without having to reimport the entire set or attempting to Scan for Added ROMs (which doesn't really work with the Arcade platform anyway).
Features:
See what new Arcade (ONLY) games were added specific MAME release Hyperlink to Arcade Games Database site for selected game Filter games by Status (Good, Imperfect, Preliminary) Import the new games (from your updated MAME ROM set) (Optional) Add an Additional Application direct link to the Arcade Database for the game
A huge and special thanks to motoschifo and his Arcade Database (ADB) website!
All data used comes direct from the Arcade Database and is what makes this plugin possible.
http://adb.arcadeitalia.net
Prerequisites:
Requires LaunchBox version 13.19 or newer. Nothing else if you only wish to see what new games were added. If you wish to import the new games An updated MAME romset [containing those ROMs]
Installing:
Copy the contents of the zip file into your /Plugins/ folder
e.g. D:\LaunchBox\Plugins\MAMEarcadeWhatsNew\MAMEarcadeWhatsNew.dll
Using:
In LaunchBox, go to Tools and select MAME (Arcade) What's New
The plugin will attempt to find your MAME emulator
If found, the MAME Revision field will populate with your MAME's version and populate the games for that revision
To see new games that were added in a different release
Change the number in the MAME Revision field Must be formatted 0.xxx e.g. 0.281 Press Enter Un-check/check the Show Status checkboxes to see only ROMs with those status(es)
Click a ROM to see brief details about that game
Click the Arcade Database logo to navigate to that game on ADB
Existing: as seen below the game details refers to, if the game exists anywhere in your collection.
Checks across ALL games in ALL platforms (by ROM filename).
Below it will show the platform it is in (if "existing")
This is useful if you're checking previous releases for that hidden gem you didn't know you were missing
Importing:
If you've updated your MAME set, you can import the new ROMs into your collection.
All new ROMs shown will be imported. You can multi-select games to add just those games selected. If you wish to import just a single game, close the plugin. Then in LaunchBox, press Ctrl+N to add a new game.
Click Add Games Select a platform (Arcade is set by default if exists) (optional) Un-Check Use Platforms Default Emulator Select an emulator to assign to the games being imported from the dropdown list Select the folder containing your ROMs (default is the folder your game files are in for the selected platform) If you keep a curated set separate from your MAME fullset, you can select the folder your fullset is in. Then after importing, have LaunchBox copy the ROMs and reset the game ROM path. **(see more below) If you've already placed your new ROMs in your curated set folder, select that. (Optional) Check the box Add link to ADB as Additional App Click Import Games
Importing Notes:
Games already existing (based on ROM filename) in the platform (step 2) will not be imported Games whose ROM file doesn't exist (step 4) will not be imported After import, a report will show the # of games added and/or skipped Anything in the games Title that is in (parenthesis) will get moved to the games Version field e.g. "Hacha Mecha Fighter (bootleg with Raiden sounds)" Game Title will be saved as "Hacha Mecha Fighter" Game Version will be set to "(bootleg with Raiden sounds)" (Optional) Add an Additional Application direct link to the Arcade Database for the game This will appear as an "Arcade Database" clickable link in the Game Details section (except for LaunchBox version 13.24). Game data set when importing:
Title Platform ROMs application path Date Added/Modified Associated Emulator Version (if available)
Getting Metadata and Images:
After importing, in LaunchBox select all the newly added games Hint: Click Arrange By and select Date Added. Select the 1st new game. Hold down Shift then click the last, new game. Go to Tools - Download - Update Metadata and Media for selected games When asked "Would you like to update games with existing metadata and/or media?" Select "Yes, but do not replace and existing fields and media" Selecting otherwise will remove the Version data (if exists)
Metadata Notes:
If importing from the latest MAME revision, when you go to Download/Update metadata, the game(s) may not be found.
** Copying the new imported games ROM files to a different ("curated") folder:
To Copy the ROMs and reassign their location (as seen by LaunchBox)...
After importing, (in LaunchBox) select the newly added games Copying: Go to Tools - File Management and select Export ROM Files from Selected Games to New Folder Have LaunchBox copy the ROMs to the Folder your curated set is in Reassigning: With those games still selected, go to Tools - File Management and select Change Roms Folder Path for Selected Games Change to the Folder your curated set is in
Plugin Updates:
If an Update for this plugin has been released on the forums,
- The Info/Support icon will flash red.
- Click the Info/Support icon, then click the Update Available button.
This will open the plugins download page in your default browser.
Again, a big thanks to the Arcade Database and all its contributors!
As always, all thoughts, views, suggestions, comments and accolades are welcome.
91 downloads
-
Create Playlists from MAME category ini files
By JoeViking245 in Third-party Apps and Plugins
May 2026
This plugin has been moved into the MAME Tools plugin along with several other on my MAME related plugins.
Install and use MAME Tools instead of this plugin for continued support.
Thanks for looking.
Create Playlists from MAME category ini files for your Arcade Platform.
This plugin allows you to generate Playlists in LaunchBox from .ini files. The same ones MAME uses in its UI to apply filters used to categorize viewing of your games.
To be clear:
This doesn't really expand much on the already available Arcade/MAME Playlist building feature in LaunchBox. But if there's a rare instance you come across a MAME category ini file that has a 'pre-built' "filter" list and isn't already available in LB, well here you go. Regardless, this was actually a just-for-fun, 'let's see if I can' type of thing. And figured I'd just put it out here for whatever reason.
..now on with the show..
Only games that actually exist in your Arcade Platform will be added to the created Playlist. So say you choose “Control.ini” and Select “Joystick 8-way”, there are 6827 roms listed with that ‘filter’. If your Arcade Platform only has 1007 of those 6827, only 1007 will be imported into the new Playlist.
Many of these files can be found at www.progettosnaps.net. (Specifically here) And several more at https://mameinfo.mameworld.info/ (Look for the “MAMEUI 0.2xx Category-, Version and Alltime inifiles” link). There’s probably other sources available out there too.
These files are typically (and should be) stored in the ../MAME/ini/folders/ folder.
Requirements:
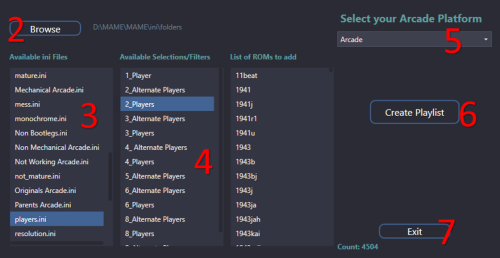
This plugin file. Place it inside the ../LaunchBox/Plugins/ folder. Your MAME/Arcade Platform MUST be named “Arcade”. v3.0 A valid .ini file (or set of files) to read from. (see possible sources above) (sample from “Controls.ini”)
[FOLDER_SETTINGS] RootFolderIcon mame SubFolderIcon folder [ROOT_FOLDER] [Dial] 2mindril 720 720g 720gr1 ..... [Joystick 8-way] 10yard 10yard85 10yardj 1941 ..... How to use:
First download and unzip the file. Copy “Create Arcade Playlists.dll” to you LaunchBox/Plugins folder. Right click the file and select Properties. Check the box to “Unblock” (if present) then click OK. Now start LaunchBox.
In LaunchBox, select “Tools”, then “Arcade Playlists from ini” (near the very bottom). [not to confused with "Create Missing Arcade/MAME Playlists.."] When the plugin loads, it will attempt to automatically locate your ../ini/folders/ location and populate the “Available ini files” section. If it wasn’t able to find it or you want to look in a different location, click “Browse” and navigate to the folder you want to use. Click on the ini file you want to use. This will populate the “Available sections/filters”. If there are no ‘[Sections]’ below “[ROOT_FOLDER]”, that means there are only rom names listed, and those will be added to the “List of roms to add” area. Click on one the “Available sections/filters” you want to use. This will add all the roms for that selection to the “List of roms to add” area. Select the Platform that has all your Arcade games. If it's called "Arcade", it will be selected automatically. (new v3.0) Click “Create Playlist” to create the playlist. Click Exit or create more. (new look v3.0)
Once Exited, select Playlist or Platform Category and expand Arcade to see the new Playlist.
Notes:
This does not work with Additional Apps (mainly clones).
This adds “Arcade” to the beginning of the selected section/filter for its “Unique Name:” (to maintain consistency). The “Nested Name” will be the same as selected section/filter.
The Playlist will be added to the “Arcade (Category)” of the Platform Categories list.
If you click Create Playlist and you don’t have any existing games that match, an empty Playlist will not be created.
If a Playlist of the same name already exists, either delete your existing Playlist or edit it and change the name. It will not be overwritten nor modified.
1,236 downloads
-
Filter Arcade Platform - post MAME Arcade Full Set Import Wizard
By JoeViking245 in Third-party Apps and Plugins
May 2026
This plugin has been moved into the MAME Tools plugin along with several other on my MAME related plugins.
Install and use MAME Tools instead of this plugin for continued support.
Thanks for looking.
Dilemma:
"Oh snap! I used the MAME Arcade Full Set Import Wizard, unchecked all filter boxes and now I have a bunch of extra junk in my Arcade platform."
Solution(s):
Option 1: Delete the Arcade platform and re-import again (this time paying attention to the boxes you decide to un-check).
This is actually a super easy and relatively fast process. And you won't need to re-download images again (assuming you downloaded some and didn't delete the media also when deleting the platform).
Option 2: Run this plugin and check the boxes to have those filter types removed from your collection and click Delete.
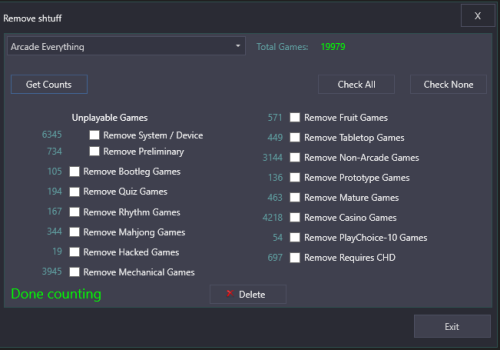
Plugin Features:
Show you the number of 'games' you have in each filter type. (unplayable, bootleg, quiz, rhythm, mahjong etc.) Check the boxes for the filter type(s) you wish to remove and click Delete to remove them from your LaunchBox collection. Click the number next to the filter type to show a list of the 'games' included with that filter. (shows ROM name and game Title) (optional) Create a text file of "the list" (for whatever reason) (optional) Create a playlist from "the list"
Notes:
You don't need to have used the MAME Arcade Full Set Import Wizard to make use of this plugin.
When launched, the plugin will attempt to load the platform "Arcade". If that's not found or you want to check a different platform that uses MAME ROMs, select the platform from the drop-down list then click Get Counts.
"Total Games" only takes into account your Main Games. No Additional Apps (clones) are accounted for in that number.
When clicking Delete to remove the games in the selected filter type(s), if a game being removed has Additional Apps, those will be removed too. No ROMs will be deleted from your system. Only the entries in your LaunchBox collection.
It won't delete any images associated with the removed games. But most likely, the 'junk' won't have any anyway. If they did, it's nothing that a suitable application of Clean Up Media located in the Tools menu couldn't take care of.
The Save to Text File option saves the file to ..\Plugins\FilterArcadePlatform\Output\[filter_type].txt
The Add to Playlist option will name the new playlist "Arcade type-[fileter_type]" and place it under the category "Arcade". If your selected platform is named something other than "Arcade", it' will name the playlist and put it under the category using your platforms actual name.
RE: Game Counts:
Some games fall into multiple filter types. i.e. some (but not all) Fruit games are also included in with Casino games. So don't try to add the numbers up and have them make sense. "Remove Preliminary" refers to Emulation Status and only includes games that are marked as Preliminary AND are not included any of the other filter types.
Example Usage:
Using the Import Wizard, un-check Skip games unplayable in MAME Once done, from the Arcade platform Search for source:model3 Select all the resulting games Press Ctrl+E to start the Bulk Edit Wizard Select the Field "Platform" Set the Value to (type in) "Sega Model 3" (without quotes) Save From here, you can Do "Option 1" (above) and your Sega Model 3 games will [now] be safe. Or, using the plugin and have it remove the remaining "Unplayable Games". Have the Import Wizard include "Bootleg", "Hacked" and "Prototype" games Use the plugin to create playlists of those respective filter types Select the playlist "Arcade type-Bootleg" created in example (2) and... well, I don't know. Attempt to play them, I guess.
Beyond that (if that), it's not very practical. But may have some merits.
166 downloads
-
How Long To Beat (HLTB)
By JoeViking245 in Third-party Apps and Plugins
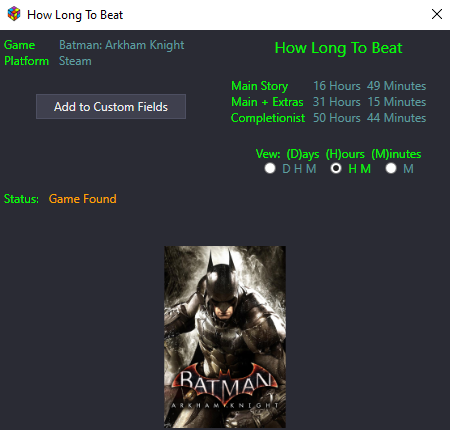
View how long it takes to complete a game and optionally save these times as Custom Fields for viewing in the game details. Also displayed are what other platforms (if any) the particular game is available on.
All data comes direct from How Long To Beat. Be sure to log in there to save, compare and share times. Without them, this plugin wouldn't be here.
The 3 types of timed gameplay this plugin gets are:
Main Story (just run to the end) Main + Extras (Main Story plus Additional Quests/Medals/Unlockables) Completionist (complete 100% of everything)
What makes this plugin different from other HLTB plugins and apps?
It works Result are 'live' With some luck and little-to-no fear of website updates, it will still work next week, next month, through the end of the year and beyond... without any updates required (fingers crossed)
Requirements:
LaunchBox and the plugin file.
Installing:
Download and extract the contents into your /LaunchBox/Plugins/ folder
i.e. D:/LaunchBox/Plugins/HLTB/HLTB.dll
Using:
Select a game Right-click and select How Long To Beat If the game is not found, follow the onscreen instructions to help narrow down results (optional) Click Add to Custom Fields The Custom Fields names will be: HLTB Main Story HLTB Main + Extras HLTB Completionist Reinstated v2.2.2 (informational) Platforms that the game is available for are shown No longer provided. If platform data is unavailable, a Box-Front image is shown instead. Select a radio button for how you want your times to be displayed and saved. (Days-Hours-Minutes, Hours-Minutes or Minutes only)
New in v2.0.0
HLTB Viewer and Playlist creator (Requires HLTB times to have been saved to Custom Fields)
- View and sort HLTB games by title or Time To Beat
- Launch a game directly from Viewer
- Create playlists
Creating Playlists:
From the Tools Menu, select HLTB Viewer. Select a platform Select one or (preferably) more games Click on the HLTB Time column header to sort by Times. Click again to reverse the sort. Click Create Playlist (This will open a new Window) Set the playlists Title, Nested Name and Category (Category is optional) Click Create Playlist
Playlists will be static. If you add more games to your collection, just add the HLTB times to the games Custom Fields (right-click game option) and then in the Playlist Creator, check the box Add to Existing Playlist. Select the playlist.
Notes about the names and platform category
[Unique] Name - No other playlist can have 'this' name.
Nested Name - what shows in the sidebar. (i.e. HLTB 30-60 Minutes)
Category - The [Platform] Category it will be nested under. (i.e. Arcade How Long To Beat)
To get the Nested Names to sort properly, edit the playlist and set the Sort Title. In the image above, '30-60' sort title is set to "2". '1-2 Hours' is set to "3". etc.
Plugin Updates: New version 2.3.0
The plugin will indicate if an update is available for download.
If an update is available, the plugin title in the Tools Menu and in the Right-Click menu will begin with (U) i.e. (U) How Long To Beat (LaunchBox only) Open the information/support window and click the Update Available button to take you to the Downloads page
Remember to Like and Subscribe and check out my other.....🤣. Just go have some fun and be good humans. 😎
1,597 downloads
-
MAME DATs Viewer
By JoeViking245 in Third-party Apps and Plugins
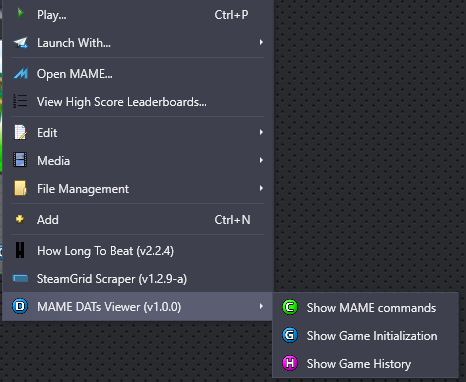
View MAME DATs for games using MAME ROMs.
Works across platforms (Arcade, Sega Model 3...) and emulators (MAME, Demul...).
DAT - A file that stores specific information [data].
MAME uses Dat files to display extra information about its systems. (see The DAT Files below)
Inspired from MAME's built in feature in the main UI and via their in-game Tab menu to view game specific initialization procedures (LaunchBox only), commands and history (LaunchBox only).
This plugin combines my 3 other DAT Viewer plugins into a one-stop-shop.
⦁ View game specific commands from MAME's command.dat
⦁ MAME History.xml Viewer
⦁ MAME gameinit.dll Viewer
Why this plugin? Why now?
When I created the 1st one for command.dat, I didn't fathom creating any more. Same thing happened after creating the 2nd one for history.xml. It wasn't until after creating the gameinit.dll viewer that I realized I should have combined them all into one plugin. So here we are.
Why use this one instead of the other 3?
If you use at least 2 of the other plugins, you may consider using this one instead. Especially if one of them is the command.dat viewer. The original plugin doesn't provide the update feature this one has. All 3 Dat files are contained with this plugins folder. So no need to set them up in MAME (or MAMEUI). This plugin uses LaunchBox's multi-menu feature, making a cleaner look when right-clicking a game. It's just one plugin that LaunchBox has to load instead of [up to] three.
Important note if switching from the other plugin(s) to this one:
If you are switching from one (or more) of the other plugins to this one, remove the other plugin(s) from your LaunchBox installation!
It won't break anything to have all 4 installed. But will create excess duplicative processing.
Features:
The 3 Dat files are included with the plugin. No need to download them separately or include them with your MAME installation. Option to update to the latest DATs as they become available. (See Updating) Choose which DATs to have available. (Remove or add on-the-fly. No restart required) (Updating and re-adding requires an internet connection) Option to have to always have the DAT Viewer window open full screen Badges are displayed for games that have initialization procedures and/or commands. (See Badges below for enabling them) Option to temporarily disable the plugin and badges (See Settings) Plugin Requirements:
LaunchBox 13.3 or higher This plugin file (MAMEdatsViewer.dll) (The download includes all 3 DAT files to get you started) Installing:
Download and then open the zip file using 7zip. If you don't use 7zip, first unblock the zip file (Right click, select Properties, and click Unblock) then open it as you normally would. Extract the main folder from inside the zip file into ..\LaunchBox\Plugins\ i.e. D:\LaunchBox\Plugins\MAMEdatsViewer\ Start LaunchBox How to Use:
LaunchBox
Right-click on a game Select MAME DATs Viewer Select an available option from the submenu(s) BigBox
Select MAME commands from the Games View menu
Settings: (LaunchBox only)
Tools < View MAME DATs - Settings
All 3 DATS will be listed and will each show:
if the local file exists the local files' version (if exists) the current available version available to download three buttons (depending on the local files' status) Remove Add (requires an internet connection) Update (requires an internet connection) (Option) Full Screen: Check the box to have the DAT Viewer window always open full screen.
(Option) Temporarily Disable Plugin: Checking this will remove the plugin from the games right-click menu and will also disable the plugin badges. It will stay disabled until it’s unchecked or LaunchBox is restarted.
Badges: (LaunchBox only)
A history badge is not included because pretty much all (if not all) MAME ROMs will have some sort of history entry.
A badge will be displayed if there is an entry in gameinit.dat for that game.
A badge will be displayed if there is an entry in commands.dat for that game.
To enable the badge(s), click
Badges, Plugin Badges, MAME Gameinit, MAME Commands. The Badge image can be changed by replacing the image(s)
../LaunchBox/Images/Badges/MAMEgameinit.png
../LaunchBox/Images/Badges/MAMEcommands.png
Updating: (LaunchBox only)
(Requires an internet connection)
2 options:
When loading the plugin by right clicking a game, it will check the local version of the selected DAT against what's available online If a newer version is available, you will be given the option to Update the local copy. Updating will attempt to download and then replace the existing file. Tools < View MAME DATs – Settings Here you can check/update all 3 DATs
The DAT Files:
command.dat
Courtesy of: https://www.progettosnaps.net/command/
Lists the various commands of many arcade games.
Shows controller command sequences used to make special moves in games.
gameinit.dat (LaunchBox only)
Courtesy of: https://www.progettosnaps.net/gameinit/
Shows information on how to run tricky systems.
This file lists the initialization procedures of some games emulated by MAME.
(Not all MAME games require any initial setup to run, but some do.)
history.xml (LaunchBox only)
Courtesy of: https://www.arcade-history.com/index.php?page=download
Contains game information, trivia, facts and tips on the arcade systems supported by MAME.
Navigating the DAT window:
LaunchBox
Use Ctrl+Mouse-Wheel to change the font size
Escape (or click the red X) to close
BigBox
Left-Joy or d-pad to scroll
Right-Joy for page up/down
"Back" to close
As always, all thoughts, views, opinions, suggestions, comments and accolades are welcome. 😎
See all my plugins here: https://forums.launchbox-app.com/profile/102158-joeviking245/content/?type=downloads_file
181 downloads
- command.dat
- gameinit.dat
- (and 2 more)
-
BezelLauncher
By JoeViking245 in Third-party Apps and Plugins
What is it?
Use this plugin to display bezels for emulators that don't natively support them.
What does it do?
It displays a bezel and resizes the emulator window to fit within the bezels transparent area.
What's required to make this plugin work?
LaunchBox v13.3 (or newer), the plugin file, bezel images and some minor setup. No more. No less. (See Setting up)
Do I need to provide my own bezel images?
Yes. (See Setting up for where to place them)
Will it work with game specific bezels?
Yes.
Will this work with all emulators?
Yes, with exception. RetroArch and MAME emulators will not show in the list of emulators and cannot be used with this plugin.
The emulators that have been tested so far all work. Some adjustments may be necessary. (see Emulator Settings)
Will this work with storefront games or Windows games?
No.
Can I use my existing RocketLauncher bezel configuration files?You can use the existing platform.png and platform.ini files from RL. These existing files should be located under:
/RocketLauncher/Media/Bezels/platform_name/_default/something.ini (and something.png)
(See Setting up [step #3])
What are the .ini files for?
The .ini (configuration) files tell the plugin how to resize and move the emulator window to fit within the bezel. (See .ini (configuration) Files for more info and Testing for creating and saving them)
Can this plugin add shaders as well?
No. Yes. See Using Shaders (new v2.1.0)
Disclaimer
This works on my test PC. I didn’t test it on my cab because I didn’t want to change my emulator settings to not use fullscreen (see Emulator Settings). Outside of RetroArch and MAME, I don’t use bezels, so didn’t want to mess-up-a-good-thing.
There are no guarantees, express or implied… blah blah blah blah blah blah blah.
There is no risk. This plugin makes no changes to LaunchBox or your emulators. If you decide this isn’t for you, simply undo any fullscreen changes you made and (with LB/BB not running) delete the BezelLauncher folder.
Special Thanks
Special thanks to @MadK9 for the idea, direction and help with testing! Without him, I would have never contemplated starting this project. Also a big thanks to @Sbaby for testing un-tested emulators with the plugin.
Installing
With LaunchBox/BigBox not running...
Download the plugin .zip file "Unblock" the file Right-click the file, select Properties, check the box "Unblock", click OK. Or better yet, just use 7-zip to open the file Copy the contents (a folder called "BezelLauncher") into your \LaunchBox\Plugins\ folder Start LaunchBox
Setting up
Start BezelLauncher Setup from the LaunchBox Tools menu, then click Close This will create the \Plugins\BezelLauncher\Bezels\platform_name\ subfolders Copy your bezel images into their respective platform_name subfolders See Bezel Images for more information (optional) If you have existing RL platform_name.ini files, copy those alongside the image files See .ini (configuration) Files for more information Restart BezelLauncher Setup Select a platform Choose an emulator you wish to use for that platform. Check Disabled to enable it Click Test Adjust (Move/resize) the orange frame to fit within the view area of the bezel (See Testing) Click Shaders to enable, adjust and change shader (see Using Shaders) (new v2.1.0) Click Save [to save the .ini file] Click Save on the main setup screen to add the emulator to the list of Enabled platform emulators Repeat for other platforms and emulators you wish to add You must click "Save" for each emulator you've enabled, separately.
Maintenance
After adding/removing platforms or emulators
Run BezelLauncher Setup Click Refresh Continue with Setting up, step #5
Testing
To configure the placement of the emulator window within the bezel (Requires an existing bezel image):
Run BezelLauncher Setup Select a platform and an emulator Enable it (if it's not already) Click Test
Move and resize the frame
Click [and hold] the left or right side of the frame to move it around Click [and hold] the bottom right corner to resize Use the on-screen buttons to fine-tune the adjustments The on-screen display will show information about the emulator window.
(You can click and drag the OSD to move it around as needed)
x, y = upper left monitor-coordinates of the emulator window w, h = width and height of the emulator window x, y = lower right monitor-coordinates of the emulator window
If any of the values are red, they are off the screen The OUTSIDE edge of the frame is the emulator window extents After adjusting, click Save. This will overwrite any existing configuration file.
Using Shaders (new v2.1.0)
First you need some shaders. Place the .png images in the /Bezels/Shaders/ folder (Scanline.png 'shader' is included) Start BezelLauncher Setup Select your platform and emulator and click Test Click Shaders Check the box to turn shader on Use the slider to adjust the shader Adjust the opacity down to lighten the shader Use the drop-down box to select a different shader Click Save to save your settings
Parameters
Depending on the emulator and the bezel, you may need to check 1 or more of the following parameters:
(h) hideStuff
Check this if you see the desktop behind bezel while the game is loading. This adds a black background during the startup process.
(s) startupSleeper
“Hide stuff” for a little longer during startup (3 seconds)
(l) longerSleep
Same as above (4 seconds)
(g) hideGameStartup
Check this if LB Game Startup screen is showing behind the bezel at game startup
When selecting a platform, if the plugin detects an emulator that has been tested, “suggested” parameters will be shown. Your mileage may vary.
Emulator Settings
For the plugin to move/resize the emulators’ window, you will need to disable fullscreen in the emulator(s). This may be as easy as removing "-f" or "-fullscreen" from the Default Command-line Parameters (depending on the emulator).
Beyond that, of the emulators I've tested, the only one that needs to have its Default Command-line Parameters altered is SuperModel. You will need to manually set the resolution.
Start BezelLauncher Setup Select your Super Model 3 platform and Enable it Click Test and after adjusting the frame to where you want it, make note of the W(idth) and H(eight) #'s shown in the OSD. Save and Close. (Be sure to click Save on the main Setup screen to save Enabled as well.) Edit your SuperModel emulator (in LaunchBox) and set the Default Command-line Parameters to "-res=W,H" (no quotes, no spaces and replacing W & H with the #'s noted above) Example: -res=1420,1076
Bezel Images
When you run BezelLauncher Setup for the 1st time, the plugin creates subfolders for each of your eligible platforms. They are created in:
\LaunchBox\Plugins\BezelLauncher\Bezels\[platform_name]\
The platform image file needs to be in the [platform_name] folder and must be named the exact same as the platform.
\BezelLauncher\Bezels\Sony PSP\Sony PSP.png
Game-specific bezel files
Game-specific bezel folders (or files) can be named after the games ROM filename or the games Title.
Using the games Title:
If the Title has 'invalid file name characters', those characters will need to be replaced with _ (underscore). The exact same way LaunchBox does with its image files (but without the -01 suffix).
Example: Title = Disney-Pixar's Toy Story 2: Buzz Lightyear to the Rescue!
Bezel = Disney-Pixar_s Toy Story 2_ Buzz Lightyear to the Rescue!.png
NOTE: Additional Apps game Titles are (i.e.) "Play USA Version...". So the bezel would be "Play USA Version....png". Same rules apply with 'invalid file name characters'.
Invalid characters are:
< (less than) > (greater than) : (colon) " (double quote) / (forward slash) \ (backslash) | (vertical bar or pipe) ? (question mark) * (asterisk) ' (single quote) Not technically invalid (post-DOS), but consistent with LaunchBox character replacement
Storing game-specific bezels:
Option 1:
Place your game bezel images directly inside their respective \[platform_name]\ folder. Game-specific image files must be named the exact same as the games ROM file or the games Title (accounting for invalid characters).
example:
\BezelLauncher\Bezels\Sony PSP\After Burner - Black Falcon (USA) (En,Fr,Es,It,Nl) (PSP) (PSN).png
Option 2:
Place your game-specific bezel image folders under the \[platform_name]\ folder. The subfolder must be named the exact same as the games ROM file or Title (barring invalid characters). The .png and .ini files in the subfolder can be any filename. example:
\BezelLauncher\Bezels\Sony PSP\After Burner - Black Falcon (USA) (En,Fr,Es,It,Nl) (PSP) (PSN)\thisIsAnyFileName.png See Launching different game versions for information about bezel requirements for games that are combined as Additional Apps.
ScummVM
Setting up ScummVM for use with this plugin:
In LaunchBox, Edit games using ScummVM. In the ScummVM section, have both checkboxes un-checked. (Fullscreen and Aspect Correction). This cannot be done using the Bulk Edit Wizard, so will need to be done on a per-game basis. One-at-a-time.
If it's not displaying correctly with just the above, try the (optional) following:
Navigate to /LaunchBox/Third Party/SummVM/ and start ScummVM.exe. On the Graphics tab, set Graphics Mode to opengl. Leave the other 2 as default and the check box's un-checked. Click OK and Exit. ScummVM Bezel Files:
To use bezels with games using LB's integrated ScummVM, you will need to set them up manually. It will not appear in BezelLauncher Setup.
Navigate to the plugins Bezels subfolder and add your platform folder. i.e. \LaunchBox\Plugins\BezelLauncher\Bezels\ScummVM\ Add your platform default png and ini files to this folder. i.e. ScummVM.png ScummVM.ini Game specific bezels for ScummVM must be named the same as the Game Data Folder.
i.e. D:\LaunchBox\Games\ScummVM\King's Quest 1 - Quest for the Crown\[game files]
use: "King's Quest 1 - Quest for the Crown.png"
DOSBox
The integrated version of DOSBox is NOT supported by this plugin. I couldn’t get it to cooperate 100% of the time. So going with plan “B”.
To use DOSBox with this plugin, you will need to install and set up DOSBox-X.
Setting up DOSBox for use with this plugin:
Note: BezelLauncher Setup will NOT show your DOSBox platform ('MS-DOS') as an available platform. So don't bother looking for it.
Download DOSBox-X
DOSBox-X releases can be found here: https://github.com/joncampbell123/dosbox-x/releases
Download the vsbuild-win64 version. (direct link for the download file) Create a new folder under \LaunchBox\ThirdParty\ and name it DOSBox-X Extract the contents of the downloads "\bin\x64\Release\" folder into the new folder Be sure to unblock the zip file before extracting (unless you’re using 7-Zip) Configuring DOSBox-X
In Windows Explorer, navigate to \LaunchBox\ThirdParty\DOSBox-X\. Make a copy of dosbox-x.conf. Rename the copy to [something like] "BL-dosbox-x.conf" Right-click the new 'BL-dosbox-x.conf' file and select edit (Notepad++ works great for this. But any text editor (Notepad) will work) Look for the following keys and change their Values as shown: (starting on approximately line 78)
fullresolution = 1400x1080
windowresolution = 1400x1080
windowposition = 260,0
output = ttf
showmenu = false
"1400x1080" (2 locations) is the dimension of the transparent area of your bezel. Adjust as necessary.
From your MS-DOS.ini file, use [Right X]-[Left X] for the 1st value (1400) and [Right Y]-[Left Y] for the 2nd (1080)
"260,0" is the upper-left coordinate of the transparent area. Use the Left-X value for the 1st number and Left-Y for the 2nd.
Save the changes and close the editor.
Configure games to use DOSBox-X
The following assumes your MS-DOS platform games are already setup to use the integrated version of DOSBox.
In LaunchBox, select all your DOSBox games and press Ctrl+E to start the Bulk Edit Wizard. (Select 1 game in the MS-DOS platform, then press Ctrl+A to select all) On the 2nd screen select the Field Custom DOSBox Version EXE Path for Value, Browse to and select dosbox-x.exe Click Next, Next Click “Yes, I would like to make more changes” select the Field DOSBox Configuration File for Value, Browse to and select the new file you created (BL-dosbox-x.conf) Click Next. Next (again). Click "No, I would not like to make more changes"
MS-DOS Bezel Files:
This assumes your DOSBox platform is called "MS-DOS".
In the Bezels subfolder under the plugin folder, create a new folder called 'MS-DOS'. In \LaunchBox\Plugins\BezelLauncher\Bezels\MS-DOS\, add your bezel files (MS-DOS.png and MS-DOS.ini). Game specific bezels for DOSBox need to be named the same as the Game Data Folder
i.e. D:\LaunchBox\Games\MS-DOS\Cosmos Cosmic Adventure\COSMO1.EXE
use "Cosmos Cosmic Adventure.png"
.ini (configuration) Files
The .ini files contain the monitors' coordinates for placing the emulator window.
The Upper Left x,y coordinate and the Lower Right x,y coordinate
Example:
Upper Left X Coordinate=240
Upper Left Y Coordinate=100
Lower Right X Coordinate=1680
Lower Right Y Coordinate=1080
The platform ini file must be named the exact same as the platform. If copied from RocketLauncher, you may need to rename it (removing any under_scores).
i.e. \BezelLauncher\Bezels\Sony PSP\Sony PSP.ini
For game-specific ini files, if they are located in a subfolder below /[platform_name]/ (see Bezel Images, Option 2, above), they can have any filename. If they are inside the /[platform_name]/ folder (Option 1), then they must be named the exact same as the games ROM file or Title.
If a game-specific .ini file doesn’t exist, the plugin will use the games platform.ini file.
Launching different game versions
Also known as Additional Apps, when right-clicking a game and selecting Play Version, the Additional App is not required to have its own bezel files. If the Additional App doesn't have its own bezel, the plugin will look for the Default Games' bezel. If neither of those exist, it will use the platforms’ bezel.
This eliminates the need to have a separate set of bezel files for each version of the game. Useful since they most likely all use the same image. This only works for games that are Additional Apps.
Plugin Folder Structure
As always, any thoughts, views, opinions, [constructive] criticism, comments and suggestions are welcome.
1,509 downloads
-
Copy Metadata (plugin): Apply metadata from someone else's XML file to your own.
By JoeViking245 in Third-party Apps and Plugins
Scenario:
"I have a build where I'm manually changing every game genre to a single genre/subgenre value and would love to share it, but without a tool to apply my metadata to their own it's kinda pointless."
Solution:
Copy Metadata plugin.
Purpose:
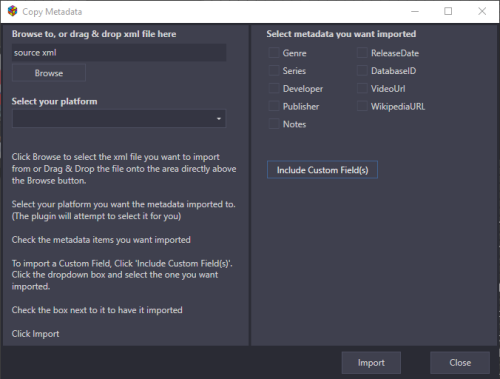
Import selected metadata from someone else's platform_name.xml file into one of your existing Platforms.
This will scan a LaunchBox platform_name.xml file and compare it your existing platform. For all matching games*, it will update the metadata you chose to have imported.
(*See Finding Matching Games for how games are matched up.)
Metadata fields to import (can select one or more):
Genre Series Developer Publisher Notes ReleaseDate DatabaseID VideoUrl WikipediaURL PlayTime (new v1.0.1) Imports PlayTime and PlayCount CustomField (up to 3)
Warning:
This will REPLACE any existing metadata for the fields you've selected. There is no un-do button. The exception is Custom Field(s). This will add new Custom Fields. If an existing Custom Field with the same Name as one be imported is found, you have the option to Overwrite your existing Custom Field Add a new Custom Field (creating 2 with the same Name but different Values)
How to:
Requires LaunchBox 13.3 or newer
Download, unblock the zip file, copy the contents of the zip to ..\LaunchBox\Plugins\ i.e. D:\LaunchBox\Plugins\CopyMetadata\CopyMetadata.dll Start LaunchBox Click Tools Select "Copy Metadata" Click Browse to locate and select the xml file you want to import from (optional) Drag & Drop the file onto the TextBlock (directly above the Browse button) Select your platform you want the metadata imported to (The plugin will attempt to 'select' the appropriate one for you) Check the metadata items you want imported To import a Custom Field Click "Include Custom Field(s)" Click the dropdown box and select the one you want imported Check the box next to it to have it imported (optional: you can select up to 2 others to be imported) Click Import
Finding Matching Games:
Every effort is made to properly match games in your existing platform to an external platform_name.xml.
It will first use the games LBDatabaseID # to ensure an exact match. If there are no matching database ID #'s, it will compare the games file_name.ext. If there are still no matches, it will look for a matching game Title.
Concept for this plugin was inspired by @C-Beats who caught me when I was bored and looking for a plugin idea.
352 downloads
-
Launch Platforms
By JoeViking245 in Third-party Apps and Plugins
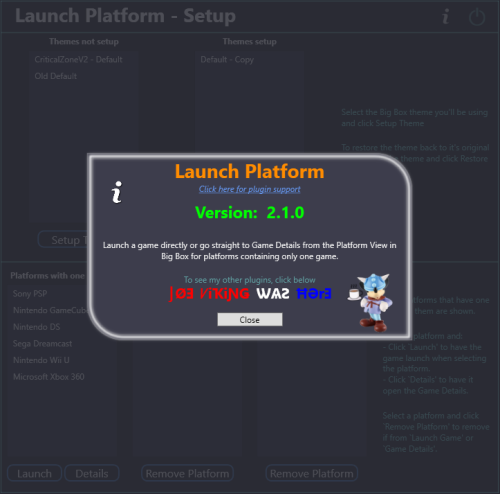
This is a Big Box plugin that allows you to launch a game/application directly from the Platform Wheel View level. For use with platforms that only have one game/application.
New in v2.0, now works in Hybrid views (if available). Hybrid Views are available in the Default theme in LaunchBox v13.22-beta-1 and newer.
New in v2.1.0, (option) Set platform to go straight to the Game Details View (instead of directly launching the game).
Example Use Case:
You have a platform called "Music Box Alpha" which contains only one "game", the Music Box Alpha application.
To launch it:
Select the platform Select the [only] "game" Select "Play" (or press A on your controller to go to the games Details view). Using this plugin (once you've setup the Theme and added the platform via Launch Platform Setup in the Tools menu), to launch the application or go straight to the Game Details:
Select the platform (That's it)
Installing:
Open the zip file and copy the contents into your ../LaunchBox/Plugins/ folder
e.g. D:\LaunchBox\Plugins\LaunchPlatform\LaunchPlatform.dll
If updating from a previous version, remove any existing .dll files first from the /LaunchPlatform/ subfolder.
Setup:
Click Tools and select Launch Platform Setup
(You may first want to create a backup of the themes' folder you will be using for Big Box. You shouldn't need it, but never a bad idea.)
Note: The Default theme is excluded. To use it, make a copy of the Default folder. e.g. /LaunchBox/Themes/Default - Copy/
In the Themes Not Setup list will be all your Big Box themes. (Excluding Default) Select the one you will be using use then click Setup Theme. This will now be listed in Themes Setup. At any time you can undo the changes made by selecting the setup Theme and click Restore Theme.
Selecting platform(s) to Launch "the game":
Select a Platform in the Platforms with one game List and click Launch . This will move it to the Platforms - Launch Game list.
Selecting platform(s) to go directly to the Game Details View:
Select a Platform in the Platforms with one game List and click Details . This will move it to the Platforms - Game Details list.
Using:
Start Big Box. If you just finished setting it up in LaunchBox, you can press Ctrl+B to switch to Big Box.
Set the theme to the one you setup earlier (if it's not the current theme already).
Scroll through your Platforms wheel until you find a platform you've added and select it.
What's actually happening when you "Setup" a theme: (a behind the scenes look)
@jayjay is the brains behind getting this to work, and I'm the one that threw it all together. So credit goes to where credit is due. (you decide ) If something's not working right, go ahead and post here and it'll get looked at. And possibly even get resolved.
297 downloads
-
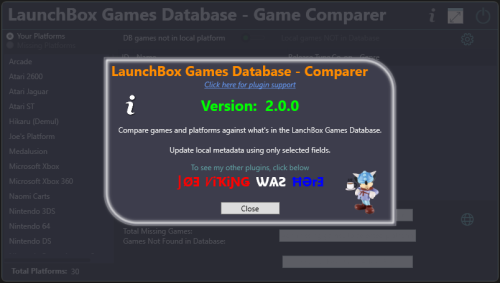
LaunchBox Games Database - Comparer Plus
By JoeViking245 in Third-party Apps and Plugins
See What You're Missing™
Game/Platform comparer
Compare games in your platforms against what's listed in the LaunchBox Games Database
See which platforms are in the Games Database that are not in your collection
Filter out games by Release Type, Genre and Co-op.
Import placeholders (see Game Placeholders below) into to a new platform, those platforms or games not found.
(optionally, import missing game placeholders into your existing platform)
Output the results to a tab-delimited text file.
Custom Metadata Updater (New v2.0.0)
Update an individual games metadata or do it in bulk.
Select only the fields you want to have updated. All others will be left untouched.
Requires LaunchBox 13.19 or newer
Installing;
Copy the contents of the zip file into your /Plugins/ folder
e.g. D:\LaunchBox\Plugins\LBDBcomparer\LBDBcomparer.dll
Using:
(click or scroll down for using the Custom Metadata Updater)
Game/Platform comparer
In the Tools menu, select LaunchBox Games Database - Game Comparer
Select a platform to compare.
(the list excludes platforms you've imported using Add Missing Games to NEW platform [see below])
This will show games listed in the database for this platform that are not found in the selected platform.
(this searches and compares by database ID)
Click the games ID # to open the LaunchBox Games Database to that game.
Other things:
Toggle Local games NOT in Database
This shows your games that either don't have an associated LaunchBox database ID # or their ID # is not in the database for the selected platform.
Toggle Missing Platforms
This show database platforms not found in your collection.
Search is done by Name Only. Exact match (but Ignore Case).
Does not cross-check the platforms Scrape-As value.
Does not exclude platforms you've imported using Add Missing Games to NEW platform (see below).
Settings: (click the gear icon)
Show only games that match the criteria (boxes that are checked). Filter by Release Type, Genre and/or Co-op.
Click Save and Close to save the selected filters and close the settings window.
Click Reset All, Save and Close to reset all filters to the defaults, save and close the settings window.
Click the Close icon to close the window without saving and changes.
The column headers will be highlighted Orange if any filters are set for that column.
Add/Import options:
Add Missing Games to NEW platform
This will create a new platform named platform_name (M) e.g. Atari 2600 (M)
Add game placeholders of games listed in the datagrid (filtered or otherwise) to the new platform.
Re-running it will essentially recreate the platform based on the items in the datagrid.
Add missing games to selected platform (not recommended)
This will import game placeholders into your existing platform for games listed in the datagrid (filtered or otherwise).
Game Placeholders:
The imported game placeholders will have set their
Title
LBDB-ID
Broken=True
Installed=False
With Installed=False, you can set Arrange By and choose Installed. But you can't Filter by it (nor Broken)
You can also, on the left panel select View Installed [vs. e.g. Platform Categoy] and then select the No option.
This can be helpful if you decide to add them to your existing platform. "Broken" can be used to hide the placeholders.
Output Results to A Text File:
This will output the results to a tab-delimited text file.
The file will be named platform_name (missingGames_count).txt and gets created in /Output/ under this plugins folder.
If it's a platform missing from your collection, the filename will be platform_name (M) (missingGames_count).txt
e.g. D:\LaunchBox\Plugins\LBDBcomparer\Output\Atari 2600 (137).txt
D:\LaunchBox\Plugins\LBDBcomparer\Output\Atari 2600 (M) (137).txt
Click the view file icon to view the created file.
Click the open folder icon to open you Windows Explorer to the /Output/ folder
Notes:
This will not check your games that are Additional Versions (Additional Apps). Additional Versions don't contain a LaunchBox database ID # to compare against. It "the numbers don't add up", check your platform for duplicates.
Custom Metadata Updater
From the LaunchBox main window... Select one or more games. Right-click one of them and select Custom Metadata Updater. If the games' field matches what's in the database, the Database column will show "identical". If they are different, double-click the value in the Database column to update that field in your game. Click the fields name in the left column to see both values in a larger window. (useful for the Notes field) If you selected more than one game, click the arrows to move to the next/previous game. Optionally, you can click Bulk Update, and update only the selected fields for all selected games. (click to go back up to using Game/Platform Comparer)
If a plugin update is available, the Info icon will flash red. Click it to find a link to the downloads page.
296 downloads
- launchbox games database
- missing games
- (and 2 more)
-
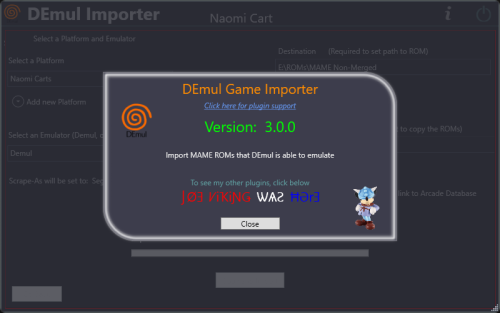
DEmul Games Importer
By JoeViking245 in Third-party Apps and Plugins
Import games for use with Demul (Sega * Emulator).
Purpose:
This purpose of this plugin is to import only the MAME machines that can be emulated in Demul. A sort of MAME machine ‘filtered’ importer to supplement LaunchBox’s Import Tool.
Why:
LaunchBox can already import these machines (games) for you using the built-in Tools - Import - MAME Arcade Full Set. All you need to do is un-check the skip games unplayable in MAME checkbox. The concern is this results in over 6000 additional entries imported (even more if you uncheck any other boxes and include clones). And as in most cases, more is NOT always better. Alternatively you can also simply drag-and-drop the roms into LaunchBox. Which is great when you already have them sorted out.
Included Systems:
The list of machines included for this plugin was generated by running the command “demule.exe –listroms” using Demul v0.7 (Apr 28, 2018). The systems included are Naomi, Naomi 2, Atomiswave, Hikaru, Gaelco, Cave3rd (CV1000) and System SP. (Sega Dreamcast, though emulated, is not included in the list. [It’s not a MAME machine])
Naomi and Naomi 2 are each broken into 2 separate systems: Cartridge System (rom only) and GDROM (chd).
Requirements:
LaunchBox v13.19 or newer DEmul already set up as an emulator in LaunchBox
What this plugin will do:
Import games for a selected system. Import into an existing Platform or create a new one. When creating a new Platform, assigns “Scrape as” per the associated system. Attempt to automatically detect/select your Demul emulator. (Required to exist as an emulator) (optional) Copy ROMs to a new location for the games you’re importing. What this plugin won’t do:
Add DEmul as a new emulator. Add the required command line to the emulator (**see below). Feature added v3.0 ‘Bulk’ import into separate Platforms. Add metadata and media to the imported games. If copying ROMs (optional), only the games main rom file is copied. It will not look for nor copy any required BIOS, Device or chd files.
Installing the plugin:
After downloading the zip file, extract the contents of the zip into your \LaunchBox\Plugins\ folder.
e.g. D:\LaunchBox\Plugins\DemulImporter\
If updating from a version prior to 3.0, "DemulGames.xml" is no longer needed and can be deleted from the plugins folder.
Using the plugin:
Click Tools and select Demul game Importer
Select a system This will populate a list of all the games for that system. (optional) Check View Parent ROMs Only When checked, only the parents ROMs will be imported When you select a game, a "globe" and the ROMs filename will appear Click the globe to navigate to the Arcade Database for the selected game Click Import Games Select a platform to import the games into You can select an existing platform from the dropdown list or click on Add New Platform to create a new one. Select an emulator The plugin will attempt to automatically select your DEmul emulator. If it isn’t already selected, look for it in the dropdown list. Select the folder where your ROMs are located (or will be if you select Copy) This is required to set each games Application Path (optional) Check Copy ROMs to another location Browse to the folder [Source Folder] where they’re located. (optional) Check Add Additional App with link to Arcade Database (New v3.0) The Additional App will be a hyperlink to the Arcade Database for that game Select Import (or Copy and Import) to complete the process
NOTES:
**Default Command-Line Parameters
System Command Line Parameter Naomi -run=naomi -rom= System SP -run=naomi -rom= Gaelco -run=gaelco -rom= Atomiswave -run=awave -rom= Hikaru -run=hikaru -rom= Cave -run=cave3rd -rom= Medalusion -run=alien -rom= Once import is completed, simply select the newly imported games and click Tools, Download Metadata and Media....
Information on getting these systems to run in Demul can be found here: https://forums.launchbox-app.com/topic/30622-sega-naomi-demul-in-launchbox/
After importing into a newly created platform, be sure to Edit the platform and check "Disable ROM Auto-Import".
Disclaimer:
I personally only have a few of these games on my cab. So I’m not very familiar with the systems mentioned here. Also, I have no idea if DEmul is even “the best” emulator for these systems.
746 downloads
-
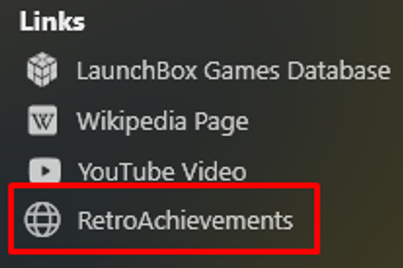
RetroAchievement Game Direct-Links
By JoeViking245 in Third-party Apps and Plugins
Inspired by @AstroBob's Feature Request https://feedback.launchbox.gg/p/retroachievements-icon-and-link-in-game-details-pane
This plugin will add an Additional Application to your games that will appear as a clickable link in the Game Details panel which directly links to that game on retroachievements.org.
If using @C-Beats Omni theme, this plugin [mostly**] fulfills this request. (**just not innately)
It works in the Default theme as well. Just appears differently in the Game Details panel.
This plugin is able to accomplish this without the need to Add RetroAchievements Game Page ID to LaunchBox Games Database.
Installing:
Extract the contents of the zip file into /LaunchBox/Plugins/
e.g. D:\LaunchBox\Plugins\RetroAchievementLinks\RetroAchievementLinks.dll
Using:
Click Tools and select Add RetroAchievement Game Links
In the window that opens, select Add Additional Apps.
The plugin will scan each game in your collection for a game-specific RetroAchievements Id. If found, an Additional Application and will be created for that game, named RetroAchievements. The Application Path will be the hyperlink to that game on retroachievements.org. e.g. https://retroachievements.org/game/1003 When done, a message box will appear indicating as much. Depending on your PC and the size of your collection, this could take 2 - 30 seconds to complete.
If at some point you wish to remove these Additional Apps, click Delete Additional Apps.
The plugin will scan each game in your collection for an Additional App called RetroAchievements. If found, it will attempt to remove it.
Note:
If, for whatever reason a game already has an Additional App named RetroAchievements, it will not add a 2nd one of the same name.
On that same note, if you click Delete Additional Apps, ALL Additional Apps named RetroAchievements will be removed.
77 downloads
(0 reviews)0 comments
Submitted
-
Pause-Menu Music Player
By JoeViking245 in Third-party Apps and Plugins
Inspired by a feature request on the LaunchBox feedback site by @crusadeRGP
https://feedback.launchbox.gg/p/pause-screen-music-player
"Add option to set custom music tracks and/or game music to be auto played when pause screen is activated and muted/stopped when returning to game"
This plugin will allow you to play music while your game is paused.
This can adapted to any Pause Theme.
Requirements:
LaunchBox version 13.19 (or newer) Game and/or Platform and/or Background music files Modified Pause Theme
Installing:
Extract the contents of the zip file into /LaunchBox/Plugins/ e.g. D:\LaunchBox\Plugins\PauseMenuMusic\PauseMenuMusic.dll
Setup (Required for this to work)
Navigate to your \LaunchBox\PauseThemes\ folder If you don't use a custom pause theme, select the Default folder Press Ctrl+C, then Ctrl+V This will create a copy of the Default pause theme folder (Default - Copy) Go into your theme's folder (e.g. D:\LaunchBox\PauseThemes\Default - Copy\) Using any text editor, open Default.xaml Add/insert these 3 lines as shown below xmlns:playMusic="clr-namespace:PauseMenuMusic;assembly=PauseMenuMusic" <playMusic:PauseMenuMusicPlugin x:Key="playMyMusic"/> <MediaElement Source="{Binding SelectedGame, Converter={StaticResource playMyMusic}}"/> Save and close the file Repeat for other xaml files in that folder Go to Tools < Options < Gameplay < Game Pause Make sure the Pause Theme you modified above is selected
Insert line #1 here:
Insert line #2 here:
Insert line #3 here:
Optional:
Now that you've read, and have a complete understanding of how to modify your theme... included as an additional download is a pre-modified version of the Default Pause Theme (Default - Music). You can use this instead of doing the above theme modifications if you so wish.
After downloading, copy the contents of Default - Music.7z into your \LaunchBox\PauseThemes\ folder e.g. D:\LaunchBox\PauseThemes\Default - Music\Default.xaml Set Default - Music as your Pause Theme
Settings/Options:
Start LaunchBox
Go to Tools < Pause-Menu Music Player
Default settings (shown):
Look for the games' music file
Use fallback music files
The plugin is enabled
Volume set to 50% (new v1.1.0)
Music types:
Select to play:
Game specific music Platform specific music Background music Fallback order-of-precedence:
With fallback enabled, the plugin will look for music files in the following order, starting with your selected music type:
Game > Platform > Background Platform > Background Background: [none] If fallback is disabled and there is no music file for your selected type, no music will play.
Disable Pause Music:
When checked, no music will play during Pause.
After making any changes, be sure to click Save Changes before closing the window.
Music Files:
Only .mp3 and .wma audio files are supported. The plugin will search for them in that order. If your platform or background folders have music files that are .mp3 and .wma, only the .mp3 file will ever play. Many audio files formats are supported. Including, but not limited to: .mp3, .wma, .ogg, .webm, .wav (v1.1.0) Music folders/files:
As prescribed by LaunchBox, music files should be located respectively in the following folders:
Game: \LaunchBox\Music\[platform]\[game.ext]
Platform: \LaunchBox\Music\Background\Platforms\[Platform Name]\[any_file.ext]
Background: \LaunchBox\Music\Background\[any_file.ext]
Caveats:
Only .mp3 and .wma audio files are supported. (a limitation of the method I chose to play audio files) (v1.1.0 Many audio file formats now supported)
When you pause the game, the music (if found) plays. When resuming the game, the music stops pauses.
When you pause the same game-play again later on, the music resumes from where it left off. plays. From the beginning. Again. (v1.1.0)
With the tools and motivation at hand, there isn't a reasonable workaround for this. (motivation found )
If you have multiple audio files for the game, platform or background, only the 1st one found will ever be played.
There's no volume normalizer feature. Analyzing the media's audio levels programmatically to normalize them would add excess processing. (That, and I don't know how with the tools and motivation at hand.)
Music/song files will not loop. So don't pause for longer than the song. (We're here to play games, after all. Right? )
(v1.1.0) Music/song files will restart/loop when the track ends during pause.
As always, all thoughts, views, opinions, comments and suggestions are welcome.
51 downloads
-
Bulk Playlist Manager
By JoeViking245 in Third-party Apps and Plugins
Features
- Set auto-populate to False (single or bulk)
- Existing games in playlist will remain
But no new games will/can be added unless done manually
- May help decrease LB loading time
- Cannot be undone [via the plugin]
- Delete playlist(s)
- Permanently delete the selected playlist(s)
- Delete all playlists that have zero games
- Whether the playlist is auto-populated or is just there, if there are no games in it, permanently delete the playlist(s)
- Single or Bulk add/remove parent platforms and/or categories
- Select a playlist
- Check and un-check parents to your hearts content, then click Save Parents to save the changes.
- If selecting multiple playlists, clicking Save Parents will set the parents for all selected playlists to the ones checked.
e.g. Selected playlist A had "Computers" checked and playlist B had "Consoles" checked, clicking Save Parents will set both playlists to be under "Computers" and "Consoles".
Installing
Download and extract the contents of the zip file to /LaunchBox/Plugins/
e.g. D:\LaunchBox\Plugins\BulkPlaylistManager\BulkPlaylistManager.dll
Using
You may 1st want to turn on Backups (under Tools < Options < Data < Backups), exit then restart LaunchBox (to create at least one backup) before proceeding.
Click Tools and select Bulk Playlist Manager
Hopefully the layout is fairly intuitive. You can mouse over the buttons for a little more detail.
As always, all feedback, comments and suggestion are welcome.
88 downloads
-
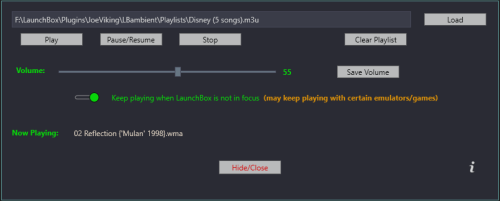
LaunchBox Ambient Music Player
By JoeViking245 in Third-party Apps and Plugins
Listen to your favorite Arcade music playlist while admiring your LaunchBox collection.
Requires LaunchBox 13.3 or newer
Just add your own playlists and start listening when LaunchBox starts. The music will pause when launching a game, and then resumes after exiting the game.
Setup:
Download and extract the contents of the zipped file into /LaunchBox/Plugins/
Quick Start:
With LaunchBox closed
Copy a music playlist (i.e. MyPlaylist.m3u) into the Playlists subfolder
i.e. /LaunchBox/Plugins/LBambient/Playlists/MyPlaylist.m3u
Start LaunchBox
See Playlists below for playlist requirements.
About this plugin:
Place your music playlist(s) into /LBambient/Playlists/
When you start LaunchBox, a random (if there're more than 1) playlist from that folder will be selected and start playing
Songs in the playlists will be played in a random order and will not repeat.
Songs will Pause when launching a game and then Resume when the game has exited.
Fixed v1.2.0 Exception: It might not stay paused when launching Steam games and others using a launcher.
Once the player has gone through the entire playlist, that's it. No more music.
So, if you plan to spend a lot of time looking at LaunchBox and not playing games, be sure to have a long playlist.
Options:
Go to Tools - LB Ambient Music
Adjust the player's volume slider (which is independent of LaunchBox's volume control) to your desired volume.
Click Save Volume to save it in Settings for next time you start LaunchBox.
To manually select a specific playlist (or song) to load when LaunchBox starts
Click Load to select a playlist (or song) and start playing it.
The selection will be saved in Settings.
Next time you start LaunchBox (and every time thereafter), the saved selection will be played.
To remove a playlist (or song) from Settings, click Clear Selection.
This immediately stops the player and removes it from Settings.
Next time you start LaunchBox, a random playlist (if any exists) will be selected from /LBambient/Playlists/ and automatically start playing.
Click Hide to close window.
Playlists:
Required: Playlists MUST have absolute paths to the song(s).
Some players (i.e. VLC) will save the playlists using relative paths if it's saved within the players folder structure.
(new v1.1.0) Playlists can have absolute or relative paths to the songs. Relative paths MUST be relative to the Playlists subfolder
Playlist formats tested are .m3u, .m3u8 and .xspf
No other formats have been tested and will not work with this plugin.
If you have playlists saved in a different format that you'd prefer to use, let me know.
THIS HAS ONLY BEEN TESTED WITH LOCAL FILES.
If the files paths in the playlists are URL's (i.e. start with "http://"), things might break.
You can try it if you want. Let me know what you find.
As always, all comments and suggestions are graciously accepted and encouraged. 😎
251 downloads
-

Emulators and Their Games / Platforms and Their Emulators
By JoeViking245 in Third-party Apps and Plugins
View all games associated with an emulator.
Can't remember which games in your Nintendo Wii platform use the Dolphin emulator and which ones use the Dolphin-TriForce branch?
Use this plugin see which games are used by a specific emulator.
New 2.0.0
Platforms and Their Emulators (toggle)
View all emulators associated with a Platform.
Setup:
With LaunchBox NOT running, download and copy the **contents** of the 7z (zip) file into you /LaunchBox/Plugins/ folder.
i.e. D:\LaunchBox\Plugins\Emulator-Games\Emulator-Games.dll
Using:
Stat LaunchBox Click Tools Click Emulators and Their Games Select an emulator to see a list of all games that use that emulator.
If a game uses the selected emulator but is NOT in one of its Associated Platforms (go figure how that happens. ), it will appear in Red.
A list of Associated Platforms for that emulator will also show.
Click on one of the Associates Platforms to view only games that use this Emulator AND are in the Platform.
Click Reset to go back to showing All games using the Emulator.
To create a Playlist of the games shown, click Create Playlist.
The Playlist will automatically be given the name of the selected Emulator. (Change it to whatever you want)
If you had selected an Associated Platform then clicked Create Playlist, the auto-fill name will be "emulator (platform)".
The playlists will be added to Platform Category "Emulator Games"
New 2.0.0
To view all emulators associated with a Platform, flip the toggle switch.
As always, all comments and suggestions are welcomed and encouraged.
398 downloads
-

MAME Software Lists Import Tool - plugin
By JoeViking245 in Third-party Apps and Plugins
Use this plugin to filter and import MAME Software Lists into LaunchBox.
New - version 6.0
Requires LaunchBox 13.3 or newer* Slightly different look. Same old features. A lot of (behind the scenes) code improvement. This update has been rewritten in .NET 6.0 to “keep up with the times”. *If you’re using LaunchBox version 13.2 or older, download version 4.5 of the plugin.
(For now, at least) v4.5 will still work with LaunchBox 13.3 and newer.
Features:
Import MAME Console/Computer ROMs into a new or existing Platform Import clones as Additional Apps, separately or not at all (Option) Skip Prototypes (Option) Skip Non-Supported ROMs Adds the Platform and Command-line Parameter to the selected MAME emulator (ex. Atari 2600 a2600 -cart) (Option) Copy ROMs to a new folder during importing Imported games tagged as not supported by MAME will be marked as "Broken". (Option) Import only games that exist in your ROMs Source Folder (Option) Ignore games that only have a Title change (when updating) Version information found inside parenthesis in a Games Title will be added to the games "Version" (metadata)
Audit Feature: Compare your existing softlist console/Platform against the MAME hash.xml.
Will cross check Title and Rom names.
- Select the respective hash.xml and Platform
- Click Audit (last page)
- Any differences along with a brief description will be shown.
- Option to select files (if any) and have them removed from your LaunchBox Platform.
- Will check main Titles as well as Additional Apps (if you imported them that way).
This does NOT check rom integrity. That's between you and Clrmamepro (or related utility).
What's needed:
(1) dll file included in the zip. MAME Software List hash files (located in the "hash" sub folder of your Mame's main folder) MAME Software List ROMs* and BIOS files (only if you want to actually play them) *The rom set needs to be either a Split set or a Non-Merged set for a full import If you plan to not import clones, any type set will work.
What it won't do:
Filter/Sort by Region (it's a MAME hash file limitation) Determine if/what BIOS files are needed Import Metadata and Media (just use the built in LaunchBox Tool) To remove extra information from the games titles [Example "(Jpn)"], select Yes, download and replace all existing metadata and media when running the tool.)
How to:
- Copy the "ImportMameSoftwareLists" folder from the zip file to your ..\LaunchBox\Plugins folder.
- Navigate to that folder and unblock the .dll file. (Right click, Properties, and click Unblock)
- Start LaunchBox. Click on "Tools" and select "Import MAME Software Lists".
- Navigate through the wizard.
- After running the plugin, right-click your new platform and select Edit. Set Scrape-as to whatever your platform is and save.
Notes:
ROM Folder Locations (screen): The Destination Folder is required even if you don't plan to copy the files. It's needed to set up the Application Path for the ROMs when Importing.
Copy and/or Import (screen): To add Version info (if it exists in the Games Title) to an existing console (Platform), run the plugin and DO NOT CHECK Ignore games that only have a Title change (when updating)
Selecting an emulator:
The main intent of this plugin is to import consoles and computers using MAME softlist ROMs and set the games "proper" Title and application path. It will also attempt to add the appropriate Command-line Parameter for the platform in MAME’s Associated Platforms.
If you prefer to use an emulator that can load MAME ROMs other than MAME (or a variant there-of), go for it. It’s recommended to select MAME while using the importer, and then change the Default Emulator when done importing.
You can select the 'other' emulator in the plugin, and it will be set as the default for the platform. But it will also have the default command line parameters for the associated platform set using MAME parameters. So be sure to adjust as necessary.
Importing:
(optional) "Import games that only exist in the ROMs Source Folder"
If using a Merged softlist set, clones will not get imported using this option. But if you have a curated Split set, this can be handy.
(optional) "Ignore games that only have a Title change (when updating)"
If you manually renamed your game titles, check this box.
Updating:
If you’ve updated your MAME emulator and MAME softlist ROMs, simply run the importer and point to the updated hash file and select your existing platform.
When updating, this plugin will NOT remove any games from your collection that MAME has removed from the hash file(s). You can use Audit to compare your collection to the MAME hash file and manually remove games from your collection that don't exist in the hash file (if you so desire).
Downloading Metadata:
After running the plugin, right-click your new platform and select Edit. Set Scrape-as to whatever your platform is and save.
When downloading metadata and Media, choose "Yes, download and replace all existing metadata and media". This will remove the Version info from the games Title.
After updating the metadata, if some, but not all games got updated, restart LaunchBox and try the bulk metadata downloader again.
Auditing:
When auditing, if a game originally had the version info in its Title and you have ran the Download Metadata and Media wizard selecting "Yes, download and replace all existing metadata and media", you WILL see games marked as Missing.
* MESS xml *
Other Notes: (things I've learned)
- Software List folder/file locations:
- *Associated Platform Command line parameters
- MAME and CDROMS
3,513 downloads
-
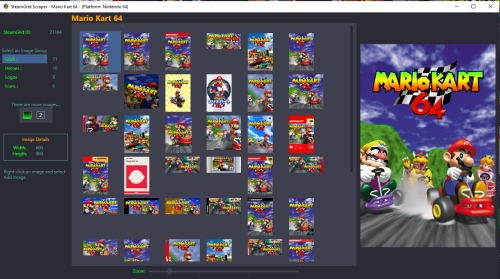
SteamGridDB Scraper
By JoeViking245 in Third-party Apps and Plugins
Preview and import images from SteamGrid Database directly into your LaunchBox collection.
A personalized SteamGridDB API Key is required. (See below about getting yours) Downloaded images are saved to the default LaunchBox image folder(s).
Installing
Download and extract the contents of the download to your /LaunchBox/Plugins/ folder.
i.e. D:/LaunchBox/Plugins/SteamGrid Scraper/SteamGridScraper.dll
First Time Run
Select a game, right-click it and select SteamGrid Scraper.
The "API key Required" window will open.
Paste (or manually type in) your personal SteamGrid API key.
Click Save
Using
Select a game, right-click it and select SteamGrid Scraper.
In cases where an exact match for the game Tite is not found, a window will popup listing 'close matches'.
Double-click a game from the list to select it.
Click on the SteamGrid image group you'd like to view. Options are:
Grids
Heroes
Logos
Icons
Up to 50 images will show in the Gallery. If the selected group has more than 50 available, click "2" to see then next 50.
Use the Zoom slider to increase/decrease the image sizes in the Gallery.
Double-click on an image to see a larger view. (Opens in a separate window).
The Icons group is pretty much useless in LaunchBox. But since they're available, they're included.
Saving an image
To add an image to your game, right-click the image in the gallery switch from Image Preview to Add Image and select Add Image.
Select the Image Type (folder) you want to save it as from the dropdown box. (It doesn't change automatically for you.)
Only a few select image types are shown by default.
To see all image folders (types), check the box See All available image types.
(Optional) To view your existing images for the game, click View Existing Images Gallery. (Opens in a separate window)
This shows only the images for the selected image type.
(Optional) Click Open Image Folder to open Windows Explorer to the folder where your existing images are and where the image will be saved to.
Click Save Add Image to save the image.
Getting your SteamGridDB API Key
Log into your SteamGridDB account.
Go to your Profile - Preferences - API
Click 'Generate API key'
As always, all comments and suggestions are welcome. 😎
1,587 downloads
-
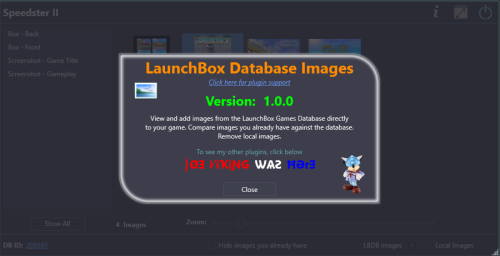
LaunchBox Games Database Image Viewer-Plus
By JoeViking245 in Third-party Apps and Plugins
View and add images from the LaunchBox Games Database directly to your game.
Compare images you already have against the database.
Remove images from your collection.
Scenario #1:
You're looking through your collection and you notice a game is missing an image. (An Arcade Cabinet in this case)
Solution #1:
Edit the game Go to Media < Images Click Download Media Click Uncheck All Check Arcade Cabinet Switch to the EmuMovies tab Click Uncheck All Click Download Arrow through the images until you get to the newly added images Find the one you want and click Remove Image on each of the others Click OK to save Solution #2:
Open this plugin Click Arcade - Cabinet Double-click which image you want to add Close the plugin
Scenario #2:
You have multiple Arcade Cabinet images in your collection, and you've discovered you can only ever see one-at-a-time.
Solution #1:
Edit the game Go to Media < Images Arrow through the images until you get to the Arcade - Cabinet Images Arrow through each one until you decide on which one you want to keep Click Remove Image on each of the others Click OK to save Solution #2:
Open this plugin Switch to Local Images Right-click the image(s) you don't want and select Remove Image Close the plugin
Requirements:
An internet connection An associated LaunchBox Games Database ID# for the selected game LaunchBox version 13.19 or newer
Installing:
Download and extract the contents of the download into your /LaunchBox/Plugins/ folder.
i.e. D:/LaunchBox/Plugins/LBDBimages/LBDBimages.dll
Using:
Start LaunchBox Right-Click a game Select LB Games DB Images * *If a game does not have an associated LaunchBox Games Database ID#, the menu option will be disabled.
(v1.2.0) Bulk: Select multiple games, then right-click and select the plugin. Navigate to the next/previously selected game by clicking the left/right navigation buttons
Mouse-over an image to see its image type and region (if available)
Switch between the LBDB Images and your games' [Local] Images (lower left corner)
Image Gallery Zoom:
Adjust the Zoom slider to make the gallery images larger/smaller.
(new v1.2.0)
Use Ctrl+Mouse Wheel over the Image Gallery to adjust the zoom level Use the mouse wheel over the Zoom slider to adjust the zoom level Right-Click NOT over an image inside the Gallery to reset zoom level
LBDB Images view:
Select a filter on the left to view only those image types
Double-click an image to add it to your game
Check Hide images you already have to not show...yup...images you already have **
New v1.3.0 The Hide Images you already have check status will be saved for next time you open the plugin.
**This only checks for an exact CRC32 match between the database images and your local images. "Pretty close" is not an "exact match".
Local Images view:
Select a filter on the left to view only those image types
Right-click an image and select Remove Image to remove it from your collection
Preview images fullscreen: (new v1.2.0)
Right-click image and select View Image Fullscreen
Left-Click: Drag/Move image
Mousewheel: Zoom in/out
Right-Click: Reset image
Left/Right arrow keys: Show previous/next image (new v1.3.3)
Escape: Close the preview window
Navigate to the LaunchBox Games Database website:
Click the DB ID # to navigate to the LaunchBox Games Database webpage for that game (opens into your default browser)
Features: (new v1.3.0)
Keyboard Shortcuts: Press F to show selected image fullscreen Press Delete to remove selected local image Press I to switch between database and local Images When switching between LaunchBox DB images and Local images, the selected image type is carried over. Window size/location and Image Zoom level are saved on close and used next time you open the plugin.
Known Issue: When adding an image to your collection and having Hide Images you already have checked, the image may not get removed from the Gallery
Updating your local DB file may resolve this. Tools < Download < Force Update Games Database Metadata...
Image Regions: (new v1.3.1)
Click the Image Regions drop-up box (a dropdown box that goes up) to view only image for the selected region. A 'blank' option (if shown) is for images that don't have a region associated with it.
Plugin Updates:
If an (U)pdate for this plugin has been released on the forums,
a) the plugin title in the right-click game menu will show as: (U) LB Games DB Images
b) At the top of the plugin window, the Info icon will flash red.
Click the Info/Support icon, then click the Update Available button. This will open the plugins download page in your default browser.
As always, all thoughts, views, suggestions, opinions and accolades are welcome.
"Be excellent to each other." (Bill S. Preston, Esq)
686 downloads
-

Bulk Add/Remove Additional Applications
By JoeViking245 in Third-party Apps and Plugins
Thanks to the new (since v13.5) plugin feature that supports menu nesting, 2 plugins have been combined into 1.
(Bulk) Add Additional Applications - https://forums.launchbox-app.com/files/file/2866-bulk-add-additional-applications/
(Bulk) Remove Additional Applications - https://forums.launchbox-app.com/files/file/2980-bulk-remove-additional-applications/
These combined plugins have both been overhauled both functionally and visually to 'keep up with the times' and have a smaller footprint plus added features.
This plugin Requires LaunchBox v13.5 (or newer)
If you haven't updated to LaunchBox v13.5 (or newer), you really should. But until then, the original versions of the plugins (for now) still work. (see links above)
Installing:
After downloading the file, open the zip file and copy the contents into \LaunchBox\Plugins\
i.e. D:\LaunchBox\Plugins\BulkAddRemoveAdditionalApps\BulkAddRemoveAdditionalApps.dll
If you didn't use 7Zip to extract the contents,
Navigate to the plugin folder and right-click the file. Select 'Properties' Click "Unblock" and then click OK. If switching to this plugin from either of its predecessors, be sure to remove the older version(s) from your 'Plugins' folder.
Using:
Select one or more games Right-click on one of the selected games Select Bulk Add/Remove Additional Apps to expand 2 more options Select either: Bulk Add Additional Apps Bulk Remove Additional Apps
Bulk Add Additional Apps
The intent of this is to add the same Additional Application to more than one game, all in one shot.
It can also be used to add an Additional App to a single without having Edit the game.
What's new:
UI completely overhauled for that 'modern look' Removed restriction requiring multiple games be selected aka: You can now add an Additional App directly to a single game without having to Edit the game NEW Feature: Add %romfile% to the Command-Line Parameters to insert the "full\path\to\ROM\file.ext" (including quotes) when saved Option: Remove quotes Option: Remove file extension and folder path Tip: press Ctrl+R to insert %romfile% Bonus Feature: Add %title% to insert the games full Title Add %platform% to insert the games platform Name Tip: press Crtl+T or Ctrl+P to insert these (respectively) Hint: You may want to enclose these in quotes if they consist of more than 1 word %platform% = Atari 2600 "%platform%" = "Atari 2600" Huge Thanks to @Headrush69 for the idea of adding the %romfile% option!!! (%title% and %platform% was also his.)
Bulk Remove Additional Apps
The intent of this plugin is to Remove the same* Additional Application for all games in a given Platform, all at one time.
*Same is determined by the Additional Applications Application Name and Application Path. If they match exactly, they are the ‘same’.
Why use this?
Quite possibly you used Bulk Add Additional Apps and you clicked “OK” before realizing you forgot to add in the Command-Line Parameters, or the Additional App is simply not needed anymore.
Using:
When opening, the plugin will default to the selected games' Platform. You can select a different platform using the dropdown box.
By default, the plugin will 'combine' all Additional Apps that have the exact same Application Name AND Application Path, and only display one of those.
When you remove that "one", all occurrences (having the same Name and App Path) will be removed. Regardless of Command-Line parameters.
To separate these out by Command-Line parameters, check Split By Command-line.
Once you click Remove, there's no going back.
Some icons by Yusuke Kamiyamane
1,209 downloads
-

Visual Pinball X – Top Scores (hiscore) Viewer
By JoeViking245 in Third-party Apps and Plugins
View the Top Scores for your Visual Pinball X Tables
This plugin uses DNA Disturber’s PINemHi app to read a tables top scores that are stored in the nvram files created by VPinMAME. PINemHi currently it supports 425 roms.
New v2.0 Now viewable in Big Box (Requires LaunchBox/Big Box v13.19 or newer)
Instead of scrolling through these (in game)
See this (in LaunchBox)
If you’ve signed up on the PINemHi Leaderboard site, this plugin will also let you view your Personal Top 10 Scores (these scores are tracked separately from the Tables’ top scores) as well as the Best Top 10 Scores on the Leaderboard. Signing up is free and you only need to provide a username. No email address, proof of citizenship nor vaccinations required. (See Top 10 Scores below)
Requirements
LaunchBox/Big Box v13.19 (or newer) This plugin downloaded and setup (see Setting up the plugin below). PINemHi v3.6.3 (included with the plugin download) The game needs to point to a valid Visual Pinball table (i.e. file extension .vpx) This is required to get the ROM info for the table(s). Optional Requirements
Sign up for PINemHi Leaderboards. (see Top 10 Scores below)
Setting up the plugin
Copy the VPXHiScores folder (from inside the zip) into your \LaunchBox\Plugins\ folder (new install) rename New_pinemhi.ini to pinemhi.ini (existing installs) skip to Updating Existing Installs Edit the pinemhi.ini file (\LaunchBox\Plugins\VPXhiScores\PINemHi\pinemhi.ini) Under [paths], edit the path to the Visual Pinball (VP) “nvram” folder located inside your Visual Pinball installation. i.e. VP=D:\Emulators\Visual Pinball\VPinMAME\nvram\ Also edit the path to the "user" folder i.e. USER=D:\Emulators\Visual Pinball\user\ The path MUST end with a slash!! (optional) Under [user], type in your PINemHi Leaderboard name and code. (see Top 10 Scores below) Save and Close pinemhi.ini Updating Existing Installs (if updating from a previous version of this plugin)
The latest PINemHi app is included in the download.
pinemhi.ini and has been renamed it to New_pinemhi.ini so it doesn't overwrite your old settings
After copying the files into the plugins' folder
Navigate to the \VPXhiScores\PINemHi\ folder Open pinemhi.ini Open/Edit New_pinemhi.ini Copy from your original pinemhi.ini under [paths] the path to your Visual Pinball \nvram\ folder the path to your Visual Pinball \user\ folder under [user] your 'name' and 'code' Paste (or just type) these into New_pinemhi.ini Also adjust any other settings you may have changed. i.e. [keys] Note: under [keys] is a feature called "send_button". This allows you to submit your score without needing to exit the table. After saving and closing New_pinemhi.ini, rename your original pinemhi.ini file (just in case. i.e. OLDpinemhi.ini). Then rename New_pinemhi.ini to pinemhi.ini
Using the plugin
LaunchBox
Start LaunchBox. Right click on one of your VPX tables and select Visual Pinball Table HiScores Select View Table High Scores (see below for Starting/Stopping pinemhi_rom_monitor.exe) Big Box
Start Big Box. Go to the Game Details for one of your VPX tables and select VPX HiScores (see below for Starting/Stopping pinemhi_rom_monitor.exe) Navigating the window in Big Box:
Use Left Joy Up/Down or DPad Up/Down to scroll… you guessed it… Up/Down.
Use DPad Left/Right to switch between the score types.
Use your Big Box assigned Back button to close the window.
Right Joy will move the window.
Plugin Updates (new v2.0)
If an update for the plugin is available, the right-click menu will start with (U) i.e. (U) Visual Pinball Table HiScores
(LaunchBox only) When viewing high scores, click the information/support icon and click the Update Available button to take you to the plugins download page.
How it works
To get the top scores for a table, we 1st need to know which VPinMAME rom it’s using. To get this, the plugin searches the table for the name of the ROM that it uses. It will then search VPMAlias.txt to check if it has a ROM alias. The ROM name is then passed to pinemhi.exe which extracts the top scores from the nvram file associated with the ROM.
The plugin searches the tables file directly for the ROM name. Power users: If you use an extracted/modified .vbs and change the cGameName = to a different ROM, be sure to change (at least that part) in the table itself.
Top 10 Scores
To be able to view your Personal Top 10 and Best Top 10 scores, you need to sign up at http://pinemhi.com/hiscores.php. This is where you’ll get your name and code to add to “pinemhi.ini “. (See note #4 under Setting up the plugin [above])
You will also need to have PINemHi’s ROM Monitor (“pinemhi_rom_monitor.exe”) running. This is a tiny executable that runs in the background and detects when a VPX table is loaded and then keeps track of your Personal top scores as well as downloads the Best Top 10 scores for that table.
Please read through “PINemHi LeaderBoard installation and config.txt” located in the plugin folder.
(\LaunchBox\Plugins\VPXhiScores\PINemHi\ PINemHi LeaderBoard installation and config.txt) Some main points in the documentation (for use with this plugin):
Setup your Visual Pinball (VP) and user (USER) path and [user] name and code. Keys Make note of which shortcut keys do which action. There are 6 different hotkeys. Change them as necessary. Controller buttons are also supported. under [keys] is a feature called "send_button". Setting and using this allows you to submit your score without needing to exit the table. Run “pinemhi_rom_monitor.exe”. Other IMPORTANT notes:
As a final note... The pinemhi_rom_monitor.exe was made with AHK (autohotkey). Microsoft Defender will frequently call AHK executables to be a virus/trojan This is a false positive. Feel free to test it with other anti-virus programs There is an option in Microsoft Defender to allow the program to still be used (make an exception for that file)
Starting/Stopping pinemhi_rom_monitor.exe
You can toggle the Rom Monitor On/Off from the Tools menu. Depending on its state, you’ll see this:
Or this:
In Big Box, in the Game Details screen, you’ll see either "Start PINemHi Monitor" or "Stop PINemHi Monitor")
When you launch a Table with PINemHi Rom Monitor running, you’ll get a popup after the table loads showing your Top 10 Scores. Press “L” (default) to hide it. This is a nice indicator that the ROM Monitor is running and that your Personal Top Score will be saved. Alternately, you can set on_at_start=0 in pinemhi.ini to disable the popup.
PINemHi Leaderboard
Along with Personal Top Scores, PINemHi Leaderboard has some other cool features not directly accessible through this plugin like daily, weekly and 5-minute challenges. (These are accessible using the shortcut keys mentioned above.) It tracks Player 1 scores [aka Personal Top 10 Scores] as well as Special Scores (i.e. 20 loops [Back To the Future] or 50 martians killed [Attack From Mars]). You can add up to 9 friends and view each other’s top scores. There are also a number of Badges that can be earned on various tables.
Main Site: http://www.pinemhi.com/
Leaderboard: http://pinemhi.com/hiscores.php
VPForums discussion: https://www.vpforums.org/index.php?showtopic=44580
ROM-less Tables (new v2.1.0)
[Some (most?)] ROM-less table are supported to show local high scores. Thanks goes to @Sbaby (and a little bit of AI ) for doing most the work towards implementing this feature. To see online top scores, your tables will need to be modified. See PINemHi's Main Site and click ROM-LESS CODE SNIPPETS for details.
Special thanks to DNA Disturber for creating PINemHi for the Visual Pinball community and allowing permission to use it here, making this plugin possible!!
116 downloads


