

Tsik
-
Posts
93 -
Joined
-
Last visited
Content Type
Profiles
Forums
Articles
Downloads
Gallery
Blogs
Everything posted by Tsik
-

PCSX2 - Escape Key not closing games and exiting app
Tsik replied to Who_Dunnit_Roger's topic in Troubleshooting
If I understand correctly when launching PCSX2 from LaunchBox/Bigbox the emulator does not exit when pressing ESC... if so go to Tools>Manage>Emulators> choose your PCSX2 entry and in the Running Script tab paste the lines: #NoEnv $Esc:: { Process, Close, {{{StartupEXE}}} } (It's the I/O board you mentioned that's confusing me, but still, try the above and we'll see.) 🙂 -
Hi, you can also try a fresh "test" installation to a separate location, and see what it does there. Just take the installer from the Updates folder. Another suggestion is also to check your plug-ins. Try and remove them temporarily, all of them or one-by-one, to see if the problem still occurs. I also doubt that the problem is the library size. Cheers 🙂
-
Maps and text passwords - What do i do with them?
Tsik replied to Shredder_guitar's topic in Game Media
Hey, I've honestly never heard of Kavita reader before. May I ask, do someone have to have Kavita already installed in their system for this to work? I would love to learn a bit more about on how it works. Quick searching for "Kavita reader" in Google leads to -here-. Can this be used as a standalone reader? (perhaps tomorrow I'll try and look around for more info). In your video you said it is compatible with cbz files (which is I think essentially a zip file full of pngs formatted to be used for those flip-book comic/magazine readers as you already said) and looks like it is also with PDFs but in your first post you also mention raw .png images and .txt files is it working with those also? Also many DOS games used to have some kind of code wheels for protection like "Monkey Island's 2" Mix n Mojo below which I found can be viewed/used like -this-. Any luck with those? Thanks! 😄
-
Hello there and welcome to the forums, to check each emulator's path go to Tools>Manage>Emulators choose the emulator you want and track down the path to the executable and that the Assosiated Platforms are registered correctly as well. If you are referring specific to RetroArch please also check in the Assosiated Platforms tab for the specific cores you are using for each platform/system that are downloaded and selected. If you experience any problems after that, posting screenshots of the above windows will get you further... 🙂
-
Disclaimer #1: I create this post just to share my way viewing multiple and different file/file types/documents and/or Images together in a single screen setup and move between them with the controller. Disclaimer #2: I'm not an expert at all in any of this, neither in the applications nor in batch scripts. I managed to do it just by searching, reading and A LOT OF TESTING, so please bear with me if you find anything that doesn't look right or perhaps needs to be changed for whatever reason. That being said, please don't expect me to be able to help/troubleshoot everything (even though I could try my best 😅) nor (maybe) receive requests, there are many members around the forums who are truly experts in scripting/coding and maybe can/willing to help more than I can, so if you are experiencing any issues or need help at anything feel free (of course) to post it below for discussion, but don't count only on me to be able to find the solution although I would love to. 😅 ☺️ Alright, so here how it goes... Part 1: - My version of SumatraPDF + Autohotkey + JoyToKey. Long ago (2016) I came across -this- @fasm's thread about using SumatraPDF as a pdf viewer for reading game manuals and I gave it a try. It was a nice idea to use a pdf viewer other than the default one. A Little later (2017) I came across -this- @teeedubb's and -this- @KUPOkinz's threads about using SumatraPDF and Autohotkey (and another app) to be able to read the manuals also without leaving my hands off the controller, I gave it a try also and it was working nicely. So a HUGE shout-out to all of them for helping/inspiring me found my own “path” beside them. 😄 After some time (in 2024) I had this idea to create my own version of SumatraPDF + Autohotkey combination through a "simple" batch file which could open multiple files/file-types (as long SumatraPDf supports them -see here-) from just one file, the 'Game manual' itself. (In my version I make use also of ‘Nircmd’ to just manipulate the app and/or the cmd window to my needs such as start minimized, maximized, set on-top etc.) Now let’s get to the point. The basic idea is to have the batch file take the place of your game manual which when used identifies the folder where is placed in and also the filename it has and looks under a specified custom directory for that same path/folder OR file name base on its filename and open the file(s) found with SumatraPDF combined with the use of Autohotkey for some automation moves (eg. To “hide” the mouse pointer), JoyToKey for controller support and Nircmd for some window manipulation and error/info messages. Below are the links to the applications used: 1. SumatraPDF (choose the portable version) -link- 2. Autohotkey (V2) (prefer the portable zip version) -link- 3. JoyToKey (prefer the portable zip version -manual installation-) -link- 4. Nircmd [x64] (scroll down to the end of the page) -link- Below is a sample image so you get the picture on how the batch files and the actual document manuals are placed so they work: - NOTE #1: The Platform Name (in RED) matches the name of the LaunchBox platform - NOTE #2: In this situation (in ORANGE) the bat file is calling one file per game as long as the name of each file (no matter the extension) matches the batch file name and the Platform it is sitting in also match the folder of the file. - NOTE #3: In this situation (in PURPLE) the same bat file is calling multiple files per game (no matter the extension) as long as the name of each folder matches the name of the batch file and the Platform it is sitting in also match the parent folders name. * If any of the above matching is not happening then the batch file shows a message of what is not found. As for the third party apps you are free to place them where ever you want as long as you point them correctly in the batch script. As reference here is where I’ve put mine: SumatraPDF: G:\TOOLS\SumatraPDF\SumatraPDF.exe AutoHotkey: G:\TOOLS\AutoHotkey\AutoHotkey64.exe JoyToKey: G:\TOOLS\JoyToKey\JoyToKey.exe Nircmd: G:\TOOLS\Nircmd-x64\Nircmd.exe · After placing the apps above in their own directories use the file below as the AutoHotKey script: SumatraPDF-JoyToKey.ahk (After downloading remember to right-click>properties>unblock) and place it also in a folder. (I choose to put it inside the G:\TOOLS\AutoHotkey folder beside Autohotkey.exe) *Posting below the same Autohotkey script for reference (open with/paste it into Notepad++ for proper reading): #SingleInstance force SetWorkingDir(A_ScriptDir) #Warn Sleep(1000) ;Wait 1 second. if WinWaitActive("SumatraPDF ahk_exe SumatraPDF.exe", , 2) ;Wait for 2 seconds for SumatraPDF to open then { CoordMode("Mouse", "Screen") ;Move the mouse MouseMove(A_ScreenWidth/1, A_ScreenHeight/2) ;to the side of the screen and WinActivate("SumatraPDF ahk_exe SumatraPDF.exe") ;activate SumatraPDF. } ;Send "^+l" ;SumatraPDF Presentasion mode.(commented) else ;If SumatraPDF (from WinWaitActive) fail to open then ProcessClose("joytokey.exe") ;close joytokey process. ProcessWaitClose("SumatraPDF.exe") ;After SumatraPDF loads wait for it to exit and ErrorLevel := ProcessExist("joytokey.exe") ;close joytokey after that. if ErrorLevel { ProcessClose("joytokey.exe") } · Then here is the SumatraPDF configuration file for using JoyToKey with SumatraPDF for the controller: SumatraPDF.cfg (After downloading remember to right-click>properties>unblock) (I think that this one MUST be inside ..\JoyToKey folder beside JoyToKey.exe, I put mine in G:\TOOLS\JoyToKey) Controller configuration below (XINPUT): D-pad or Left Stick UP/Down: Scroll Up/Down slow Game-Pad A: Move to last page D-pad or Left Stick Left/Right: Next/Previous page Game-Pad B: Page rotate left Right Stick UP/Down: Scroll Up/Down fast Game-Pad X: Page rotate right Right Stick Left/Right: Next/Previous page fast Game-Pad Y: Move to first page Back: Exit Start: Full-screen toggle Left Trigger (Analog): Zoom out Right Trigger (Analog): Zoom in Left Bumper: Previous tab Right Bumper: Next tab Left Stick Push: Normal view Right Stick Push: Fit page view NOTE: Perhaps you might need to change the controller-buttons to fit your needs. · The AppLink data file which is the file that tells JoyToKey to “auto engage” the specific profile when SumatraPDF is active. AppLink.dat (After downloading remember to right-click>properties>unblock) (This one MUST DEFINITELY be inside ..\JoyToKey folder beside JoyToKey.exe, I put mine in G:\TOOLS\JoyToKey) *ATTENTION: Before using JoyToKey open AppLink.dat file with any text editor (preferably Notepad++) and change the PATH-TO-SUMATRAPDF part with the actual path you are using (eg. G:\TOOLS\SumatraPDF) NOTE: You can skip the drive letter here also if you are aiming for portability. (eg. \TOOLS\SumatraPDF) · And lastly here is the batch/script file you can get from below: Multi Manual Launcher.bat (After downloading remember to right-click>properties>unblock) NOTE: Remember to replace the PATH-TO-... parts with your actual paths you are using and Change the name of the bat file to match the game title in LaunchBox each time (preferably using Notepad++'s Replace function for convenience). NOTE: You can if you want use any file-name as long as you make sure the target’s [folder or file] name matches the batch file-name exactly but then you must point LaunchBox to it manually in the Edit Game>Media>Game manual path. I am also posting below the batch script from above for reference (open with/paste it into Notepad++ for proper reading): @echo off title Multi Manual Launcher if not defined IS_MINIMIZED set IS_MINIMIZED=1 && start "" /min "%~dpnx0" %* && exit start /wait "" "PATH-TO-NIRCMD\Nircmd.exe" win min title "Multi Manual Launcher" ::Setting-up the Main +Manuals directory set Dir=PATH-TO-REAL-MANUALS (eg.G:\Real Manuals) ::Searching inside '%Dir%' for the same directory as the folder of this batch file cd %Dir% for %%b in ("%~dp0.") do set "DirName=%%~nxb" ::If the name of the '%Dir%' matches the folder-name of this batch file '%%~na' for /d /r "%Dir%" %%a in (*) do if /i "%%~na" == "%DirName%" goto FOUND :PLATFORM_NOT_FOUND start /wait "" "PATH-TO-NIRCMD\Nircmd.exe" infobox "The '%DirName%' Platform folder you specified does not currently found inside the '%Dir%' directory!" "Attention!" timeout /T 1 /nobreak >nul start /wait "" "PATH-TO-NIRCMD\Nircmd.exe" win activate title "Attention!" exit :FOUND :FOUND_FILES ::Search RECURSIVELY INSIDE ALL OF THE FOLDERS WITHIN THE '%DIRNAME%' for the FILES WITH THE SAME FILE-NAME (not extension) with :: this batch file cd %DirName% for /r %%f in (*) do if /i "%%~nf" == "%~n0" ( ::and open them with SumatraPDF. start "" "PATH-TO-SUMATRAPDF\SumatraPDF.exe" "%%~pnxf" -presentation start /wait "" "PATH-TO-NIRCMD\Nircmd.exe" win max ititle "%%~nxf" start /wait "" "PATH-TO-NIRCMD\Nircmd.exe" win settopmost ititle "%%~nxf" ) & goto END :FOUND_FOLDERS ::Search for ALL OF THE FOLDERS WITHIN THE '%DIRNAME%' for the FOLDERS WITH THE SAME FILE-NAME (not extension) with :: this batch file and OPENS EVERY FILE INSIDE (recursively) THEM REGARDLESS OF THE FILENAME, cd %DirName% for /d %%f in (*) do if /i "%%~nxf" == "%~n0" ( cd %%~nxf for /r %%g in (*) do ( ::with SumatraPDF. start "" "PATH-TO-SUMATRAPDF\SumatraPDF.exe" "%%~pnxg" -presentation start /wait "" "PATH-TO-NIRCMD\Nircmd.exe" win max ititle "%%~nxg" start /wait "" "PATH-TO-NIRCMD\Nircmd.exe" win settopmost ititle "%%~nxg" )) & goto END :NAME_NOT_FOUND set file_name=%~n0 start /wait "" "PATH-TO-NIRCMD\Nircmd.exe" infobox "The '%file_name%' Folder or File you specified does not currently found inside the '%Dir%\%DirName%' Platform directory!" "Attention!" timeout /T 1 /nobreak >nul start /wait "" "PATH-TO-NIRCMD\Nircmd.exe" win activate title "Attention!" exit :END start "" "PATH-TO-JOYTOKEY\JoyToKey.exe" start "" "PATH-TO-AUTOHOTKEY\AutoHotkey64.exe" "PATH-TO-AUTOHOTKEY\SumatraPDF-JoyToKey.ahk" exit NOTE: You can skip the drive letter [D:\, G:\, etc.] if you're aiming for portability replace the G:\ with just the \ NOTE #2: Whenever is possible in ahk or bat script I put comments so that is clear what its line is supposed to do. Conclusion of the first part: As I said on the top feel free to ask anything, change anything you might think is worth changing and if you want share with the rest of us your ideas or your own “version” 😃 I've been using the above setup for quite some time (almost a year) and everything seems to work perfect (for me at least) if you get the idea/hang of it will be as easy as copy/paste/rename. 😀 Part 2: - Feature Request: Support for .bat (batch file) as game manuals for the "Game Pause menu" As of all the above works perfect from inside LaunchBox's right-click menu>View Manual and/or BigBox's Game menu>View Manual, the “Documents” are showing in SumatraPDF exactly as intended BUT when it comes to 'Pause Menu' the bat file is opened like text ! 😒 So I made -this- feature request so that the 'Pause Menu' can ALSO support the batch scripts/.bat files in place of the game manual and not viewing them as text. It fills a bit odd that something that is working from the LaunchBox and BigBox menu does not work also from the Pause menu. I understand somewhat that the pause menu stands on its own code but it’s the support for that file type that it needs. 🤔 So if after all you still found the above setup useful you might also consider up-voting the above feature request. Thank you for your time in reading all this and please let me know your thoughts. 😄
-
Maps and text passwords - What do i do with them?
Tsik replied to Shredder_guitar's topic in Game Media
Well, yes that is exactly what my feature request is all about, the Pause Menu! I really don't know why the same functionality that is already there though the LaunchBox's right-click menu and BigBox's Game Menu does not work also from the pause menu at least the default one. Also many games come with many other documents such as keyboard overlays and button guides/maps and put them in there one-by-one per game is A-Pain-In-The-Butt.🙃 Not to mention the freedom of launching them with any PDF/CBZ reader you want. It's common sense (I guess...) -
Maps and text passwords - What do i do with them?
Tsik replied to Shredder_guitar's topic in Game Media
Hello, sorry if I'm poking my nose into this thread 😁 but perhaps this feature request I made is what could potentially solve the issue with "Pause Menu" and Images, Pdfs, custom pdf readers, text files etc. once and for all! Thanks. 🙂 -
BezelLauncher
Tsik replied to JoeViking245's topic in Third-Party Applications and Plugins (Released)
Well, I am aware that "MAME (or a derivative like MAMEUI), RetroArch or DOSBox are blacklisted from the plugin " your "Documentation" is pretty clear 🤓: You see I can't recall right now (from memory) which platform uses which emulator as I don't have immediate access to this setup, I surely use the above ones on many platforms (alongside others) but these all work with their own bezel/shader system (except DosBox® of course). I use RetroArch and MAME for the most part alongside many others so perhaps you are right about that. If you want I can see if could I make a list of 'Which Platform Uses Which Emulator' perhaps utilizing this plug-in below that some random dude on this forum made 😁 I don't remember really if there is any way I could export some kind of list out this? (If not, how about include that feature some time in the future 😉) Anyway let me know and I see what I can do. Cheers! 😃 -
BezelLauncher
Tsik replied to JoeViking245's topic in Third-Party Applications and Plugins (Released)
@JoeViking245 Well... Yes, of course! Alongside some additional files that might (or not) give a better "view" of what I'm experiencing... Take note that all that I did to retrieve the above was just start LaunchBox, open Bezel-Launcher, click the Refresh button, wait...🕒, wait...🕝, wait a bit more🕓, close Bezel-Launcher, close LaunchBox. I'm saying that because the numbers don't match. If you need any more info let me know. Hope it helps 🙂 Bezel Launcher logs xml and more.zip -
BezelLauncher
Tsik replied to JoeViking245's topic in Third-Party Applications and Plugins (Released)
@JoeViking245 I've tested it in my go-to setup (191 platforms) with another not-so-potato PC and it worked but took extremely long time (almost looked like its froze) also. Yes, (for me at least) it always completes the refresh on both PCs if I don't click the plugin window (which causes Windows to ask to kill the process). Just as I thought, but wouldn't it be more logical/productive to create those folders only if the user enables the bezel for that emulator? 🤔 It is not. 🙃 -
BezelLauncher
Tsik replied to JoeViking245's topic in Third-Party Applications and Plugins (Released)
@JoeViking245 I noticed that the plugin creates folders in ..\BezelLauncher\Bezels which are empty apart from the ones I activated the bezel for, are those being created because those Platforms have only one specified emulator (where the <DefaultEmu>true</DefaultEmu> in the xml exists) or something else? Edit: The emulator is not the "default" like ticked in those cases (looks <Default>false</Default> in the emulators xml) but simply the only one that exist in the Emulators>Associated platforms and it is not activated in the Bezel Launcher. -
BezelLauncher
Tsik replied to JoeViking245's topic in Third-Party Applications and Plugins (Released)
After some testing I can tell that the crash/hang probably not caused from any specific platform entry because I copied over to a new fresh build all my platforms and although at first I got the same hang/crash when I clicked the 'Refresh' button after adding around 185 to 190 platforms I got some significant inconsistency and instability (some times works sometimes no). As I created the 190th platform the refresh took significantly more time (which for my super-potato pc is around 6~10 minutes) but the process eventually ended successfully. @darreldearth How many platforms you have and can you tell what happens if you let it take its time and not click on the plug-in window (which causes Windows to ask to kill the process).? Apart from that everything else works as expected. 🙂 -
BezelLauncher
Tsik replied to JoeViking245's topic in Third-Party Applications and Plugins (Released)
Ok, I created a "test" build with some fake platforms and some roms and Bezel Launcher seems to be working fine on that. So now my thoughts are that perhaps me and darreldearth have something in common that brakes the 'Refresh' process... 🤔 I really don't now where to start looking, perhaps there is a "thing" about a specific platform which when the plugin tries to add to the (xml) list it breaks it. Going to do some more testing and report back any findings... -
BezelLauncher
Tsik replied to JoeViking245's topic in Third-Party Applications and Plugins (Released)
Hello there, the same happens to me also, the plug-in works as expected but when I click the 'Refresh All' button everything hangs/freezes! The Setup log stops at 'Checking XML for platforms that don't exist' below I attach the logs... Logs.zip Also include a LaunchBox log LaunchBox Logs.zip I tried to remove the BLSetup.xml and re-create but the problem is still there. Thanks in advance. -
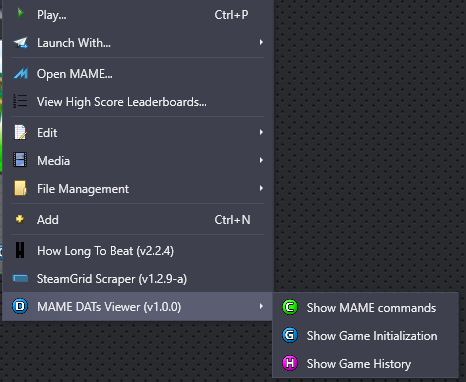 Thank You, as always perfect from inspiration to execution! PS. You might already know that but as of LaunchBox 13.26 the badges C & G don't show up. I had to put the png's manually in '\Images\Media Packs\Badges\[My badges folder]' and restart LaunchBox to get them show-up. 🙂 Again Thanks a lot for your time and effort!😄
- 4 comments
-
- 1
-

-
- command.dat
- gameinit.dat
- (and 2 more)
-
@Ronen1984 After some more testing I made to this I found another possible solution that works with the use of the variables that @JoeViking245 provided, with which you don't have to do a separate command in every ScummVM game you have instead in the ScummVM Emulators section under Command-Line arguments put this: --config="path_to_custom scummvm.ini" --auto-detect --no-console -f --path=%romlocation% %romfilename% %noromfile% Notice there is no -p parameter and I put the ScummVM --path= argument there, also there are both %romfilename% and %noromfile% together side by side, the first one takes the filename only (no extension, see *) and the last one removes the default "FULL\PATH\ROM\TO\FILE" argument entirely. If you use the default ini file under LaunchBox\Emulators\ScummVM remove the --config"... part of the command. With this ScummVM is forced to launch the specific game and no -1 suffix happens even with the game save files! *By default LaunchBox uses only the game path folder (no rom file) with the -p parameter but here I use the gameid.scummvm file as a fake ROM under the game's launching path (as the command below): ..\path_to_game_folder\gameid.scummvm (Game id in this case will be of course monkey2) This makes the above work together with RetroArch (scummvm core) as the default emulator pointing to that file alone (no extra commands there) and ScummVM as a "Launch with..." additional emulator. PS. One other thing to take in consideration is that in my setup I have Imported my games into ScummVM (in both libretro and standalone ScummVM) so I don't know if this works without importing them... Anyone please give it a test and tell me if works! 😊
-
Big Box Theme Templates to Spark More Creativity?
Tsik replied to drtechnolust's topic in Big Box Custom Themes
+1 for this... Not only for BigBox but also for LaunchBox, for the new user maybe for starters the default themes or the default launcher theme could be "edited", meaning there should be an easier way than just creating a copy and then digging into the xaml code without knowing where to start, where to end and what to edit for the simpler/smaller modifications that some of us only need. I think this feature will attract more people coming to LaunchBox. I can say that I have dug deep enough into the code for my knowledge just to move/remove that "Loading now..." visual from the launch screen or make the CD spin slow-down and slide off the screen in the animation for the shutdown screen (which by the way I am still struggling to complete). But there is also a problem that arises from this, if more people can edit things, more problems will arise (high RAM usage, coding errors, conflicts, etc.) and each of these problems will be tailored to a very small group of users, so the work from moderators/developers, and even members who are willing to help solve these problems will suddenly increase! LaunchBox (I think) has revived well since its last update, the only thing we don't want is to go back to this hole of fixing something that broke and adjusting things to please every user, which (in my opinion) is a step towards that. I honestly don't know (I'm not a developer nor do I have a programming background) if theme editing can conflict with the rest of the software in such significant ways, but i believe we have to take that into account. Besides, according to this team article and this one (about plugins), the things that come with LaunchBox by default are fixed, optimized for compatibility, stability and ease of use. The bottom line is that Yes, we want easy customization for new/inexperienced users, @PadeMoNiuM Prods said "...a clean wheel view, a minimalist platform view, basic game view and some "clean" animations, well-made and ready to teach how things work", but in a way that whatever they do doesn't interfere with the software core and doesn't make things worse (if it does in the first place). Perhaps this is the reason other frontends/launchers don't have all those customization options LaunchBox is already offering. P.S. The use of Community Theme Creator by @y2guru was made (maybe) just to solve this issue, but it seems to have paused its development. (also in the Patreon). 🥲 plus you couldn't edit the already default themes with it. 🥲🥲 I hope you get my point. Thanks -
Also from the posts I "Follow" I get my email flooded with those spam posts. That's pretty annoying 😠
-
Fantastic! So glad I've helped! 😄 I also learned something new from all this, never heard of the %noromfile% variable before, very useful! Thank You
-
I hope I helped and didn't make things more complicated by bombarding you with all these "instructions". 😅😅 At this point you should be able to do the same for every other game you might have and experiment with the Options, Global or per Game, just remember to backup that ini file every so often until everything is working! If you need any further information/help about this subject feel free to post here. 😃
-
Now if everything went well you should have a working ScummVM set-up and a game fully imported.! 😅 BUT, unless you want all this effort go down the drain if something goes work from now on backup your scummvm.ini now so you can experiment safely with the options. As a rule of thumb try to avoid starting ScummVM directly from LaunchBox\Emulators\ScummVM\scummvm.exe although we have the scummvm.ini there sometimes things might go wrong and put you in trouble trying to fix it again. Your save games by default are saved in LaunchBox\Emulators\ScummVM\Saved games all together although I prefer to edit the individual game options and from the paths tab point to individuals folders for each game e.g. LaunchBox\Emulators\ScummVM\Saved games\Monkey Island 2. but that only my preference. As for the save games suffix as said before if you open the gui (even within LaunchBox) and launch the game from there it saves different files than launching the game from LaunchBox normally, ScummVM thinks that it is some other monkey2 game and again puts -1, -2 in the save file e.g. monkey2-1.s01 as from the gui it saves as monkey2.s01. (Remember that a save game named monkey2-1.s01 and monkey2.s01 does not show up as saves together). If this is annoying for you use the fix as discribed by @JoeViking245 :
-
For best practice about the ID suffix in my own setup I use a monkey2.summvm file in the game folder (which is actually a .txt file renamed [game_id].scummvm and edited it with notepad adding only the game ID e.g monkey2 inside it and save it). To this file I point LaunchBox to (as if it is a ROM):
-
That's perfect! So lets summarize: We have downloaded ScummVM from within LaunchBox We have imported the game into LaunchBox The game is playable through LaunchBox but the gui shows empty Now check that there is indeed a scummvm.ini in LaunchBox\Emulators\ScummVM folder and no ScummVM folder at all in %Appdata%\Roaming because we are going to save some data on to it. Attention there is no ini file either reinstall ScummVM from LaunchBox or just create an empty txt document call it scummvm and change the extension from .txt to .ini Use the right-click 'Open ScummVM' option from the 'Monkey Island 2' game in LaunchBox and check the paths from the 'Global Options' the should point to LaunchBox\Emulators\ScummVM\scummvm.ini as below: Now press the Apply and OK buttons without doing anything else and close scummVM gui. If you did everything correctly there should be some options saved in that scummvm.ini file like below: Next step is to import the game into scummVM itself because if you don't you might have issues with the games ID as @JoeViking245 already point out a few posts above. (scummVM adds a -1 if it restarts and uses the same game ID again using a suffix number e.g. monkey2-1 Lets 'Open ScummVM' from the games right-click menu and choose Add Game from the ScummVM gui, navigate to the game folder (as usual) and select the game folder as below: ScummVM now opens the game options window: In this window the most important part is the ID of the game, make sure that it has no number suffix (-1,-2 etc) after the name! (if it does you can always edit and correct it unless you need two instances of the same game). Leave everything else as is and hit OK and QUIT Back to our scummvm.ini file now looks like this: Notice that there are two sectors now [scummvm] and [monkey2] which are the Global Options and the Game Options respectively. (You may want some time in the future when filling sure to edit those if needed)
-
That's true, I fell a lot of times in that id-1 hole in the past. The other way for avoiding the "id-1" change and also to the save games I think is to 1st add the games to ScummVM as normal as you importing them (making sure you use the same scummvm.ini file of course) and in addition to that (as I do in my own setup) I use a [id_name].scummvm file (a txt file with the id text inside and changed the extension to .scummvm) "as the rom" files instead of just the game folder, but all that are a bit more... you know... later stuff. First I'm trying to help setting-up the basis as LaunchBox is intended to do ( *in a portable fashion) and then "build" from there. 😉
-
Its ok, just leave everything else for now and lets concentrate just to the steps I show you (I now they are baby steps but trust me on this). Will wait for confirmation on the above steps and continue with more custom stuff. Cheers 🙂


