
.png.d63b88dc3d5c6db8803dfbd996ce65fc.png)
JoeViking245
-
Posts
2,934 -
Joined
-
Last visited
-
Days Won
25
Content Type
Profiles
Forums
Articles
Downloads
Gallery
Blogs
Posts posted by JoeViking245
-
-
11 minutes ago, midd said:
When i use this to convert Dreamcast games, none of them convert? If I do one at a time using chdman and a bat file it converts individual games
Are you getting any kind of error (or otherwise) messages? Such as "Converting", "Please Wait", ""Converting Complete", "Error Converting".... Any details you can provide will greatly help to determine what is or is-not going on.
Does your batch file use the same "createcd" command line parameter for chdman?
It's possible you have different versions of chdman.exe on your system. Copy the one your batch file uses (the one that works for you) into your ../LaunchBox/Plugins/BulkConvert2CHD/ folder and run the plugin again.
Please let me know what you find. Thanks.
-
1 hour ago, stigzler said:
Are there others who are into it?
Of course. Just go to the Third-Party Applications and Plugins (Released) section and you should see quite a few. Or simply peruse the Downloads section.
")
-
1 hour ago, stigzler said:
the media name is derived from `<Title>`, as presumably underscore replaces the colon, and the result would not fit the pattern of the rom name.
When LaunchBox imports images, pretty sure it bases it off the game Tile. As you deduced. That said, if you bring in your own images, LaunchBox will match them to either the games Title or the ROM name. Both of these will work:
Tomcat - The F-14 Fighter Simulator (USA).png
Tomcat_ The F-14 Fighter Simulator.png1 hour ago, stigzler said:what is the replacement algorithm for all invalid filename chars?
To replace invalid (filename) characters, you can make use of the built in System.IO.Path.GetInvalidFileNameChars(). When doing one of my [more obscure] plugins, I found that LB also replaces the single quote ( ' ). Since I was needing to do this often, I created a method that accommodates both the built in list and the single quote.
private string ReplaceInvalidChars(string filename)
{
   return string.Join("_", filename.Split(System.IO.Path.GetInvalidFileNameChars())).Replace("'","_");
}
(Hint: Click "Code" next to the above smiley face to inset code with syntax highlighting. The forum does use Markdown. I commend the attempt though.
") )
1 hour ago, stigzler said:
)
1 hour ago, stigzler said:if there's two "Pong_01.png" and Pong_01.jpg", which is given priority?
Don't know. But if you select a game in LB that has both image formats, you can press F5 and it will randomly switch between the 2. The key here being "random". (as opposed to 'alternating') Actually, as I think about it, that may be just if you have _01, _02 etc.
1 hour ago, stigzler said:is there any way to set the image name in the database manually?
LB doesn't store a record(s) of your images. (That would get ugly, fast.) But if you wish to rename your images that are stored on your HDD (or wherever you may have them stored) to the ROM name (ugh), there's a plugin that will do that for you.
-
 1
1
-
-
Try removing -cart and use only mtx512.
Also, it appears any actual "games" for this system are on cassette media (mtx_cass). (Assuming it's the games you're after.) So if removing -cart doesn't work, try using -cass instead.
-
17 minutes ago, Headrush69 said:
smart quotations
Appears that was my oversite. Never even paid attention to that. What's unfortunate is I copied 5thWolfs [in-line] text and pasted it into the 'code' formatting here when replying. The original in-line text appears fine, but when pasted, they come out as smart quotes. Note [to self] for future: pay attention to the quotations. 😊
-
 1
1
-
-
5 hours ago, 5thWolf said:
Mine is just a windows error popup box from mame, will send a pic tomorrow when i can, doesn't look like your pic though just that single line i quoted before.
Open the Windows Command Prompt from your MAME folder and start mame.exe. You'll get a verbose readout in that window, and MAME will start to load then close (no error popup window should appear [this time]). In the Command Prompt window, about the 2nd line up from the bottom should be that message ("Fatal Error:"). Hopefully the line above that will give some more clarity.

-
1
-
-
1 hour ago, 5thWolf said:
But shouldn't copying what mame gives you into clipboard work? if it does it will make it a million times easier to handle the IDs. it says it in the site
I would make it "easier". And the site says to do that. But in their example, it also shows using &. So not sure what to tell you on that. But I can say, using & does work.
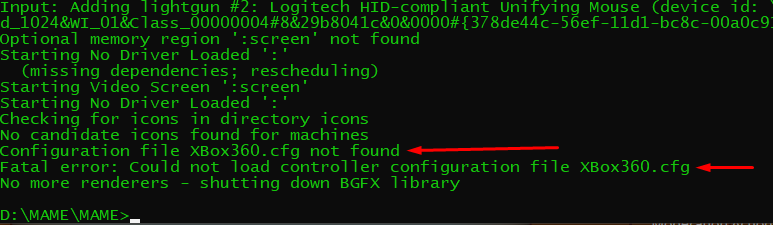
8 hours ago, 5thWolf said:"fatal Error: Could not load controller configuration file controls.cfg"
Looking back at the original error, it almost reads like it can't find the file. What does the line before it show? This happens when I rename my .cfg file:
? Double check the spelling of your actual file (/ctrlr/controls.cfg) ?
? Double check that in mame.ini ctrlrpath is [still] set to ctrlr ?
-
1
-
-
1 hour ago, 5thWolf said:
I have created the config file "controls" and placed it in the "ctrl" folder, and set in mame.ini to point to that file.
On your ID Version... insert before your line 1 <?xml version="1.0"?>. On your <mapdevice device= line, change the ampersand (&) to &
<?xml version="1.0"?> <mameconfig version=”10”> <system name=”default”> <input> <mapdevice device=”VID_046D&PID_C24F” controller=”JOYCODE_1” /> </input> </system> </mameconfig>
-
1
-
-
I trust that fixed it?
Edit the game. Startup/Pause. Check the box to Override Default Startup Screen Settings. If you have the games in a playlist, you can select all, click Edit and do it in bulk.
-
1
-
-
1 hour ago, 5thWolf said:
after launching a game through BB the main screen works for a few seconds then loses focus and is black screen.
Try turning off LaunchBox's Game Startup Screen. Then when that fixes it, you can either keep it off for your MAME emulator, or override the Startup Screens for just the Arcade games that use dual screens.
-
1
-
-
8 minutes ago, bundangdon said:
definitely helped me with 3DS, as it's now working after I checked it as the "Default Emulator".
Whew. Gotta love a 'simple fix'.
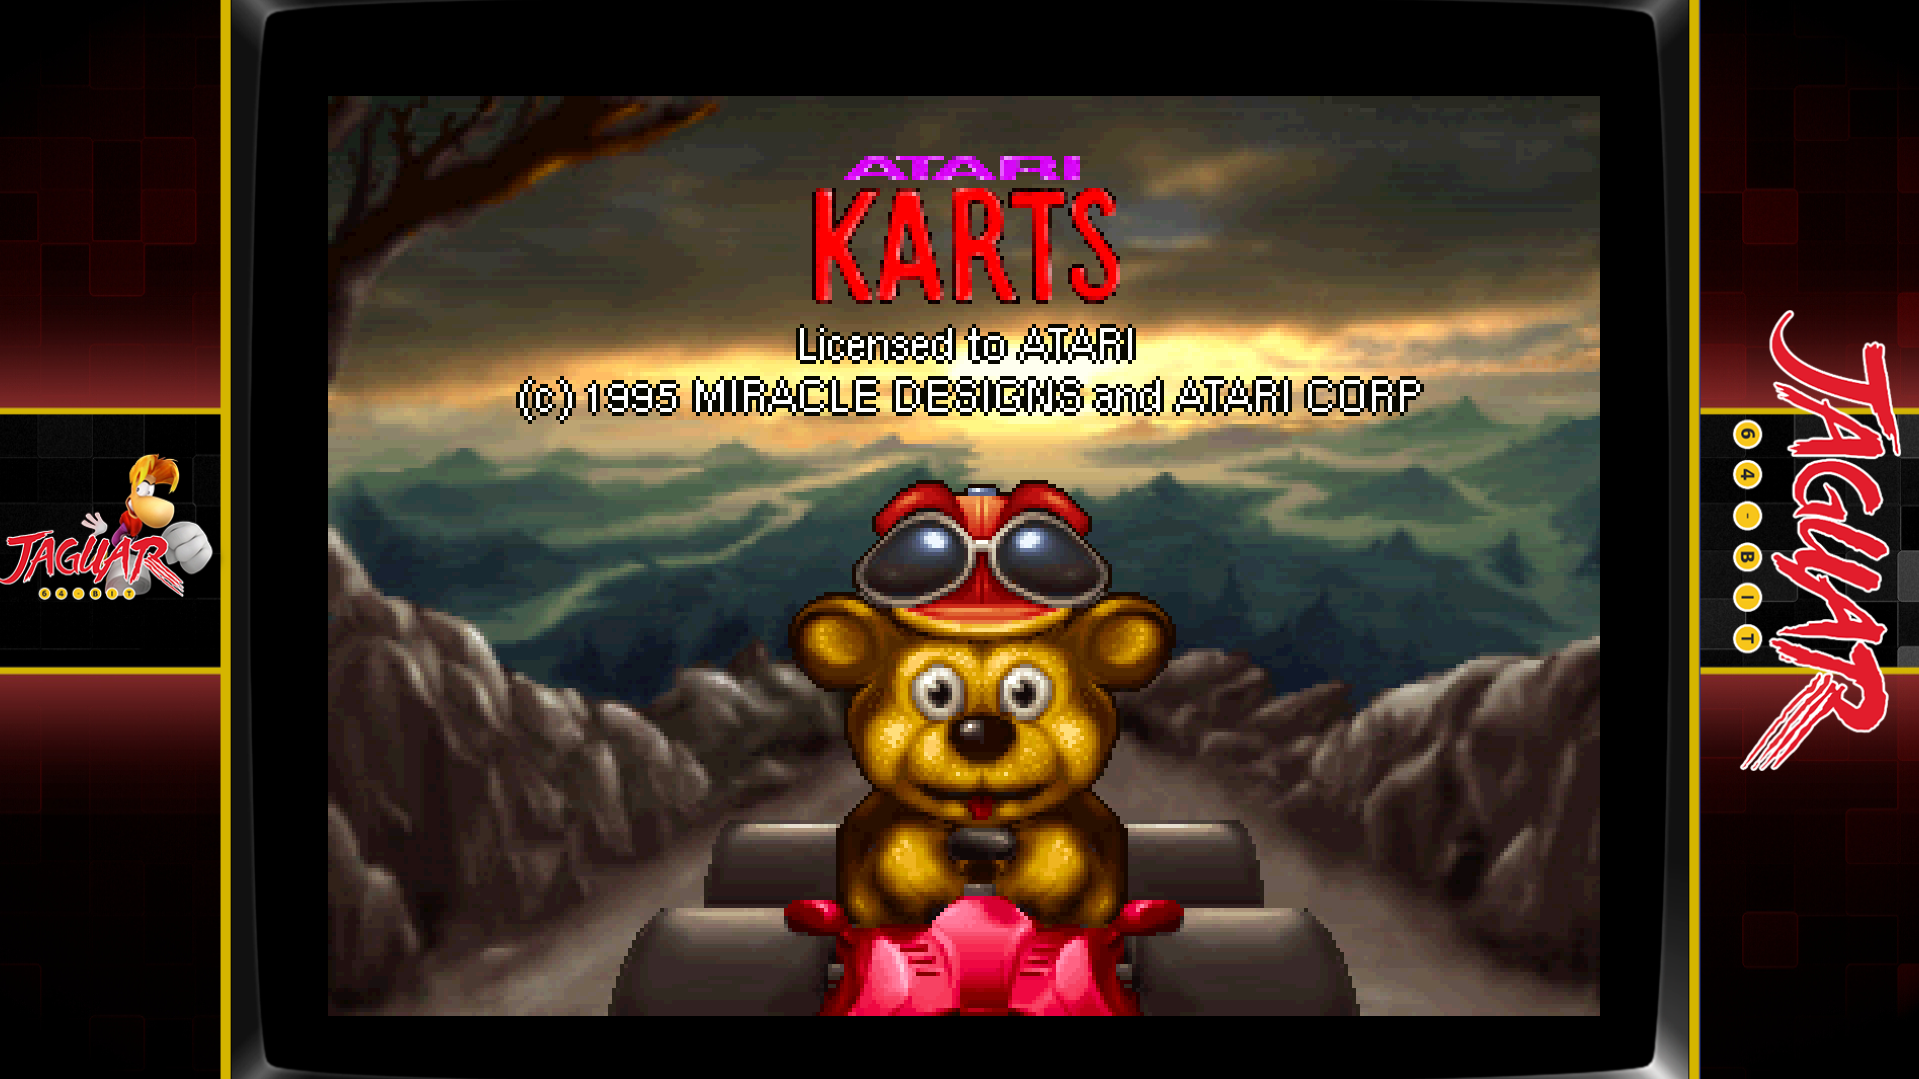
10 minutes ago, bundangdon said:I tried to manually change the measurements in the .cfg file but nothing changes. Would you be willing to share your BigPEmu cfg? Otherwise, it's possible I may have an issue with the BigPEmu emulator's video settings.
I didn't touch anything in BigPEmu. (I don't think) I put it on my computer in Feb this year, added it to LB, but never added any games. This morning added Atari Kart, ran BezelLauncher Setup to Enable it, clicked Test, Saved, Saved, Closed. And got what you see above.
Can you share the most recent "log xxx.txt" file (in \BezelLauncher\Logs\) (after having launched a Jaguar/BigPEmu game)
Here's the video section of my BigPEmu....cfg file. My monitor is 1920x1080. Thought the W and H are set here, it still resizes. So maybe it's one of the other settings.
"Video": {
    "Display": "\\\\.\\DISPLAY1",
    "DisplayWidth": 1920,
    "DisplayHeight": 1080,
    "DisplayBitDepth": 32,
    "FirstColNTSC": 176,
    "WidthNTSC": 1280,
    "FirstLineNTSC": 14,
    "HeightNTSC": 240,
    "FirstColPAL": 196,
    "WidthPAL": 1280,
    "FirstLinePAL": 14,
    "HeightPAL": 288,
    "DisplayMode": 0,
    "VSync": 1,
    "ScreenScaling": 0,
    "ScreenAnchor": 0,
    "ScreenFilter": 0,
    "ScreenAspect": 2,
    "LockAspect": 1,
    "ScreenEffectForceHDR": 0,
    "HDROutput": 0,
    "HDRGamma": 1.0,
    "HDRScale": 3.75,
    "ForceHorizontalOverscan": 0,
    "DisableScreensaver": 0,
    "DispVer": 1
},
My Atari Jaguar ini file looks like:
Upper Left X Coordinate=240 Upper Left Y Coordinate=0 Lower Right X Coordinate=1680 Lower Right Y Coordinate=1080-
1
-
-
3 hours ago, Nixx said:
Interesting, can we have the source code ?
Not that I'm hording the couple hours of work my team and I put into this... but feel free to use DotPeek or ILSpy. None of my plugins are encrypted (or whatever people do to keep prying eyes out of it). So all code will show up using either of those. Showing off all my coding disfunctions.
-
3 hours ago, bundangdon said:
Citra and the 3DS didn't come up in my list while setting up the plugin. Any ideas or tips on how to get 3DS and Citra (Canary or Nightly) working?
Is the Default Emulator for your 3DS platform Citra? Or is it RetroArch, and Citra has the Associated Platform 'Nintendo 3DS', but is not 'checked' as the Default Emulator? Make sure Citra is the Default Emulator.
3 hours ago, bundangdon said:Also, I can't seem to get it to fit properly with BigPEmu. While the bezel shows up, the display size of BigPEmu has shrunk down to a tiny 800x600 on the right corner of my 3840x2160 screen
Did you run Test to set the emulator window size? (And then Save?)
-
1
-
-
1 hour ago, knup36 said:
I re-do the platform, it SHOULD point back the same entry and 'reconnect'?
That I can only assume to be a correct statement. But there's one sure way to find out.
In the meantime, a quick, simple safety net would be to make a backup copy of your \LaunchBox\Data\Playlists\ folder prior to re-doing your collection.
-
1
-
-
I think it depends on how you have your playlists populated. If you don't have them auto populated, and if the game's Titles don't change and they stay in the same platform 'name'. you should be good.
If you do have them auto-populated, it will depend on how the filters were setup.
-
1 hour ago, 5thWolf said:
I set up dual monitor in MAME
However you set this up (in MAME or by manually editing mame.ini), when done and saved, make a copy of mame.ini and rename the copy to playch10.ini. Then revert MAME back to a single monitor and save (mame.ini).
playch10 is the name of the source file for PlayChoice-10 (playch10.cpp)
If all goes well, when you play a PlayChoice-10 game, you should have the dual monitor setup as it will (should?) read playch10.ini via the order of precedence. And every other game (non PlayChoice-10) should display normally (single monitor) reading just mame.ini.
To do this on a game-by-game basis, you can copy playch10.ini and name the copy the same name as the games ROM filename. (punchout.ini)
punchout is probably not the best example as punchout is the name of a game ROM file AND a source file. But you get the idea.
-
1
-
-
Dec. 2, 2023 Depreciated. Please see the official release here:
What is it?
Use this plugin to display bezels for emulators that don't natively support them.What does it do?
It displays a bezel and resizes the emulator window to fit within the bezels transparent area.What's required to make this plugin work?
LaunchBox v13.3 (or newer), the plugin file, bezel images and some minor setup. (See Setting up)Do I need to provide my own bezel images?
Yes. (See Setting up for where to place them)Will it work with game specific bezels?
No. Only bezels on a platform basis will be displayed.Will this work for every platform and emulator?
Only platforms using their Default Emulator can be used. Platforms using RetroArch or MAME as their Default Emulator will be ignored.The emulators that have been tested so far all work. Some adjustments may be necessary. (see Emulator Settings)
Will this work with storefront games or Windows games?
No.Why not just use RocketLauncher?
Have you ever tried setting up RL?Can I use my existing RL bezel configuration files?
You can use the existing platform.png and platform.ini files from RL. These files should be located under:
/RocketLauncher/Media/Bezels/platform_name/_default/something.ini (and something.png)
(See Setting up [step #3])What are the .ini files for?
The .ini (configuration) files tell the plugin how to resize and move the emulator window to fit within the bezel. (See .ini Files for more info and Testing for creating and saving them)Can this plugin add shaders as well?
No.Disclaimer
This works on my test PC. I didn’t test it on my cab because I didn’t want to change my emulator settings to not use fullscreen (see Emulator Settings). Outside of RetroArch and MAME, I don’t use bezels, so didn’t want to mess-up-a-good-thing.
This is a beta release and some refinements to the plugin may be needed to accommodate other setups. Depending on how well this works (or doesn’t work) and what (if any) changes need to be made (to work well outside of my test environment), this may later become an “official release”. Until then, no guarantees, express or implied… blah blah blah blah blah blah blah.
There is no risk. The plugin makes no changes to LaunchBox or your emulators. If you decide this isn’t for you, simply undo any fullscreen changes you made and (with LB/BB not running) delete the BezelLauncher folder.
Special Thanks
Special thanks to @MadK9 for the idea, direction and help with testing! Without him, I sure as hell would have never contemplated starting this project.
InstallingWith LaunchBox/BigBox not running...
- Download the plugin .zip file
-
"Unblock" the file
- Right-click the file, select Properties, check the box "Unblock", click OK.
- Or just use 7-zip to open the file
- Copy the contents (a folder called "BezelLauncher") into your \LaunchBox\Plugins\ folder
-
Start LaunchBox
Setting up
-
Start BezelLauncher Setup from the LaunchBox Tools menu, then click Close.
- This will create the \Plugins\BezelLauncher\Bezels\platform_name\ subfolders
-
Copy your bezel images into their respective platform_name subfolders.
- Only 1 image file per platform subfolder.
- See Bezel Images for more information
- (optional) If you have existing RL platform_name.ini files, copy those alongside the image files
- Restart BezelLauncher Setup
- Select a platform you wish to use
-
Check Disabled to enable it
- Click Test
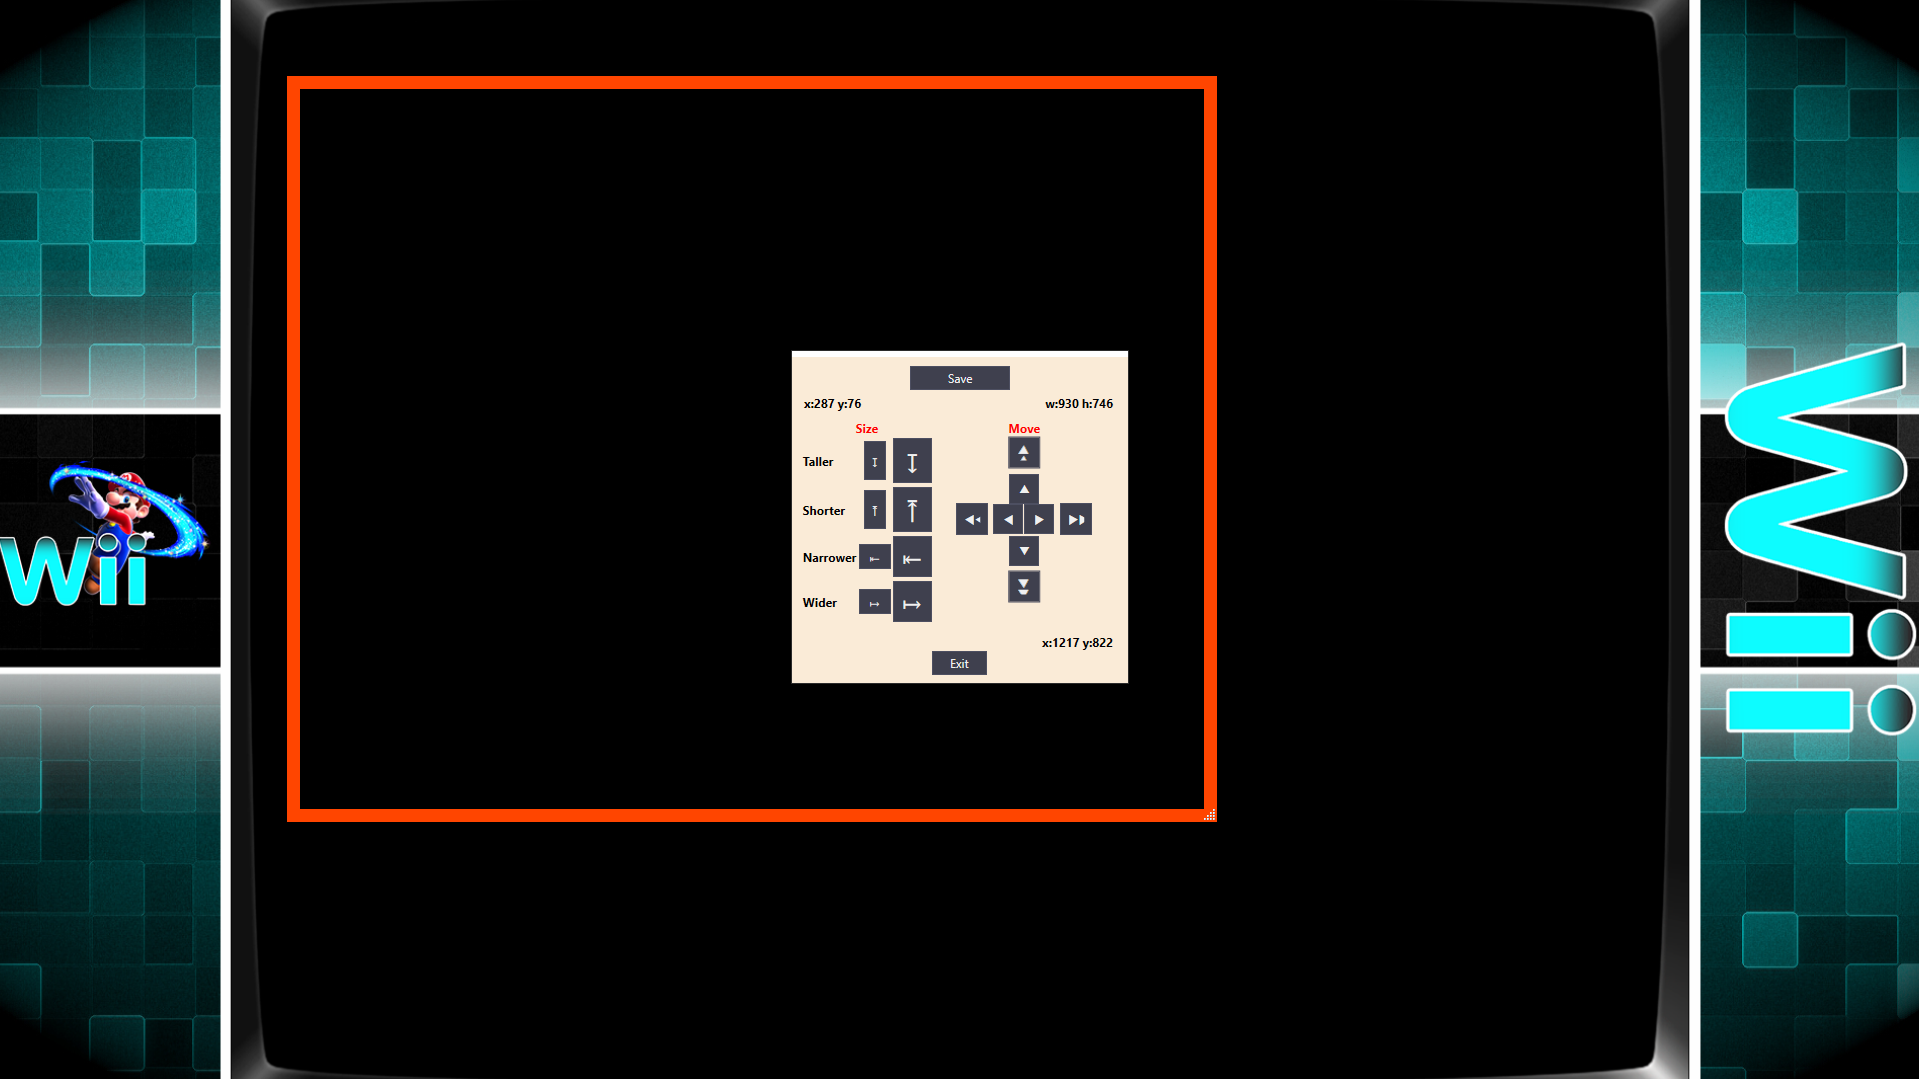
- Adjust (Move/resize) the orange frame to fit within the view area of the bezel (See Testing)
- Click Save [to save the .ini file]
- Click Save on the main setup screen to add the platform to the list of Enabled platforms.
- Repeat for other platforms you wish to add
-
You must click "Save" for each platform you've enabled
Maintenance
After adding/removing platforms or changing default emulators in LaunchBox- Run BezelLauncher Setup
- Click Refresh
- Continue with Setting up, step #5
Testing
To configure the placement of the emulator window within the bezel (Requires an existing bezel image):- Run BezelLauncher Setup
- Select a platform
- Enable it (if it's not already)
- Click Test
Move and resize the frame
- Click [and hold] the left or right side of the frame to move it around
-
Click [and hold] the bottom right corner to resize
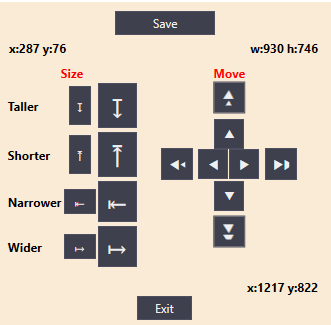
- Use the on-screen buttons to fine-tune the adjustments
The on-screen display will show information about the emulator window.
(You can click and drag the OSD to move it around as needed)- x, y = upper left monitor-coordinates of the emulator window
- w, h = width and height of the emulator window
- x, y = lower right monitor-coordinates of the emulator window
• If any of the values are red, they are off the screen
• The OUTSIDE edge of the frame is the emulator window extentsAfter adjusting, click Save. This will overwrite any existing configuration file.
Parameters
Depending on the emulator and the bezel, you may need to check 1 or more of the following parameters:(h) hideStuff
Check this if you see the desktop behind bezel while the game is loading. This adds a black background during the startup process.
(s) startupSleeper
“Hide stuff” for a little longer during startup (3 seconds)
(l) longerSleep
Same as above (4 seconds)
(g) hideGameStartup
Check this if LB Game Startup screen is showing behind the bezel at game startup
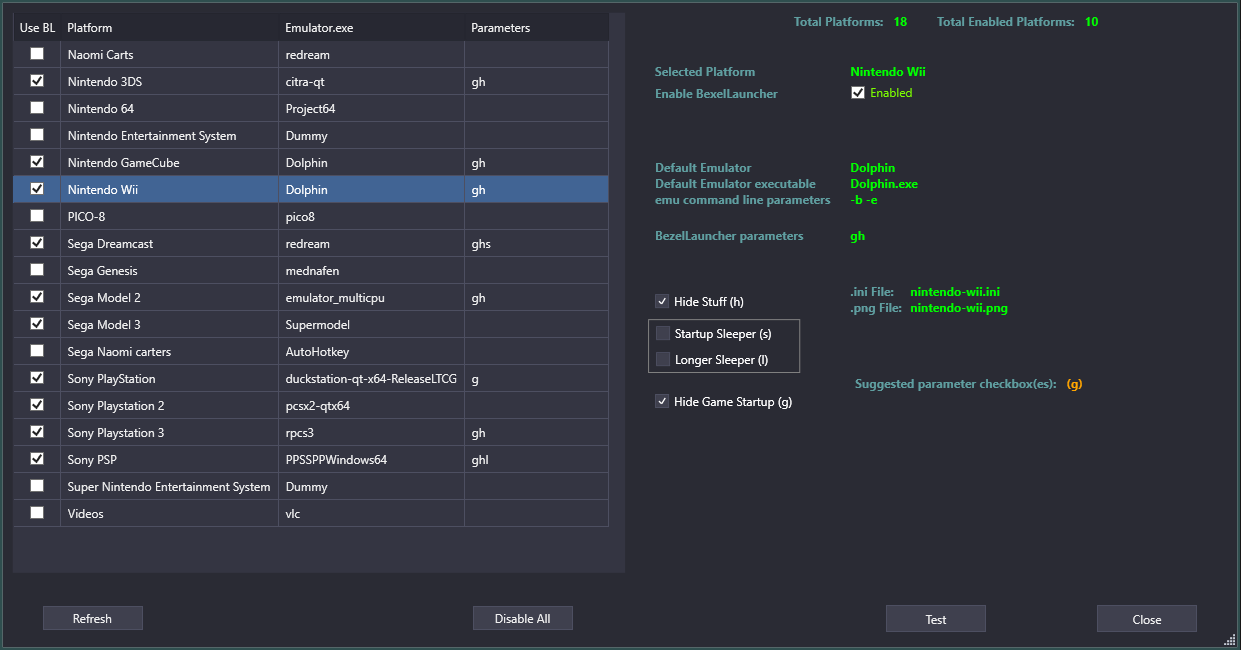
When selecting a platform, if the plugin detects an emulator that has been tested, “suggested” parameters will be shown. Your mileage may vary.
Emulator Settings
For the plugin to move/resize the emulators’ window, you will need to disable fullscreen in the emulator(s). This may be as easy as removing "-f" or "-fullscreen" from the Default Command-line Parameters (depending on the emulator).Beyond that, of the emulators I've tested, the only one that needs to have its Default Command-line Parameters altered is SuperModel. You will need to manually set the resolution.
- Start BezelLauncher Setup
- Select your Super Model 3 platform and Enable it
- Click Test and after adjusting the frame to where you want it, make note of the W(idth) and H(eight) #'s shown in the OSD.
- Save and Close. (Be sure to click Save on the main Setup screen to save Enabled as well.)
-
Edit your SuperModel emulator (in LaunchBox) and set the Default Command-line Parameters to "-res=W,H" (no quotes, no spaces and replacing W & H with the #'s noted above)
-
Example: -res=1420,1076
-
Example: -res=1420,1076
Bezel Images
SpoilerWhen you run BezelLauncher Setup for the 1st time, the plugin creates subfolders for each of your eligible platforms. They are created in: \LaunchBox\Plugins\BezelLauncher\Bezels\platform_name\
Place your bezel image in the \platform_name\ folder for each platform
example: \BezelLauncher\Bezels\Sony PSP\PSP_bezel.png- The filenames can be anything you want. As long as it has a .png file extension.
- Only one image per platform subfolder..ini (configuration) Files
SpoilerThe .ini files contain the monitors' coordinates for placing the emulator window.
The Upper Left x,y coordinate and the Lower Right x,y coordinateExample:
Upper Left X Coordinate=240
Upper Left Y Coordinate=100
Lower Right X Coordinate=1680
Lower Right Y Coordinate=1080Folder Structure
SpoilerD:\LaunchBox\Plugins\BezelLauncher\
BezelLauncher.dll
BLSetup.xmlD:\LaunchBox\Plugins\BezelLauncher\Bezels\
D:\LaunchBox\Plugins\BezelLauncher\Bezels\platform_name\
anyFileName.ini
anyOtherOrTheSameFileName.pngD:\LaunchBox\Plugins\BezelLauncher\Logs\
log [date/time].txt (Up to 5 files max)
SetupLog [date/time].txt (Up to 5 files max)
BezelLauncher (v1.0-beta-1).zip
Dec. 2, 2023 Depreciated. Please see the official release here: BezelLauncher - Official Release
As always, any thoughts, views, opinions, [constructive] criticism, comments and suggestions are welcome.
-
6
-
1
-
I don't know what it all means because I've never ran Linux, but the relatively recent post mentions the words "Linux", "WINE", "Proton" and "got it to work".
-
16 minutes ago, link182 said:
Hello solved for the rom I had to put everything on mame (mameui always started the same game) and for the rom I anyway insert -cart. Now everything works, you were very kind P.S. last thing you know apple pippin it's emulable with mame? thanks
Glad it's working for you now.
Pippin? You pick the oddest systems to emulate. lol
According to this site, it should [somewhat] work: Pippin @mark - MAME machine (arcadeitalia.net)
Note that it uses CDROMs (.chd files) and requires a System ROM (pippin.zip) and a Device ROM (cuda.zip).
You'll need to search around on how to make that all work correctly as I've never tested it and (no offense) don't plan to.
-
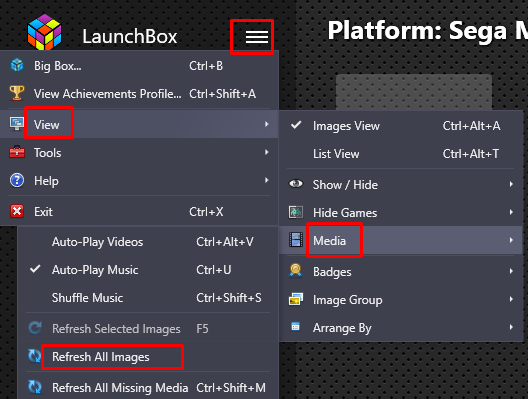
Try... Click the hamburger menu, View, Media, Refresh All Images.
-
3 hours ago, link182 said:
start on launchbox them gives me an error message
Like..... what sort of message?
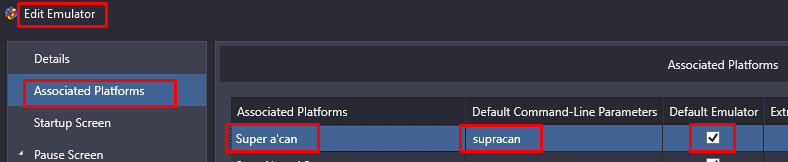
Do you have the games (ROMs) imported into LaunchBox? In LaunchBox, when you edit your MAME emulator, under Associated Platforms, did you set the Default Command-line Parameter for that platform to just "supracan" (without quotes)? Or did you put the full [test] parameters "supracan monopoly"?
-
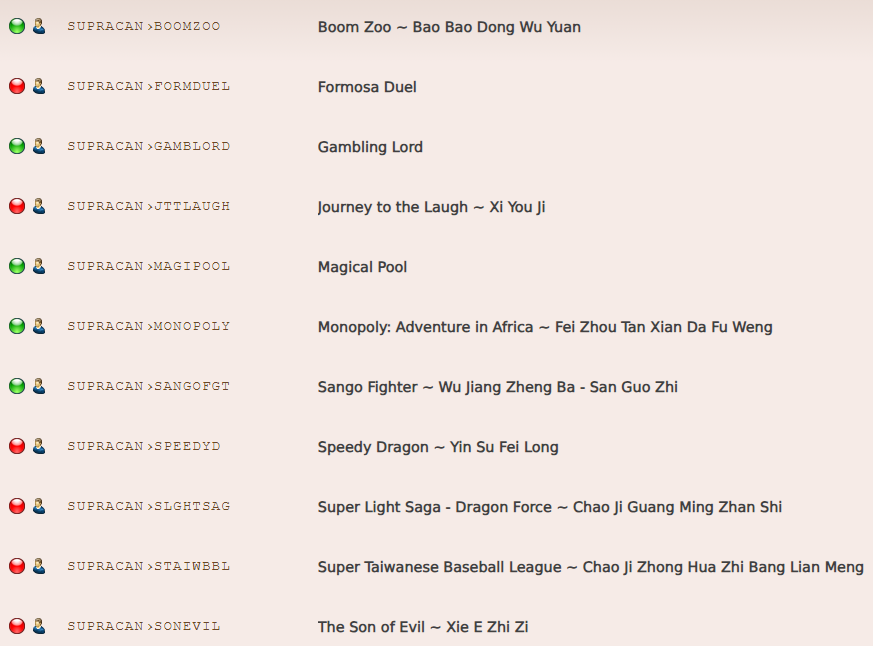
On 6/1/2023 at 5:59 PM, link182 said:
Hi I wanted to know if someone had managed to emulate with mame the super a'can. I put the rom in the rom\supracan folder but do not start I know that does not need bios can you help me? Thank you
Because it's a MAME softList console, you need to add supracan to the default command-line parameter for that [Associated] platform. (It will work without having to also add -cart.)
To test Monopoly from the command prompt, you'd simply type: mame.exe supracan monopoly And since you now know it works there, it'll work when launched from LaunchBox.
But of the 11 games available, only 5 are noted as working. So make sure to test with one of those 5.
-
Nice find. Nice solution. Very creative!
But can you elaborate on why you would even want to launch an emulator if the ROM file doesn't even exist? (Future readers want to know
)
Side note:
Since the emulators Title only needs to contain "mame" to skip the 'does ROM file exist' check, I might suggest just checking for that. This would save on some unnecessary operations. i.e., if the emulators Title is "Mame" or "MameUI" or "Test emu MAME", there's no need to rename it.
It's a minor thing and the way it's written, realistically has very little impact behind-the-scenes. But in the grand scheme of things, every little bit helps.
public void OnBeforeGameLaunching(IGame game, IAdditionalApplication app, IEmulator emulator) { if (!File.Exists(game.ApplicationPath) && !emulator.Title.Contains("mame", StringComparison.InvariantCultureIgnoreCase)) { emulator.Title = $"MAMEFAKE-{emulator.Title}"; } //return; } -
The permission dialog would have been for DirectX. Just re-run the installer for 13.5. Just make sure you select the root folder of where your current installation is in.
i.e. If it's on the D drive, select D:\. The installer will add the "LaunchBox" subfolder to the location. Check that you don't accidentally install it into D:\LaunchBox\LaunchBox\.


Bulk Convert cue/gdi/iso files to CHD
in Third-Party Applications and Plugins (Released)
Posted
Screenshots are worth a thousand words! The plugin you're using is the [older] Bulk Convert .cue/.bin files which will only look for .cue files.