Sega Model 3
5 files
-
Sega Model 3 | Supermodel Git - EVERYTHING Pre Configured inc Controls. For PC, Controller, Mouse & Light Guns. Test Menu's Configured. Free Play. All Games in English. 2 Player Mouse Support. Audio Adjusted. Layout Images...The Whole 9 Yards
IMPORTANT: I am not working for the Supermodel Team. This is in no way official. It's just me, admiring Ian and the teams amazing hard work. Presenting it in a way that is usable for PC, Controller and Mouse with minimal effort. A lot of people are turned away from this emulator because of the setup. Thinking it's broken or too much hard work. I want to change that and make things easy so people realise just how good Supermodel is.
ONLY COFIGURATION FILES ARE AVALIABLE HERE. YOU MUST PROVIDE THE EMULATOR AND ROMS YOURSELF. YOU KNOW THE DRILL......DON'T ASK.
Supermodel recently moved over to GitHub and got some quality of life updates inc:
-Being able to use recent MAME roms.
-Being able to save a LOT more on a per game basis. This enables us to setup and calibrate everything with just one instance of Supermodel.
I love this emulator.....but it is a pain in the ass to setup.
This is more due to the nature of how the hardware worked not the emulator itself. Supermodel can be implemented into original hardware, arcade authentic setups as well as racing wheel setups, network multiplayer with multiple screens etc.
Because of these factors Supermodel isn't pre setup for any specific use case, it's up to you to configure it for your specific use case.
But lets face it, most of us are using a PC, Controller, Mouse and Light Guns.
Lots of Hard Work and Love Went Into This
It's been....long......and almost emotional. I can't tell you how scattered the info is on this platform and emulator with much of it being out of date. Including the documentation that comes with it.
So, I just tested the crap out of everything. Most of my documentation is below.
With this pre configuration you will get:
-Every Game Working with No Errors. (AS LONG AS YOU HAVE THE CORRECT ROMS)
-2 Player Mouse Light Gun Support. The Lost World, The Ocean Hunter, L.A. Machineguns and Start Wars Arcade (yes I have calibrated for both players). For this to work the mouse indexing needs to match what has been set in the ini file. By default the mouse indexes have been set to MOUSE1 and MOUSE2. For mouse only users this is generally fine, but light gun users may find their mouse index to a higher/different MOUSE number. I have an entire video dedicated to identifying and changing your mouse index. So, if it doesn't work for you it's probably the mouse indexing, in which case follow along with the video. Most light gun users will be familiar with their respective software and will know how to set up/match inputs. This is simply light gun ready, everything set to rawinput, calibrated and controls inverted where needed. You still have to setup your light gun software. Check the ini file to see what controls I have set so you can line these up in you light gun software.
-Audio Configured. Left at default the audio is quiet/loud and not balanced for most games as the baseline (not bassline) is not known. Supermodel simply sets it all to max by Default leaving some games really loud and others really quiet. So, Audio has been adjusted on a per game basis. This took ages and would probably need a video an hour long to explain. Just know that it was super confusing with the Balance option doing different things per game.
I adjusted every games volume to be 'about' the same db.
-Test Menu Fixes. Every game that needed a test menu fix has had it done. For E.g. the Network Board Not Present issue and Feedback Lever issue in Star Wars. This includes setting many of these games Cabinet Type to 'normal' rather than leaving them set to Deluxe. Most of the Deluxe variants have more input options (clutch, fishing line etc) that aren't used or emulated, especially for use with a controller. All games are set to Free Play, Japanese games are in English and regions have been changed to USA where possible.
-Analogue Steering Saturation & Analogue Calibration. All of the racing games have very twitchy steering by default. This is because of the Analogue Saturation not being correct or calibrated. Some of these games for e.g. Dirt Devils and ECA can be correctly calibrated in the test menu using 'Volume Setting' or whatever analogue calibration function the game has natively. Other racing games for e.g. Daytona 2 and Sega Rally 2 do not have a native analogue steering calibration function in their test menus. However Supermodel has a InputJoy1XSaturation option that kinda does the same thing. By default, these games with no native analogue configuration have a lot of 'dead zone' when the steering is fully locked. Meaning you can ease off the stick some of the way with no effect on the steering in game which means the Analogue Saturation is incorrect causing twitchy steering. I have tested every racing game and adjusted InputJoy1XSaturation. This is now perfect for all the games without a native analogue calibration function, while keeping all of the steering range. This makes all the racing games far more playable. Other games like Sega Bass Fishing also needed their analogue controls calibrating in the Volume Setting function in their test menus. For full details on this please see the table below. (A lot of testing went into this)
-Enhancements. Some games benefit from having different modes activated. For e.g. Sega Rally 2 'Game Type' set to 'Special' enables 3 laps per stage rather than just the one. Virtua Striker has Golden Goal and Penalty Shootout modes that are off by default, having a longer play time is also preferable in this type of game. There's also little changes like setting Speedometers to MPH from KPH. Please see the table below for more info.
-Controls Have Been Pre Configured...yayyyy. Please see the images provided for button layouts. I have spent many hours on figuring out the best layouts to ensure no clashing inputs and intuitive controls, I could go into detail but again it would need a video an hour long to cover it all. Just know a 'dead zone' of 5% has been added to the analogue sticks to prevent saggy sticks from steering your car for you, or randomly entering directional inputs when you don't want. Also, some games will use force feedback to vibrate your controller.
I have provided a pre configured Supermodel.ini file for XINPUT and DINPUT.
XINPUT (Xbox/Windows) is by far the preferred input method. This is because all XINPUT controllers are the same between controllers with their input IDs. This is great for making pre configurations because it's the same for everyone.
If you are unsure as to what input system your controller uses a quick google search should tell you, or this should tell you https://gamepad-tester.com
DINPUT is not so great for making pre configs as their input IDs can vary between controllers.
So, now here comes a...
DISCLAIMER: FOR THE DINPUT PRE CONFIG I USED A PS4 CONTROLLER. IF YOU ARE USING A DIFFERENT DINPUT CONTROLLER YOUR INPUTS COULD BE WRONG AS DINPUT CONTROLERS CAN VARY WITH INPUT IDs. TEST THIS IN GAME AND IF THEY ARE WRONG YOU'LL HAVE TO USE THE REMAPPING TOOL. ONLY THE BUTTON INPUTS WILL BE DIFFERENT.
So with that out of the way.
INITIAL SETUP INSTRUCTIONS & ROMS INFO
Download the most recent Supermodel Git version. Not SVNr as this is now old. Also download the Sega Model 3 UI if you want to (recommended). USE SEGA MODEL 3 UI - r860 or newer. Unzip both. Transfer the Include Folder, Snaps Folder and the Sega Model 3 UI exe, from the Model 3 UI folder into the Supermodel Git folder. ONLY TRANSFER THESE FILES. Use as recent as possible MAME Split Roms or NON-Merged Roms. DON'T USE MERGED ROMS. Supermodel is now kept in line with MAME updates if they are to do with Model 3 Games. You can use as old as 0.236. Supermodel is "backwards compatible" to this point.
magtruck was updated 0.249
oceanhun was updated 0.253
Parent roms should/have been used wherever possible. However, some 'clones' need to be used. 'gatbassur' is the preferable version of Sega Bass Fishing due to I/O. 'scudplus' and 'vf3tb' are also clones. I consider these to be separate games in their own right as they have additional/different content so they are here as well as their parent rom counterpart. Virtua Striker 2 has a bunch of versions, I am using the parent roms of the main 3 versions/revisions. Their content does differ slightly so I have all 3. This is essentially a 1 game 1 rom list.
This is the set to use, place in ROMs folder or your preferred location: (You don't need the optional files for split roms, but I will list them anyway).
bassdx (Don't play this version of Sega Bass Fishing. This is only here because it's the parent rom for getbassur, which won't work without bassdx if using Split roms. bassdx will break and is not ideal with I/O)
dayto2pe
daytona2
dirtdvls (Split rom will be missing optional file 'epr-19338a.bin'. Found in scud.zip)
eca (Split rom will be missing optional file 'epr-19338a.bin'. Found in scud.zip)
fvipers2 (Split rom will be missing optional file 'epr-18022.ic2'. Found in segabill.zip)
getbassur (Only play this version of Sega Bass Fishing. All the others break/crash after 10 mins. This version was ported to the Dreamcast because of it's more controller friendly setup. If using a Split rom you'll need the parent rom 'bassdx' also)
harley
lamachin
lemans24 (Split rom will be missing optional file 'epr-18261.ic9'. Found in stcc.zip)
lostwsga
magtruck (Better dump as of 0.249. Fixes Attract Mode. This is a newer version so it will be the new parent. With the old 'magtruck' parent becoming the clone 'mgtrkbad')
oceanhun (New dump as of 0.253. This is a newer version so it will be the new parent. With the old 'oceanhun' parent becoming the clone 'oceanhuna')
scud
scudplus
skichamp
spikeofe
spikeout
srally2
swtrilgy
vf3 (Split rom will be missing optional file 'epr-18022.ic2'. Found in segabill.zip)
vf3tb
von2 (Split rom will be missing optional file 'epr-18022.ic2'. Found in segabill.zip)
vs2 (Split rom will be missing optional file 'epr-18022.ic2'. Found in segabill.zip)
vs298 (Split rom will be missing optional file 'epr-18022.ic2'. Found in segabill.zip)
vs2v991 (Split rom will be missing optional file 'epr-18022.ic2'. Found in segabill.zip)
FURTHER INSTRUCTIONS
Download the NVRAM folder from this page and unzip. Move the NVRAM folder you just unzipped into Supermodels file system, replacing the NVRAM folder/files that are already there. Download the Supermodel.ini file for your input system, XINPUT or DINPUT. Move the Supermodel.ini into the Config folder, replacing the one that is already there. Run the Sega Model 3 UI exe. Press the Folder button in the bottom left corner, select the folder where the roms are located and click OK. If you need to, change your resolution. I have it set to 1920x1080. If you are getting slowdown drop the resolution to 1280x720. All other settings are set for a reason, so only touch them if you know what you are doing. Run a game and PLAY! PLEASE NOTE: No need to touch Games.xml. New versions of Supermodel do not require the input type to be changed for 2 Players in The Lost World. The default 'analog_gun' input version now works properly and is preferable as it's way more accurate. It has a far more granular calibration function compared to the 'gun' version.
Awesome Feature:
Try using WideScreen at the same time as WideBackround. This is essentially a widescreen hack giving a true anamorphic widescreen image.
It works really well with most games, apart from Virtua Striker 2 and Sega Bass Fishing. IT WORKS LIKE REALLY, REALLY GOOD.
Any questions feel free to ask.
Below is a list of everything that I have done per game. YOU DONT NEED TO DO ANY OF THIS. Consider this the documentation for this pre configuration.
Please give this a read! A lot of hard work went into this.
Not only have I listed everything that I have done I have also listed any cheats, region change codes and important information.
Daytona USA 2: Battle on the Edge
daytona2
Daytona USA 2: Power Edition
dayto2pe Test Menu Changes:
-Language/Game Region set to English/USA. Only achievable by using the Region Change Code. Japan is the default.
-Link ID set to SINGLE. Fixes Network Board Not Present.
-Setting Region to USA removes the option to switch between the Dennis St. James and the Takenobu Mitsuyoshi soundtracks. (Dennis) is the default when set to USA. However you can still play the alternate soundtrack version with a really easy cheat that is listed below.
Analogue Steering Saturation & Calibration:
-Steering was very twitchy due to the Analogue Saturation. The analogue steering is technically 1 to 1 however, there is actually quite a lot of 'dead zone' when you have the steering fully turned. I found you can ease off the control stick about a quarter of the way, from fully locked, before it actually started affecting the steering. I confirmed this in 1st Person view where you can see the drivers hand and steering wheel. I eased of the steering about a quarter of the way before the steering wheel moved and the steering started to react. The 'Input Test' within the test menu did not reflect this, giving values for the entire range of the left stick XAXIS.
-So after some extensive testing I have changed the InputJoy1XSaturation to 155%, to compensate for this 'dead zone'. This makes the area of the analogue steering XAXIS wider giving way better control, without losing any actual in game steering 'range'. As soon as you ease of the stick the steering will react.
-This 'kinda dead zone' would have been present on the original arcade hardware, but due to the amount of travel left and right on the steering wheel it wouldn't have been noticed. This adjustment is more of a "trueish" 1 to 1 and is much more appropriate for use with a controller.
General Info:
-Controller will vibrate with this game if you have that functionality.
-More racing modes and 'number of laps customisation per difficulty' are available in the test menu when set to USA. All have been set to 8 Laps.
Alternate Camera Views:
-Press VR1 and VR2 (Y+A) at the same time to get a view from just behind the front left wheel well.
-Press VR2 and VR3 (A+X) at the same time to get a view from just behind the front right wheel well.
-Press VR2 (A) while already in view 2 to get a cockpit view.
-Press VR4 (B), and while you are holding it press the other three (X+A+Y) at the same time to get a sky cam view.
-Hold VR2 (A) or 3 (X) or 4 (B) and repeatedly tap Start for other alternate views.
Cheats:
-Hold Start when selecting a transmission for 'Time Lap' mode. No other cars on the track.
-Hold Start when waiting for the race to start/load to play the alternate soundtrack.
-Hold Start when selecting a track to play the mirrored version.
-Light Up Fantasy Amusement Park - Rapidly tap Start during Lap 3 or Lap 4 to light up the road.
Unlock Hornet Car - Battle on the Edge Version Only:
-Before starting the game, move the gear stick into first gear. (Right Stick UP, before adding credits and or pressing Start. You don't need to hold the stick up)
-At the course selection screen, move the stick into fourth gear. (Right Stick RIGHT, you don't need to hold the stick right)
-Then Press View Buttons in this Order: 1(Y), 4(B), 2(A), 4(B), 1(Y), 2(A), 2+3 (A+B together), and 1(Y). You only have 8 seconds to pull this off and then quickly select a track if you dont want to play the beginner course.
-If done correctly, you'll get the Hornet in place of the usual selection of cars. The cars stats can be modified using the view buttons and the steering wheel. Again you only have 8 seconds to do this, just set it all to max and have fun.
Region Change Code:
-In the main test menu, Push and Hold Start, then with Start Held, Press GREEN/VR4 (B), GREEN/VR4 (B), BLUE/VR2 (A), YELLOW/VR3 (X), RED/VR1 (Y), YELLOW/VR3 (X), BLUE/VR2 (A).
-This brings you to a hidden region select screen where you can change to USA and other regions. Dirt Devils
dirtdvls Test Menu Changes:
-Oversteering issue fixed via calibrating the analogue controls with the 'Calibrate Control Devise' function in the test menu. Gas and Brake have also been correctly calibrated.
-Speedometer set to MPH. KPH is the default.
General Info:
-Region dictated by rom. The parent rom 'dirtdvls' is Export region with no option to change to USA. This is fine as its in English.
-Controller will vibrate with this game if you have that functionality.
-Hold Shift UP in the Vehicle Select screen to toggle to Manual Transmission.
Analogue Steering Saturation & Calibration:
-As the analogue controls have been calibrated in the 'Calibrate Control Device' to fix the oversteering issue in the test menu there is NO need to adjust the InputJoy1XSaturation. Emergency Call Ambulance
eca Test Menu Changes:
-Siren Volume set to 1. It's really annoying otherwise. Default is 7.
-Distance set to MILE. METRE is the default. Although, because its the Export version Mile is actually Ft in game because of the metric system or something. ("you's a smart mother f***er") They just didn't label it correctly when set to Export.
-Analogue Controls calibrated in the 'Volume Setting' function.
Analogue Steering Saturation & Calibration:
-As the analogue controls have been calibrated in the 'Volume Setting' within test menu there is NO need to adjust the InputJoy1XSaturation.
General Info:
-Region dictated by rom. The parent rom 'eca' is Export region with no option to change to USA. This is fine as its in English.
Cheat Code to Play as an EMT on Foot with a Stretcher:
-On transmission select screen, highlight Manual Transmission
-Push Gear shift Up, Up, Down, Down, Up Fighting Vipers 2
fvipers2 Test Menu Changes:
-Language/Game Region set to English/USA. Only achievable by using Region Change Code. Japan is the default.
General Info:
-Controls are set to the Dreamcast port defaults. P=(X), K=(Y), G=(A). The Left Stick and D-Pad are usable at the same time.
-A full moves list can be found here https://strategywiki.org/wiki/Fighting_Vipers_2/Moves
Region Change Code:
-Go to test menu then go into 'Game Assignments'
-Set cursor at 'Country' line then press Left, Left, Left, Right, Right, Left.
-This will then allow you to change the 'Country' to USA and others. Harley-Davidson & L.A. Riders
harley Test Menu Changes:
-Game Region set to USA. Only achievable by using Region Change Code. Export is the default.
-Cabinet Type set to STANDARD.
-Engine Volume set to 5. The default is 8.
-Number of Stages set to 5. The default is 4.
-Analogue Controls calibrated in the 'Volume Setting' function.
Analogue Steering Saturation & Calibration:
-As the analogue controls have been calibrated in the 'Volume Setting' in the test menu there is NO need to adjust the InputJoy1XSaturation.
Cheats: Extra Music Track
-When you select your bike press and hold the foot/rear brake (A).
-Then select your transmission with the Start button. Hold the foot/rear brake (A) and the Start button until the race starts.
-Now scroll through the music tracks and you'll find one called ''Jingle Bells''.
Region Change Code:
-Go to test menu then go into 'Game Assignments'
-Press Shift Up, Shift Up, Shift Down, Shift Down, View, Music, View, Music
-This brings up an additional region select option where you can select USA and other regions. L.A Machineguns: Rage of the Machines
lamachin Test Menu Changes:
-Language/Game Region set to English/USA. Only achievable by using Region Change Code. Japan is the default.
-Cabinet Type set to STANDERED. (Not a typo, it's spelled like this in the test menu)
-Calibrated for Accuracy in the 'Aim Set' function.
Region Change Code:
-In the main test menu push Start, Start, Service, Start, Start, Start, Service, Test.
-This brings you to a hidden region select screen where you can change to USA and other regions. Le Mans 24
lemans24 Test Menu Changes:
-Language/Game Region set to English/USA. Only achievable by using Region Change Code. Japan is the default.
-Special Car set to SKYLINE. The default is NONE
Analogue Steering Saturation & Calibration:
-Steering is very twitchy due to the Analogue Saturation. Controls are a perfect 1 to 1 however it's still really difficult to control.
-So after some extensive testing I have changed the InputJoy1XSaturation to 110%. This makes the area of the analogue steering XAXIS 'wider' giving way better control.
-You do lose some steering range but the trade off is more than worth it and barely noticeable.
Region Change Code:
-In the main test menu press Start, Start, Service, Service, Start, Test.
-This brings you to a hidden region select screen where you can change to USA and other regions. Lost World, The
lostwsga IMPORTANT:
-This game has a light gun and an analogue version. THIS IS ONLY CHNGEABLE IN THE Games.xml.
-<input type="analog_gun1" /> is the default and preferred version.
-InputAutoTrigger in the .ini is ON. This allows you to simply press the reload button to reload. If this is OFF you'd need to hold reload and then press fire to reload.
Test Menu Changes:
-Language/Game Region set to English/USA. Only achievable by using Region Change Code. Japan is the default.
-Calibrated for Accuracy in 'Gun Setting' option.
General Info:
-Crosshairs are ON in the .ini file.
Region Change Code:
-In the main test menu press Start, Start, Service, Start, Service, Test.
-This brings you to a hidden region select screen where you can change to USA and other regions. Magical Truck Adventure
magtruck Test Menu Changes:
-Language/Game Region set to English/USA. Only achievable by using Region Change Code. Export is the default.
-Christmas Mode is ON. Changes outfits of players.
-Analogue Controls calibrated in the 'Device Settings' function.
Region Change Code:
-In the main test menu press Start, Start, Service, Start, Service, Test
-This brings you to a hidden region select screen where you can change to USA and other regions. Ocean Hunter, The
oceanhun Test Menu Changes:
-Language/Game Region set to English/USA. Only achievable by using Region Change Code. Japan is the default.
-Cabinet Type set to STANDARD. The default is DELUXE.
-Analogue Controls calibrated for Accuracy in 'Volume Setting' function.
Region Change Code:
-Go to test menu then go into 'Game Assignments' and press 1P Start, 2P Start, 1P Start, 2P Start, 1P Start, 2P Start, 2P Start
-This brings up an extra option. Select USA or other regions. Scud Race / Sega Super GT
scud
Scud Race Plus / Sega Super GT Plus
scudplus Test Menu Changes:
-Language/Game Region set to English/USA. No Region Change Code. USA and other regions selectable from 'Game Assignments'. Japan is the default.
-SETTING TO USA CHANGES GAME TITLE TO SEGA SUPER GT.
-Link ID set to SINGLE. Fixes Network Board Not Present.
General Info:
-Controller will vibrate with this game if you have that functionality.
Analogue Steering Saturation & Calibration:
-Steering is very twitchy due to the Analogue Saturation. The analogue steering is 1 to 1 however there is quite a lot of 'dead zone' when you have the steering fully turned, despite the values the test menu gives you. I found you can ease off the stick about a quarter of the way before it actually started affecting the steering. I confirmed this in 1st Person View where you can see the drivers hand and steering wheel, I eased of the steering about a quarter of the way before the steering wheel moved and the steering started to react. The 'Input Test' did not reflect this, giving values for the entire range of the control stick XAXIS.
-So after some extensive testing I have changed the InputJoy1XSaturation to 155%, to compensate for this 'dead zone'. This makes the area of the analogue steering XAXIS wider giving way better control, without losing any actual in-game steering 'range'. As soon as you ease of the stick the steering will react.
-This 'kinda dead zone' would have been present on the original hardware, but due to the amount of travel from left to right on the steering wheel it wouldn't have been noticed. This adjustment is more of a 'kinda true 1 to 1' and is much more appropriate for a controller. Sega Bass Fishing / Get Bass
getbassur IMPORTANT:
-Use 'getbassur' over every other version of Sega Bass Fishing.
-Other versions will play for 10 mins and give an I/O error. This version (getbassur) doesn't break due to I/O as it doesn't have a 'line tension' input.
-This also makes the controls pretty much the same as the Dreamcast port.
Test Menu Changes:
-Language/Game Region set to English/USA. Only achievable by using Region Change Code. Japan is the default.
-Analogue Controls calibrated in the Volume Setting function within the test menu.
-Game Time and Continue Time have been set to the maximum '3m50s'.
Region Change Code:
-In the main test menu, select CRT TEST and move to screen 2/2.
-Push the Service Button 4 times, exit the CRT TEST.
-Go into Game Assignments, push Service Button 3 times, then press and hold Service Button and then press Test.
-This brings you to a hidden region select screen where you can change to other regions. Sega Rally 2
srally2 IMPORTANT:
-This game will run slow and have graphical glitches if the PowerPCFrequency is left on 49.
-Setting to a higher number will fix this. However if set too high the emulator will start to run slow.
-PowerPCFrenquency set to 75 in the ini file. This fixes the issue. It's the sweet spot.
Test Menu Changes:
-Game Region set to USA. Only achievable by using Region Change Code. Export is the default.
-Game Mode set to SPECIAL. This enables 3 Laps per stage. The default is NORMAL (1 Lap per stage).
-Default View set to BEHIND. The default is Driver.
-Speedometer set to MPH. Default is KMH.
-Cabinet Type set to TWIN. The CLUTCH and other stuff are NOT used when set to TWIN, which is what we want. The default is DELUXE.
-Coin Assignments set to Free Play. This helps with a bug where if you restart the game with credits loaded it may not display any graphics. Setting to Free Play helps with this.
Analogue Steering Saturation & Calibration:
-Steering is very twitchy due to the Analogue Saturation being 'short'. The analogue steering is 1 to 1 however there is quite a lot of 'dead zone' when you have the steering fully turned, despite the values the test menu gives you. I found you can ease off the stick about a quarter of the way before it actually started affecting the steering.
-So after some extensive testing I have changed the InputJoy1XSaturation to 150%, to compensate for this 'dead zone'. This makes the area of the analogue steering XAXIS 'wider' giving way better control, without losing any actual in-game steering 'range'. As soon as you ease of the stick the steering will react.
-This 'kinda dead zone' would have been present on the original hardware, but due to the amount of travel from left to right on the steering wheel it wouldn't have been noticed. This adjustment is more of a 'kinda true 1 to 1' and is much more appropriate for a controller.
General Info:
-Controller will vibrate with this game if you have that functionality.
Cheats:
-Unlock the Delta and Celica Cars - Press View Change and the Handbrake (A+Y) at the same time on the car select.
-Better Time Display - Put in your name then hold View Change and Handbrake (A+Y) at the same time until the game starts.
-Turn Off Music - Put in your name then hold Start until the game starts.
Region Change Code:
-In the main test menu using the Service Button:-
-Do 4 short presses, 2 long (about 2 seconds per press), 2 short presses, then 1 long press (about 2 seconds).
-This brings you to a hidden region select screen where you can change to other regions. Ski Champ
skichamp IMPORTANT:
-This game has an InputSkiY AXIS Input. Despite this being designated as a Y axis it's actually used for movement on the X axis.
IT'S NOT USED FOR UP AND DOWN MOTION.
It is for turning harder, like digging in the edges of the skis. This is how the original arcade hardware works.
This is assigned to the Right Stick. Move the Right Stick in the same direction as the Left Stick to turn harder.
Changing View
The OG Arcade HW didn't really have a 'Start' button. The 3 coloured buttons were the start button and simultaneously the view selection.
Supermodel has the Green Button hard coded to Start if in Free Play. This will always start in 1st Person view.
If using Free Play simply start the game by pressing the coloured view button you want. NOT the start button like the on screen prompt tells you.
X/Button 1/Blue = Far View (X)
A/Button 2/Red = Mid View (A)
B/Button 3/Green = 1st Person (B)
If using Credits hold X, A or B button for the view you want at the same time as adding credits.
Test Menu Changes:
-Language/Game Region set to English/Export. Setting to USA kept crashing the game for me. Only achievable by using Region Change Code. Japan is the default.
-Extend Time set to 25s. The game is pretty much impossible to complete otherwise. The default is 20s.
-Analogue Controls calibrated in the Volume Setting function within the test menu.
-Force Feedback MUST be enabled otherwise you'll get the 'Check Drive Board' error. Preventing you from playing the game.
General Info:
-Controller will vibrate with this game if you have that functionality.
Region Change Code:
-In the main test menu press Blue, Green, Blue, Green, Service, Service.
-This brings you to a hidden region select screen where you can change to USA and other regions.
Spikeout
spikeout
Spikeout Final Edition
spikeofe Test Menu Changes:
-Game Region set to USA. Only achievable by using Region Change Code. Export is the default.
General Info:
-To pick up an item press Beat+Charge+Down (X+A+Down, at the same time). I couldn't figure this out for ages.
-There is a surprising amount of moves and combos. Here is a full list https://gamefaqs.gamespot.com/arcade/574616-spikeout/faqs/414
Spikeout Region Change Code:
-Set cursor on Game Assignments.
-Then press Button3(Charge), Start, Button4(Jump), Start, Start, Start, Button1(Shift), Start, Start.
-This brings you to a hidden region select screen where you can change to USA and other regions.
Spikeout Final Edition Region Change Code:
-Set cursor on TIMER TEST.
-Then press and hold the Service Button and enter the following:
-Button4(Jump), Start, Button4(Jump), Start, THEN RELEASE SERVICE BUTTON, Button1(Shift), Start, Start, Start, Button3(Charge), Start, Start, Button1(Shift), Start, Test.
-This brings you to a hidden region select screen where you can change to USA and other regions. Star Wars Trilogy Arcade
swtrilgy IMPORTANT:
-The bonus stages invert the YAXIS. Use the mouse for shooting sections and the controller for the bonus stages for correct AXIS input.
-Coin Assignments set to Free Play. This helps with a bug where if you restart the game with credits loaded from a previous play session, it may not display any graphics. Setting to Free Play helps with this.
Test Menu Changes:
-Cabinet Type set to U/R. This prevents an issues with the 'Feedback Lever'. The default is DELUXE
-Flip Lever is set to UP-->UP, DOWN-->DOWN. Despite this the XAXIS will still be inverted with the mouse & both the X & Y AXIS will be inverted with a controller. I have compensated for this with the control setup by inverting the MOUSE_XAXIS and inverting both X & Y AXIS on the controller left stick, for use in the bonus stages.
General Info:
-The parent rom 'swtrilgy' is USA region. This game has a Region Change Code available, it will be listed below just for reference.
Region Change Code:
-In the main test menu using the Service Button,
-Do 3 short presses, 2 long presses (about 2 seconds per press), 2 short presses then 1 long press (about 2 seconds).
-This brings you to a hidden region select screen where you can change to USA and other regions. Virtua Fighter 3
vf3
Virtua Fighter 3 Team Battle
vf3tb Test Menu Changes:
-Language/Game Region set to English/USA. No Region Change Code, USA and other regions selectable from 'Game Assignments'. Japan is the default.
-Show Command set to ON.
-Stage Select set to CHALLENGER. The default is OFF.
General Info:
-Controls set to Dreamcast port defaults. The Left stick and D-Pad are usable at the same time.
-A full moves list is here https://virtuafighter.com/commands/?ver=3tb
Cheats:
Different Costumes - Hold Start and then select your character with any button. Virtua Striker 2
vs2
Virtua Striker 2 '98
vs298
Virtua Striker 2 '99.1
vs2v991 Test Menu Changes:
-'vs2 and 'vs2v991'Language/Game Region set to English/USA. No Region Change Code, USA and other regions selectable from 'Game Assignments'. Export is the default.
-'vs298' Game Region set to USA. Only achievable by using Region Change Code. Japan is the default.
-Game Time set to maximum 3m00s. Default is 2m00s
-G Goal Mode (IF THERE'S A DRAW BY THE END OF THE MATCH) = (EXTRA TIME, NEXT GOAL WINS) Set to MAX Time 1m. OFF is the default. (If extra time goes 1m with no goals the match will go to a Penalty Knockout.)
-P K Mode (PENALTY KNOCKOUT) Set to REAL. OFF is the default. (This will let penalties go on until there is a clear winner.)
Virtua Striker 2 '98 Region Change Code:
-Go to test menu then go into 'Game Assignments'.
-Then press the Service Button once for about 5 seconds, then press the Service Button three times shortly, then press the Service Button one time for about 5 seconds again.
-This brings you to a hidden region select screen where you can change to USA and other regions. Virtual On 2: Oratorio Tangram
von2 Test Menu Changes:
-Language/Game Region set to English/USA. Only achievable by using Engineers Code. Japan is the default.
-Play Time for all options is set to DEATHMATCH (No Timer). The default is 80 secs.
General Info:
-Using Macro Controls, Turn Left & Right are set to the right stick.
Region Change Code:
-In the main test menu press Start, Start, Service, Start, Start, Start, Service, Service, Test.
-This brings you to a hidden region select screen where you can change to USA and other regions.9,678 downloads
-
0 comments
Submitted
-
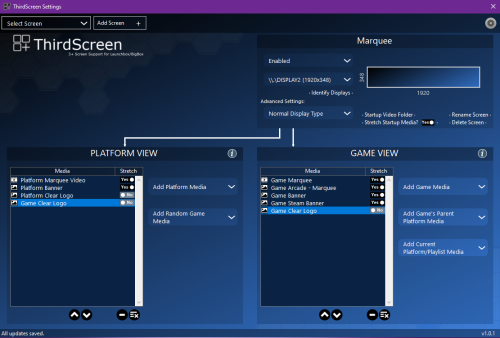
Sega Model 3 Full Media Pack
By sucramjd
And here's the Model 3 pack in all its glory, this is great now its all working again, i'm working on Sega Naomi, Sega Hikaru, Sega Alls and an updated version of Sega Nu all coming Soon, Hope you guys Like
here's it in action
491 downloads
0 comments
Updated
-
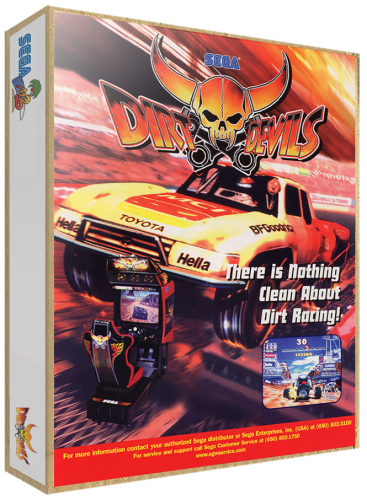
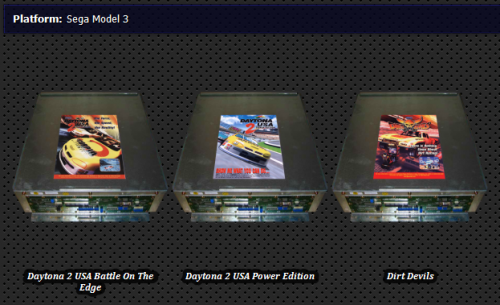
3d boxes SEGA MODEL 3 3D BOXES (40)
By Robin55
-These have been added to the LaunchBox Database
A collection of all flyers converted to 3D Boxes for the Sega Model 3 Arcade System. Complete Set.
605 downloads
-
0 comments
Updated