
.png.d63b88dc3d5c6db8803dfbd996ce65fc.png)
JoeViking245
-
Posts
5,283 -
Joined
-
Last visited
-
Days Won
38
Content Type
Profiles
Forums
Articles
Downloads
Gallery
Blogs
Everything posted by JoeViking245
-
Most, if not all imported Steam games should have a direct link to the game's web page in with its metadata. When it is there, it will show in the game's details panel. Mouse-over the Steam icon to see "Steam Store". Click it to open your web browser to that associated page. The page it opens will show the system requirements. At least it did on this game. Note the other possible cool links available that are directly related to the specific game. (LaunchBox Games Database, Wiki, YouTube) Also note you can add your own custom links. Shown in this example screenshot, I've added a link to IGN's Walkthrough page for the game. "recommended" is going to be subjective. But you can see community users' ratings for the game at the top of the game details panel. Though I don't think it's what you meant, there is also a section for recommended games based on the selected game.

-
To clarify, for Wii U, is there no startup screen then? It you switch startup screens, does one then appear for Wii U? If not, check that startup screens are not disabled for the emulator. If it's only certain games in the Wii U platform that don't show it, they may have an override set, disabling them.
-
.thumb.png.c9faf450e4d2b690a819048b18173f61.png)
Add a shortcut to set a Favorite (or a tag) in screensaver mode
JoeViking245 replied to Luca1010's topic in Features
You may want to [officially] Request a Feature. Top of this page, Help & Support - Request A Feature. Once it's been made public, be sure to post a link to it here so others can upvote it. -
Under Tools < Manage < Plugins... Select the MAME Integration plugin and click Update. This will download the updated plugin and restart LaunchBox after clicking Close. Doing that will fix the error. @DMas @Madman_DE @AnAngryWabbit
-
Can you break down "some occasions" a little? Does the Default Startup Theme show on games in a certain platform? Do you have any other .xaml files in with your \Stagebox\ folder (ither than Defaul.xaml and Default Shutdown.xaml)?
-
Steam Achievements not showing up in Desktop Mode
JoeViking245 replied to AgentAquaM's topic in Troubleshooting
Sorry, I do not. Just seems odd they're showing in Big Box (though lagging in updating) and showing "No Achievements" in LaunchBox. At this point, you can wait and see if one of the LB Team is able to respond here sometime this week, and/or submit a bug report (top of this page under Help & Support) and wait to hear something back form there. -
LB crashing with error soon after opening
JoeViking245 replied to torgojones's topic in Troubleshooting
The issue has been internally resolved. On your end, you will 1st need to force update your local database. Go to Tools < Download and select Force Update Games Database Metadata... Once done, you can undo any temporary fixes put in place and get back to enjoying your collection. 😎 @torgojones @Spydey @kb72 @Gaming.Zone -
*Feature Request* start big box vertical for pincab
JoeViking245 replied to thechadisgr8's topic in Features
The login should be the same credentials as here. -
lol Sounds almost like a quote from "Airplane". Nah, minor thing and a quick and easy [temp] fix.
-
*Feature Request* start big box vertical for pincab
JoeViking245 replied to thechadisgr8's topic in Features
Make the request official by submitting a Feature Request on the Feature Request page. (top of this page under Help & Support) When you do and it's made public, be sure to post a link here for other to go to and upvote it. Not sure what theme you're using on your pincab as there's nary a handful of vertical Big Box themes available. -
Please see this post for details and a temporary fix:
-
LB crashing with error soon after opening
JoeViking245 replied to torgojones's topic in Troubleshooting
Update: LaunchBox staff have narrowed this down to a possible ill-entered entry in the database. A "Date" more specifically in one (or more) of the games. (If you so desire) you can (re)enable the Possible Ports, Recommended Games and Similar Games under Tools < Options < Visuals < Game Details. The [temporary] updated fix is to un-check Include games not in my library under Tools < Options < Related Games for each of the 3 subsets. Similar Games, Recommended Games and Possible Ports. Thanks for your patience and understanding.
-
LB crashing with error soon after opening
JoeViking245 replied to torgojones's topic in Troubleshooting
Try.... under Tools < Options < Visuals < Game Details, un-check: Possible Ports Recommended Games Similar Games -
Bigbox loading slowly and not loading my chosen theme
JoeViking245 replied to Jigen271's topic in Troubleshooting
Since it's not crashing, sounds like it's starting in a View your theme doesn't have, giving the appearance of not loading that theme. Can check this section of the LaunchBox Strategy Guide and see if it sheds any light.. Big Box Themes and Where They Apply - LaunchBox -
Launchbox Crashing in 13.23 and 13.24
JoeViking245 replied to Gaming.Zone's topic in Troubleshooting
I'm not a LB developer and know only enough to be dangerous. But for the folks that are, using the Default theme will definitely help towards troubleshooting as will the other 2 "next" on your list. (back to me being dangerous) The (forgive the term) 'cherry picked' exceptions may not be as helpful as attaching the log file as some are better seen with their before's and after's. But suppose is a starting point. That said, don't start attaching a ton of different files because they're not really fun-reading. The #2 and #4 exceptions you show above I'm not sure would cause a crash. That is, the font would (should) revert to something default and the image would (should) just show an empty space. (all speculation) The #3 one (FileNotFoundException) is a pseudo false-positive. It's an old Visual Studio compiler thing that always brings up that error unnecessarily. Yeah, the file truly isn't there, but that stuff is a handled innately by other dependencies. (this one I know for fact) All I can say about this is, slow down, take your time and enjoy the ride. Marvel at your collection and play some on them games. 😎 -
Steam Achievements not showing up in Desktop Mode
JoeViking245 replied to AgentAquaM's topic in Troubleshooting
First off, THANK YOU for the troubleshooting you did and the well detailed and formatted explanation!!! It's refreshing to see. Not being a part of the development team, a guess is that Big Box and LaunchBox (desktop mode) uses [similar but] different methods for obtaining the data displayed (or not displayed, as is the case for your LaunchBox [desktop mode]). You mentioned seeing "No Achievements", which indicates it's not (or at least shouldn't be) a theme issue. It's "showing" them but saying you don't have any for that game. (You mentioned trying multiple themes. I just tested with Default and the achievements appeared for games that have them.) Try forcing a scan for achievements for the specific platform. Select the platform, the Tools < Achievements < Scan For Windows... (replace "Windows" with whatever your platform name is.) Hoping that's different than your very first bulleted item. 😊 One other troubleshoot/test would be to run the LB installer from your /Updates/ folder (e.g. D:/LaunchBox/Updates/LaunchBox-13.24-Setup.exe) and create a clean install (with no leftover xml files) into a new location (e.g. D:/LaunchBox Test/). If you do this, before clicking the final Install button, check the path to make sure it didn't 'double up'. e.g. D:/LaunchBox Test/LaunchBox/ (it's a thing "that happens") Then add your Steam games and check for Achievements to show in LaunchBox. -
Launchbox Crashing in 13.23 and 13.24
JoeViking245 replied to Gaming.Zone's topic in Troubleshooting
Do you experience the same issues if using the Default theme? That would be best for baseline testing. e.g. The AmbiguousMatchException is a theme related issue missing theme image (Not Rated.png) may be theme related Of the LB themes I do have installed, Ricewind is the only one that actually has that image in its /Images/Ratings/ folder. BB themes "BannerBox" and "Neon Deluxe Arcade" have it their /Media/ subfolder It's not to be found anywhere in [my] /LaunchBox/Images/ folder(s) RE: the transport connection exception, I too get a bit of those in the log(s). But don't experience crashing. For LB, I mostly use the Omni theme and sometimes Default. -
I don't have a definitive answer for this, but I do see on my test PC the yml file is in RPCS3's root folder and on my cab it's in the config folder. Since I can't even start RPCS3 on my [antique] test PC anymore (since a few years?), I can't test if it even works. That said (which probably didn't even need to be said), what happens if you delete (or rename games.yml e.g. old_games.yml) located in the root folder?
-
BigBox Freezing when trying to load games
JoeViking245 replied to G5Pokefan's topic in Troubleshooting
Good customer service does not necessarily mean an immediate response. Glad you thought to try and verify with a different theme as, once someone got around to reading/replying to this thread, would have been the 1st suggestion. Be sure to let the theme author know on the themes Support or Download page (which would be the 2nd recommendation, to ask the one who created it. ). -
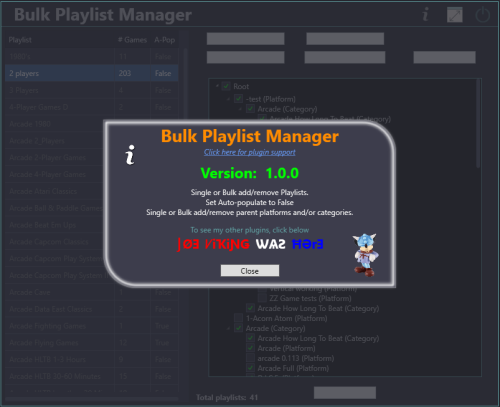
Version 1.0.0
89 downloads
Features - Set auto-populate to False (single or bulk) - Existing games in playlist will remain But no new games will/can be added unless done manually - May help decrease LB loading time - Cannot be undone [via the plugin] - Delete playlist(s) - Permanently delete the selected playlist(s) - Delete all playlists that have zero games - Whether the playlist is auto-populated or is just there, if there are no games in it, permanently delete the playlist(s) - Single or Bulk add/remove parent platforms and/or categories - Select a playlist - Check and un-check parents to your hearts content, then click Save Parents to save the changes. - If selecting multiple playlists, clicking Save Parents will set the parents for all selected playlists to the ones checked. e.g. Selected playlist A had "Computers" checked and playlist B had "Consoles" checked, clicking Save Parents will set both playlists to be under "Computers" and "Consoles". Installing Download and extract the contents of the zip file to /LaunchBox/Plugins/ e.g. D:\LaunchBox\Plugins\BulkPlaylistManager\BulkPlaylistManager.dll Using You may 1st want to turn on Backups (under Tools < Options < Data < Backups), exit then restart LaunchBox (to create at least one backup) before proceeding. Click Tools and select Bulk Playlist Manager Hopefully the layout is fairly intuitive. You can mouse over the buttons for a little more detail. As always, all feedback, comments and suggestion are welcome. -
Bulk Playlist Manager
JoeViking245 posted a topic in Third-Party Applications and Plugins (Released)
Bulk Playlist Manager View File Features - Set auto-populate to False (single or bulk) - Existing games in playlist will remain But no new games will/can be added unless done manually - May help decrease LB loading time - Cannot be undone [via the plugin] - Delete playlist(s) - Permanently delete the selected playlist(s) - Delete all playlists that have zero games - Whether the playlist is auto-populated or is just there, if there are no games in it, permanently delete the playlist(s) - Single or Bulk add/remove parent platforms and/or categories - Select a playlist - Check and un-check parents to your hearts content, then click Save Parents to save the changes. - If selecting multiple playlists, clicking Save Parents will set the parents for all selected playlists to the ones checked. e.g. Selected playlist A had "Computers" checked and playlist B had "Consoles" checked, clicking Save Parents will set both playlists to be under "Computers" and "Consoles". Installing Download and extract the contents of the zip file to /LaunchBox/Plugins/ e.g. D:\LaunchBox\Plugins\BulkPlaylistManager\BulkPlaylistManager.dll Using You may 1st want to turn on Backups (under Tools < Options < Data < Backups), exit then restart LaunchBox (to create at least one backup) before proceeding. Click Tools and select Bulk Playlist Manager Hopefully the layout is fairly intuitive. You can mouse over the buttons for a little more detail. As always, all feedback, comments and suggestion are welcome. Submitter JoeViking245 Submitted 09/26/2025 Category Third-party Apps and Plugins -
I think it is. You said " it'll start at full screen at 1st but automatically go to the Citra small screen. ". It sounds like Citra is Set for fullscreen already (the steps I mentioned to do), then the Running Script code "presses F11" to toggle it out of fullscreen. Remove or comment out those 4 lines, click OK to save and close, then launch a game and see if it's doing the same thing. If it's [now] starting fullscreen and staying that way, problem solved. If it's starting windowed and staying that way, exit the game and do steps shown above (without loading a game) and try again.
-
You kind of answered your own question. When LaunchBox is running, it needs to read and write files within its folder structure. With protection on, it can't write files.
-
Do you have anything in the Running script section of the emulator [in LaunchBox]? You shouldn't need anything there if you... Start citra-qt.exe View [Menu] check Fullscreen Exit Sounds like you may have both. The Running Script with something along the lines of Send, {F11} AND Fullscreen checked in the View menu. Pro Tip: You can press F11 instead.
-
Just tried a search (very generic... "1942") and it worked here. Maybe fixed now?
.thumb.png.c9faf450e4d2b690a819048b18173f61.png)


