Leaderboard
.thumb.png.c9faf450e4d2b690a819048b18173f61.png)


Popular Content
Showing content with the highest reputation since 02/09/2026 in File Comments
-
 What's New in Version 22.0 - Added the last update pack 22. Thats all folks, thank you for the support through the years, we'll meet again on other projects in the future. I couldn't have done this project without the work and help of the following people and websites: Most of the artwork used are from the most excellent @Mr. Do & the many team members: http://mrdo.mameworld.info/index.php For NeoGeo artwork much artwork came from: http://www.neogeosoft.com/ For Flyer artwork the amazing: https://flyers.arcade-museum.com/ and https://www.flyerfever.com/ Some artwork used from: https://www.verticalarcade.com/ which has amazing vertical bezels, be sure to pay them a visit. Photos from Museum of the Game® & International Arcade Museum® https://forums.arcade-museum.com/ For research the great Arcade Database by: http://adb.arcadeitalia.net/ Special thanks to the following people, without them this project wouldn't be what it is: @ArsInvictus John Merrit, @Briball @cmgssilva @Orionsangel @Boz1978 @L4ZYD4NE @Manson976 UDb23 @IainSA TheGuru, Smitdogg, CAG, DrVectrex, tbombaci, italie, MAMEWorld, Ad_Enuff, UDb Raspbear, @destrowade @CKL @Thoggo @Antny @Dreamstate Andyaust @zugswang Spinnhacker, CCF Gameplay, jkburks, Comboman, Tim Lindquist, TrevEB, Aaron Giles, Jumpman1981, @kloug666 Tormod, yaggy, @NightVoice, Dillweed, @NeoKarnage, Vaughan, Zorg, Divemaster, Ad_Enuff, ranger lennier, Kiltron, @damageinc86, AntoPISA3 points
 -
 Very nice! Looks very good 😍 thanks for sharing!2 points
 -
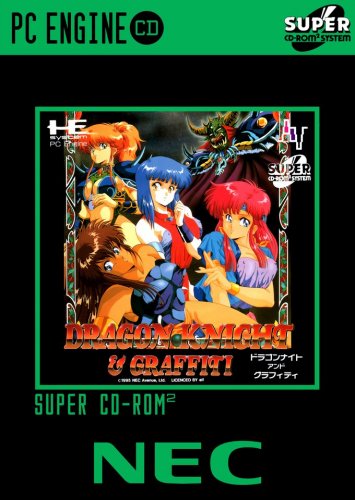 I'm playing around with some restoration before making the final cover, because that circuit on the left side is really ugly.2 points
 -
1 point
-
 be kind, rewind peoples!!!1 point
 -
Thank you man, that’s really kind of you. But be careful not to compliment me too much, it wakes up the trolls, lol. Just kidding. It’s the kind of sentence that reminds you of something simple but profound: on the internet, creations live much longer than we imagine. A theme posted ten years ago can still end up in someone’s hands today, spark an idea, a vocation, or simply the desire to tinker with a frontend. In retro communities, it’s even more true. Projects circulate, get remixed, inspire other setups and other interfaces… and after a while you don’t even know who inspired who anymore. It’s a bit like an old cartridge being passed around between friends and ending up in ten different houses.So yeah, it’s just a comment, but it made me want to share a couple more.I’m posting two more themes. I’m a bit embarrassed because some of them haven’t aged very well . they’re about ten years old after all. But if a few of you enjoy them, then that’s great. It also shows the very beginning of my work and creations. I started exactly like many of you I didn’t really know what I was doing back then. It was a lot of tinkering: editing, layering things together, green screens, basic compositing… nothing very professional at all.So it definitely doesn’t represent my current skills, but honestly I don’t mind sharing it. At least it shows where it all started. I’m not going to pretend my early work didn’t exist. Launch themes are pretty rare anyway. There aren’t that many around. Back then I really enjoyed making them. It was pure imagination — I was just letting my creativity run wild.1 point
-
 This is such a great plugin! Thank you very much for creating it!1 point
 -
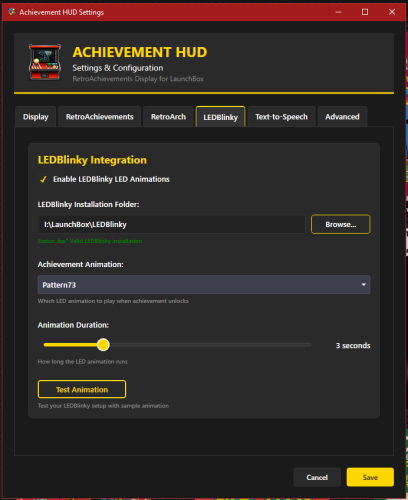 AzgoRAth. I am looking into the multiset now. I have not used that feature but it looks really cool. I will see how that might be added. I believe we will be able to see if it is a softcore or hardcore and add a way to tell which it is. This is great feedback and this is my first plugin. I am not a programmer, I mow grass for a living. LOL I do love playing Achievements so I would like to make this a cool tool. I got tired of having RA always open. I will post back as soon as get this multiset working in Retroarch. Then we can see about adding it.1 point
 -
So, multiset is a new feature on RA where you can unlock base sets and subsets at the same time by using only the base rom (or subset-patched rom for Specialty Subsets) instead of playing a different rom per set. Oh another problem I found is the plugin in it's current state can't tell if the unlocked achievements are hardcore or softcore unlocked. So as you can see in the picture, I have unlocked all the achievements in Hardcore except for "THE MAN" which I have unlocked in Softcore.1 point
-
Thanks. I honestly have not used it much with BB so any feedback on that is appreciated. I am not sure I know what Multiset is. You are correct with the mouse settings, Those have to set in BB. I will look to see if I can make it show when moved to that screen,1 point
-
I've tested this for about an hour now and it's mostly great. There are 2 problems I've found so far though. 1 - The plugin seems to be quite unstable. LB/BB has crashed a few times while using it or when exiting LB/BB. I have changed the DPI settings as instructed but still crashes sometimes. 2 - Plugin doesn't work with multiset (yet, hopefully). There was a 3rd problem which is the mouse cursor is hidden if using the plugin with BB but I managed to fix that by enabling "Enable Mouse" and disabling "Hide Mouse Cursor when Not in Use" in BB->Options->Mouse settings. Awesome work otherwise.1 point
-
 My testing is far from exhaustive, in part because I was running the search on games I'd already done (I did just struggle through and finish a couple days ago), but that seems to have fixed it.1 point
 -
.thumb.png.8b2262ce4d2eafc6cd65bec34b45008e.png) I think I mentioned in the description tat Keith Courage was never released in retail cardboard box form. It was only a pack in game with jewel case art only. I am sure there is custom cardboard box artwork out there somewhere for the game though.1 point
I think I mentioned in the description tat Keith Courage was never released in retail cardboard box form. It was only a pack in game with jewel case art only. I am sure there is custom cardboard box artwork out there somewhere for the game though.1 point -
 It's done, I haven't tested it intensively, but it seems to work well.1 point
 -
 Yep. I had a weird Lunchbox installation issue. Not the plugin's fault at all. Fixed on my end and can confirm it works great!1 point
 -
It may be a "no duh" thing but wanted to comment here in case anyone else has the issue in the future and goes looking for a solution that I wasn't able to pull any info until I turned off my vpn.1 point
-
Thank you for everything1 point
-
i really like this its cool by request can you do zero wing1 point
-
No problem, @JoeViking245. I'll give the reboot a try and if it works, great, if not, c'est la vie >either way, thank you, I do appreciate you looking into it.1 point
-
Thanks @JoeViking245, really appreciate it!1 point
-
 Well yes and no. I used WinArcadia (https://amigan.1emu.net/releases/). It is a multi system emulator that has several old arcade systems. One of the things it has is a General Instruments AY-3-8500 emulator. That's the original pong chip. Its quite good and accurate. It has all of the variations of those early consoles. It even has the quirks, like when the ball goes through your paddle and certain locations, etc. The Radio Shack console was my first console and I wanted to get it on Bigbox, but I didn't find WinArcadia easy to use with Bigbox. You have to go into the Windows menu to change things frequently with the mouse and the gamepad keys are a little odd. Anyway, I used Gemini and Claude (I am not a programmer) to help me get the C code (its open-source freeware) into Visual Studio and modify the source to make changes so it has a proper controller setup and has a 1-button click to map all the existing settings to the Radio Shack console I had. I also added a pause screen with key mappings and a settings status bar that's always under the game. I got it into BigBox with some decent photos and logos. I'm happy to get it together and attach what I made here. Not sure where is the appropriate place. I'm not on Github or anything.1 point
 -
@JoeViking245 Thanks so much. This works wonderfully!! And so quickly!1 point
-
Wow @JoeViking245 lightning fast!!!! That's a very impressive turnaround - great work as always1 point
-
 I've been using Launchbox for years and years (haven't been on the forums until now though...), never knew this plugin existed until today and it literally solves my entire issue I've had + I've wanted a function like this for possibly half my time using Launchbox! Thank you so much for this!! Works perfect right from the start! 👍1 point
 -
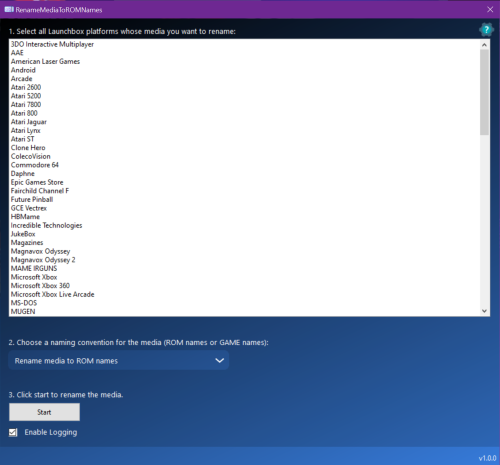
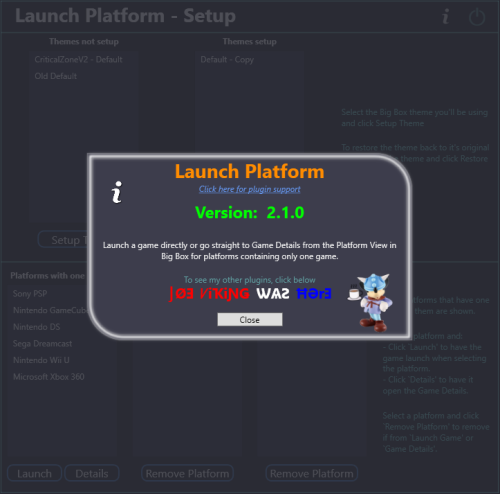
New Release v2.1.0 New Feature: (option) Go straight to the Game Details View from the platform wheel for platforms having only one game. exist Feature: (option) Launch games directly from the platform wheel for platforms having only one game.1 point
-
Thanks. I appreciate you adding it to your list. Its just one of those little things but I think it would be a cleaner and more consistent look for my system. In my case, I have added a platform for the Radio Shack TV Scoreboard (a 70s pong console), where the platform basically is the game. Technically it has multiple types of pong games but those toggle inside the emulator since it didn't have cartridges. So it actually is a game unlike other apps like a music jukebox or video streamer, etc. so it has a box, manual, gameplay screenshots... Things that could be utilized in that screen. Others might have similar uses.1 point
-
@JoeViking245 I am currently using this plugin and its working nicely. Thanks! However I've found that I have some scenarios where I have one game in a platform, where it would be nice to skip the game selection but still get the game detail where I have to the option to select play, show the manual and have the text description, etc. Is there anyway to have this go straight from the platform list to the game detail screen, while skipping the game selection? Select the platform Select the [only] "game" <--- I want to skip only this Select "Play".1 point
-
Version 2.3.5 Released Fixed: once again @chrimbobells1 point
-
 @JoeViking245 Yes, I know! 😁 It also works if you delete the drive letter from lets say G:\Emulators\MAME\hash to just \Emulators\MAME\hash from the "Browse" window before clicking "Next" which is the method I'm using. I also tried to write-protect the file after the mod but it needs write privileges... (of course) 😐 Thanks for the effort.1 point
 -
Version 6.1.1-beta-1 Improvement: Newly imported games' Application Path will now be saved as relative paths, keeping LaunchBox truly portable. ImportMameSoftwareLists (v6.1.1-beta-1).7z @Tsik RE: hash folder location: A quick test shows that (with LaunchBox not running) if you manually edit the file swlFolders.xml located in this plugins folder and set the <hash> value to a relative location [and save it], when opening the plugin and clicking the 1st "Next" button, the hash files will populate. <?xml version="1.0" encoding="utf-8"?> <folders> <source /> <destination /> <hash>..\Emulators\MAME\hash</hash> <emulator>MAME</emulator> </folders> Note: If you click Browse on that 1st page and set a new location, it will get saved as an absolute path. If all goes well with the ROM's relative application paths, I'll look at saving the Folders paths as relative paths as well in the next plugins official release.1 point
-
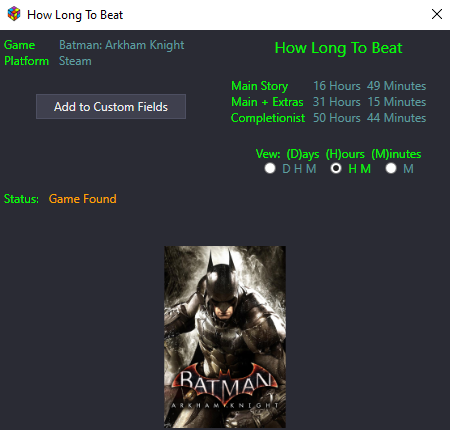
This is a perpetual issue where HLTB periodically makes changes with how data is retrieved. aka, the plugin is broken. Again. Thanks for bringing this to my attention. I'll see if I can figure out a(nother) fix. No. It will not show there. The Plugin Manager is only for integrated plugins created by the LaunchBox developers.1 point
-
.thumb.png.7678b86be02cd7632031f6b96402fdaf.png) Thank you @WallyWonka for the great template. I re-created those that were missing for the Japan exclusives. I followed the original pictures I could find on the internet. I believe there's a translation for those games now and they're actually all good titles! If you want to update your pack, hop this meets your quality standards.1 point
Thank you @WallyWonka for the great template. I re-created those that were missing for the Japan exclusives. I followed the original pictures I could find on the internet. I believe there's a translation for those games now and they're actually all good titles! If you want to update your pack, hop this meets your quality standards.1 point -
Thanks for sharing these1 point


.thumb.png.f238d0c9587f24b7c504a0ad449f515b.png)

.thumb.png.916fffa3138540195e62f61daaecddd0.png)


.thumb.png.8b2262ce4d2eafc6cd65bec34b45008e.png)


.thumb.png.7678b86be02cd7632031f6b96402fdaf.png)
