.png.d63b88dc3d5c6db8803dfbd996ce65fc.png)
JoeViking245
-
Posts
5,215 -
Joined
-
Last visited
-
Days Won
38
Content Type
Profiles
Forums
Articles
Downloads
Gallery
Blogs
Everything posted by JoeViking245
-
No. But my browser is.

-
No worries. I already did. 😁
-
When you said "but I'd like automatic imports back" in your OP (sorry, I have to clarify), the game(s) automatic import is working. It's just that the media is not being downloaded when the games are [auto] imported? Correct? If the games are not auto-importing, make sure the platform (right-click the platform and select Edit) is un-checked to Disable ROM Auto-Import. (Now that I got that off my chest... ) Based on, you can manually download the media, I presume the auto-imported games are getting their metadata (i.e. at least an associated LaunchBox Database ID #). If the games are auto-importing but no media is being added to the games, despite having several media types selected in Tools < Options < Media < Automatic Imports Media, you may want to file a Bug Report (top of this page, Help & Support, select Report a Bug). Be sure to clarify with [something like] the above sentence. Also note a couple of specific platforms and that they worked before. Edit: Also note what version of LaunchBox you are using. In lieu of a bug report, you could instead clarify here the above then hope one of the LaunchBox staff will chime in with some ideas. (which still they may as it's still early on Monday morning. )
-
Well wa'da you know. Would you look at that. Well done!
-
The auto-import media for auto imported games is set under Tools < Options < Media < Automatic Imports Media (introduced v13.23). But by default, should at least have something checked. Are you seeing this happen only with a specific platform? Or with platforms where it had worked before (also)?
-
.thumb.png.c9faf450e4d2b690a819048b18173f61.png)
How can I stop the damm stupid notificaction
JoeViking245 replied to TrevorZ's topic in Troubleshooting
That was the one that came out in September. I was curious about the one Arturo saw today. For your situation (clicking update and restarting doesn't update it), I've seen reports saying they try it 3 or more times, and eventually the update takes. You might (not tested) be able to... with LaunchBox not running, delete the MAME Integration folder under /Plugins/ and then start LaunchBox. I'm not saying this is "the fix". But an interim means to resolving the issue you're seeing. I would recommend filing a Bug Report though. (Top is this page under Help & Support - File a Bug Report) -
How can I stop the damm stupid notificaction
JoeViking245 replied to TrevorZ's topic in Troubleshooting
Just curious, which plugin was the update for? Maybe it just hasn't been pushed here yet, but my last one was back in September [for the MAME integration]. -
Yeah, it says "Board is in Keyboard Mode". But can't read what board is attached. I can read "PAC" and assume that's a "4" after it (though doesn't really matter). I only have an older I-PAC Mini that doesn't have any options other than Keyboard Mode. So what I asked before is about the extent of my knowledge. 😊 Hopefully someone who has an I-PAC 4 running in keyboard mode can chime in with their findings.
-
The LaunchBox Games Database may have been temporarily unavailable when you tried this. Try again and report back if it still says unavailable to download.
-
(have to ask...) Are you sure your I-PAC 4 is set to Keyboard Mode ("Mode 1")? And not Dinput or Xinput mode (Mode 2, 3, 4 or 5)? It shouldn't show as a controller if it's Keyboard Mode (as I suspect is what the I-PAC 2 is in). Even if its software is uninstalled and reinstalled, the physical I-PAC device retains its programming. So you'd need to change its mode via the software or by pressing the mode button-combos.
-
Changing none rom games path please help
JoeViking245 replied to Erv G kid's topic in Troubleshooting
For PC games, the executable for each game is in its own subfolder (or /sub/subfolder/). So, to do a bulk-change-executable-location is not reasonably feasible. That said, you could do it manually. If your games were in (for example) G:\My PC Games\this_is_game_1\game1.exe G:\My PC Games\this_is_game_2\game2.exe G:\My PC Games\this_is_game_3\some_subfolder\game3.exe G:\My PC Games\this_is_game_4\game4.exe And now they're in H:\All My Games\My PC Games\this_is_game_1\game1.exe H:\All My Games\My PC Games\this_is_game_2\game2.exe H:\All My Games\My PC Games\this_is_game_3\some_subfolder\game3.exe H:\All My Games\My PC Games\this_is_game_4\game4.exe ...where the only thing that changed was the 1st part of the path... With LaunchBox not running and using a text editor, edit the platforms xml file and do a bulk find and replace. -
MAME (Arcade) - What's New
JoeViking245 commented on JoeViking245's file in Third-party Apps and Plugins
 v1.0.1 Released Fixed: Added check if game exists as an Additional Application [in ANY platform] When importing, checks Additional Apps ONLY in the selected platform Fixed: Clicking Status checkboxes when "No games exist for this release" causes unexpected results New Feature: Shows latest available release data available from ADB (ADB may not have the latest data the minute MAME releases a new revision) Thanks @MadK9 and @sundogak for the feedback! When you stare at a code for hours and hours, it all starts to become a blur, and the little (and sometimes not-so-little) things get overlooked.
 -
MAME (Arcade) - What's New
JoeViking245 commented on JoeViking245's file in Third-party Apps and Plugins
Every option I mentioned is super easy. Namely because @MadK9 asked about it in a DM before me releasing the plugin. -
MAME (Arcade) - What's New
JoeViking245 commented on JoeViking245's file in Third-party Apps and Plugins
Conversely, how about a multi-select option where you can select just the games you want to import? e.g. There's 6 ROMs in a given release and you want all except the 5th one listed. Click the 1st ROM, press/hold Shift and click the 4th ROM. Now [let go of Shift and] press/hold Ctrl and click the 6th ROM. or Click the 1st ROM, press/hold Shift and click the 6th ROM. Now [let go of Shift and] press/hold Ctrl and click the 5th ROM (to de-select it). or Click the 1st ROM, press Ctrl+A (to select all). Then press/hold Ctrl and click the 5th ROM (to de-select it). -
MAME (Arcade) - What's New
JoeViking245 commented on JoeViking245's file in Third-party Apps and Plugins
You're welcome. And love the pun! Same here, and that was my thought exactly. Though whatsnew.txt gives a lot of good information, it's not, as they say, "for the faint of heart". The prior. I don't keep any Additional Apps (clone games) in my Arcade platform. If I do know of a clone that's better (or I like better) than the parent ROM, that ROM is the main game. And still, no Additional Apps. So, I didn't even think about Additional Apps and clones. 😊 Well, I did for about a half-a-sec and remembered how much of a pain it is dealing with clone/parent relationships and Additional Apps [in code]. Then quickly "forgot", thinking... "this is working on my setup." The next update will iron out Additional Apps dilemma. Thanks for bringing this up as it affects the import part as well. (which I conveniently ignored also) (As a general note....) Speaking of importing, I have no intentions at this point of importing clones as Additional Apps for their parent games (or if the parent is an Additional App and one of its clones is the parent, adding it to that). Thought being, there's only about 12 games [on average] added per release, and "I got you this far. You can work out the rest". But knowing me.... [I'll leave it at] subject to change. 😎 -
That looks like a 3D Box Model (not to be confused with a 3D Box Image). It rotating indicates your controller joystick is "being pressed" up (or down). I believe the right joystick it the default for rotating that image. Give it a flick. If you have a different kind of controller, look in the controller mappings to see what's mapped for rotating that and check it.
-
This is pretty off topic from the subject thread. Also none of those files shown can be ran without an emulator. You should start a new thread.
-
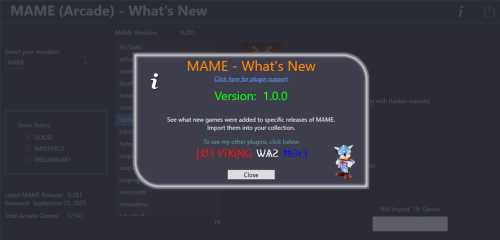
MAME (Arcade) - What's New View File See what new Arcade machines (games) were added for a specific MAME release. Import some or all of those games from your updated MAME ROM set, into your LaunchBox collection. The intent of this plugin is to be able to see what new Arcade machines were added in the latest release of MAME. Then, along with your updated ROM set, provide a means of importing just those new machines into your LaunchBox collection without having to reimport the entire set or attempting to Scan for Added ROMs (which doesn't really work with the Arcade platform anyway). Features: See what new Arcade (ONLY) games were added specific MAME release Hyperlink to Arcade Games Database site for selected game Filter games by Status (Good, Imperfect, Preliminary) Import the new games (from your updated MAME ROM set) (Optional) Add an Additional Application direct link to the Arcade Database for the game A huge and special thanks to motoschifo and his Arcade Database (ADB) website! All data used comes direct from the Arcade Database and is what makes this plugin possible. http://adb.arcadeitalia.net Prerequisites: Requires LaunchBox version 13.19 or newer. Nothing else if you only wish to see what new games were added. If you wish to import the new games An updated MAME romset [containing those ROMs] Installing: Copy the contents of the zip file into your /Plugins/ folder e.g. D:\LaunchBox\Plugins\MAMEarcadeWhatsNew\MAMEarcadeWhatsNew.dll Using: In LaunchBox, go to Tools and select MAME (Arcade) What's New The plugin will attempt to find your MAME emulator If found, the MAME Revision field will populate with your MAME's version and populate the games for that revision To see new games that were added in a different release Change the number in the MAME Revision field Must be formatted 0.xxx e.g. 0.281 Press Enter Un-check/check the Show Status checkboxes to see only ROMs with those status(es) Click a ROM to see brief details about that game Click the Arcade Database logo to navigate to that game on ADB Existing: as seen below the game details refers to, if the game exists anywhere in your collection. Checks across ALL games in ALL platforms (by ROM filename). Below it will show the platform it is in (if "existing") This is useful if you're checking previous releases for that hidden gem you didn't know you were missing Importing: If you've updated your MAME set, you can import the new ROMs into your collection. All new ROMs shown will be imported. You can multi-select games to add just those games selected. If you wish to import just a single game, close the plugin. Then in LaunchBox, press Ctrl+N to add a new game. Click Add Games Select a platform (Arcade is set by default if exists) (optional) Un-Check Use Platforms Default Emulator Select an emulator to assign to the games being imported from the dropdown list Select the folder containing your ROMs (default is the folder your game files are in for the selected platform) If you keep a curated set separate from your MAME fullset, you can select the folder your fullset is in. Then after importing, have LaunchBox copy the ROMs and reset the game ROM path. **(see more below) If you've already placed your new ROMs in your curated set folder, select that. (Optional) Check the box Add link to ADB as Additional App Click Import Games Importing Notes: Games already existing (based on ROM filename) in the platform (step 2) will not be imported Games whose ROM file doesn't exist (step 4) will not be imported After import, a report will show the # of games added and/or skipped Anything in the games Title that is in (parenthesis) will get moved to the games Version field e.g. "Hacha Mecha Fighter (bootleg with Raiden sounds)" Game Title will be saved as "Hacha Mecha Fighter" Game Version will be set to "(bootleg with Raiden sounds)" (Optional) Add an Additional Application direct link to the Arcade Database for the game This will appear as an "Arcade Database" clickable link in the Game Details section (except for LaunchBox version 13.24). Game data set when importing: Title Platform ROMs application path Date Added/Modified Associated Emulator Version (if available) Getting Metadata and Images: After importing, in LaunchBox select all the newly added games Hint: Click Arrange By and select Date Added. Select the 1st new game. Hold down Shift then click the last, new game. Go to Tools - Download - Update Metadata and Media for selected games When asked "Would you like to update games with existing metadata and/or media?" Select "Yes, but do not replace and existing fields and media" Selecting otherwise will remove the Version data (if exists) Metadata Notes: If importing from the latest MAME revision, when you go to Download/Update metadata, the game(s) may not be found. ** Copying the new imported games ROM files to a different ("curated") folder: To Copy the ROMs and reassign their location (as seen by LaunchBox)... After importing, (in LaunchBox) select the newly added games Copying: Go to Tools - File Management and select Export ROM Files from Selected Games to New Folder Have LaunchBox copy the ROMs to the Folder your curated set is in Reassigning: With those games still selected, go to Tools - File Management and select Change Roms Folder Path for Selected Games Change to the Folder your curated set is in Plugin Updates: If an Update for this plugin has been released on the forums, - The Info/Support icon will flash red. - Click the Info/Support icon, then click the Update Available button. This will open the plugins download page in your default browser. Again, a big thanks to the Arcade Database and all its contributors! As always, all thoughts, views, suggestions, comments and accolades are welcome. Submitter JoeViking245 Submitted 10/30/2025 Category Third-party Apps and Plugins
-
Version 1.0.1
91 downloads
May 2026 This plugin has been moved into the MAME Tools plugin along with several other on my MAME related plugins. Install and use MAME Tools instead of this plugin for continued support. Thanks for looking. See what new Arcade machines (games) were added for a specific MAME release. Import some or all of those games from your updated MAME ROM set, into your LaunchBox collection. The intent of this plugin is to be able to see what new Arcade machines were added in the latest release of MAME. Then, along with your updated ROM set, provide a means of importing just those new machines into your LaunchBox collection without having to reimport the entire set or attempting to Scan for Added ROMs (which doesn't really work with the Arcade platform anyway). Features: See what new Arcade (ONLY) games were added specific MAME release Hyperlink to Arcade Games Database site for selected game Filter games by Status (Good, Imperfect, Preliminary) Import the new games (from your updated MAME ROM set) (Optional) Add an Additional Application direct link to the Arcade Database for the game A huge and special thanks to motoschifo and his Arcade Database (ADB) website! All data used comes direct from the Arcade Database and is what makes this plugin possible. http://adb.arcadeitalia.net Prerequisites: Requires LaunchBox version 13.19 or newer. Nothing else if you only wish to see what new games were added. If you wish to import the new games An updated MAME romset [containing those ROMs] Installing: Copy the contents of the zip file into your /Plugins/ folder e.g. D:\LaunchBox\Plugins\MAMEarcadeWhatsNew\MAMEarcadeWhatsNew.dll Using: In LaunchBox, go to Tools and select MAME (Arcade) What's New The plugin will attempt to find your MAME emulator If found, the MAME Revision field will populate with your MAME's version and populate the games for that revision To see new games that were added in a different release Change the number in the MAME Revision field Must be formatted 0.xxx e.g. 0.281 Press Enter Un-check/check the Show Status checkboxes to see only ROMs with those status(es) Click a ROM to see brief details about that game Click the Arcade Database logo to navigate to that game on ADB Existing: as seen below the game details refers to, if the game exists anywhere in your collection. Checks across ALL games in ALL platforms (by ROM filename). Below it will show the platform it is in (if "existing") This is useful if you're checking previous releases for that hidden gem you didn't know you were missing Importing: If you've updated your MAME set, you can import the new ROMs into your collection. All new ROMs shown will be imported. You can multi-select games to add just those games selected. If you wish to import just a single game, close the plugin. Then in LaunchBox, press Ctrl+N to add a new game. Click Add Games Select a platform (Arcade is set by default if exists) (optional) Un-Check Use Platforms Default Emulator Select an emulator to assign to the games being imported from the dropdown list Select the folder containing your ROMs (default is the folder your game files are in for the selected platform) If you keep a curated set separate from your MAME fullset, you can select the folder your fullset is in. Then after importing, have LaunchBox copy the ROMs and reset the game ROM path. **(see more below) If you've already placed your new ROMs in your curated set folder, select that. (Optional) Check the box Add link to ADB as Additional App Click Import Games Importing Notes: Games already existing (based on ROM filename) in the platform (step 2) will not be imported Games whose ROM file doesn't exist (step 4) will not be imported After import, a report will show the # of games added and/or skipped Anything in the games Title that is in (parenthesis) will get moved to the games Version field e.g. "Hacha Mecha Fighter (bootleg with Raiden sounds)" Game Title will be saved as "Hacha Mecha Fighter" Game Version will be set to "(bootleg with Raiden sounds)" (Optional) Add an Additional Application direct link to the Arcade Database for the game This will appear as an "Arcade Database" clickable link in the Game Details section (except for LaunchBox version 13.24). Game data set when importing: Title Platform ROMs application path Date Added/Modified Associated Emulator Version (if available) Getting Metadata and Images: After importing, in LaunchBox select all the newly added games Hint: Click Arrange By and select Date Added. Select the 1st new game. Hold down Shift then click the last, new game. Go to Tools - Download - Update Metadata and Media for selected games When asked "Would you like to update games with existing metadata and/or media?" Select "Yes, but do not replace and existing fields and media" Selecting otherwise will remove the Version data (if exists) Metadata Notes: If importing from the latest MAME revision, when you go to Download/Update metadata, the game(s) may not be found. ** Copying the new imported games ROM files to a different ("curated") folder: To Copy the ROMs and reassign their location (as seen by LaunchBox)... After importing, (in LaunchBox) select the newly added games Copying: Go to Tools - File Management and select Export ROM Files from Selected Games to New Folder Have LaunchBox copy the ROMs to the Folder your curated set is in Reassigning: With those games still selected, go to Tools - File Management and select Change Roms Folder Path for Selected Games Change to the Folder your curated set is in Plugin Updates: If an Update for this plugin has been released on the forums, - The Info/Support icon will flash red. - Click the Info/Support icon, then click the Update Available button. This will open the plugins download page in your default browser. Again, a big thanks to the Arcade Database and all its contributors! As always, all thoughts, views, suggestions, comments and accolades are welcome. -
Here's some info from the LaunchBox Strategy Guide that may help. https://feedback.launchbox.gg/help/articles/4883944-music-in-launchbox-and-big-box
-
If the original posted was written in a different language, then yes. Depending on your browser, you should be able to right-click it and select Translate.
-
You can't use a cvs file to import games. I suppose you could get creative and create a batch file or PowerShell script to extract the names and create files (e.g. .txt files) from the names and import those. The Platforms.xml (in /LaunchBox/Data/) stores metadata for the Platforms in your collection. The [platform_name].xml file (under /LaunchBox/Data/Platforms/) stores the info for the games imported into your collection for that specific platform. The database file (located in /Metadata/) stores the metadata for all games. Once an imported game is associated to the respective game in the LaunchBox database, metadata from the database file is copied into the [platform_name].xml file for easy retrieval by the UI.
-
Adding things is easy. But there's other things to consider. Just a guess as to why... low cost-benefit [at this early stage of PS4 emulation]? Lack of interest from the user base (as deemed by limited Feature Requests and Upvotes)? Time (as in, it's currently being spent on features that have been requested/upvoted)? Regardless, I think it boils down to not being a beta issue. What can you do now? Upvote the current feature request for shadps4. Create a new Feature Request (vs. a Bug Report) to incorporate the importing of PS4 games. Once it becomes public, create a new thread asking users to Upvote the request(s).
-
Unless I missed it (and I'm sure someone will let me know if I did ), I don't believe anything's been implemented (even in beta) to cover Playstation 4 importing or for shadps4. There was this Feature Request to Add Plugin Support for ShadPS4 and ShadPS4 Plus Emulators about 4 months ago. But doesn't appear to have gotten much love.
-
Just tested (13.25-beta-2) and EmuMovies is working fine here. Tested via: Edit Game, Images, Download Media and was able to select images and videos in the EmuMovies tab.
.thumb.png.c9faf450e4d2b690a819048b18173f61.png)