

skizzosjt
-
Posts
746 -
Joined
-
Last visited
-
Days Won
1
Content Type
Profiles
Forums
Articles
Downloads
Gallery
Blogs
Everything posted by skizzosjt
-
I'm sure it has some influence. They cited over 1 million illegal download of Tears of the Kingdom, maybe Ryujinx facilitated many illegal downloads of Echoes of Wisdom. Or just the general principle that said emulator exists. The array of arguments they could make is wide and varied. Sudachi is available to download. Like I said in initial post, it's a fork of Yuzu and it's operation is the same. I set it up in just mins since already being familiar with Yuzu. Yuzu can be found in some internet archive fashion Ryujinx likely can be found in same way The emulators themselves will never be fully removed from the internet. But their development has mostly been stifled, for the time being at least.
-
 glad you sorted it out. I was just making some pics to post before I saw your response so I'm posting it anyways for reference for others I think these are the important parts for the parent element. Apparently I used a dock rather than a grid for this one specifically. Fullscreen enabled Alignment properties are centered Update when is ONCE SELECTED I The parent element needs the animation properties that were once applied to the hardware overlay element (not going into specific values since nothing should be changed there) The hardware overlay element needs those animation properties removed once they were copied over to the new parent element. And the one other critical setting is update DURING SELECTION There is more that needs to be adjusted if you wanted it just like it was intended to be. For ex, the animations for the color conditioned rectangle that has some metadata around it. This one might only look messed up in certain conditions, like from switching from some other theme to Colorful, or switching from one view to another within Colorful. I think this discrepancy wouldn't be noticed in "normal" conditions, ie booting into Big Box with Colorful as the theme and you are booting into your intended view and not using the assignable hotkeys to change views etc. What you would find here is colors changing later than intended, ie, you see the color change rather than have the screenmask wipe away and the colors are already changed appropriately. And/or the animations for the color conditioned rectangle shapes happen at a different time (would be harder to notice since it's just a single object moving, unlike the hardware overlay which was meant to be aligned exactly with the main video and makes it super obvious when it's off). To fix this it's more of the same idea as above. Had to leave color conditions as update DURING SELECTION for colors to change at same quick pace, but needed to create a parent element to make the animations happen at the intended later time using update ONCE SELECTED This only fixed PlatformWheel1FiltersView. You would need to do same ideas to fix up PlatformWheel2FiltersView as well if you wanted that wheel looking as intended too I noticed you mentioned previously the CTC source files for Colorful are gone. Just the links on the main discussion thread are broke. They otherwise are still existing from the file download thread.
- 840 comments
-
- 1
-

-
- bigbox
- custom bigbox themes
- (and 1 more)
-
The "hardware overlay" element is definitely one of them that needs adjusting. The element itself, so the one you circled, needs to use the "update during selection" radio bubble. This way the hardware overlay image immediately changes each time you scroll to a new platform in your wheel. This keeps that part of the theme working as the original authors intended. Then it gets into the understandably confusing part. I know what needs to be done, but may struggle to explain it. So, don't be shy about asking for help, I'll do my best. If you leave the animation properties tied to that same hardware overlay element it's going to also do the transparency changes, and the position animation change at the same time. Meaning it's going to happen at a wrong time. We need the animation properties to start once selected which means we need to use the "update once selected" radio bubble. Problem here is we are already requiring this element to use update during selection for the image to change when intended. This hopefully explains the reasoning for the disconnect between animations of various elements. So, to get around this I made a GRID element that will be a PARENT element to the hardware overlay element. This makes the hardware overlay element now a child element to the grid element. I then copied the animation settings from the hardware overlay element, into the new grid element. You will then need to make sure the grid element is using update once selected radio bubble, as well as then remove the animations from the hardware overlay element since we don't want these animations on both elements, it would cause things to be misaligned still. Putting this together now means the hardware overlay will update during selections, meaning right away. But since we now put the hardware overlay into a parent element that has the animation properties, we can use update once selected for the parent element. This results is the opacity and position changes will happen at the right time. All together, it means it will work just like the authors originally intended. I'm going off my memory right now, so I could make some screen shots of my CTC settings to make sure I'm not misremembering details. Full screen background can be left as is I believe. Background color.....might need an update? If anything it should be "update during selection"....I assume. I think if it is on "update once selected" it still works "OK" but the colors are going to change a few moments later. Like if you are in a playlist that has games from many platforms/systems with different colors, you might see the "old" color for a split second before the selected bindings are read. I changed names of stuff to make more sense to me. So the "Background color" is not the same as what I called "LHS Rectangle Color". I think that specific element is only in the 1st wheel which is what you show in this image. But just to clarify, from your video you posted you were using the 2nd wheel there. The difference there is the 2nd wheel has the color coordinated background taking up the whole screen. The first wheel always has sort of a dark gray section on the left hand side and puts some of the info into a color conditioned rectangle. The wheels are a little different like that, so there are different adjustments needed for both wheels to animate correctly. I did do the fixes for both, but looking back at my previous posts I see I only really addressed this on wheel 1. Take note some issues also occur on the game selection view (whatever the views are called for selecting the actual game). I do not recall if TextListGameView (or whatever the text list view is called) has some problems too. There are at least 4 views that would need adjusting. Two platform views, and two game views, at least. Possible a 5th would be the TextList one. There is def more I changed, but don't remember all the details. So I'd have to look at my settings and post them, or something to give more specific details. I already feel like I'm rambling lol Give it a shot and let me know if you need some more help! I'm willing to share images of my settings or even the CTC files, whatever would help you out.
-
read up on the theme's thread. I posted details on how to resolve the discrepancies. I discovered this I guess back in 3.1.3 per my previous post in the linked thread. Copy/paste the 2.5.5 theme source files into the CTC folder for 3.1.3 (or later/more recent versions) and it seemed all animations are out of sync in 3.1.3+ My experience suggests it is not their start time, or duration, etc parameter/values related to animations. It is the "update when selected" and "update during selection" radio bubble option that is messing with things. Per my post it seems I concluded they don't really operate the same anymore due to update during selection now occurring earlier when compared to previous versions of CTC. I'm talking about copy/paste of the same files that worked through 2.02 (or whatever version was used to initially make the CTC version of the theme) up to 2.5.5. After 2.5.5 is when I first started noticing the issues that Madhead is also referring to.
-
I don't get why they didn't go after Ryujinx at the same time as Yuzu. I would believe people thought the difference was one was a more low key, and the other was acting like a rockstar, shinning the spotlight on themselves, doing it for profit. The result was one had a target on its back, the other was flying under the radar, or so it seemed. (or I should say, flying low enough that they, Nintendo, didn't care to react) But you're correct, they are going ham lately. Lots of stories surrounding ROM sites and youtubers/streamers getting shutdown or at least content removed. Seems like a disproportionate response they are taking.
-
If I could physically eat my own shoe....I would. I didn't think this emulator was in their crosshairs. this leaves only sudachi that I am aware of. this one seems like an actual fork of Yuzu. It's GUI and general operation from a user perspective is basically the same. Literally set it up in the few mins it took me to write this post. I must have had a premonition that this was going to happen because I've always been happy with Yuzu. But last weekend I got Ryujinx setup just to see how much better/worse it is. Pretty glad I got the like 2nd to last release before this happened.
-
There is no auto import process for native PC games that were not purchased through a storefront. If they are storefront bought games like Steam, Epic, Ubisoft Connect and so on, then you can follow the instructions on linking those accounts to auto-import those games.
-
THOTD4 is basically the only reason I have TP. I otherwise find TP's operation annoying. I've never even heard of JConfig (I had to google it lol!) so thanks for bringing that up! I'm going to look into that as an alternative for sure!
-
I'm kinda just rambling and thinking out loud in the linked post below but I share everything so should at least give you an idea of how to implement something for yourself. I sure didn't use that wrapper, it was garbage when I tried it! I did not want a bunch of random text files with just a single game name in them. Pretty dumb in my opinion. So I have a single file which can have different games on each line. Script will parse through the file looking for the game/emulator window title or executable (hint you should be using executable for a emulator!) Pic of the WindowCast file for ex below. You def do not need to do it like this, but thought I'd point out that is sort of "above and beyond" what you likely need to implement. I did this bc my main use is more on native PC games.

-
"disable controls" is expected for keys assigned as a hotkey. the "1" key will no longer function unless you use the tilde (~). using a tilde will allow "1" to function as normal. since it's a combo hotkey, this doesn't impact "5" regardless if the tilde is there or not. The keyboard modifier ($) is def not useful in this situation. It's meant for making send commands not trigger a hotkey I'm sure the script works fine, since it works fine for me. The problem is it seems you have no idea what you are actually closing. TP's GUI is its own window. It still launches this GUI even when games are launched via command line. So when you run a line like Process, Close, TeknoParrotUI.exe literally the only thing you are doing is closing this window, for ex.... The "game" window is still going to continue running. What I have circled in red is normally hidden behind the game window. I put it on top just for reference This means the script is not appropriate because the thought process on how to close TP is off. What you should do instead is make the hotkey trigger the intended exit key, in this case, escape. For ex ~1 & 5:: Send {Escape} This works as intended when I test it. correct it is another executable, ie "teknoparrotui.exe" vs "<game-specific-exe>.exe" since teknoparrotui.exe technically.....normally.....stays open for the duration of the game being ran said script should work from the Running Script field. but for what it's worth, I only tested with a stand alone script (same thing as using an additional app setup) since I use a script to launch various TP games
-
it's theme specific. use a theme that uses and displays the field or customize one to your liking. Coverbox comes to mind, so does Colorful, maybe only at platform level by default though. browse the themes download section and check them out to find one you like. this is a relatively common field
-
chd compression support PCSX2 (PlayStation 2)
skizzosjt replied to Your Friendly A.I Overlord's topic in Noobs
oof, apparently I got lucky then because I didn't even know about the other createdvd option when I did my conversion lol. I have not run into any issues with the handful of games I have I try searching now to see if there is some compiled list of CD vs DVD games, this looks promising. but, this seems like a giant hassle for sorting/organizing/segregating the ISOs prior to doing the conversion. I'm not sure of a good way of doing that. Maybe some scripting. And I bet someone could find a better list if they search longer than like the whopping 5 mins I just did https://www.epforums.org/showthread.php?80757-List-of-CD-and-DVD9-games-for-the-Playstation-2-PS2 -
chd compression support PCSX2 (PlayStation 2)
skizzosjt replied to Your Friendly A.I Overlord's topic in Noobs
I converted my PS2 library, about 50 games, from ISO to CHD using "createcd" no complaints from me. I would assume would work for going from .gz format but idk for sure -
well, now you're moving the goal posts you can use hotkeys to start/stop the overlay, and to kill the script. for ex....F1 to display bezel. End to remove bezel. You can use those back and forth to your hearts content. Escape removes bezel and terminates script. Script terminates on frontend exit. customize to your liking with the sFile variable assignment and if you want to use different hotkeys then change them too. ;F1 hotkey to add bezel F1:: #include gdip.ahk If !pToken := Gdip_Startup() { MsgBox, 48, gdiplus error!, Gdiplus failed to start. Please ensure you have gdiplus on your system ExitApp } Gui, 1: -Caption +E0x80000 +LastFound +OwnDialogs +Owner +hwndHWND +alwaysontop Gui, 1: Show, NA , Bezel sFile := "Andro Dunos II Bezel.png" pBitmap := Gdip_CreateBitmapFromFile(sFile) Gdip_GetImageDimensions(pBitmap,w,h) hbm := CreateDIBSection(w,h) hdc := CreateCompatibleDC() obm := SelectObject(hdc, hbm) pGraphics := Gdip_GraphicsFromHDC(hdc) TransValue := 0 SetTitleMatchMode, 2 WinTitle := "ahk_exe BigBox.exe" WinWait, %WinTitle% Sleep, 5500 ;13500 Gdip_DrawImage(pGraphics, pBitmap, 0,0,w,h) UpdateLayeredWindow(HWND, hdc, (A_ScreenWidth-w) // 2, (A_ScreenHeight-h) // 2, w, h, TransValue) Gdip_DisposeImage(pBitmap) DetectHiddenWindows, On SetTitleMatchMode, 2 WinSet, AlwaysOnTop, On, Bezel Loop { UpdateLayeredWindow(HWND, hdc, (A_ScreenWidth-w) // 2, (A_ScreenHeight-h) // 2, w, h, TransValue) If (TransValue < 220) TransValue := TransValue + 2.5 Else If (TransValue >= 220) TransValue := TransValue + 1 If (TransValue >= 255) Break } WinWait, %WinTitle% WinWaitClose, %WinTitle% Goto, ExitScript ;End hotkey to remove bezel, but keep script running End:: TransValue := 255 Loop { UpdateLayeredWindow(HWND, hdc, (A_ScreenWidth-w) // 2, (A_ScreenHeight-h) // 2, w, h, TransValue) If (TransValue > 25) TransValue := TransValue - 20 Else If (TransValue <= 25) TransValue := TransValue - 1 If (TransValue <= 0) Break } SelectObject(hdc, obm) DeleteObject(hbm) DeleteDC(hdc) Gdip_DeleteGraphics(pGraphics) Gdip_Shutdown(pToken) Return ;Escape hotkey to remove bezel, and terminate script Esc:: ExitScript: TransValue := 255 Loop { UpdateLayeredWindow(HWND, hdc, (A_ScreenWidth-w) // 2, (A_ScreenHeight-h) // 2, w, h, TransValue) If (TransValue > 25) TransValue := TransValue - 20 Else If (TransValue <= 25) TransValue := TransValue - 1 If (TransValue <= 0) Break } SelectObject(hdc, obm) DeleteObject(hbm) DeleteDC(hdc) Gdip_DeleteGraphics(pGraphics) Gdip_Shutdown(pToken) ExitApp no it runs at boot of the frontend. use a hotkey to toggle it as needed. setting up by game specific doesn't make sense for your goal, not to mention more difficult to configure/manage. what if you want to use the light gun right when you boot into Big Box? if it only appeared after launching/exiting a game, you would lose that ability to use it first thing. use hotkeys for toggling instead allows a user to choose when they want this bezel displayed, and if needed, terminate the script all together.
-
In the Startup Applications tab. in the "Start With?" column, select "Big Box Only" I use this script to put a bezel over some native Windows games that are in 4:3 aspect ratio. In particular, this one was for Andro Dunos II. change the "sFile" variable assignment to the image you want used and unless you give appropriate paths or set a working directory it will need to be in same folder as the script. I just tested it, and it goes over Big Box just fine. Sloppy, and other stuff going on that you likely don't need or care about. But......it works! So, customize what you need to from here. #include gdip.ahk If !pToken := Gdip_Startup() { MsgBox, 48, gdiplus error!, Gdiplus failed to start. Please ensure you have gdiplus on your system ExitApp } Gui, 1: -Caption +E0x80000 +LastFound +OwnDialogs +Owner +hwndHWND +alwaysontop Gui, 1: Show, NA , Bezel sFile := "Andro Dunos II Bezel.png" pBitmap := Gdip_CreateBitmapFromFile(sFile) Gdip_GetImageDimensions(pBitmap,w,h) hbm := CreateDIBSection(w,h) hdc := CreateCompatibleDC() obm := SelectObject(hdc, hbm) pGraphics := Gdip_GraphicsFromHDC(hdc) TransValue := 0 SetTitleMatchMode, 2 WinTitle := "ahk_exe BigBox.exe" WinWait, %WinTitle% Sleep, 5500 ;13500 Gdip_DrawImage(pGraphics, pBitmap, 0,0,w,h) UpdateLayeredWindow(HWND, hdc, (A_ScreenWidth-w) // 2, (A_ScreenHeight-h) // 2, w, h, TransValue) Gdip_DisposeImage(pBitmap) DetectHiddenWindows, On SetTitleMatchMode, 2 WinSet, AlwaysOnTop, On, Bezel Loop { UpdateLayeredWindow(HWND, hdc, (A_ScreenWidth-w) // 2, (A_ScreenHeight-h) // 2, w, h, TransValue) If (TransValue < 220) TransValue := TransValue + 2.5 Else If (TransValue >= 220) TransValue := TransValue + 1 If (TransValue >= 255) Break } WinWait, %WinTitle% WinWaitClose, %WinTitle% Goto, Close Esc:: Close: TransValue := 255 Loop { UpdateLayeredWindow(HWND, hdc, (A_ScreenWidth-w) // 2, (A_ScreenHeight-h) // 2, w, h, TransValue) If (TransValue > 25) TransValue := TransValue - 20 Else If (TransValue <= 25) TransValue := TransValue - 1 If (TransValue <= 0) Break } SelectObject(hdc, obm) DeleteObject(hbm) DeleteDC(hdc) Gdip_DeleteGraphics(pGraphics) Gdip_Shutdown(pToken) ExitApp You NEED the Gdip library for said script to work. Must be in same directory as the main script unless you change the include path in the main script. Save this as gdip.ahk or whatever you save it as, make sure the file name and path (if needed) matches the include line (line #1) in the main script
-
Additional Apps not waiting for Exit *Solved*
skizzosjt replied to TheRealUnderhill's topic in Troubleshooting
lol sorry not needed! I'm sorry now lol. that's not what I meant to imply! wanted to make sure it was understood that the original post was really user error, but your post was about the feature not really working as expected and could be considered a bug looking at it from the angle of not considering it could be a fail safe. You scratching your head about this proves it could use some clarification in the program. Not everyone will interpret it the same and can be frustrating when interpreted different than the devs intended. I agree a tool tip or some notification method to communicate to users that there is a built in timeout would be helpful! So in the end, your post was more appropriate for the thread title than the original posters post -
Additional Apps not waiting for Exit *Solved*
skizzosjt replied to TheRealUnderhill's topic in Troubleshooting
I too have noticed this, but I didn't think of it as a bug. I assumed it is a fail safe. If said additional app gets hung up for one reason or another, the game will never launch and stay stuck in that status until further user intervention. The current implementation at least lets the game start booting if additional app took longer than 30 secs to do its thing. The workaround is scripting. If your additional app needs to be doing stuff for 30+ secs before booting the game, then the game itself will need to be launched from the script too. So, essentially no additional app would be needed. And instead, the single script will need to be the ROM/application path for the entry. Said script will need to launch whatever was your additional app, use some wait or sleep commands, or some equivalent, and then run the game. I think what you are speaking about is unrelated to the original post despite the title suggesting it does. The OP simply did not configure their approach appropriately, their script wasn't doing what they thought it was. You on the other hand did configure your approach appropriately, but due to the fail safe implemented as it currently is, doesn't actually execute as you would have thought it should. I'd say it's a legit complaint to bring up to the dev team. There appears to be a timeout on "Wait for Exit" though. I interpret this as they do not want the timeout to occur. Sbaby did use this checkbox. I noticed this myself a few months ago when I added an additional app script with some bogus code (mistakes on my end). The script didn't run as intended, staying open indefinitely, but the game launches about 30 secs later regardless of the script actually exiting. Script was still running and game would be considered to have launched prematurely if we take "Wait for Exit" at a literal face value. -
Random black screen when selecting console/handheld
skizzosjt replied to sebas001's topic in Troubleshooting
it's a known issue, it's not theme specific, and VLC vs WMP is not a factor here either. unknown factors at play here for an otherwise intermittent issue. impacts any video, not just game videos. my experience is seeing the issue in Big Box, but I don't have videos play in LaunchBox (so never seen the issue there) and some users have problems there too I know dev team is aware and have looked into it, but I don't think a good grasp is understood on the root cause and/or resolution to clarify it is not it creates a black screen, it is the video is a black screen. if your entire screen is black it is because the video file is fullscreen. the audio for the video will still play, it's the actual video displaying that messes up. here is one thread I find for reference. there are others in Big Box I find it is possible to make the issue happen on demand depending on when you enter/exit an area. ie going from Category to platform or vise versa. If there are transition animations being used, they might be lending to the issue too. Don't quote me on that though, it's been quite a while since I deep dove into troubleshooting this. Would have been one of the 12.X betas when it got discussed a bit with the team. That's why I know they are aware but I don't recall any obvious solutions/workarounds -
-
user uses directory path "ABC" for some path or paths regarding one or more platform but then they changed that path within Windows, so it would now be "XYZ" LB is still looking for directory "ABC" and will crash when you try to do something that uses this "ABC" path still, like editing a platform because "ABC" no longer exists (refer to last point, it was changed to "XYZ") I have same issue due to using external disks. If I forget to connect one of them and I try to edit a platform that uses paths to an external disk that isn't connected the program will crash. I keep TV shows and movies on a disk given drive letter M: .....for example "M:\TV Shows\" is listed as the "Games" directory for my "TV Shows" platform, if it cannot be found due to the disk not being connected when I try to edit the TV Shows platform...boom....crash! The way I try to get around this is to change this "Games" directory for this platform to some relative path such as \LaunchBox. This way the crash will not happen if I forgot to connect the disk prior to making some edit. Problem is anytime I import new content the Games directory automatically updates to the directory where I imported those files from....which is going to be the external disk. So, I have to remember to change this path after anytime I import new files for this platform from that disk. The issue is silly. I get an error should pop up, but the program shouldn't have to crash. The program should instead fail "gracefully" with a standard error prompt stating the directory could not be found and the edit could not be saved as a result. Though, this suggestion would only fix the crashing. Users would still be stuck having to edit the non-existent path to a path that actually exists through the relevant XML file(s). So, going one step further, when said error appears it would need to prompt users "Would you like to update the path?" and then we can select Y/N depending on if we wanted to update it or not. If yes, then we can select the new path and problem solved! If no, problem continues but there could be some reason a user does not want to update the path so I think giving the option would still be important. Back to your question though. Since the OP apparently could not (or just didn't want to) change their "XYZ" path back to "ABC" within Windows they would consistently crash in LB. So, since they cannot get to the proper window to edit this within LB, the only way to edit this would be through the actual data file, which for their issue the path(s) were in /Data/platforms.xml and /Data/Platforms/ (specific_system_name).xml so you folks need to change or create the path(s) in Windows to what LB is expecting, or edit the path(s) to what LB is looking for manually through the XML file(s) that means you have the issue on multiple platforms. so, keep editing them until they are all fixed!
-
The one liner here is closing the active window when the Escape key is pressed. The script you have doesn't do what you think it does, the Guide button and Start button are not being told to do anything here. But, there is a much simpler way built right into the frontend! You should instead be doing this through LaunchBox. Go into Tools > Options > Game Controllers > Mappings and simply change the hotkey to what you want. In this case you want the Guide button and Start button (mine is showing the View button and Start button) In LaunchBox it will be called "Exit Game"
-
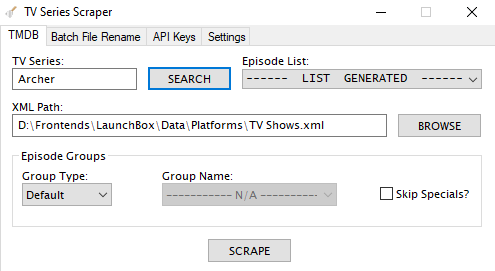
TV Series Scraper
skizzosjt replied to skizzosjt's topic in Third-Party Applications and Plugins (Released)
Hi there! If the GUI never shows up, it is not finishing a specific startup task. Can you please open a CMD Prompt window and then run this line? winget install jqlang.jq this is a Windows package utilized by the script to "pretty print" JSON responses in a human readable format rather than one giant string blob. the GUI waits to be shown until this package is first checked and downloaded if not already present on your system. your system must be getting hung up here on not being able to download it then. The response you should get should look like this. If you are getting something else, please post that and maybe we try and find a solution!
-
Can I zip a pc game and have LaunchBox unzip it and run it.
skizzosjt replied to VisionsIC's topic in Troubleshooting
I don't actually employ this tactic. I just knew it was possible, so provided the answer. In my opinion this only makes sense for a DRM free game, which likely means something old, or maybe a more modern game from GOG could fit the bill. I provided an example using a game from 1998. It's a few GB's in size (maybe less! cannot recall off the top of my head) and would take less time than the frontend's startup screen to unpack it! Meaning, if this method were used optimally a user would have no idea this is how things are being handled under the hood. The amount of space being saved is likely not going to matter much unless you have quite a collection of games that fit this niche use case. Slower is factually correct because even if it's only 1.5 secs long to unpack it, that is longer than not unpacking it. I could not make any argument that it is not slower, but most use cases the extra time will not be meaningful. It would be silly to use this for some monster 100GB+ game for ex. Making clutter though.....meh.....that's a stretch. Consider LB does this with emulators that need ROM files unpacked, and also creates temp AHK files anytime a script is ran that was inputted to a field in LB (like the "Running Script" field). I wouldn't consider that clutter. Users aren't going to care if something is created/deleted for temp use, you gotta go outta your way to find these things. Though LB does this for more operational/functional reasons rather than saving disk space -
the software is not the bottleneck, any third party program claiming they can magically increase transfer speeds is literally a scam/lies. stay away from any company pushing that BS! HDD is likely not going to be getting over 125 MB/s which is not impressive by today's standards when considering NVMe's and the like I've backed up 8TB HDD's over USB before and it does not take 9-10 days so you must have a horribly slow disk or something else is creating the bottleneck. Even USB 2.0 exceeds the speeds of any HDD. USB 2.0 max is 480 MB/s. So, the protocol is not the bottleneck either. RPM of a disk shouldn't impact much in this regard, ie difference of a 5400 vs 7200 RPM HDD isn't going to make a meaningful difference in transfer speeds Consider this, and this aligns with my experience. This should take less than 1 day. Any calculator could determine this, for ex Look at how slow your disk would need to be to predict 9 days of time! 10 MB/s !!!! lol if your disk is this slow it's about to die or has something failing about it. I'd like to think your disk is getting better speeds than 10 MB/s because that is how slow it would need to go in order for this to take 9 days! 222 hours / 24 hours = 9.25 days! USB 2.0 is fine until you get into talking about NVMe drives. Yes, technically, a decent 2.5" SSD could exceed USB 2.0 max rate of 480 MB/s (maybe getting up to around 550 MB/s) but it wouldn't be a huge blow to performance. So, point being here going to USB 3.0 would not be helpful. With the little info shared, I have to assume you are using slow hardware, a spinning platter HDD and though excellent for backups, they are nowhere near the speeds of various SSD's. But your speeds are still a fraction of what they should be! A quick test would be you should connect this HDD via SATAIII (assuming it has SATAIII connection) and see if there is a meaningful improvement. Maybe your USB port/hub is messed up. Also, any chance you are doing multiple things over that USB hub simultaneously? Just because your motherboard has, say, 4 USB 2.0 ports doesn't mean they all have a separate controller. They are normally going to the same controller, making those 4 ports essentially a hub. Meaning if you are doing other stuff at the same time over those USB 2.0 ports these other tasks could be hogging all the bandwidth and forcing this disk transfer to run at a snail's pace
-
Can I zip a pc game and have LaunchBox unzip it and run it.
skizzosjt replied to VisionsIC's topic in Troubleshooting
Here is a working example doing what I describe in my previous post RunWait, 7z.exe x "E:\PC Games\Commandos\Commandos - Behind Enemy Lines.7z" -o"E:\PC Games\Commandos\Temp", C:\Program Files\7-Zip, Hide Run, commandos.exe, E:\PC Games\Commandos\Temp\Commandos - Behind Enemy Lines WinWait, ahk_exe commandos.exe WinWaitClose, ahk_exe commandos.exe FileRemoveDir, E:\PC Games\Commandos\Temp, 1


