.png.d63b88dc3d5c6db8803dfbd996ce65fc.png)
JoeViking245
-
Posts
5,215 -
Joined
-
Last visited
-
Days Won
38
Content Type
Profiles
Forums
Articles
Downloads
Gallery
Blogs
Everything posted by JoeViking245
-
.thumb.png.c9faf450e4d2b690a819048b18173f61.png)
LaunchBox Games Database - Comparer Plus
JoeViking245 commented on JoeViking245's file in Third-party Apps and Plugins
 I'll have to check if those are readily available to filter by. And if so, how easily or not it will be to implement. An interim option is to import them all, then in LaunchBox filter accordingly and delete those one you don't want to see. Same as above. Thanks!!
 -
Boaderless gaming window wont close
JoeViking245 replied to wolfenstein0099's topic in Troubleshooting
And if you revert the $ change, does that error not come up? (granted, when exiting the game, BorderlessGaming (BG) still wouldn't close) And if doesn't come up after reverting, (manually close BG and...) change it back to a $ to confirm (or not), that indeed what's causing the error. (then back-and-forth again for a triple/quadruple confirmation). aka: absolute process-of-elimination. Some thoughts: Run the script from outside of LaunchBox to eliminate LB as the issue (which I'm doubting it is). Make sure not to have both Esc sequences in the script at the same time. The "return" at the end of the escape sequence shouldn't be necessary It may be keeping the script open/running after escaping/exiting the game Though may not be an issue when using SingleInstance Force There's no need to have it continue to run. However harmless. Maybe create (and test) a script that starts BG, pauses 5 seconds or so, and then [attempts] to close BG to confirm that it's even possible with the methods used. Run, "C:\Program Files (x86)\Borderless Gaming\BorderlessGaming.exe" Sleep, 5000 Process, Close, BorderlessGaming.exe MsgBox Borderless Gaming should be closed now (when copying/pasting that 1st line, noticed you have 2 double-quotes at the end of the line. Removed one of them in my example) If Process, Close doesn't work, then try it with the Run, TaskKill... line. Don't need both of them in there. Only the one-that-works. -
When you have LaunchBox update itself (e.g. Tools - Options - check for updates), it adds and/or updates its files necessary to run, in the Core folder (as well as others). The Data folder holds settings files necessary to run, as well as data for systems and emulators you've added to your collection. If one or more of these setting files are missing, LB will create them on next launch. Help is available to work towards resolving whatever "isn't working great". However that does not extend to pre-built LaunchBox installations, as we've no idea, nor care to figure out, how all they did what they did when they installed it (additions, changes, third party add-ons etc.).
-
Boaderless gaming window wont close
JoeViking245 replied to wolfenstein0099's topic in Troubleshooting
That's not an AutoHotkey error. So the $ change wouldn't have caused that. Doesn't look like a LaunchBox error. Which leaves us with a TP or BorderlessGaming error. ? maybe one or the other was still running in the background and you ran the script [again]? ? (speculating) -
Boaderless gaming window wont close
JoeViking245 replied to wolfenstein0099's topic in Troubleshooting
Can you share what the error was? -
Boaderless gaming window wont close
JoeViking245 replied to wolfenstein0099's topic in Troubleshooting
Process, Close, {{{StartupEXE}}} won't work in your script because (I'm pretty sure) {{{StartupEXE}}} is a LaunchBox parameter (vs. an actual AHK parameter). In your original script, you may try replacing ~Esc with $Esc -
This article should help give some insight. After following through, report back if you're still having issues. "Could not install MAME because the archive could not be extracted" Error - LaunchBox
-
Can you share a screenshot of the Critical Error? The varying types of possible critical errors are boundless making it difficult to help without knowing the details. Please also share which version of LaunchBox you're on.
-
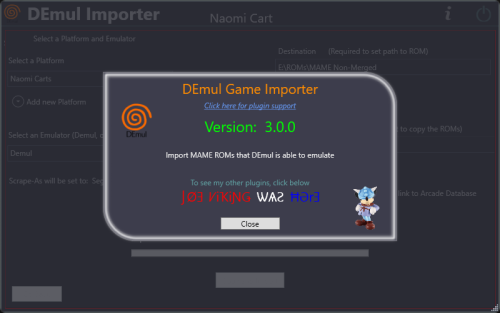 Version 3.0.0 released Improvement: Available games are now taken directly from DEmul (vs. a pre-defined list from 2018). New feature: Added clickable hyperlink to Arcade Database for the selected game New feature: Added (option) When importing, add an Additional App that links to the game on Arcade Database Improvement: When/if re-importing, [also] checks Additional Apps for games already existing (eliminate duplicates) New feature: Adds the command-line parameters for the system being imported to the DEmul emulator, under Associated Platforms. 1st improvement allows the plugin to work with recent beta releases of DEmul. (And will continue to work with the last official release from 2018.)
 -
Good Tutorial On Button Mapping?
JoeViking245 replied to Muzikarcade's topic in Collections and Builds
Your panel can do keyboard, x-input and d-input mode. The encoder I have only has keyboard mode. I presume you'd use KB mode for MAME (but it can use x-input mode). It would be easiest to stick with just 1 mode for all emulators. Keyboard seem fairly universal. That said, your panel most likely has a command line that can be sent (e.g. when starting a specific emulator) that can change modes on-the-fly. Or probably even a button-combo to change it. Still thinking keyboard mode, your panel is most likely setup (universally) as: Player 1 - button 1 = Ctrl P1-B2 = Alt P1-B3 = Space P1-B4 = Left Shift P1-B5 = Z P1-B6 = X P2-B1 = A P2-B2 = S P2-B3 = Q P2-B4 = W P2-B5 = I P2-B6 = K Up/Down/Left/Right = R/F/D/G For RetroArch, I believe most consoles it emulates should automatically get setup. (Again, thinking keyboard mode) For others that typically use a controller, it can be done on a panel. But it's a little less intuitive. And you need to plan out what works for you. Using Dolphin (Wii) as an example, for Mario Kart Wii, I set mine up like: Button 1 (on the cab) = A (on the Wiimote) Button 2 = B Button 3 = Z Button 4 = Tilt Up (gotta wheelie them bikes ) Button 5 = C But I set that up a long time ago and have since got an Xbox 360 wireless controller. It seems to be the most universal for most all systems. You don't have to set it per game (but you can). However ["a long time ago"] that's what I did. But for just a couple of games. The long and short of it is, you need to do it per emulator (RA aside). And assign them in a layout that's comfortable to you. -
2 "different" images.

-
Good Tutorial On Button Mapping?
JoeViking245 replied to Muzikarcade's topic in Collections and Builds
What the actual control panel is, is only necessary to know if can be set to keyboard, x-input and/or d-input mode. Well, the number of players and buttons helps too. Beyond that, the panel name, brand or cost is insignificant. If someone were to have a cab that has 2 players, each having a joy and 6-buttons, and have successfully set it up to use with RetroArch (various platforms), Dolphin, Xemu and the sort, sharing which mode they used, and the mappings made is what would make it helpful. -
Good Tutorial On Button Mapping?
JoeViking245 replied to Muzikarcade's topic in Collections and Builds
Not very helpful. But point taken. Granted, it does take away from the joy of having a cab, certain emulated systems just "need" to be played with a controller. -
Import Roms issue - not working some arcade roms
JoeViking245 replied to gudwls5022's topic in Troubleshooting
I don't believe any platform imports games based solely on the LaunchBox Games Database. Pretty sure they're imported based on the games filename. And in some (most? all?) cases, the file extension as well. The Arcade platform (or Scrape-As Arcade) is unique to most all other platforms. It imports games base on the filename and extension also, but then looks them up (cross-checks) them against the MAME.xml file (located in the Metadata folder). This file is created by running mame.exe -listxml, as mentioned earlier. This will produce a "list" of all Arcade machines [available to MAME]. The 2 you mentioned were removed by MAME at the request of the games' developers. Note: not all games in the "list" are playable in MAME. For the MAME derivatives, e.g. HBMAME, they generally use the same set of ROMs and are able to emulate some games MAME can't. And they may also add in those 2 in question (and others?). I'm not sure if these other Arcade emulators have an available -listxml parameter or at the least, a definitive list of the ROMs (along with the machines game Title) they can emulate. If they do, you might want to put in a feature request to include a custom importing feature for games using those specific emulator(s). (Top of this page, under Help & Support) -
Import Roms issue - not working some arcade roms
JoeViking245 replied to gudwls5022's topic in Troubleshooting
I believe those 2 Cave games were removed from Official MAME, so the ROMs aren't found when running mame.exe -listxml. Which is what LaunchBox uses to cross-check MAME (Arcade) ROMs/games. When in your FBNeo platform (that's set to scrape-as Arcade), you can press Ctrl+N to manually add them. Fill in the games Title and press Enter (to search the database), they'll be found. Then in the Launching section Browse to your ROM(s). Just be sure to spell DoDonPachi SaiDaiOuJou correctly. -
Without knowing the specifics on the error(s) (not sure if the error said which exact files were missing), is there a possibility the version of mame.exe you're testing with is not 0.238? Maybe you have different installs and accidentally started testing with an older version of the executable. Although, looking through the revision releases for the ROM and the CHD, nothing appears to have changed with the 4 total files (3 in the zip and the CHD) in a long time. At least their SHA hashes haven't changed. Not sure if that's an actual indication of anything or not. If my thinking on that is correct, using mame.exe v0.278 with ROM v0.280 and CHD v0.282 should work. Which leads me to think your CHD's may be screwy. As in, maybe something happened during download. And 'the old ones' you used that did work are "not screwy". (technical term. ) If you're so inclined, you could cross check the SHA1 hashes of your files against what's shown on Arcade Database. Or.... just use the older ones and start playing these games.
-
Just tried all 3 and they worked here (0.283 non-merged ROMs and 0.282 merged CHDs). Well Gaunt Legends (1.6) would load and accept coins. But pressing player 1 start wouldn't do anything. But was able to load and start v1.2 (gauntleg12) (which the CHD is [already] in with the /gauntleg/ folder). As for getting a complete set for the CHD's... some food for thought: (this was as of 0.266 as I'm too lazy to update it. 😊) There were 640 CHDs, including clones. 351 of those are parents. If those 351, 57 were considered "working". I'd recommend cherry-picking which ones you decide to get. A great resource for determining which games are considered working is the Arcade Database. e.g. gaultleg
-
Well, that's good to hear you got it working and sad to hear "the source" file didn't work. The only golden source I know of is PD. The 'archive' source is too volatile. Which game were you trying? The ROM filename. Call it morbid curiosity, but would like to test it also. Speaking of "tests", I completely forgot about this little plugin. If all went well, it would have mentioned either an issue with the ROM and or CHD not being accessible to MAME or the files missing (and I believe would also say exactly which files were missing). Maybe if more issues arise.
-
Ah ya, forgot to comment about that. If you find a non-merged CHD set, I wouldn't trust it. From a "reliable" source, they are Merged. Check your mame.ini file for proper formatting of the rompath line. Should be something like: rompath "roms;D:\My Games\MAME NonMerged;D:\My Games\MAME CHDs" Quotes at the beginning and end, only. ; (semicolon) separating each path. Paths can be relative to your MAME folder. e.g. "roms" is a folder under the MAME root folder. And since you've done this and it's working directly in MAME, make sure you DON'T have -rompath %romlocation% in the command-line parameters.
-
Where are your CHD folders located? (semi-rhetorical) This depends on how you tell MAME where your 'regular' ROMs are located. You set the rompath(s) via the MAME UI (or manually edited mame.ini) You have -rompath %romlocation% in you default command-line parameters (in LaunchBox - Edit - Emulator) if (1), you need to also add the path to your CHDs folder. If (2), your CHD folders need to be in the same folder as your non merged ROM set. e.g. D:\My Games\MAME NonMerged\asteroid.zip D:\My Games\MAME NonMerged\dkong.zip D:\My Games\MAME NonMerged\gauntleg.zip D:\My Games\MAME NonMerged\gauntleg\gauntleg.chd 1 & 2 are non-CHD games. 3 is the ROM for Gauntlet Legends and 4 is the CHD folder\file for it.
-
Assuming the games run in Demul standalone, check all 3 boxes.
-
If you let MAME know where the ROMs are, it only needs the filename (without extension). e.g. gradius (vs. gradius.zip) That said, you have either manually set the ROM paths in MAME itself (told it where they're located), you placed them in its /roms/ folder (default location for where it looks) or... in the Details section of your MAME emulator (in LaunchBox), the Default Command-line Parameters has the variable -rompath %romlocation% in it. %romlocation% is a LaunchBox variable in which it replaces that with the full path to the ROM with quotes "C:\Path\To\Rom" e.g. "X:\_RomArchive\__zipped sets\_Mame Roms\MAME 0.283 ROMs (non-merged)" NEVER unzip MAME ROMs. That's just how MAME (and any emulator using MAME ROMs [e.g. SuperModel3]) works. Some emulators need to have the ROMs unzipped to be able to emulate them. 90%+ of the cores in RetroArch for example.
-
In LaunchBox, edit your MAME emulator and uncheck Extract ROM in both the main Details section the Associated Platforms section If there's still issues, share a screenshot of both those sections so we can have a better look.
-
Depends on the platform. MAME (and a couple others) aside, ROMs are typically named after the games Title. For MAME (Arcade), LaunchBox will parse the xml result from mame.exe -listsml to "convert" the ROM name to the games' Title. I didn't realize Daphne had its own set of ROMs. I've only ever used Hypseus Singe for LD games, which uses MAME ROMs (and can be scraped as Arcade). You can watch a tutorial here. Provided Daphne has an accessible means of "translating" ROM name to game Titles (e.g. the -listxml parameter or a definitive source), you might want to put in a feature request (top of this page under Help & Support) to add it as a Scrape-As value.
-
All games have an "Install" button instead of a "Play" button
JoeViking245 replied to SiriusVI's topic in Troubleshooting
At this point, it seems you should be able to go into the All platform, select all games, press Ctrl+E to start the bulk edit wizard, set Installed to the white filled box. vs. or Get it done in virtually no time.
.thumb.png.c9faf450e4d2b690a819048b18173f61.png)