
.png.d63b88dc3d5c6db8803dfbd996ce65fc.png)
JoeViking245
-
Posts
5,298 -
Joined
-
Last visited
-
Days Won
38
Content Type
Profiles
Forums
Articles
Downloads
Gallery
Blogs
Everything posted by JoeViking245
-
.thumb.png.c9faf450e4d2b690a819048b18173f61.png)
Bulk Add/Remove Additional Applications
JoeViking245 commented on JoeViking245's file in Third-party Apps and Plugins
 You might try checking All, then just un-checking the ones you do want to keep. Another option would be to remove all those games, then re-install again. This way you're reinstalling without the 'forgetting to uninstall first'. Either of those might be faster than waiting for me to figure out how to add that in and updating this. But yes, something along the lines correlating the selected rows with the boxes that are (or get) checked would be good. In-line with the post(s) above yours. And like that previous post, I will add this to the someday-to-do-list. No promises on if/when that 'someday' will come.
 -
The import wizard is geared towards adding games to your LaunchBox collection. Not really for 'updating' it. Arcade is unique to other platforms in that its ROM set encompasses all things arcade, emulatable or otherwise. Including but not limited to Arcade machines, fruit machines ("slots"), pinball and handheld games. I won't even go into its soflists side of things in which the main ROM set includes all the devices and bios files for. Even more unique are the 3 types of ROM sets MAME has. Merged, non-merged and split. That alone can make updating your collection challenging. It's primarily because of these differing sets that Arcade is purposefully blacklisted from the AutoImport feature. With MAME being updated monthly, there's no real automagical way to have newly added ROMs classified into their respective 'genres'. e.g. poker/casino, fruit and handheld (which is a lot of what's being added these past months). This part of the MAME integration into LaunchBox is done [at least] semi-manually. And doesn't (can't?) happen as-soon-as a new update comes out. I have no idea how frequently LB developers update that aspect of it. I presume within a week-ish of the [MAME] new release. I suspect this is what/why you're seeing the post 13.21 issue. Thanks for the follow up on the bezel updating. That's good to know. RE: -listxml, when importing, LB will actually run that [in the background] to get a list of MAME ROMs your MAME emulator is aware of and use that to import from. When doing a fullset import, LB doesn't even look at all ROMs you have in your set. It just goes off "the list". e.g. if you have a 0.284 ROM set, but your mame.exe is 0.179, you'll have a lot fewer playable games imported than are in your set. (a farfetched example, just to show a point).
-
This was fixed in version 13.21 (Apr. 24, 2025) "MAME Gambling games are now marked as Casino games allowing you to easily filter them out during imports" Don't have LB delete media when deleting your existing Arcade platform and then click None for both LB and EmuMovies media during re-import. Since MAME doesn't really add many "new" machines between releases, those few games will be easy to identify. If you are manually updating your emulator, you can of course skip that step. I haven't checked in a long while, but I believe when "updating" this particular emulator, LB will install (unzip, basically) MAME into a new folder, suffixing the folder name with the release number. Essentially giving you a "new" install vs. updating your existing install. It then reassociates the game to use the "new' emulator. Do note that a new/fresh install of MAME only includes the base files and that there are no configuration files included. I manually update my MAME emulator myself. Which involves downloading the binaries from MAMEDev, right-clicking the exe file and opening it with 7zip (as the installer is just an executable zip file). Then copy the complete contents of the "zip" into my existing MAME folder. After at least 5 years and doing monthly updates, I've never ran across an issue doing it this way. If doing a full import, I don't know. If after the import is complete you go to Tools < Download < Update Metadata and Media for Selected Games..., I'm fairly certain it will only download the missing artwork (bezel files). But I not 100% on that. It shouldn't affect your Categories at all. Since you're importing only one Platform (Arcade), it will still get added under the Arcade Category. If your current Arcae Platform is under multiple Categories, then you will probably need to reset that in the Platforms Parents tab. On the other hand, Playlists you had or have manually created that look specifically for games in the Arcade Platform will still be there. Maybe someone else can chime in on how best use the import wizard for monthly updates. I don't use it for that. I update my Arcade ROM set each month, update the emulator as mentioned above then read through whatsnew.txt to see what new Arcade Machines were dumped/added. If I see something intriguing, I'll manually it (them?) using Ctrl+N. There's also a plugin in which you can see what new Arcade Machines have been added with each release. It only shows you MAME cabs, so you're not inundated with fruit machines and the sort. Unfortunately, since the plugins release, there haven't been any "new" machines added to speak of. A lot of new or updated ROMs, yes. But not cab machines.
-
The purpose of the emulator integration plugins is for installing and updating those emulators. It won't actually update the emulator until you specifically tell LaunchBox to do so under Manage Emulators. To get rid of the update plugin notifications, you can update the plugins [without having any effect on your existing emulator installs].
-
The error code indicates there's an issue with your license file. Contrary to the message, you need to contact support regarding licensing issues. email: support@unbrokensoftware.com
-
MAME cheats only have Autofire as option
JoeViking245 replied to jruizleon's topic in Troubleshooting
Is the cheats file compatible with the version of MAME you're using (looks like 0.279 is the most recent)? You're using stand-alone MAME. Correct? Or MAME via RetroArch? Are you using MAME from MAMEDev? Or a derivative of MAME (like MAMEUI)? Which version? Just tested here with cheats 0.279 and MAME 0.284. Placed "cheat.7z" in the same folder as "mame.exe". Started MAME and enabled Cheats (and Autofire) in General Settings - Plugins. Exited and restarted MAME. Started "1942", pressed Tab and selected Plugin Options and both Cheats and Autofire were showing. Maybe the game you're testing doesn't have cheats available for it. Not really sure how that works as I don't use it.
-
MAME cheats only have Autofire as option
JoeViking245 replied to jruizleon's topic in Troubleshooting
The zip file goes in the same folder as mame.exe. Individual game custom xml files go in the /cheat/ folder. Autofire is a MAME plugin. -
It moved to here: MASH's MAMEINFO
- 1 reply
-
- 1
-

-
Having issues with Big Box and dual monitors
JoeViking245 replied to FurabioS's topic in Troubleshooting
What Windows sees as monitor #1 and monitor #2 is not necessarily how Big Box sees them (order-wise). It's not a bug or something that will cause ill side-effects. It's "just a thing". In Windows, set your monitors in the order you want them. Then in Big Box, change it to "1" or "2" until BB is on the monitor you want. Also, though "shouldn't" affect your particular setup, when setting up the monitors in Window's Display Settings, align the tops of the 2 'monitors' and have them side-by-side (vs. one on top of the other). It "seems" like this shouldn't matter, but (e.g. not having the tops aligned) can have undesirable effects.
-
At first, it sounded like something was done to do a mass edit on all your games. Which was really odd. That Feature, also found under View - Show/Hide - Versions, toggles showing the version along with the games Title in the Main section.
-
 Unless the plugin developer specifically checks for "IsPremium" (or by some other means) and blocks the plugin if "false", 3rd party plugins will should work with the Free license.
- 214 comments
-
- 1
-
-
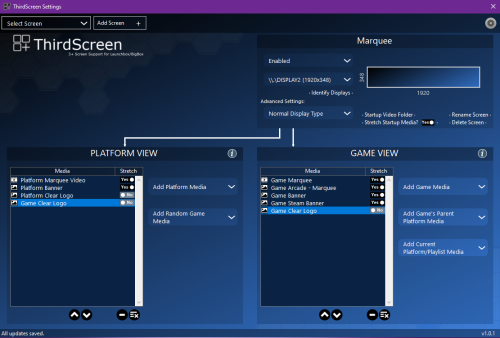
- third screen
- platform marquee videos
- (and 3 more)
-
What are the default command line parameters for Suyu?
JoeViking245 replied to Frex16's topic in Emulation
According to the help printout, yes. What's your games ROM path pointing to? -
What are the default command line parameters for Suyu?
JoeViking245 replied to Frex16's topic in Emulation
When running suyu-cmd.exe -h from the Command prompt, it shows: -c, --config Load the specified configuration file -f, --fullscreen Start in fullscreen mode -g, --game File path of the game to load -h, --help Display this help and exit -m, --multiplayer=nick:password@address:port Nickname, password, address and port for multiplayer -p, --program Pass following string as arguments to executable -u, --user Select a specific user profile from 0 to 7 -v, --version Output version information and exit -l, --applet-params="program_id,applet_id,applet_type,launch_type,prog_index,prev_prog_index" Numerical parameters for launching an applet. If no game is provided, then the applet will launch off of the applet_id. Make sure you're using suyu-cmd.exe for the executable. -
Starting Themes work in Desktop mode, but not BigBox.
JoeViking245 replied to onebadveggie's topic in Troubleshooting
I think it's time to file a bug report. Top of this page under Help & Support. -
Starting Themes work in Desktop mode, but not BigBox.
JoeViking245 replied to onebadveggie's topic in Troubleshooting
A couple quick tests shows switching the games startup theme in Big Box on-the-fly isn't applying the newly selected theme. But switching theme, exiting/restarting Big Box does work. Tested back-and-forth between Default, SlipStream and StageBox startup themes. Same results each time: The "old" (originally selected) startup theme still showed until Big Box was restarted. But... (regarding your PS2 dilemma) when I switched back to Default, exited and restarted Big Box, then launched PS2's Arctic Thunder, the spinny disc, spun. aka it used the 'Sony Playstation 2.xaml' startup file. So maybe the restart is the trick? "trick". NOT to be confused with "solution". BB not applying the changed startup theme seems like it may be a bug. 🐞 Which brings me to, my tests were all using LaunchBox version 13.25-beta-3. Yours? (I didn't test on any earlier versions of LB/BB) -
Starting Themes work in Desktop mode, but not BigBox.
JoeViking245 replied to onebadveggie's topic in Troubleshooting
(just some background info...) For game startup themes, it will use the xaml file that has the same name as your platform. If it can't find one named the same, it will look for one named after the platforms Scrape-As value. If it can't find either of those matches, it will use Default.xaml. However, it doesn't explain why you see the spinning disc when launching a Sony Playstation 2 game from LaunchBox and not from Big Box. So call this a non-helpful fyi reply. -
how can change name on your email
JoeViking245 replied to thepersonyes's topic in Collections and Builds
Read here: LaunchBox Licensing FAQ - Name or Email Change on a License -
Themes. Latest Build. Maddening. Need Help, Please?
JoeViking245 replied to Rotgut's topic in Troubleshooting
Sounds like you had downloaded a custom theme. Can probably look through the Big Box Custom Themes section of the Downloads area and see if the image previews show the one with the awesome backgrounds, you're referring to. Alternately, in Big Box itself, you can look at previews of the 20 popular themes via System Menu - Manage Themes - Available Most Popular. If you find it there, you can install it directly from there. -
Help Us Expand the LaunchBox Games Database!
JoeViking245 replied to AstroBob's topic in News and Updates
A Feature Request was made for this that you may want to look at, comment/expand on and/or upvote. Missing Platform in the Game Database: Mega LD / Pioneer LaserActive -
Ran a test for importing... can't find 'mspacmanf' as a MAME ROM. But 'clubpacm' (and 'clubpacma') should import without issue. On the How would you like to import your MAME games screen, be sure to un-check Skip hacked games.
-
You can manually add it. Press Ctrl+N, enter the games Title. Go to the Launching section and Browse to the games file and select it. Press OK to save & close.
-
Pause-Menu Music Player
JoeViking245 commented on JoeViking245's file in Third-party Apps and Plugins
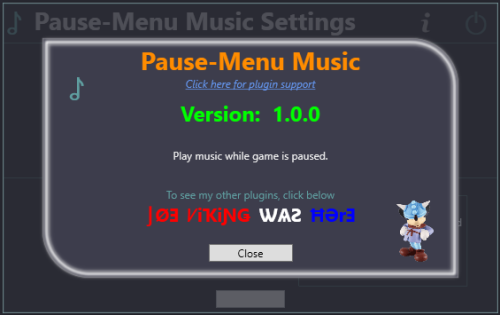 Oops. Didn't account for multiple tracks in all the code. 1.2.0-beta-2 PauseMenuMusic (v1.2.0-beta-2).7z
 -
Pause-Menu Music Player
JoeViking245 commented on JoeViking245's file in Third-party Apps and Plugins
lol Can you please attach your .m3u file (drag and drop the file onto your response here. Don't copy/paste the contents) and also the log files found in the plugins /Logs/ folder? -
roms Unable to add roms in Launchbox!
JoeViking245 replied to ServiceMode's topic in Troubleshooting
Carefully follow all of the steps in the "possible solution". Note that the mentioned "curated copy" that is created is your [new] 4GB set. Once done, and satisfied, delete the folder the full set ("complete set") is in. e.g. F:\MAME 0.284 (non-merged) You won't be able to later to retrieve a future-discovered "gem". (Well, you can. By going through the process that initiated this post. ) But this will accomplish what you're asking for. Having a 4GB set and no full set. Please take some time and carefully re-read my previous 2 posts as they're pretty elaborate to begin with. Then if you have questions about a specific item in them, ask. -
roms Unable to add roms in Launchbox!
JoeViking245 replied to ServiceMode's topic in Troubleshooting
Follow the steps I outlined above. As stated above: If you were to start with a full set, you can cherry pick from that. Then if you later discover a "hidden gem", you can go back to your full set and "pull it out". The process I outlined creates your "4GB only games" set. AND maintains the full set. Which you can keep on an external drive, or wherever, so that it's out-of-the-way. Yet available. Again: Note: This process will only work with a non-merged set! Adding new games: Then when you discover a "gem" (like Gun Force 2) that's not in your LaunchBox collection, go to your external drive (or wherever) and copy gunforc2.zip to where you have your "4GB only games" set. Then use Tools - Import (or Ctrl+N) and navigate to where you copied the ROM to. Keeping the full (non-merged) set intact (somewhere, wherever) is cheap insurance in case something was to happen with your "4GB only games" set. Also, it makes it easy to retrieve the "gems" from.
.thumb.png.c9faf450e4d2b690a819048b18173f61.png)


