
.png.d63b88dc3d5c6db8803dfbd996ce65fc.png)
JoeViking245
-
Posts
5,259 -
Joined
-
Last visited
-
Days Won
38
Content Type
Profiles
Forums
Articles
Downloads
Gallery
Blogs
Everything posted by JoeViking245
-
.thumb.png.c9faf450e4d2b690a819048b18173f61.png)
Create custom startup animations/ sound effects?
JoeViking245 replied to CuzzinChizzy's topic in Startup Themes
If you look in ..\LaunchBox\StartupThemes\Default\ you'll see Default.xaml which is the default startup View for all platforms. You also see Nintendo GameCube.xaml which is specific for that platform [which in turn, overrides the Default.xaml]. The latter having the Spinning Disc Animation. Same with the other platform specific xaml files in that folder. You can make a copy of the \Default\ folder, add/remove platforms to your hearts content, and edit them to your liking. When done, [with LaunchBox premium] change the default startup theme to your new (modified) theme. Tools < Options < Gameplay < Game Startup There's a writeup about Startup Themes in the Help Center / Strategy Guide. Startup Theme - LaunchBox Though at this point doesn't offer up much more info than what I've said. Getting into the nitty-gritty of xaml manipulation is a whole 'nother thing. As for adding sounds effects, I'm sure that's possible. And is probably relatively simple to do. (Once someone figures out how to do it. Note, that won't be me. ) I've honestly never looked, but there may be some already in the Downloads section (Don't hold me to it) that you can use/use as a reference. Maybe. -
Can't add item already existing LB DB to Launchbox
JoeViking245 replied to Skyroller's topic in Troubleshooting
Did any of the other platform versions/ports show up with just "Shantae"? I just tried it, and it was found here. This is what I did: Clicked on the Nintendo Game Boy Advance platform went to Tools < Import < Manually Add Game... (actually I just pressed Ctrl+N. Same thing). typed in "Shantae" (without quotes) and pressed Enter
-
Edit playtime of games in Launchbox 13.21
JoeViking245 replied to Turaltay's topic in Troubleshooting
Edit from within LaunchBox? No. You are able to reset them (play-time and play-count) to 0. Right-Click Game < Edit < Reset Play Count & Time There is a feature request to allow for this. Feel free to upvote (and comment,) if you wish. Manual Playtime Editing - https://feedback.launchbox.gg/p/playtime-manually-edit-function -
I tried here and it worked as expected. I'm not savvy enough to know what SSL connection actually means (without googling it). Hopefully someone in-the-know can chime in if it doesn't resolve itself or you can't find a workaround.
-
LaunchBox Games Database Image Viewer-Plus
JoeViking245 commented on JoeViking245's file in Third-party Apps and Plugins
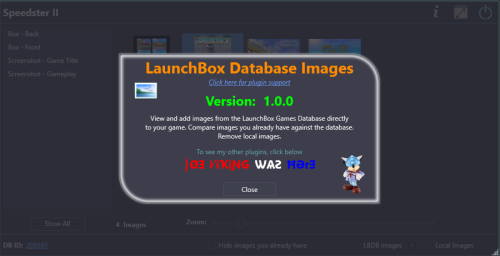 Tanks! Glad you find it handy. For all 3 of them? The info window's kind of cluttered already. I'll add this to my requests list and see if I can come up with something that doesn't get in the way. Until then, here they all are: F show selected image Fullscreen Delete Delete (remove) selected local image I switch between database and local Images
 -
1st off, you've got a lot of nice 3rd party plugins there. That said, Third-Party plugins do not (will not) appear in the LaunchBox Plugins Manager. Only ones that are LaunchBox sanctioned integrated ("xyz LaunchBox Integration" and the "GamesDB Discovery Lists") As for the media issue, I'm not sure. You might try force updating your local database file. Tools < Download < Force Update Games Database Metadata...
-
How to show arcade game vertical wheel screen on bootup
JoeViking245 replied to Symon's topic in Playlists & Playlist Media
The Game Details Screen. System Menu < Options < General < Skip Game Details Screen Then once you're satisfied, take a look at the other items under Options. There's [potentially] a lot of other cool stuff you could use there. For example, for your hard-core, advanced users, you could map a cab button to Show Game Details Screen. (I use Player 2 button 4 [for whatever reason]) Keyboard mode: System Menu < Options < Keyboard Mappings < Show Game Details Screen Xinput mode: System Menu < Options < Controller Mappings < Show Game Details Screen -
How to show arcade game vertical wheel screen on bootup
JoeViking245 replied to Symon's topic in Playlists & Playlist Media
It sounds like you just have the 1 platform (Arcade). So in your case you basically want to have your Default Startup View be All Games. System Menu < Options < Views < Default Startup View: All Games -
database disk image is malformed Error
JoeViking245 replied to TheMadMan007's topic in Troubleshooting
In that particular Feedback and Bug Reports thread, if you click "Continue Reading" it'll show you SOLUTION Run the following tool: Tools > Download > Force Update Games Database Metadata- 1 reply
-
- 1
-

-
Off hand, my guess is the [extra] period you have between unmute and bigbox. You can try putting the entire parameter "within quotes" (just like you have in the batch file). Or try removing that dot ('period'). But NOT the dot before ahk. If you end up going this route, create a shortcut to the batch file. Right click the shortcut and select Properties. Next to "Run", change it to Minimized. Click OK to save and close. Then point to the shortcut.
-
I would like to remove the rounded corner from the box art.
JoeViking245 replied to KingCronecker's topic in Troubleshooting
Would be best to put in a Feature Request so it doesn't get lost here. (Top of this page, under Help & Support) -
It does. But I thought you already put the BIOS (neogeo.zip) into the same folder as the ROMs. And make sure you're still working with SNK NeoGeo Carts and not SNK NeoGeo CD. Also, in most cases, you don't need to have the media type (i.e. -cart) in the command-line parameters. So here you could have just: -rompath %romlocation% neogeo For [future] Reference: Go here: http://adb.arcadeitalia.net/dettaglio_mame.php?game_name=neogeo Scroll down to and click on SHOW... That'll show what files are required for that system. Save the above link, change just the last part (neogeo) to the system you're working on next. (32x, neocd, etc.)
-
LaunchBox Games Database Image Viewer-Plus
JoeViking245 commented on JoeViking245's file in Third-party Apps and Plugins
v1.3.3 Released New Feature: When viewing an image fullscreen, use Left/Right arrow keys to navigate through all images. -
I would like to remove the rounded corner from the box art.
JoeViking245 replied to KingCronecker's topic in Troubleshooting
No. You can remove the "OLD square corner". You just won't be able to use that [customized] theme. Again, you need to purchase a license to be able to use a custom theme. You can't modify the Default Theme because it will "fix" itself if changed. (hence needing to make a copy). As all was stated previously by Neil. You could try the Old Default theme (which I believe still comes with the free version) and see if that's better suited to your liking. -
I would like to remove the rounded corner from the box art.
JoeViking245 replied to KingCronecker's topic in Troubleshooting
You can practice it in theory by following along in the above posts. Main key point is, if using the Default theme, you need to make a copy of its folder and then edit the copy. That said, the free version of LaunchBox does not support custom themes. So to make the above 'practice' a reality, you would need to purchase a license. -
When it does freeze, if you press Alt+Tab and (while holding Alt) tab to Big Box, let go of Alt, does it then function as it should? If so, check your Keyboard Mappings to see if you have Esc mapped to more that item. Be sure to check in Keyboard Automation also.
-
Copying clones along with roms and finding out missing roms.
JoeViking245 replied to Opus132's topic in Noobs
If you indeed have a non-merged set (and not a merged set), you could use Tools - Scan - Scan for Removed ROMs. That'll bring up a message box with "the list". You can then highlight and copy the contents of that message box to a text file. Or wherever. But it's limited to showing only a certain amount. So if you have a ton of ROMs missing, you may need to do it in stages. And there it is. Also, MAME rarely changes ROM names. And usually when they do, it's actually a re-naming of a ROM. i.e. the game 1942 (1942.zip) When they had the Revision A ROM, it was named 1942.zip. Then when they came across Revision B, 1942.zip became 1942a.zip, and Rev. B became 1942.zip. With certain disorders comes great personal responsibility. If the Scan mentioned above doesn't fill the void enough, you may want to Request a Feature. (Top if this page under Help & Support)
-
I think 32X may also need 32x.zip. (It's been a while since I looked at it.) Start with checking both boxes, just like you do with Arcade. (In fact, you could just the one emulator. Up to you.) Then in the Associated Platform section, add to the beginning of the command-line parameters -rompath %romlocation%. This assumes any BIOS or other support files for that console are in with the console's ROMs. (as you indicated you did with SNK) See if that helps any.
-
Could it be you have Exit Game mapped in LaunchBox? (Tools < Options < GameControllers < Mappings) Or if in Big Box, Close the Active Window. (System Menu < Options < Controller Mappings)
-
Error importing rom files since updating to 13.21
JoeViking245 replied to LifeOfBAM's topic in Troubleshooting
K. Just wanted to clarify the actual message.
-
Error importing rom files since updating to 13.21
JoeViking245 replied to LifeOfBAM's topic in Troubleshooting
Umm... Sound precarious. Can you share a screenshot of that actual message? -
Are you able to run games directly from stand-alone "Retro station" (or did you mean RetroArch?)? That is, without trying to launch them via LaunchBox.
-
How do I close an Additional App (UCR) after a game quits?
JoeViking245 replied to bradbradbrad's topic in Troubleshooting
Get creative and have the batch file "tell itself to run the commands elevated". You don't need to run/execute this [example] batch file as Admin, but it will start "notepad.exe" elevated (as Admin). Adjust ONLY THE ONE LINE to meet your needs, accordingly. @if (0)==(0) echo off >nul 2>&1 "%__APPDIR__%net.exe" session &&goto __elevated__ set __args__=%* "%__APPDIR__%cscript.exe" //nologo //e:jscript "%~fs0" exit /b :__elevated__ :::::::: update below here ONLY :::::::: start "" notepad.exe :::::::: update above here ONLY :::::::: goto :eof @end new ActiveXObject('Shell.Application').ShellExecute('cmd.exe','/c ""'+WScript.ScriptFullName+'" '+new ActiveXObject('WScript.Shell').Environment('PROCESS')('__args__')+'"','','runas',1); Don't change anything except the line that starts with start. Change that line to execute whatever you need ran as Admin. Pro tip: Lines starting with :: (2 or more consecutive colons) are comments in a batch file. Alternately, you can add comments by starting the line with rem (short for "remark") and is not case seNSitiVe. -
Game missing from database (Towerborne on Windows)
JoeViking245 replied to 8d6FireDamage's topic in Troubleshooting
The LaunchBox Games Database is user supported. Forum support for the database is located here: LaunchBox Games Database - LaunchBox Community Forums Being as it is user supported; you can add it to the database by going here: LaunchBox Games Database and click on Add new Game.
-
Bulk Add/Remove Additional Applications
JoeViking245 commented on JoeViking245's file in Third-party Apps and Plugins
 Thanks for letting me know. V1.2.0 Fixed: Bulk Remove: Selecting Check All with no platform selected causes error. New Feature: Added * All 'platform'. Selecting this will show every Additional App. Deleting from this 'platform' is disabled. Being able to delete from the "* All" platform requires quite a bit more of a code rewrite. Based on all the positive reviews, I'm not sure it warrants the time that would be involved to do it.
.thumb.png.c9faf450e4d2b690a819048b18173f61.png)


