-
Posts
13,723 -
Joined
-
Last visited
-
Days Won
388
Content Type
Profiles
Forums
Articles
Downloads
Gallery
Blogs
Everything posted by Jason Carr
-
Bug software in BigBox. Please FIX it soon! Thanks
Jason Carr replied to marcosgaming's topic in Troubleshooting
Hi @marcosgaming, I'm not following 100% here. Are you saying that games without videos aren't showing back up after unchecking the "Hide games without videos" box? -
Yes, we do have plans for this for a future release.
-
Are you using any third-party anti-virus or anti-malware software?
-
Unfortunately, just because your file explorer shows these network drives doesn't mean that you'll have that support for the rest of Android, outside of the app. Android doesn't have good global file share support. Some devices add it globally (such as the Nvidia Shield), but most devices don't. So we would have to build our own file share support from scratch for those devices, which honestly, is not likely to happen. Sorry I don't have better news.
-
You may need to change it to the other storage mode.
-
You shouldn't need double the videos on your device, but we don't yet have a solution for this. It is on our short list. Thanks for the support.
-
Most likely you just need to play with the Windows screen positioning settings. Go to your Display settings and try dragging the screens around to different spots. That should fix the issue if you find the right spot for the screens.
-
Unified Redux was just updated today with the 3D box models. I'm not sure what CriticalCid's decision will be with this version.
-

LaunchBox for Android New Version - Beta Testing
Jason Carr replied to Jason Carr's topic in Android
Just an update for you all on development. I actually dove into the RetroArch for Android code and submitted a pull request to them a few weeks ago: https://github.com/libretro/RetroArch/pull/14578 I'm hoping that they'll merge it here soon, so that we'll be able to implement an auto-install and auto-configure feature for RetroArch on Android. This way, we should be able to automatically install RetroArch and download the necessary cores, without any manual interaction inside of the RetroArch interface. So that is planned here for the next release, if we can get RetroArch to merge that pull request. I have been in talks with someone from the team over there, so hopefully that all will work out here soon. -

LaunchBox for Android New Version - Beta Testing
Jason Carr replied to Jason Carr's topic in Android
This is definitely coming, though I'm not sure exactly when yet. -
Hehehehe.
-
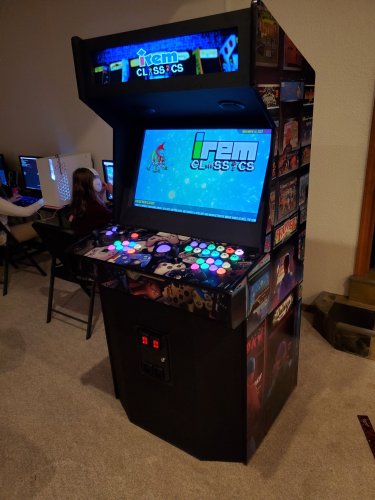
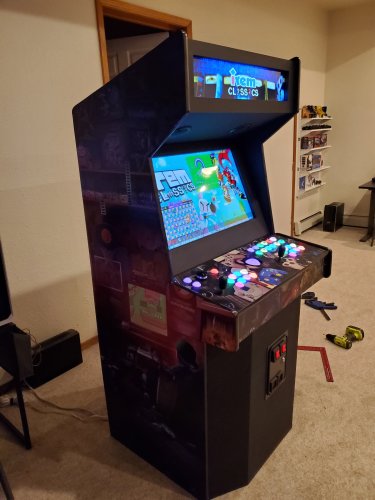
Oh, one last note that I completely forgot about: I added a button to the control panel above the 1st player buttons (it's red in the cabinet photos above). I wired that button up directly to the headers on the motherboard for the power button and the power LED. I just wired the power LED into the red channel. This way, that button acts exactly like a power button on your typical PC, and lights up when the computer is on. So I have an easily-accessible power button for the computer. Even better, I ordered one of these: https://smile.amazon.com/dp/B08LSXXG7R?psc=1&ref=ppx_yo2ov_dt_b_product_details I can connect the computer up to the "master" plug-in, so that the monitors, speakers, etc. all turn on and off with the computer. So it will truly be one button on the control panel to turn everything on and off. Edit: It will really only turn the computer on. I've disabled the shut down functionality for the button in Windows for obvious reasons. So I'll just use Big Box's shut down functionality to turn everything off.
-
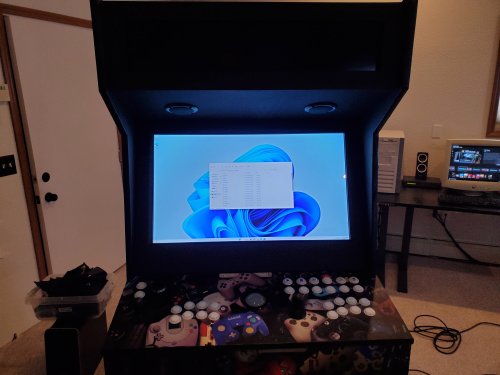
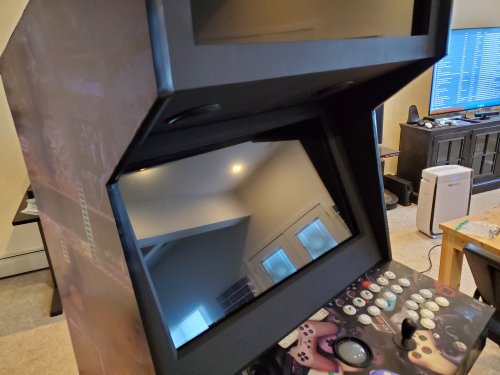
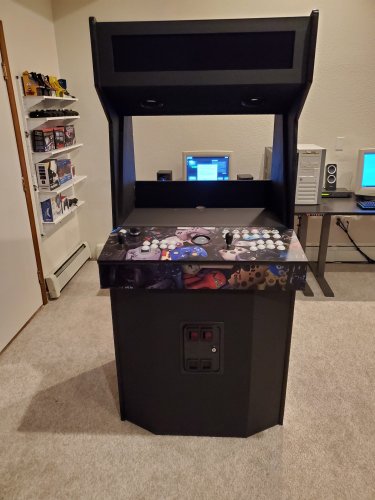
At this point, the only things left are the control panel and the side wings. The control panel was a major fiasco, and I had to order more parts from Ultimarc several times. Honestly, Ultimarc does not at all do a good job explaining to you what you need, what you get, how to install, nothing. They seem to make decent products, but installing their stuff is a recipe in frustration. The biggest issue I had is that the wiring harness that you get with the $100 I-PAC Ultimate IO is nowhere near big enough for a 32" cabinet (the cables just aren't long enough to reach all of the buttons). They sell an extension kit, but it really sucks, because instead of just giving you a longer wiring harness, they expect you to have a specialized tool to remove wires from the existing harness and put in the longer wires. Good luck with that. I ended up doing a combination of using some existing connection pieces that I had and basically breaking wires out of the harness. It was honestly a mess. So anyways, I'm not really sure what other options are out there, but Ultimarc needs some serious feedback on communication and product design, in all honesty. What a mess, and most of the issues were completely unnecessary if more thought had been put into things. I can't decide if things are the way they are because they want to nickel and dime everyone, or if it's just because they're stuck in the past, or what. I don't get it. Regardless, everything did come together eventually, but I had to wait an extra week or more because of missing parts and gotchas that no one would have been able to expect in building the controller board. So if you're building something similar, work on it early in full expectation that you'll probably have to wait and revisit later. You'll probably also need more parts than what Ultimarc has on offer. I would make more recommendations here, but I had never done arcade wiring before, so I'm anything but an expert on any of it. One last note on the controls: the Mag-Stik Plus joysticks that I bought are just okay. I'm not sure if I would recommend them for anyone's next build. I'm getting used to them, but initially I had issues with them sticking and I still have trouble switching one of them between 4-way and 8-way modes. I will say that standard joysticks do seem to be a lot more reliable. I am sticking with them for now, though, partially because I don't want to modify that controller board for a very, very long time if I can help it. Regardless, it did finally all come together. The controller board is in place, all the buttons and lights work perfectly, and lastly I attached the side wings. Here it is in all its glory: It's not perfect, but it's very, very close. I'm super happy with it, and very glad I went through the process. I don't want to do it again though. Gonna stick with my day job. I'm planning on doing a tour video of the cabinet here very soon. I'm far from a videographer but hopefully I can get that done well enough with my phone. Thanks for following along with the process!
-
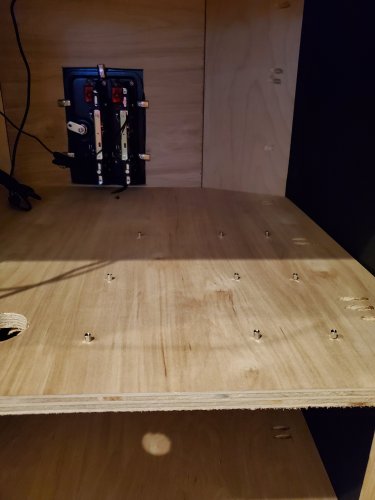
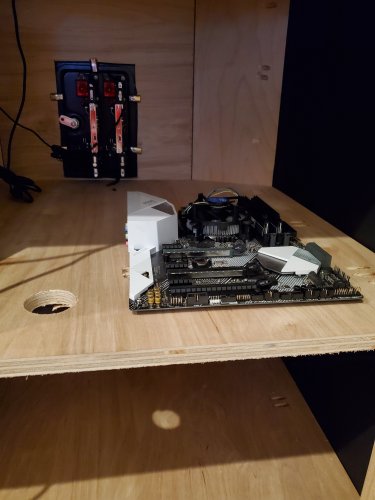
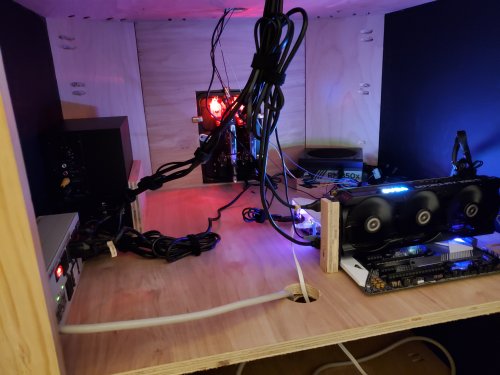
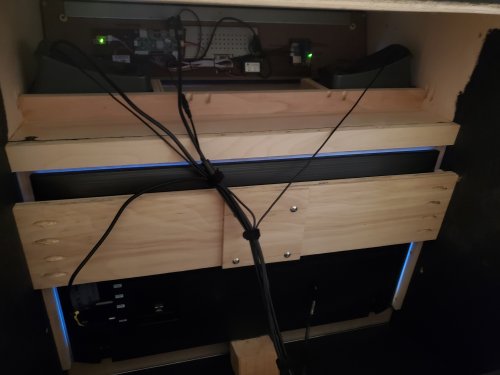
I haven't shared anything about the computer in the back yet though. I ended up just using a small drill bit and some normal standoffs to mount a motherboard directly in the back: Note that I also drilled a couple of holes next to the motherboard in order to be able to mount the video card. I could have used a PCI express riser cable and mounted the GPU horizontally on the plywood as well, but I've had issues with those in the past and just didn't want to deal with it (nor did I have one). So I mounted the video card normally and added a block of plywood for support: You can also see the power supply mounted with a simple friction fit of a piece of plywood in the back right, and the same thing with the subwoofer for the speakers in the back left. This all works rather well and nothing is moving around while I move the cabinet around, though they might come dislodged if I was ever to ship the cabinet...but I don't ever plan on doing that, so that all works for me. Here's a pic of the upper part of the back of the cabinet: You can see the monitor mount, the marquee monitor above it, and the speakers. I did build some simple resting pieces out of plywood for the speakers up top as well. Continued in next post.
-
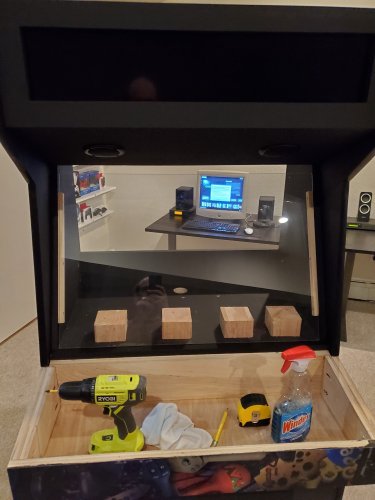
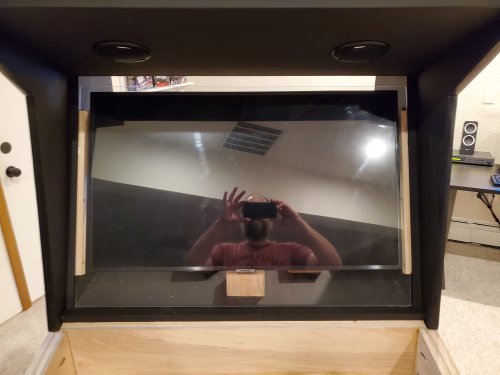
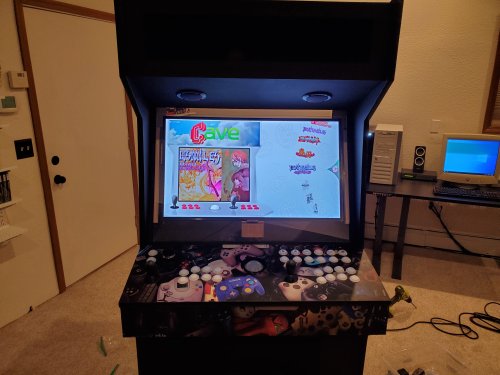
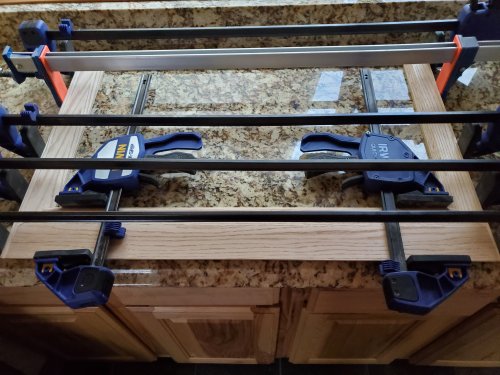
Now it was on to mounting the monitor (TV). I started by purchasing some glass from https://www.onedayglass.com/. I had used them previously to order some glass for my Rec Room Masters cabinet (to replace the plexiglass that it comes with). Then all I did was add a couple of small pieces of wood to keep the glass in place from the back: For now, ignore the four blocks of wood on the bottom. I was just using those as spacers while trying to measure out where to put the TV. I put the two pieces of wood on the sides back just a little bit, so that the front of the glass would be flush with the black painted edges of the frame. For now, the glass was basically just resting there. Next, I grabbed a piece of plywood and rigged it up to the vesa mount on the back of the TV. Then all I needed was some pocket holes on the left and right edges of the plywood piece to attach it wherever needed to the sides of the cabinet: I played around with the placement of the TV a bit, but I found that the picture was best if I jammed the TV right up into the glass. So the TV is literally pressed up against the glass, and I'm amazed how well that looks. The screen looks a ton better than the screen on my Rec Room Masters cabinet, which was a couple inches back from the glass. No idea why they did it that way, but oh man, this arrangement looks amazing. So anyways, now we have a mounted TV that is secure in place, with the piece of glass resting in front of it: Now the only thing missing was a frame to cover up all of the ugly parts, and keep the glass in place. This was admittedly a little difficult because I wasn't using plans for any of this, and I had to learn how to make cuts with miters on two different sides, and similar things. It was also a lot of trial and error, making things slightly too big on purpose, test-fitting them, making them slightly smaller, testing-fitting, etc. over and over again. Eventually though I had the pieces of my frame done and glued them all together: After painting the frame and finally putting it in the cab, it all started really coming together: Continued in next post.
-
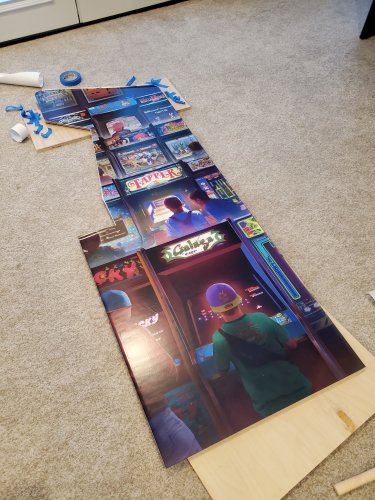
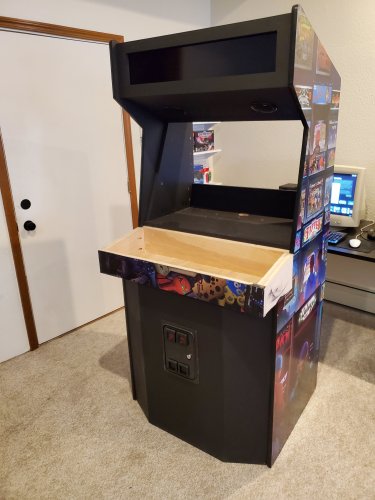
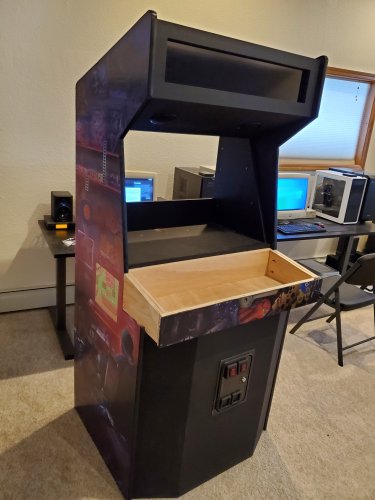
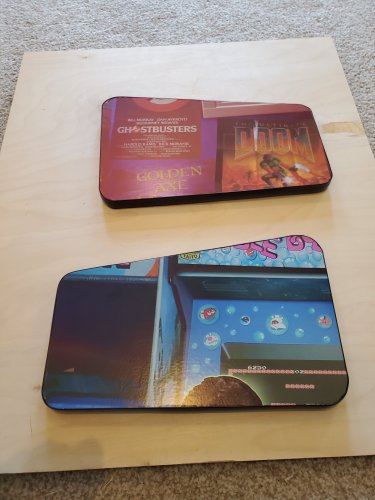
Next I tackled the artwork for the side pieces: Thankfully the artwork for these went on clean and everything looks great on both pieces. I still don't know what the difference was between what I did on these side pieces and what I did on the wings, but I'm very grateful that the biggest artwork applications worked out well. Applying the T-molding to the big side pieces was a small challenge, but nothing too bad. I did find it very important to have a pair of flush-cutters on hand, though, which I had to order before I could finish the job. It also might be worth noting that you'll want to watch a tutorial before attempting it, because there are some gotchas. And finally, I mounted the side pieces on the cabinet: The side pieces went on fairly easily, but I did have to screw in quite a few screws (some of them pocket hole screws) in order to really bring them in flush with the rest of the cabinet in all spots. Otherwise, there were areas where light was shining through, such as on the edges of the bottom angled front piece. It did turn out quite well though. I then did a test-fit of the controller board with the rest of the cabinet: Looks nice, doesn't it? I did change up the controller board slightly later on though (this was before putting the artwork reprint on the controller board). Continued in next post.
-
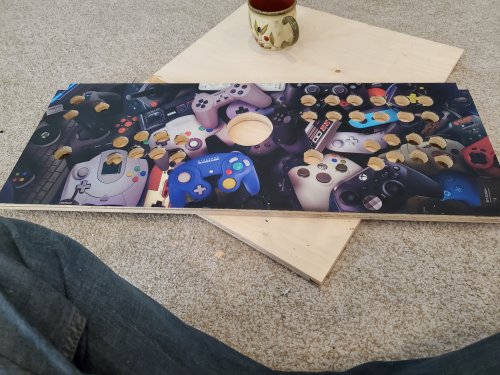
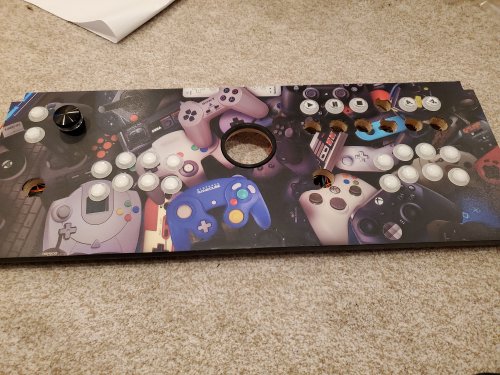
Next I worked on applying the graphics to the control panel: And started putting the controls in: I made a pretty unfortunate mistake though. I cut all the holes out all the way up to the edge of the holes, which should work in theory, but after plugging in some of the buttons to light them up, it really didn't look very good. So, just like with the art for the wings, I had to order a reprint. Redos definitely started to become a trend with this project. After ripping off the art, re-sanding, repainting, and re-sanding again, I put the reprinted artwork on and this time cut out much smaller holes. I found that the buttons/controls could rip out the holes to be a bit larger if needed, and this resulted in a much better end product. Just another lesson learned of many. Continued in next post.
-
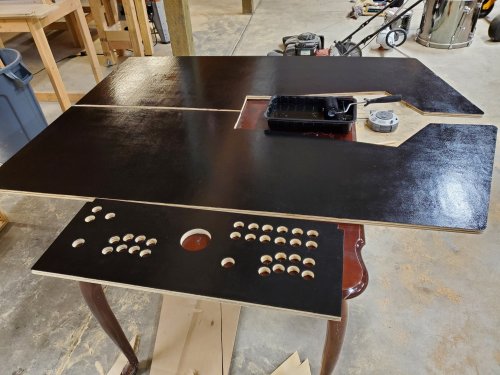
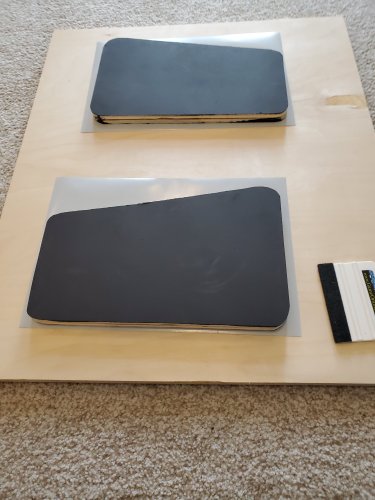
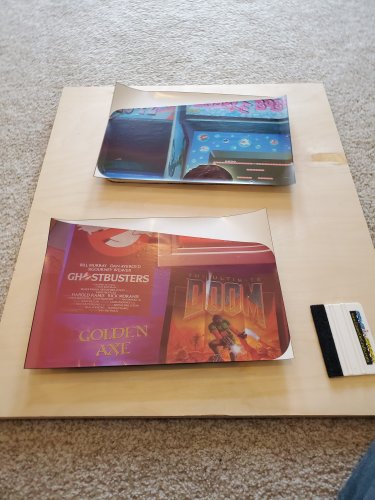
It is finished! I have a lot of catching up to do here before we get there though, starting with painting and applying the graphics: The painting was straightforward and went well. However, for whatever reason the graphics for the wings didn't turn out that great. I'm not sure if I didn't sand them well enough, or if my paint job was uneven, or what, but they just didn't look too great. There were lots of bubbles and rough parts, and trying to squeegee them out just didn't work. You probably can't tell too much in the pictures, but you sure could in real life. Later on I ended up getting re-prints for the wings done on control panel material, which gave me a much better end result. Continued in next post.
-

Can I revert back to a previous version?
Jason Carr replied to Zanchos's topic in Website/Forum Support
We can send you a previous version if needed. Just email support@unbrokensoftware.com. -

Big Box - Crashing while in attract mode
Jason Carr replied to jonathanmarcoux's topic in Troubleshooting
Okay, but we never heard any details from you as to what your issue is. -

Big Box - Crashing while in attract mode
Jason Carr replied to jonathanmarcoux's topic in Troubleshooting
Confused here. Are you Monsterclip? -

Big Box - Crashing while in attract mode
Jason Carr replied to jonathanmarcoux's topic in Troubleshooting
Do let us know @Monsterclip what themes and views you're using in Big Box. Also, I don't want to be a broken record, but make sure you're using VLC and not WMP. -

Big Box - Crashing while in attract mode
Jason Carr replied to jonathanmarcoux's topic in Troubleshooting
Yes, my test machines are all still running now a few days in. We did fix a number of stability things for this release, so whatever @Monsterclip is running into is something we haven't seen before, I'm guessing. -
Just tested this and got the email straight away, so it appears to be working perfectly fine. What browser are you using, and what email address domains?
