
.png.d63b88dc3d5c6db8803dfbd996ce65fc.png)
JoeViking245
-
Posts
4,136 -
Joined
-
Last visited
-
Days Won
34
Content Type
Profiles
Forums
Articles
Downloads
Gallery
Blogs
Everything posted by JoeViking245
-
.thumb.png.c9faf450e4d2b690a819048b18173f61.png)
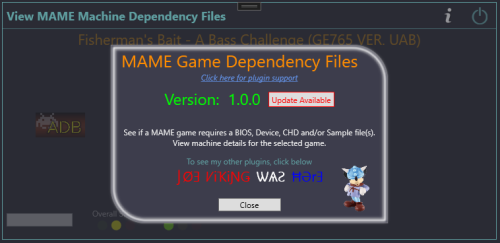
Version 1.0.0
24 downloads
The original intent of this plugin was to have a way to check if a specific MAME machine required 'other' files to be able to run. The only way I knew how to find this was to navigate to the Arcade Database (ADB), look up the game and then check the MAME Required Files section. (I've yet to see another source with this information spelled out.) After doing some investigation into the available MAME parameters and outputs they provide, I was able to deduce this info and threw it into this plugin. I also wanted to give users quick access to the machine (game) on ADB. Pursuing this I found that they had a couple API calls available and so added the Machine Details section. Unfortunately, none of the calls gave the 'required files' data. Really, this isn't very practical unless you have an incomplete curated set of Merged ROMs and need to see what else is needed for "the game" to run. Or... you're just curious to see details about a machine and want to know "what makes it tick". Features: Shows files other than the main ROM that are required to run the game (if any). BIOS, Device and CHD and [optional - not required] Sample See the games' Overall and Emulation status. (Good, Imperfect, Preliminary) If it's not "Good", see why. e.g. "sound - unemulated" "graphics - imperfect" Direct link to the machine on the Arcade Database (ADB) View details about the machine. ROM Genre Title Players Short Title nPlayers Clone of Language Manufacturer Input Controls Series Input Buttons Year Screen Orientation Status Screen Resolution Works in platforms whose ROMs are MAME, but the emulator is not. e.g. platform emulator = DEMul, SuperModel, FBNeo, Model2 etc. Requirements: LaunchBox 13.19 (or newer) MAME Arcade machines only. Will not work with MAME's Software Lists. The game(s) being checked must be using MAME ROMs. (e.g. filenames generally 2 to 13 characters with no spaces) The MAME emulator (or variant [e.g. mameui.exe]) installed in LaunchBox If the games' emulator is not MAME or one of its variants, the plugin will attempt to scan your installed emulators for one that is. RetroArch (with any MAME cores) does NOT count as a MAME emulator nor variant. An internet connection to view the Machine Details and navigate to Arcade Database. Installing: Extract the contents of the download to /LaunchBox/Plugins/ e.g. D:\LaunchBox\Plugins\MameRequiredFiles\MameRequiredFiles.dll Using: Right-click an Arcade game and select MAME Machine Dependency Files View which dependency files are required to run the game (if any) Click the Arcade Database logo (ADB) to navigate directly to the game on the ADB website Hover the mouse over Status to see why the LEDs are Yellow (Imperfect) or Red (Preliminary) Click Machine Details to view details about the machine (mostly duplicative of what you should already have/know) Acknowledgements: The MAME Development Team for... well... MAME! https://www.mamedev.org/ Information in the Machine Details section is scraped from Arcade Database by motoschifo http://adb.arcadeitalia.net/ -
Good to hear. As you discovered, the playlist image filename needs to be the exact same as the playlists' Nested Name.
-
In your \LaunchBox\Images\Media Packs\Platform Clear Logos\Nostalgic Platform Clear Logos\Playlists\ folder, for your example image, what is the file name? Nintendo 64 Fighting.png Fighting.png (Green is good. Red is bad.)
-
Launchbox Error says System.NullReferenceException
JoeViking245 replied to smallsprite84's topic in Troubleshooting
Different error and 15 [LaunchBox] versions later. For your error, try: Go to Tools > Download > Force Update Games Database Metadata Wait for the update process to complete Restart LaunchBox -
You never said what version you're on. v13.22-beta-4 resolved an issue where missing images weren't falling back to the Nostalgic folder. It might be worth a look.
-
BezelLauncher
JoeViking245 replied to JoeViking245's topic in Third-Party Applications and Plugins (Released)
No worries. Glad to hear it's working now. -
LaunchBox doesn't natively import MAME's softlists. That said, (some/most/all) softlist BIOS and Device files are in with the MAME full Arcade set. (just not the softlist game ROMs) If you use the MAME Arcade Full Set Import Wizard, on one of the screens is a list of items to check/un-check. One of them is Skip Games Unplayable in MAME (or similar). Unchecking that will import the miscellaneous file you're [most likely] seeing. If you don't want to reimport, you can click the filter icon (when in your Arcade platform) and select Genre - System - BIOS and delete the resulting files. Do the same with Genre -System - Device. I say "delete" (in LaunchBox, that is) because they do you no good and you can't play them anyway. If you want to "Hide" them instead, select All of the above resulting filtered files and press Ctrl+E to start the Bulk Edit Wizard. Then select Hide and set it to true (or however it's deemed).
-
"Unplayable" MAME games overlap SoftwareList games
JoeViking245 replied to jan.axhell's topic in Noobs
When selecting Skip games unplayable in MAME, do you have some examples (3-5 maybe) of games that are not imported but are [to a degree] playable? This could help narrow down the filtering process. Or are you saying when selecting Skip games unplayable in MAME, it's still importing things like "Double Density Floppy Drive"? I'm fairly certain that when checking that one box, only games tagged as "preliminary" are excluded (leaving "imperfect" and "good"). If it's the preliminaries are what you're want/missing, you might should put in a Feature Request to 'add another filter'. In the meantime, there's always the currently available Plan "B". Un-check Skip games unplayable in MAME, Complete the import Select the Arcade platform you just created Select Filter - Genre - System - Device Select all the filtered "games" and press Delete (Do the same for BIOS) Once that's all done, Select Filter - Status - preliminary And see what you've been missing.
-
There's a plugin for that.
-
You're not blind. Or... we both are. Depending on what you wired the Mute/Unmute button to and what mode it's in, you might be able to create an AutoHotkey script that you have run when you start LaunchBox and/or Big Box. For this (possible) option to work, you need to know what your button is mapped to. Example: Your encoder in keyboard mode and you have the button mapped to "M" (again, just an example). The script would look like m::Send {Volume_Mute} To use the built Pause Screen, set the pause button. Note: LB and BB require separate mappings. LaunchBox: Keyboard Mode: Tools < Options < Gameplay < Game Pause XInput Mode: Tools < Options < GameControllers < Mappings - Show Pause Screen Big Box: Keyboard Mode: System Menu < Options < Keyboard Mappings - Show Pause Screen XInput Mode: System Menu < Options < Controller Mappings < Show Pause Screen Once that's all dialed in, take a look around at all the other cool things you can do from within the Options Menu(s).
-
Can't access forum or go to my profile from home page
JoeViking245 replied to Elhora's topic in Troubleshooting
?? The link shows for you under Help & Support. doesn't it? Or are you thinking the Technical Forums Support link should be a top-menu item? If that's the case, also hidden under Help & Support is Request a Feature. Though I don't think there's a specific area for the main web site 'features', just click Create a new post and start typing your request/suggestion. Doing it there will ensure it'll get noticed and tracked. (Whereas a post here on the Forums can inadvertently get overlooked.) -
Can't access forum or go to my profile from home page
JoeViking245 replied to Elhora's topic in Troubleshooting
Is the Technical Forums Support not an option when you click Help & Support? Then once in the Technical Support Forums, you profile should be in the upper right. Not sure what's there if not logged in. I imagine 'Sign in or Create an Account'.?. Once here, you might think about adding it to your favorites bar.
-
Can't access forum or go to my profile from home page
JoeViking245 replied to Elhora's topic in Website/Forum Support
By homepage, I presume you mean https://www.launchbox-app.com/. If so, at the top right is Help & Support - Technical Support Forums. I know on my old, wonky laptop, sometimes the top menus don't show everything. But there'll be 3 vertical dots (I think that's what it was) that will 'pull down' the remaining menu items.
-
The default Back keyboard binding is Escape. From the main view it starts into, you should be able to press Escape, and it'll take you into the System Menu. From there, go to Options, press Enter (the default Select key) and go to Keyboard Mappings and assign the keys to your liking.
-
Thanks for the update! And solution. Well... workaround. I you haven't already, at the top of this page click Help & Support then click Report a Bug and report for findings. This way it'll for sure get recorded and tracked (and hopefully, even resolved). Where-as [only posted] here on the forums it could inadvertently get lost in the abyss.
-
Import All Arcade Games Doesn't Move All Games
JoeViking245 replied to VodkaParalyzer's topic in Noobs
Yes. Easiest way is to right-click the Arcade platform and click Delete. When it asks to delete Images (2nd popup), click no. Move all (the rest of..) the files (and chd folders) into /Games/Arcade/. Then run the Arcade Full Set Import Wizard (and it won't ask if you want to move the files. ). -
Import All Arcade Games Doesn't Move All Games
JoeViking245 replied to VodkaParalyzer's topic in Noobs
Yes. What I meant was, for the games that got imported and their ROM path (as shown in LaunchBox when you edit the game) is pointing to the Downloads folder. On your last screen shot for Dragon's Lair, if you go to the Launching section, is that path pointing to the Downloads folder? Or /Games/Arcade/dlair.zip? Going back to "what I meant was"... in either of those 2 folders, do the files dlaird.zip, dlaire.zip, dlairf.zip exist (aka the 3 other Additional Apps)? This question is rhetorical because in a merged set, they won't. You'll note in your Downloads, the folder "dlair" is there. Which of course contains the chd which "dlair.zip" will be looking for when you go to launch the game. LaunchBox won't copy the games' associated files. Just the actual ROM file. Notes on the other files I see in Downloads... (1on1gov.zip) did get copied (twice?) Note: this game also requires the BIOS file coh1002m.zip, which would not have been copied. But does exist in your Downloads folder (2mindril.zip) 2 Minute Drill is a screenless game that shouldn't have been imported (3b1.zip) UNIX PC Model 3B1 is a computer as are 3b2xxx (3bagfull.zip) 3 Bag Full is a slot machine (3c505.zip) 3Com EtherLink Plus is an ethernet card for a computer (3cdpoker.zip) 3 Cards Poker 96 Another slot machine Bottom line is, to have LaunchBox be able to successfully copy your MAME ROM files to a different folder when importing, you need to have a non-merged set. And because you can with a non-merged set is the only reason (I'm guessing) the developers left the copy feature enabled [when using the Arcade full set import wizard]. There isn't really a reasonable way to determine what set-type the user has. So toggling the copy feature isn't an option. Completely removing copying when using the full set import wizard would probably make for a lot of angry users. EDIT: The copy feature isn't in the Arcade Full Set Import Wizard. My mistake/confusion. But the feature is available in the regular Import ROMs. The reasoning why some ROMs don't get copied/moved stands. -
SteamLauncher
JoeViking245 replied to Lahma's topic in Third-Party Applications and Plugins (Released)
LaunchBox features are generally community driven. "Generally", in that the developers come up with some pretty good ideas in their own. I believe there's a feature request on the Feedback page for this. So if it's something you really think should be added, be sure to upvote it. If I had a nickel for every plugin I created that its intended "feature/use" subsequently got implemented into the official LaunchBox, I'd have 10¢ over the course of 6 years. lol -
Import All Arcade Games Doesn't Move All Games
JoeViking245 replied to VodkaParalyzer's topic in Noobs
For clarity, is your MAME ROM set a merged, non-merged or split set? If it's a merged, the files that didn't get moved most likely don't physically exist. -
Just tested. No luck. Force updated the local database, then all 4 were found.
-
I'm not at my main PC the test. You might try force updating your local database file under Tools < Download < Force Update.. Is the platform you have these in named Windows? If not, doesn't really matter. Just make sure that the platforms' Scrape-As is set to Windows.
-
BezelLauncher
JoeViking245 replied to JoeViking245's topic in Third-Party Applications and Plugins (Released)
Can you attach a log file created when running PCSX2? They're found in the plugins folder. (just drag and drop the file into your reply here) -
Moderator Guidelines and Contributor Rules
JoeViking245 replied to Jason Carr's topic in News and Updates
In some form, on the Database site, I think that's a good idea. "Some form" being like a sidebar note(s), popup tooltip or sub heading in that section (as appropriate). Or somewhere consolidated to less than 30 forum pages. If it's not already there, add a suggestion/feedback/feature request, then create a post to let people know to upvote it. If there is already something there, upvote and [still] create a post to let people know to upvote it. Feedback - LaunchBox Games Database -
BezelLauncher
JoeViking245 replied to JoeViking245's topic in Third-Party Applications and Plugins (Released)
Well, despite what I said earlier about running fullscreen, I found in my settings that I had Start Fullscreen checked. If I un-check that, I get what you're showing. One other setting (that may be the key) is to set Fullscreen Mode to Borderless Fullscreen. Hopefully the latter (in conjunction with the prior) is "the fix".
-
BezelLauncher
JoeViking245 replied to JoeViking245's topic in Third-Party Applications and Plugins (Released)
Correct. Fullscreen must be disabled. PCSX2 is one of the ones that just works. Just tested with the most recent version and had no issues. Is you emulator setup with just -batch as the Command-line Parameters?
.thumb.png.c9faf450e4d2b690a819048b18173f61.png)


