
.png.d63b88dc3d5c6db8803dfbd996ce65fc.png)
JoeViking245
-
Posts
5,300 -
Joined
-
Last visited
-
Days Won
38
Content Type
Profiles
Forums
Articles
Downloads
Gallery
Blogs
Everything posted by JoeViking245
-
.thumb.png.c9faf450e4d2b690a819048b18173f61.png)
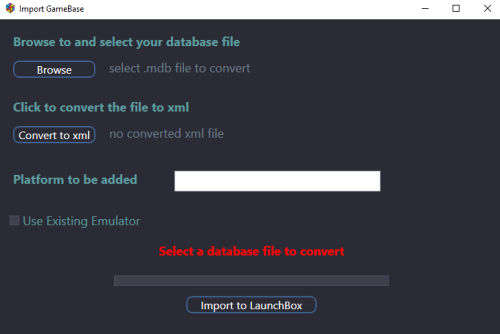
GameBase database Importer
JoeViking245 commented on JoeViking245's file in Third-party Apps and Plugins
 Thanks! I've added the new link above.
 -
DeSmuME games load fine directly with windows' CLI, but not with LaunchBox
JoeViking245 replied to MobForce's topic in Noobs
Remove -f from your Default Command-Line Parameters in the Associated Platforms section. At least on my version (DeSmuME-VS2019-x64-Release.exe), it breaks it. Also, you didn't use that when testing from the Windows Command Prompt. -
Unable to get Retroarch to launch for MAME/Arcade games
JoeViking245 replied to ArquebusX's topic in Troubleshooting
Scroll down to the bottom of the list. There should be a blank cell. Add it in there. -
MAME needs a key delay to catch AHK key presses. Try this: SetTitleMatchMode, 2 SetKeyDelay, 125, 50 Loop { ifwinactive, MAME ;title is case sENsaTivE { ;sleep 3000 send ^!{F5} break } } Note that "sleep" is commented out. If it's sending Ctrl+Alt+F5 too soon, remove the semicolon at the beginning of that line.
-
The pause menu Exit script should only contain the commands to exit the emulator. i.e. In the Pause Menu, select Exit and run the commands in the Exit Script section. Similar to Load Save State section, it'll only contain the command(s) (button presses) needed to load a save state. What you show is a hotkey method. Being a method, the 'script' will stay active without ExitApp being in there. This is unlike a Running Script which actually gets abandoned once the emulator is terminated. Try simplifying the above to just the [necessary] commands. This way, the [exit] script will process each line and then terminate. SetTitleMatchMode, 2 WinClose, Ryujinx
-
@Sbaby In your latest script, you only added some of the 1's. Initially I was thinking to add them to all joy's. I looked at some notes I had on this and see I have them placed only on the 1st joy in the method. Opposite of what you did. Give this a try. (Here, press joy6 THEN joy9 [in that order]) 1Joy9:: if GetKeyState("Joy6") Send, {Esc} Return If this method isn't intermixed with a bunch of others, and its intent is to exit the game, change "Return" to "ExitApp". Otherwise the script will continue to run in the background (depending on where you actually placed it. See below.). There's a chance that this PC game might not work with AHK scripts. To find out, you can try something simple using the keyboard to 'prove it can detect AHK'. j:: WinClose, ahk_exe hod3dpc.exe ExitApp When in game, press j and see if it closes the game. If this doesn't work, chances are you won't be able to use AHK scripts with that particular patched game. Also, you mentioned something about 'Pause'. Are you putting the script in one of the pause sections? Or is this different from your pause issue and it's going in the Running Script section? Can you share screenshots of where this is being placed? Does this game have a 'Menu' that you can select "Exit" from? (Most, if not all PC games do.) If so, it's recommended to exit via the menu for all PC games.
-
I don't think it makes a difference, but try putting a "1" in front of the "joy" (1joy9). SendInput can be tricky. Try Send, {Esc} instead.
-
AHK script to close Dolphin emulator in a specific way
JoeViking245 replied to SiriusVI's topic in Troubleshooting
Without overthinking it... $Esc:: { WinClose, ahk_exe {{{StartupEXE}}} Sleep, 5000 WinClose, ahk_exe {{{StartupEXE}}} } -
AHK script to close Dolphin emulator in a specific way
JoeViking245 replied to SiriusVI's topic in Troubleshooting
Test this, then confirm that's what's needed to be done. So remove -b, launch the game and let it completely load. Then see if [physically] pressing Escape, waiting 5 seconds, and pressing Escape actually works. If that works, then it's simply: $Esc:: { Sleep, 5000 Send, {Esc} ExitApp } This should work if you place the above in the Running Script section of the emulator and physically press "Escape" on the keyboard. If you're using a controller to exit the game ('stop the emulation'), that may be a different story. When using a controller to exit the game, LB/BB "presses Escape" (along with some other behind-the-scenes voodoo) and the Running Script (above) might catch that and do the Sleep/Escape thing. Don't know. -
Is there a way to tell Launchbox to use a different .ini file for MAME?
JoeViking245 replied to St_Eddie's topic in Emulation
Glad to hear you got it working. Sorry I missed your previous post that was embedded in the quote. I wouldn't have teamviewed anyway. But am always willing to communicate 'long-hand' to help where I can. -
Glad you got it set up to your liking. Now for some finishing touches... You can add an Additional App to the 'game' (exe). But you'll need to do it separately for each exe. Create a new text file. in it, add $Esc:: { WinClose ahk_exe spotify.exe ExitApp } Change "spotify.exe" to the actual name of the 'games' exe filename! Save the file as 'something' (like "ExitSpotify") . Change the file extension to .ahk (just make sure it's not saved by Windows as .ahk.txt). ExitSpotify.ahk Place this file somewhere where you won't lose it. Edit your 'game'. Go to Additional Apps. Add Application... Give the app a name. Click Browse and browse to ..\LaunchBox\ThirdParty\AutoHotkey\ and select AutoHotkey.exe and click Open. In the Application Command-Line Parameters box, type the "full\path\to\your\ExitSpotify.ahk" (including surrounding quotes). Check the box Automatically Run Before Main Application. Click OK to save and close. (Click OK again) Repeat the process for whatever you're using to launch YouTube (or any other 'game' that doesn't use an emulator). Now, if you have your exe open, and for some reason you switch to something else, and for whatever reason the 'something else' needs to have Escape pressed, doing so will close your exe. So don't do that.

-
You can create a platform by any name you want. When you import (mp3's, YT hyperlinks, whatever), you're asked what platform you're importing to. The default list is merely a starting point. They don't coincidentally belong to 'gaming' systems (and the sort). Afterall, that's what LaunchBox/BigBox was created for. But you're not tied to them. Just type what you want to call it. "Music". "Movies". Comics". Whatever. Just have fun!
-
2 options: Change the view in BigBox to Platform Categories. Right-click "music" (in LaunchBox, on the left panel) and select Edit. Go to the Parents tab and check the Root box. This example will show the Platform I edited in Platform View. If I'm in Platform Category View, it will also show it inside (under) the "Arcade" category. At least I'm pretty sure that's how it works. I personally don't mess with categories (nor playlists). But if nothing else, you can experiment from here.
-
Is your default View in BigBox set to View Platforms? (vs Platform Categories or Playlists)
-
Can someone do an updated Apple IIGS setup Write up?
JoeViking245 replied to DanTheMan1379's topic in Noobs
It'll be in with your MAME Arcade full set ROMs. (You won't find it with the MAME's softlist ROMs). Since the old Command-line Parameters previously worked, I'd go with that one. You just need to make sure MAMEUI knows where your ROMs are located [which is what you did by adding in the ROM paths]. -
You should be able to drag and drop the exe onto the main LaunchBox window. This will start the import wizard. Once it's imported, edit the 'game'. Go to its Emulation section and make sure 'Use Emulator' is unchecked. Save and close that window. Double click the 'game' and your exe should start. For hyperlinks (such as a YT video), [somewhere] in the 'hamburger' menu is "Add new game". In the launching section for this 'game', paste the hyperlink. Again, make sure Use Emulator is unchecked. Save and close. When launching this, it will open in your default web browser. I don't know anything about Spotify. But hopefully you can deduce something from the above.
-
Do you want to "copy" it to a different platform or "move" it to a different platform? To move it, edit the game and change the platform it's associated to. If you want the same game in two different platforms, just re import it. You'll probably need to check a box to 'force importing duplicates'. Regarding how it will affect your playlist, that depends on how the playlist was setup and how (if) it's filtered.
-
Is there a way to tell Launchbox to use a different .ini file for MAME?
JoeViking245 replied to St_Eddie's topic in Emulation
The period represents MAME's root folder (i.e. the folder that mame.exe is in). So with the period, MAME will look for ini files in: D:\Emulators\MAME\ D:\Emulators\MAME\ini\ D:\Emulators\MAME\ini\presets\ Personally, I remove the period. This way, if MAME auto creates an ini file for me, it'll get saved into the \ini\ folder, and not the root folder. Not sure what you mean here. I think you may be confusing what the author was talking about. When they mentioned "setting window 1", they were talking about a setting in the ini file. There is no order "numbering" of the ini files. The only 'order' is the order that MAME loads the files.
-
I didn't see it as an error. I just figured you were 'future proofing' the thread. After importing various handhelds, the next logical step is to put them in their own playlists.
-
Can someone do an updated Apple IIGS setup Write up?
JoeViking245 replied to DanTheMan1379's topic in Noobs
apple2gs.zip Based on the command line you're using, move it in with the ROMs. As for not seeing it in MAMEUI, can't help with that. -
Is there a way to tell Launchbox to use a different .ini file for MAME?
JoeViking245 replied to St_Eddie's topic in Emulation
Ya. Sort of. You'd be looking for something under item 5 or 6. If your 'sub-category' games all have the same Driver Source or are within the same BIOS set, then yes. Are you wanting something like this so you set a specific bezel for each sub-category? You can use the command line parameter "-override_artwork" for that. -
To clarify, the plugin @sundogak mentioned will create playlists from games already imported into LaunchBox. It won't actually import any games. So if you don't already have the game imported somewhere, it won't get added to a playlist. If you want to import only a subset of MAME machines (games), go to the site sundogak mentioned (Arcade Database) and filter down to the set you want. When exporting the 'list' (on the site under Options, Export the Results) choose the format MAME (XML). You can then use the plugin "MAME Custom XML Importer" to import those games into LaunchBox. (provided you have the ROMs) Though, for the Coleco handhelds, it might be easier just to drag & drop all 6 of the ROMs into LaunchBox.
-
Is there a way to tell Launchbox to use a different .ini file for MAME?
JoeViking245 replied to St_Eddie's topic in Emulation
Glad I could enlighten you. "all of the possible ini filenames" That's a pretty open-ended request. There are 6490 games that are considered to be "definitely working" (many, many more that 'sorta work', 'kinda work' and don't work). So there's 6490 ini files for you right there. The link above re: Order of precedence does a pretty good job showing the ones you'll want to work with. It also shows some examples of the order they're loaded. -
Is there a way to tell Launchbox to use a different .ini file for MAME?
JoeViking245 replied to St_Eddie's topic in Emulation
You'll want to set this up with MAME itself. In 'mame.ini', the "inipath" should be pointing to "ini;ini/presets". Vector.ini should be located in the \ini\presets\ folder. MAME should then load Vector.ini for all vector games that get launched. (A lot of "should" in there. But that's how it 'should' work.) Check out MAME's Order of Precedence for which order config files are loaded in. Like Vector.ini mentioned above, loading of the config files in MAME is fairly automatic based on the game being loaded. For individual games that you want further customizing of the configs they load, you can create an ini file for that game and place it in the \ini\ folder. Example: the game "1942". The ROMs name is 1942.zip. In the \ini\ subfolder, create a copy of mame.ini and save it as "1942.ini" (the_games_ROM_name.ini). Edit 1942.ini and change it to your liking, and save. Now when you launch 1942, it will load the settings/configs in mame.ini, then read 1942.ini and override any settings/configs you changed in 1942.ini. Note: In '1942.ini', you can delete ANY line that is the same as mame.ini. aka, it only needs to contain the lines that you changed. I don't think there's a way to [force] load a specific ini file via command line options. But if you want a little less automation, pretty much all (if not, all) settings you have in the ini file(s) can be set via the command line parameters. i.e. If you want to play Pac-Man and add scanlines, the full command line would be "mame.exe pacman -effect scanlines". You can read more about those here. -
How exactly are you starting LB at startup (show your work)? Regardless, the problem with WinMinimize (etc.) is the LaunchBox loading window is titled "LaunchBox" and the ahk_exe is "LaunchBox.exe". The main LB window that eventually appears is the exact same. And, they both have the same pid. When using the Min option, you'll actually want to Run "D:\LaunchBox\Core\LaunchBox.exe" (not the exe in the root folder). Not sure if that'll work ("Min") for what you're wanting. But you do want to Run the 'other' exe from a script (or batch file) for best success. If you know how long it takes for the LaunchBox main window to load, in your AHK script, you could add a sleep timer right before WinMinimize. Plan "B" is to wait, then click the underscore (minus) symbol in the upper-right corner when the main window appears.
.thumb.png.c9faf450e4d2b690a819048b18173f61.png)


