Third-party Apps and Plugins
261 files
-
Module Fightcade 2
By Crabi
What this module does
This module integrates Fightcade 2 into LaunchBox/BigBox and automates repetitive actions:
Launches Fightcade 2 automatically.
Searches for the game selected in LaunchBox/BigBox.
Quits the last joined room.
Joins the room of the chosen game.
Allows full controller navigation (via JoyToKey) across 3 zones:
Notifications (bell)
Chat
Contacts
Requirements
AutoHotkey v1.1 (you should already have it) Fightcade 2 Auto-download ROMs with lofi’s JSON pack: FC2 JSON Pack Auto Download Download fc2roms.zip
Extract the .json files into Fightcade\emulator\
In Fightcade → Settings → ROMs Path, set the ROMs folder used by the auto-download.
Module Installation
Download the Fightcade 2 Module Place fc2_RUN.ahk, fc2_SETUP.ahk, and FC2_JoinRoom.cfg.ini in the same folder.
Edit fc2_RUN.ahk and adjust the fc_root path if needed.
If your resolution ≠ 1920x1080:
Open Fightcade 2 fullscreen,
Run fc2_SETUP.ahk, hover each UI element as prompted and press SPACE to calibrate.
Setup saves everything to FC2_JoinRoom.cfg.ini (can be fine-tuned manually).
In the same config you can set JoyToKey paths and profiles. Example:
[joytokey] exe=D:\HFSBox\Utilities\JoyToKey\JoyToKey.exe fightcade_cfg=D:\HFSBox\Utilities\JoyToKey\FightCade.cfg launchbox_bigbox_cfg=D:\HFSBox\Utilities\JoyToKey\Layout 8 Boutons.cfg Controller Mapping (example with JoyToKey)
Map your controller to these logical keys expected by the AHK script:
D-Pad Up → g (up) D-Pad Down → v (down) D-Pad Left → f (previous zone) D-Pad Right → h (next zone) Button A → a (confirm / click) Button B → b (back / cancel) L/R Button → p (send “gg” in chat) Select + Start → Esc (quit Fightcade or close emulator) Alt: R3 → Esc LaunchBox Setup
Add a new “emulator” in LaunchBox (name it Fightcade for example). Application path = fc2_RUN.ahk (e.g. ..\HFSBox\Emulators\FightCade2\emulator\fc2_RUN.ahk). Under Associated Platforms, add Fightcade and set it as default emulator.
Installing Platform + Playlists
Copy the provided Data folder into your LaunchBox folder (merge). Edit Data\Platforms\Fightcade.xml to set the correct path to fc2_RUN.ahk. Playlists work out of the box, no edits needed. Bezel is included, ready to use.
Included in the pack
AHK scripts (fc2_RUN.ahk, fc2_SETUP.ahk, FC2_JoinRoom.cfg.ini).
Bezel (ready to use).
Fightcade platform XML (Fightcade.xml).
Playlists.
⚠️ Notes
You can only be in one room at a time.
Usage once in a room
Up = g
Down = v
Left = f
Right = h
Switch zones (Notifications, Chat, Contacts) with f/h.
To challenge someone: go to Contacts, scroll with g/v, press a on the player.
To accept/decline an invite: go to Notifications, press a, then accept/decline.
Chat is only used for quick “gg” via the p key for now.
If you run into any issues or have questions, feel free to ask — I’ll try to help.
40 downloads
(0 reviews)0 comments
Updated
-
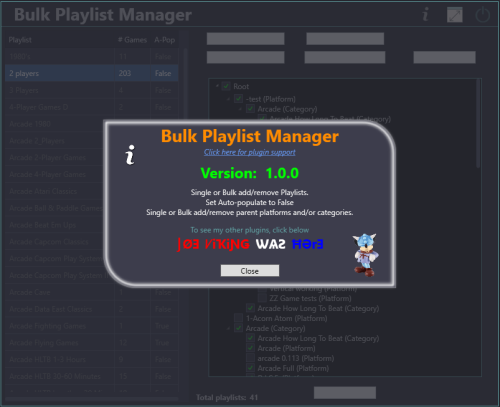
Bulk Playlist Manager
By JoeViking245
Features
- Set auto-populate to False (single or bulk)
- Existing games in playlist will remain
But no new games will/can be added unless done manually
- May help decrease LB loading time
- Cannot be undone [via the plugin]
- Delete playlist(s)
- Permanently delete the selected playlist(s)
- Delete all playlists that have zero games
- Whether the playlist is auto-populated or is just there, if there are no games in it, permanently delete the playlist(s)
- Single or Bulk add/remove parent platforms and/or categories
- Select a playlist
- Check and un-check parents to your hearts content, then click Save Parents to save the changes.
- If selecting multiple playlists, clicking Save Parents will set the parents for all selected playlists to the ones checked.
e.g. Selected playlist A had "Computers" checked and playlist B had "Consoles" checked, clicking Save Parents will set both playlists to be under "Computers" and "Consoles".
Installing
Download and extract the contents of the zip file to /LaunchBox/Plugins/
e.g. D:\LaunchBox\Plugins\BulkPlaylistManager\BulkPlaylistManager.dll
Using
You may 1st want to turn on Backups (under Tools < Options < Data < Backups), exit then restart LaunchBox (to create at least one backup) before proceeding.
Click Tools and select Bulk Playlist Manager
Hopefully the layout is fairly intuitive. You can mouse over the buttons for a little more detail.
As always, all feedback, comments and suggestion are welcome.
88 downloads
-

Clips YouTube Downloader
By thewhite
This software was created to download missing videos from your games and which are among other things missing from emumovies.
What it does:
📥 Clips YouTube Downloader – Creates 40-second gameplay clips directly from YouTube URLs stored in your LaunchBox platform XML files. Perfect for building a consistent library of preview videos. 40-second clips are created from half of the video or the first 40 seconds if it is too short.
🧹 Remove URL from XML – Cleans up dead or broken YouTube links in your XML so LaunchBox won’t try to download them again.
🔧 Fix Missing Video – Scans your video folders, compares them with your XML entries, and corrects the missing status if a clip is already present but incorrectly marked as absent.
How to use it:
Download the required Youtube downloader and FFmpeg via the button or browse for the path to use. Select the platform XML file you want to work with.
Choose what you want to do:
Download videos from YouTube and create clips with the Start button,
Create only video clips, useful if ffmpeg freezes during a video, even if the software tries to detect problems at this level.
Move the downloaded clips into the correct LaunchBox Videos folder for that platform.
Use the button Remove URL from XML, to remove dead links and Fix missing videos to fix the platform file with the newly created clips.
Use the "update metadata" tool if some errors persist in the platform file; video present, but not seen by launchbox.
Select all games on a platform, Tools -> Downloads -> Update metadata and media for Selected Games. Choose not to download any media and "Yes, but do not replace any existing fields of media (recommended)". That’s it — you’ll have a cleaner, more accurate library with proper 40-second preview videos for your games.
140 downloads
(0 reviews)0 comments
Submitted
-
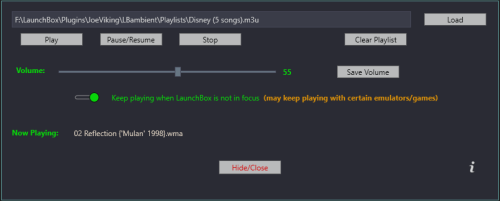
LaunchBox Ambient Music Player
By JoeViking245
Listen to your favorite Arcade music playlist while admiring your LaunchBox collection.
Requires LaunchBox 13.3 or newer
Just add your own playlists and start listening when LaunchBox starts. The music will pause when launching a game, and then resumes after exiting the game.
Setup:
Download and extract the contents of the zipped file into /LaunchBox/Plugins/
Quick Start:
With LaunchBox closed
Copy a music playlist (i.e. MyPlaylist.m3u) into the Playlists subfolder
i.e. /LaunchBox/Plugins/LBambient/Playlists/MyPlaylist.m3u
Start LaunchBox
See Playlists below for playlist requirements.
About this plugin:
Place your music playlist(s) into /LBambient/Playlists/
When you start LaunchBox, a random (if there're more than 1) playlist from that folder will be selected and start playing
Songs in the playlists will be played in a random order and will not repeat.
Songs will Pause when launching a game and then Resume when the game has exited.
Fixed v1.2.0 Exception: It might not stay paused when launching Steam games and others using a launcher.
Once the player has gone through the entire playlist, that's it. No more music.
So, if you plan to spend a lot of time looking at LaunchBox and not playing games, be sure to have a long playlist.
Options:
Go to Tools - LB Ambient Music
Adjust the player's volume slider (which is independent of LaunchBox's volume control) to your desired volume.
Click Save Volume to save it in Settings for next time you start LaunchBox.
To manually select a specific playlist (or song) to load when LaunchBox starts
Click Load to select a playlist (or song) and start playing it.
The selection will be saved in Settings.
Next time you start LaunchBox (and every time thereafter), the saved selection will be played.
To remove a playlist (or song) from Settings, click Clear Selection.
This immediately stops the player and removes it from Settings.
Next time you start LaunchBox, a random playlist (if any exists) will be selected from /LBambient/Playlists/ and automatically start playing.
Click Hide to close window.
Playlists:
Required: Playlists MUST have absolute paths to the song(s).
Some players (i.e. VLC) will save the playlists using relative paths if it's saved within the players folder structure.
(new v1.1.0) Playlists can have absolute or relative paths to the songs. Relative paths MUST be relative to the Playlists subfolder
Playlist formats tested are .m3u, .m3u8 and .xspf
No other formats have been tested and will not work with this plugin.
If you have playlists saved in a different format that you'd prefer to use, let me know.
THIS HAS ONLY BEEN TESTED WITH LOCAL FILES.
If the files paths in the playlists are URL's (i.e. start with "http://"), things might break.
You can try it if you want. Let me know what you find.
As always, all comments and suggestions are graciously accepted and encouraged. 😎
249 downloads
-
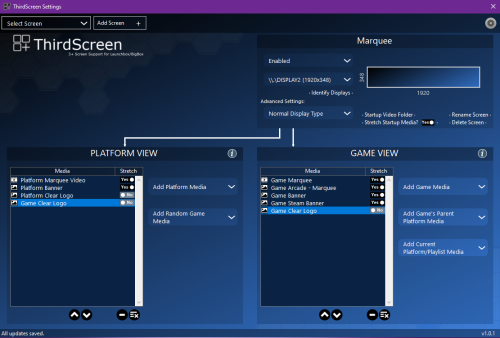
ThirdScreen Plugin for Platform Video Marquees, 3+ Screen Support, and more
By superrob3000
This plugin adds enhanced Marquee capabilities plus support for unlimited screens.
- Enhanced Marquee Capabilities:
Adds support for Platform Video Marquees, Playlist Video Marquees, and Platform Category Video Marquees. Adds support for Marquee Startup Videos. Adds support for animated gif files. Fixes marquee shift issue for TeknoParrot games. Marquee(s) will work in LaunchBox, not just in BigBox. Adds optional blur-fill background effect when media is not stretched to fit the entire screen (as of v2.0.10). - Support for a 3rd screen or unlimited additional screens each displaying their own priority based list of media.
- Each screen has access to ALL media that has been imported to LaunchBox (all images, all videos, plus rotating 3D box models!)
- Graphical user interface for setting up screens. Your theme files do not get modified.
- Ability to stretch or not stretch based on the media type being shown on each screen.
- Screens are tracked by GPU port stable IDs, so nothing will ever break due to Windows re-ordering display numbers.
Demo Videos:
Installation:
*** Before installing, please make sure you are using the latest version of LaunchBox. Version 13.0 or higher is required. *** Download ThirdScreen.zip to your PC. Right click on the zip file and extract all files. Close LaunchBox/BigBox and copy the Plugins and ThirdParty folders to your LaunchBox directory.
Adding a new screen:
1. If you are setting up your main Marquee screen, you'll first need to disable the Marquee in BigBox settings in order to transfer control of it over to ThirdScreen. Open BigBox. Hit escape to go to BigBox settings. Go to Options->General->Marquee Screen and set it to "None".
2. Select ThirdScreen Settings either from the Tools dropdown in LaunchBox or the settings screen in BigBox.
3. In the ThirdScreen Settings app choose "Add Screen" in the upper left.
4. Give this screen a name. If this is your main marquee, make sure "Start with typical marquee media" is checked - this will start you off with the typical expected media for a main marque (e.g. marquee videos, marquee images, banner images, clear logos, etc...). Then hit Continue.
5. Click "Identify Displays" and take note of the name displayed on the desired display. Then choose
the corresponding display name from the "Choose Display" drop down menu.
Choosing which media shows on each screen:
1. Select a screen from your list of existing screens.
2. Add desired media to both the game and platform views for this screen. (Tip: You can hover over most drop down boxes and controls to get a more detailed description of what each one does).
3. Adjust the priority of each media item up or down (items higher on the list have higher priority). ThirdScreen will search the selected game or platform's media starting from the top of the list and working its way down until it finds something to display.
4. For each media item in your views you can choose whether or not to stretch fill the screen. If set to No, then the item will be uniformly stretched (aspect ratio will be preserved). If set to Yes, the media will be stretched to fill the entire screen (aspect ratio will not be preserved). (Your choice will depend on the type of media and the screen dimensions. For example, Marquee videos/images will look best stretch filled on a bar type display but not on a 16:9 aspect ratio display. Video snaps will look best stretch filled on a 16:9 aspect ratio display, but not on a bar type display.)
Adding startup videos or images for each screen:
1. Select a screen from your list of existing screens.
2. Click "Startup Video Folder" to open the startup folder for this screen. Copy any media you want to be displayed at startup for this screen into this folder. Video files and static images are supported. If there is more than one item in the folder, ThirdScreen will choose one of them randomly to display at startup.
Adding Platform Marquee Videos, Playlist Marquee Videos, and Platform Category Marquee Videos:
1. In LaunchBox select Tools->"Manage Platform/Playlist Video Marquees"
2. From here you can add and manage video marquee files for Platforms, Playlists, and Platform Categories. Once added, they will be available for display using the ThirdScreen Plugin.
FAQs:
Q. How many screens are supported?
A. As many as you want. The only limit is the number of hdmi or display ports on your PC.
Q. Can I use this Plugin if I only have a single marquee screen?
A. Yes, if you don't have a third screen you can still use this for your main marquee. That will get you the added benefits of platform marquee videos, animated gif support, marquee startup videos, etc.
Q. If I choose to display 3D box models, how can I rotate them?
A. The 3D box models will be self-rotating. They will continuously spin while being displayed (no need for any user input).
Q. In Game View, what's the difference between "Add Game's Parent Platform Media" and "Add Current Platform/Playlist Media"? Which one should I choose?
A. It just depends on your preference when viewing Playlists. When scrolling games in a platform wheel, it will not make any difference which of the two dropdown lists you chose from. When scrolling games in a playlist wheel choose "Add Game's Parent Platform Media" if you want the media to change depending on the type of game (for example, the playlist might be a mix of NES, Wii, and Arcade games). Choose "Add Current Platform/Playlist Media" if you instead want to always display the Playlist's media (for example the marquee or theme video from your Favorites playlist).
Q. Will my Theme xaml files get modified?
A. No, the plugin never touches your theme files. You are free to switch and add new themes whenever you want.
Q. How can I delete/modify media in LaunchBox if it is currently being displayed by ThirdScreen?
A. You might sometimes run into a situation where you want to delete or modify a game's media files, but LaunchBox gives you an error because the media is in use. No problem, just temporarily disable ThirdScreen when in LaunchBox. Open the ThirdScreen settings app, click the gear icon in the upper right, and choose "Disabled when in LaunchBox".
Q. Why doesn't Platform view work for my marquee(s) when in LaunchBox?
A. This has been fixed with version 2.0.6 of this plugin as long as you are on LaunchBox version 13.1-beta-6 or higher..
Troubleshooting Steps:
1. Make sure you are using the latest version of this plugin.
2. If this is your main marquee screen, please first double-check that you have disabled your marquee in BigBox settings. The ThirdScreen plugin will not attempt to use your marquee display if BigBox is using it.
3. If some image or video you've added isn't showing up when you expect it to, double-check that it is categorized correctly in LaunchBox. It's very easy to add media in LaunchBox and then forget to change its image or video type (I do that all the time).
4. If you are having an issue, please enable logging for both the ThirdScreen plugin and LaunchBox/BigBox, and then send me the log files after you try the thing that isn't working. The log files will be in the LaunchBox/Logs folder. To enable logging do the following:
For ThirdScreen: Tools->ThirdScreen Settings, click the gear icon in the upper right and choose "Debug Log File Enabled". For LaunchBox/BigBox: Tools->Options->General->Debugging, check "Enable Debug Logs". 5. If LaunhBox/BigBox will not start at all after installing the dll files, make sure you are on version 13.0 or higher of LaunchBox and also try disabling any Pen or TouchScreen devices listed in Device Manager (there is currently a known conflict with the Windows Pen driver which is affecting some users). (Edit: This has been resolved in v2.0.13)
6. If animated gif files aren't displaying for you, try running LaunchBox/BigBox with admin privileges. (Edit: This has been resolved in v2.0.11)
7. If you are having issues with the ThirdScreen settings app reporting an incorrect resolution and/or your marquees being incorrectly sized, clipped, or off-center then it is most likely caused by dpi scaling. ThirdScreen v2.0.14 and higher should fix most scaling issues in both Win10 and Win11.
8. This plugin tries to fix any marquee-shift issues when a game changes the main screen resolution. As of version 4.0.0 you can select between medium mode, aggressive mode, or disabled. Medium is the default mode and is recommended. If a game changes the screen resolution, medium mode will reposition all marquees to their correct locations. Aggressive mode also hides the BigBox window to ensure it does not end up covering one of the marquee screens. While aggressive mode works perfectly on mine and many other setups, some people have reported that it can interfere with game loading or exiting (including BigBox remaining hidden after exiting a game). If you run into those types of issues you should set the option back to medium mode or disabled. In LaunchBox, go to Tools->ThirdScreen Settings. Then click the gear icon in upper right and select "Medium Shift Handling".
-------------------------------------
Enjoy, and please follow the file to be notified of updates.
3,299 downloads
- third screen
- platform marquee videos
- (and 3 more)
-

Emulators and Their Games / Platforms and Their Emulators
By JoeViking245
View all games associated with an emulator.
Can't remember which games in your Nintendo Wii platform use the Dolphin emulator and which ones use the Dolphin-TriForce branch?
Use this plugin see which games are used by a specific emulator.
New 2.0.0
Platforms and Their Emulators (toggle)
View all emulators associated with a Platform.
Setup:
With LaunchBox NOT running, download and copy the **contents** of the 7z (zip) file into you /LaunchBox/Plugins/ folder.
i.e. D:\LaunchBox\Plugins\Emulator-Games\Emulator-Games.dll
Using:
Stat LaunchBox Click Tools Click Emulators and Their Games Select an emulator to see a list of all games that use that emulator.
If a game uses the selected emulator but is NOT in one of its Associated Platforms (go figure how that happens. ), it will appear in Red.
A list of Associated Platforms for that emulator will also show.
Click on one of the Associates Platforms to view only games that use this Emulator AND are in the Platform.
Click Reset to go back to showing All games using the Emulator.
To create a Playlist of the games shown, click Create Playlist.
The Playlist will automatically be given the name of the selected Emulator. (Change it to whatever you want)
If you had selected an Associated Platform then clicked Create Playlist, the auto-fill name will be "emulator (platform)".
The playlists will be added to Platform Category "Emulator Games"
New 2.0.0
To view all emulators associated with a Platform, flip the toggle switch.
As always, all comments and suggestions are welcomed and encouraged.
395 downloads
-

MAME Software Lists Import Tool - plugin
By JoeViking245
Use this plugin to filter and import MAME Software Lists into LaunchBox.
New - version 6.0
Requires LaunchBox 13.3 or newer* Slightly different look. Same old features. A lot of (behind the scenes) code improvement. This update has been rewritten in .NET 6.0 to “keep up with the times”. *If you’re using LaunchBox version 13.2 or older, download version 4.5 of the plugin.
(For now, at least) v4.5 will still work with LaunchBox 13.3 and newer.
Features:
Import MAME Console/Computer ROMs into a new or existing Platform Import clones as Additional Apps, separately or not at all (Option) Skip Prototypes (Option) Skip Non-Supported ROMs Adds the Platform and Command-line Parameter to the selected MAME emulator (ex. Atari 2600 a2600 -cart) (Option) Copy ROMs to a new folder during importing Imported games tagged as not supported by MAME will be marked as "Broken". (Option) Import only games that exist in your ROMs Source Folder (Option) Ignore games that only have a Title change (when updating) Version information found inside parenthesis in a Games Title will be added to the games "Version" (metadata)
Audit Feature: Compare your existing softlist console/Platform against the MAME hash.xml.
Will cross check Title and Rom names.
- Select the respective hash.xml and Platform
- Click Audit (last page)
- Any differences along with a brief description will be shown.
- Option to select files (if any) and have them removed from your LaunchBox Platform.
- Will check main Titles as well as Additional Apps (if you imported them that way).
This does NOT check rom integrity. That's between you and Clrmamepro (or related utility).
What's needed:
(1) dll file included in the zip. MAME Software List hash files (located in the "hash" sub folder of your Mame's main folder) MAME Software List ROMs* and BIOS files (only if you want to actually play them) *The rom set needs to be either a Split set or a Non-Merged set for a full import If you plan to not import clones, any type set will work.
What it won't do:
Filter/Sort by Region (it's a MAME hash file limitation) Determine if/what BIOS files are needed Import Metadata and Media (just use the built in LaunchBox Tool) To remove extra information from the games titles [Example "(Jpn)"], select Yes, download and replace all existing metadata and media when running the tool.)
How to:
- Copy the "ImportMameSoftwareLists" folder from the zip file to your ..\LaunchBox\Plugins folder.
- Navigate to that folder and unblock the .dll file. (Right click, Properties, and click Unblock)
- Start LaunchBox. Click on "Tools" and select "Import MAME Software Lists".
- Navigate through the wizard.
- After running the plugin, right-click your new platform and select Edit. Set Scrape-as to whatever your platform is and save.
Notes:
ROM Folder Locations (screen): The Destination Folder is required even if you don't plan to copy the files. It's needed to set up the Application Path for the ROMs when Importing.
Copy and/or Import (screen): To add Version info (if it exists in the Games Title) to an existing console (Platform), run the plugin and DO NOT CHECK Ignore games that only have a Title change (when updating)
Selecting an emulator:
The main intent of this plugin is to import consoles and computers using MAME softlist ROMs and set the games "proper" Title and application path. It will also attempt to add the appropriate Command-line Parameter for the platform in MAME’s Associated Platforms.
If you prefer to use an emulator that can load MAME ROMs other than MAME (or a variant there-of), go for it. It’s recommended to select MAME while using the importer, and then change the Default Emulator when done importing.
You can select the 'other' emulator in the plugin, and it will be set as the default for the platform. But it will also have the default command line parameters for the associated platform set using MAME parameters. So be sure to adjust as necessary.
Importing:
(optional) "Import games that only exist in the ROMs Source Folder"
If using a Merged softlist set, clones will not get imported using this option. But if you have a curated Split set, this can be handy.
(optional) "Ignore games that only have a Title change (when updating)"
If you manually renamed your game titles, check this box.
Updating:
If you’ve updated your MAME emulator and MAME softlist ROMs, simply run the importer and point to the updated hash file and select your existing platform.
When updating, this plugin will NOT remove any games from your collection that MAME has removed from the hash file(s). You can use Audit to compare your collection to the MAME hash file and manually remove games from your collection that don't exist in the hash file (if you so desire).
Downloading Metadata:
After running the plugin, right-click your new platform and select Edit. Set Scrape-as to whatever your platform is and save.
When downloading metadata and Media, choose "Yes, download and replace all existing metadata and media". This will remove the Version info from the games Title.
After updating the metadata, if some, but not all games got updated, restart LaunchBox and try the bulk metadata downloader again.
Auditing:
When auditing, if a game originally had the version info in its Title and you have ran the Download Metadata and Media wizard selecting "Yes, download and replace all existing metadata and media", you WILL see games marked as Missing.
* MESS xml *
Other Notes: (things I've learned)
- Software List folder/file locations:
- *Associated Platform Command line parameters
- MAME and CDROMS
3,509 downloads
-
Arcade64 No-Nag
By Echostorm
Latest Release: .278
----279 has a compiler error, will try again tonight
ARCADE64 is a Windows-based frontend for MAME, a multi-arcade emulator.
Its useful if you want mame but want a nice gui for settings.
No support will be provided, due to me checking the forum very infrequently.
https://arcade.mameworld.info/
ARCADE64 is a continuation of the MAMEUIFX project. It is based on the latest MAME source at the time of release.
It is in maintenance only (no active development of new features).
What's in it?
Arcade games only NO mechanical games (pinball, crane games, etc) NO computers, consoles, terminals, appliances, etc Only playable games are included –--------
This is the No-Nag version of MAME front end, Arcade64
You need to have setup Arcade 64 in advance. This is only a replacer for the exe.
source code and project files available through my Github: https://github.com/xechostormx/arcade64-No-Nag
I will upload new versions as long as I am still using the software.
Changes are made to ui.cpp as shown below.
virus scan results here: https://www.virustotal.com/gui/url/2560d1667ac15800ac23011d93a6ae75b60932ad9596b3a250a2c536501cd835/detection
Line 629:
void mame_ui_manager::display_startup_screens(bool first_time)
{
const int maxstate = 3;
int const str = machine().options().seconds_to_run();
bool show_gameinfo = !machine().options().skip_gameinfo();
bool show_warnings = false;
bool video_none = strcmp(downcast<osd_options &>(machine().options()).video(), OSDOPTVAL_NONE) == 0;
// Removed conditional logic for nonag build
168 downloads
-
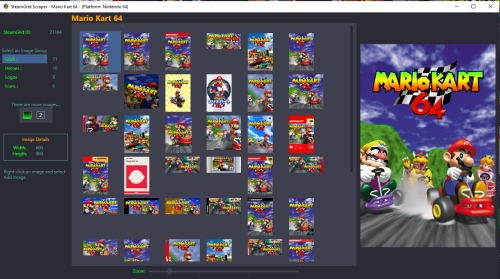
SteamGridDB Scraper
By JoeViking245
Preview and import images from SteamGrid Database directly into your LaunchBox collection.
A personalized SteamGridDB API Key is required. (See below about getting yours) Downloaded images are saved to the default LaunchBox image folder(s).
Installing
Download and extract the contents of the download to your /LaunchBox/Plugins/ folder.
i.e. D:/LaunchBox/Plugins/SteamGrid Scraper/SteamGridScraper.dll
First Time Run
Select a game, right-click it and select SteamGrid Scraper.
The "API key Required" window will open.
Paste (or manually type in) your personal SteamGrid API key.
Click Save
Using
Select a game, right-click it and select SteamGrid Scraper.
In cases where an exact match for the game Tite is not found, a window will popup listing 'close matches'.
Double-click a game from the list to select it.
Click on the SteamGrid image group you'd like to view. Options are:
Grids
Heroes
Logos
Icons
Up to 50 images will show in the Gallery. If the selected group has more than 50 available, click "2" to see then next 50.
Use the Zoom slider to increase/decrease the image sizes in the Gallery.
Double-click on an image to see a larger view. (Opens in a separate window).
The Icons group is pretty much useless in LaunchBox. But since they're available, they're included.
Saving an image
To add an image to your game, right-click the image in the gallery switch from Image Preview to Add Image and select Add Image.
Select the Image Type (folder) you want to save it as from the dropdown box. (It doesn't change automatically for you.)
Only a few select image types are shown by default.
To see all image folders (types), check the box See All available image types.
(Optional) To view your existing images for the game, click View Existing Images Gallery. (Opens in a separate window)
This shows only the images for the selected image type.
(Optional) Click Open Image Folder to open Windows Explorer to the folder where your existing images are and where the image will be saved to.
Click Save Add Image to save the image.
Getting your SteamGridDB API Key
Log into your SteamGridDB account.
Go to your Profile - Preferences - API
Click 'Generate API key'
As always, all comments and suggestions are welcome. 😎
1,577 downloads
-
ReloadData Plugin
By stigzler
A tiny plugin that allows you to refresh all games in Launchbox + Bigbox to show any changes made in the xml files outside of LB/BB. This adds System menu items to LB and/or BB which cause the refresh.
You can also edit settings.ini in the plugin directory to customise its operation.
Github repo: HERE
16 downloads
(0 reviews)0 comments
Submitted
-
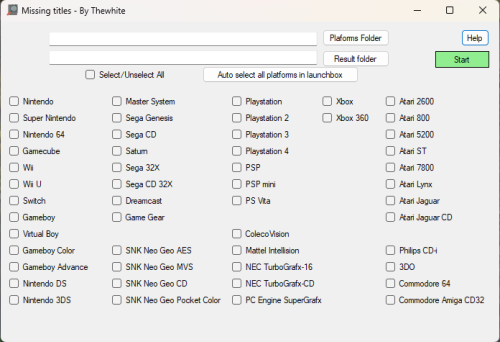
Missing Titles, find missing games in your collection.
By thewhite
Hi,
This application helps you find missing games for all your main consoles.
Step-by-step usage:
Select the folder that contains your platform XML files — usually located at LaunchBox\Data\Platforms.
Choose the output folder where the result files will be saved.
Check the consoles you want to scan.
Click Start to begin the comparison.
Important notes:
For each selected console, the app will generate a CSV and an Excel file with the results (own and not found).
Only games marked as "Released" in your database will be included in the comparison.
If you click on Auto select all platforms in launchbox, all the platforms displayed or not in the software will be processed.
As the software compares the results with the local launchbox database file, as long as it is up to date or used by launchbox, this software will work and have an up-to-date list.
152 downloads
-
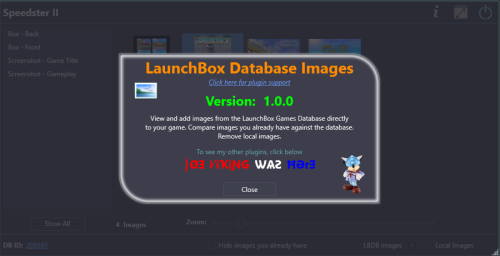
LaunchBox Games Database Image Viewer-Plus
By JoeViking245
View and add images from the LaunchBox Games Database directly to your game.
Compare images you already have against the database.
Remove images from your collection.
Scenario #1:
You're looking through your collection and you notice a game is missing an image. (An Arcade Cabinet in this case)
Solution #1:
Edit the game Go to Media < Images Click Download Media Click Uncheck All Check Arcade Cabinet Switch to the EmuMovies tab Click Uncheck All Click Download Arrow through the images until you get to the newly added images Find the one you want and click Remove Image on each of the others Click OK to save Solution #2:
Open this plugin Click Arcade - Cabinet Double-click which image you want to add Close the plugin
Scenario #2:
You have multiple Arcade Cabinet images in your collection, and you've discovered you can only ever see one-at-a-time.
Solution #1:
Edit the game Go to Media < Images Arrow through the images until you get to the Arcade - Cabinet Images Arrow through each one until you decide on which one you want to keep Click Remove Image on each of the others Click OK to save Solution #2:
Open this plugin Switch to Local Images Right-click the image(s) you don't want and select Remove Image Close the plugin
Requirements:
An internet connection An associated LaunchBox Games Database ID# for the selected game LaunchBox version 13.19 or newer
Installing:
Download and extract the contents of the download into your /LaunchBox/Plugins/ folder.
i.e. D:/LaunchBox/Plugins/LBDBimages/LBDBimages.dll
Using:
Start LaunchBox Right-Click a game Select LB Games DB Images * *If a game does not have an associated LaunchBox Games Database ID#, the menu option will be disabled.
(v1.2.0) Bulk: Select multiple games, then right-click and select the plugin. Navigate to the next/previously selected game by clicking the left/right navigation buttons
Mouse-over an image to see its image type and region (if available)
Switch between the LBDB Images and your games' [Local] Images (lower left corner)
Image Gallery Zoom:
Adjust the Zoom slider to make the gallery images larger/smaller.
(new v1.2.0)
Use Ctrl+Mouse Wheel over the Image Gallery to adjust the zoom level Use the mouse wheel over the Zoom slider to adjust the zoom level Right-Click NOT over an image inside the Gallery to reset zoom level
LBDB Images view:
Select a filter on the left to view only those image types
Double-click an image to add it to your game
Check Hide images you already have to not show...yup...images you already have **
New v1.3.0 The Hide Images you already have check status will be saved for next time you open the plugin.
**This only checks for an exact CRC32 match between the database images and your local images. "Pretty close" is not an "exact match".
Local Images view:
Select a filter on the left to view only those image types
Right-click an image and select Remove Image to remove it from your collection
Preview images fullscreen: (new v1.2.0)
Right-click image and select View Image Fullscreen
Left-Click: Drag/Move image
Mousewheel: Zoom in/out
Right-Click: Reset image
Left/Right arrow keys: Show previous/next image (new v1.3.3)
Escape: Close the preview window
Navigate to the LaunchBox Games Database website:
Click the DB ID # to navigate to the LaunchBox Games Database webpage for that game (opens into your default browser)
Features: (new v1.3.0)
Keyboard Shortcuts: Press F to show selected image fullscreen Press Delete to remove selected local image Press I to switch between database and local Images When switching between LaunchBox DB images and Local images, the selected image type is carried over. Window size/location and Image Zoom level are saved on close and used next time you open the plugin.
Known Issue: When adding an image to your collection and having Hide Images you already have checked, the image may not get removed from the Gallery
Updating your local DB file may resolve this. Tools < Download < Force Update Games Database Metadata...
Image Regions: (new v1.3.1)
Click the Image Regions drop-up box (a dropdown box that goes up) to view only image for the selected region. A 'blank' option (if shown) is for images that don't have a region associated with it.
Plugin Updates:
If an (U)pdate for this plugin has been released on the forums,
a) the plugin title in the right-click game menu will show as: (U) LB Games DB Images
b) At the top of the plugin window, the Info icon will flash red.
Click the Info/Support icon, then click the Update Available button. This will open the plugins download page in your default browser.
As always, all thoughts, views, suggestions, opinions and accolades are welcome.
"Be excellent to each other." (Bill S. Preston, Esq)
685 downloads
-
MAME Curated Softlist Importer
By dsync89
MAME Curated Platform Softlist Importer for LaunchBox (v1.0.0)
Have you ever wanted to import your MAME Software Lists (softlists) into LaunchBox in a clean, organized, playble, and automated way? This plugin is designed to do just that, acting as a powerful companion to tools like mess-curator.
It goes beyond simple importing by using a highly-configurable YAML file to intelligently map MAME systems and softlists to the correct LaunchBox platforms, apply the right emulator settings, mark games as broken if there is relevant metadata, and even handle complex scenarios like clones and importing artwork.
This plugin, when importing using my MAME 0.278 system-softlist YAML preset, will add 106 Platforms and ~16k games to your Launchbox collections, all ready to play, or at least those that I tried :-)
Important Plugin Note
Note: This is NOT a successor nor replacement for the amazing MAME Software Lists Import Tool - plugin 6.0.2 that is developed by @JoeViking245 that also serve the purpose to import MAME softlist into Launchbox. The original tool is perfect for users who want a simple, direct way to import softlist games using the MAME hash XMLs. If that's your goal, I strongly recommend using it.
This plugin, however, was inspired by it and was born from my own OCD needs and is designed for a more complex, automated workflow. It excels at creating highly customized "curated" platforms that can contain a mix of different softlist media, obscure systems, and custom launch commands—all managed through a central configuration file that simplifies maintenance for future MAME updates. The curated list (system-softlist YAML) used by this plugin is also maintained by me and is readily available as preset by this plugin. Perhaps that list will be contributed by the communities if it is able to gain some attention 🙂
Release Note
2025.07.11 - Initial release to the public community Launchbox forum Motivation
While there exist other tools can import MAME Software Lists such as MAME Software Lists Import Tool by @JoeViking245, they often fall short when dealing with the complexity and quirks of MAME's database. This plugin was created to solve common frustrations:
Platform Clutter: MAME often has multiple system drivers and media types (cassette, floppy, cartridge) for a single real-world platform. Other importers can create a messy platform list (e.g., "Amstrad CPC (Cassette)", "Amstrad CPC (Floppy)"). This tool intelligently maps them all to a single, clean platform like "Amstrad CPC". Manual Emulator Configuration: Getting softlist titles to run correctly often requires specific command-line arguments for each game or media type. This tool automates that process entirely based on a flexible configuration file. Complex System Mapping: What about systems that have no softlists but are still desirable to import, like JAKKS Pacific Plug & Play devices? This tool allows you to map them to the correct platform, ensuring they are not overlooked. Or even better, having a mixture of systems and softlist titles under one single platform, e.g. some JAKKS Pacific Plug & Play devices has pluggable soft keys. Fine-Grained Control: The import process is driven by a powerful YAML file, giving you complete control to override default settings, define custom command lines for specific games, and handle exceptions gracefully. In short, this plugin was built for curators who want their MAME softlist collection in LaunchBox to be not just imported, but correctly and cleanly organized with minimal manual effort. What's best is that job is already done for you by me, which I also maintained a template here.
Key Features
Wizard-Style Interface: An easy-to-use, step-by-step wizard to guide you through the import process. Intelligent Platform Mapping: Uses a YAML configuration to map multiple MAME systems and softlists to a single, clean LaunchBox platform (e.g., mapping a2600, a2600_cass, etc., all to "Atari 2600"). Automatic Emulator Configuration: Sets the correct MAME driver and command-line parameters for each game, ensuring they are immediately playable. Advanced Clone Handling: Choose how to handle clone ROMs: Import as Additional Apps (Recommended). Import as separate, standalone games. Skip them entirely. Artwork & Manuals Importing: Automatically finds and copies associated artwork (Gameplay, Title, Select Screens) and manuals from your MAME extras folders. Game Health Status: Automatically flags games as "Broken" in LaunchBox if they are marked as supported="no" or status="preliminary" in MAME's database. Detailed Progress Reporting: See real-time updates on which platform and file is being processed. Cleanup Options: Can remove all existing games from a platform before import to ensure a fresh start. How It Works
The importer relies on three main sources of information:
Your Curated ROMs Folder: It scans a folder where your ROMs are organized by platform, system, and softlist. This structure is essential for the importer to understand the context of each file. MESS's XML Database (mess.xml): This file provides the ground truth for all machine information, software details, and parent-clone relationships. YAML Configuration (system_softlist.yml): This is the heart of the importer. It defines how a system or softlist titles is mapped to LaunchBox platforms, which emulator to use, what custom command-line arguments are needed, and more. This file gives you complete control over the final import. The YAML Configuration (system_softlist.yml) can be automatically generated using my mess_curator tool.
The tool processes this information to create perfectly configured game entries in LaunchBox, complete with metadata, artwork, and the correct launch commands.
Dependencies
To use this importer plugin, you must first organize your MAME softlist ROMs using a companion tool, mess-curator CLI/UI that I developed.
The importer relies on the specific folder hierarchy and metadata references created by mess-curator's system_softlist.yml configuration. You can either use a preset system_softlist.yml provided by mess-curator or generate your own.
Prerequisites
Before you begin, you will need:
1. MAME Curated Softlist Importer Launchbox Plugin
Download and place the MAMECuratedSoftlistImporter.dll file into Launchbox\Plugins\MAMECuratedSoftlistImporter folder.
2. Curated ROMs Folder
A folder containing your MAME softlist ROMs, organized in a specific structure.
My mess-curator companion tool can generate this structure for you via mess-curator copy-roms subcommand.
- Your_Base_Roms_Folder/ <-- e.g., "roms" - platform-friendly-display-name/ <-- e.g., "jakks-pacific-tv-game" - mame_system_name/ <-- system without any softlist titles, e.g., "jak_batm" - system.zip <-- e.g., matches the mame_system_name (zip file), should only have one single zip file - mame_system_name/ <-- system with softlist titles, e.g., "jak_dora" - softlist_name/ <-- e.g., "jakks_gamekey_nk" - softlist_game1.zip <-- e.g., "dora.zip" - softlist_game2.zip <-- e.g., "popsnow.zip" - softlist_game3.zip <-- e.g., "volbird.zip"
Steps
Download the latest release from mess-curator Releases page. Run python src\mess_curator.py and go through the initial setup wizard until you reach the point where it download the mess.xml for your matching MAME romset version. Refer here for the initial setup. Run python src\mess_curator.py copy-roms to start copying roms from your MAME romset adhering to the system/softlist structure defined in the system_softlist.yml file. Check your output rom folder, profit! 3. MAME/MESS XML File
An XML file containing metadata for non-arcade systems that matches your MAME ROMset version, downloadable from https://www.progettosnaps.net/mess/repository.
E.g. for MAME 0.278, download https://www.progettosnaps.net/download/?tipo=mess_xml&file=/mess/packs/xml/mess278.zip.
4. system_softlist.yml YAML Config File
This is the most important file that defines the metadata for the rom files detected during import configurations. You can use a pre-defined template that is selectable in Step 1 Setup Wizard with my mess-curator tool.
This file is critical. It tells the importer how to handle each system and softlist titles. Here is an example snippet with explanations:
# This is a single entry for the Amstrad CPC system. amstrad_cpc: # A list of all MAME system/driver names that should be mapped to this platform. mame_system_names: - cpc464 - cpc664 - cpc6128 # ... and so on. # The final, user-friendly name for the platform in LaunchBox. platform_name: Amstrad CPC # A list of all MAME softlist names that belong to this platform. softlist_names: - cpc_cass - cpc_flop # (Optional) The category for this platform in LaunchBox. platform_category: Computer # (Optional) Defines the emulator and command-line parameters. emulator: # The name of the Emulator entry in your LaunchBox setup. name: MAME (Cartridge) # {mame_system_name} and {media_type} are placeholders that the importer will fill in. default_command_line_parameters: '{mame_system_name} {media_type}'
See my mess-curator repo README here for more information.
5. MAME (MESS) Emulator
Create an emulator named as MAME (MESS) and configure it to point to your mame.exe emulator. The emulator name is not hard coded in the plugin itself, and is lookup from the system_softlist.yml, and MAME (MESS) is the default emulator name specified in that file.
Usage: Step-by-Step
The importer is designed to be run from within LaunchBox (Tools > MAME Curated Softlist Importer).
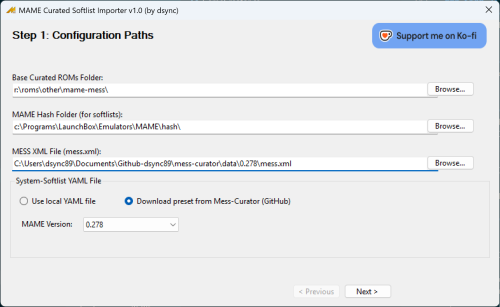
Step 1: Configure Paths
Set the paths to your ROMs, MAME hash folder, MAME XML file, and the system softlist YAML file.
For the system softlist YAML file, you can also automatically select a template matching your MAME ROMset version from my mess-curator repo.
Step 2: Select Platforms
Choose which platforms (as defined in the system softlist YAML file) you want to import or update. You can select by category and see a list of platforms that belonged to that category.
Step 3: Import Options
Configure how clones and unsupported games are handled. You can also choose to remove existing games in the platform before importing to ensure all rom paths are up to date.
Step 4: Import Artwork & Manuals
Select which types of artwork and manuals you want to copy over from your MAME extras folders. Ideally you want all since Launchbox database might not have the snaps for all of these softlist titles. The plugin will intelligently mapped each artwork type to the right Launchbox artwork folder for each selected platform.
Step 5: Processing & Summary
The tool will now process all selected platforms, providing real-time progress updates. Once complete, it will display a detailed summary of the import session. The screenshot above shows the output for all 105 platforms (took ~5 minutes).
Import complete! Games Removed: 3254 Imported: 16542 games Updated: 0 games Skipped (already existed): 462 games Clones Added as Additional Apps: 4365 games Platforms Created: 68 platforms --- Metadata Details --- Used MAME System Description Fallback: 1054 games Metadata Not Found (used filename): 1 games --- Health Status --- Marked as Broken (Unsupported/Preliminary): 3828 games --- Artwork & Manuals Summary --- Title Screens Copied: 6886 Gameplay Snaps Copied: 7583 Select Screens Copied: 117 Manuals Copied: 424
A Note on Saving: After the import is finished, LaunchBox needs to save all the changes to its database. For very large imports (100+ platforms), this can take several minutes. The UI may appear to hang during this time—this is normal. Please be patient and let it complete the save.
Just for reference, this is what a fresh Launchbox collections will looked like after importing all 106 platforms for MAME 0.278 ROMset, using my preset 0.278 system-softlist YAML file.
FAQ
Q: Why create per-game custom command lines instead of using a universal LUA script?
A: Simplicity and reliability. This method ensures that every game has a self-contained, correct launch command without relying on external scripts that can sometimes fail or require complex setup. It's the most straightforward way to guarantee playability out of the box.
For advanced users who want to automate complex sequences (like loading from a tape, entering commands, etc.), MAME's autoboot_script feature is the ideal solution. You can find excellent examples of such scripts at RandoMame's autoboot_script repository.
As a matter of fact, I'm also working on a separate project to provide these autoboot scripts. Stay tuned!
Future Work
Automatically assign newly added Platform to the Platform Categories from system-softlist YAML file
Even though the system-softlist YAML file already defined various Platform Categories for the Platforms, I couldn't find any reference in the Launchbox Plugin API that mention how to assign multiple Platform Categories for a Platform. So for now you have to add them manually.
Disclaimer
This tool modifies your LaunchBox database (LaunchBox.xml and other files). Please back up your LaunchBox Data folder before running a large import for the first time. The author is not responsible for any data loss. Use at your own risk.
88 downloads
-
Streamdeck scripts for Retroarch hotkey functions
By midd
Me and Eric Ramirez put these AHK scripts together for our Stream decks. We have available:
Load State, Save State, Next Shader, Previous Shader. Menu, Exit, Pause, Fast Forward, Rewind, Cheats
They are hot key functions utilizing 5 as the hot key. You can make the hot key anything you want but you'll have to edit each script. Same thing with the key to activate the function. For example 5 and the space bar will fast forward your game. Go to Retroarch-Settings-Input to check those assigned keys to the listed functions.
Just create a profile (I called mine Retroarch). Point it to your Retroarch.exe file. To assign functions, go down to System and drag the Open Icon to one of the windows. Choose a script and give it a name. That's all there is to it.
15 downloads
(0 reviews)0 comments
Submitted
-
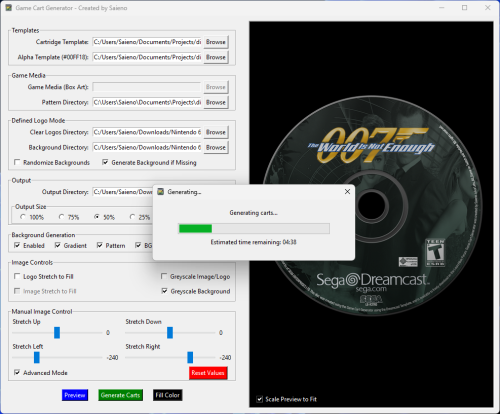
Game Cart Generator
By Saieno
Game Cart Generator - Game Art Compositing Tool
Created by Saieno - @Lets_All_Game on Twitch and LetsAllGame on YouTube
Overview
Game Cart Generator is a standalone desktop application for generating stylized cartridge or disc-based artwork. It's primarily for user-supplied template layers, clear logos or box art, and optionally background images or procedural backgrounds to compose polished output images.
The app supports both standard label and defined logo area templates for advanced layouts, with options for pattern overlays, gradient fills, padding, scaling, compositing, and live color selection.
This app is designed for batch generation and includes a threaded progress bar, preview support, auto-saving of settings per template, and example templates which you can use if you'd like.
Template Requirements
Cartridge Template (PNG):
A top-layer graphic to overlay the final composition. Should contain transparency for visible underlying layers. Alpha Template (PNG):
Must contain the color #00FF18 to define the artwork or logo area for the label. May contain the color #FF00FF to define a specific logo area which enables "Defined Logo Mode". These colors are used as masking keys and will be auto-detected and replaced during rendering. Key Features
Support for both Standard and Defined Logo Area modes. Auto-detects and enables Defined Logo Mode based on Alpha Template contents. Background generation with: Solid color fill Vertical gradient Gradient with pattern overlay Optional greyscale conversion for logos and/or background layers. Background fallback logic when no matching background is found. Pattern overlays with optional grayscale masking. "BG Burn" effect for high-contrast multiply effect backgrounds. "Logo Burn" for blending greyscale logo and background together as a single burn layer. Fill Color: fills transparent areas inside the defined logo mask with a selectable color. Color Picker: choose fill color directly from anywhere on screen. Logo Stretch to Fill: stretches logos to fill the defined area, ignoring aspect ratio. Manual Image Stretching (up, down, left, right), with Advanced Mode extended range option. Scaled preview window with real-time updates and optional fit-to-window toggle. Threaded batch generation with estimated time remaining. Per-template configuration saved to settings.conf. Recursive input directory support for all asset folders. Defined Logo Mode Behavior
When a template contains #FF00FF (magenta), the tool enables Defined Logo Mode:
Clear logos are used in place of full box art. Backgrounds are matched by filename (e.g., Sonic.png). If no match is found: If "Generate Background if Missing" is disabled, a random background from the folder is used. If "Generate Background if Missing" is enabled, a generated gradient/pattern background is used automatically—even if background generation is off—to prevent transparency gaps. Greyscale Background option converts matched backgrounds to black & white. BG Burn applies a high-contrast multiply effect to background generation. Logo Burn composites the greyscale logo and background together, then blends that composite with the stylized background. If Fill Color is defined, it replaces any transparent pixels inside the logo mask area with the selected solid color. Logo Stretch to Fill forces the logo to completely fill the masked region, ignoring original aspect ratio. Output
Final images are saved as .png to the selected output folder. Filenames are based on input image names for easy frontend installation. Composite includes background + logo/art + cartridge template overlay. Requirements
No installation or required. Windows 10/11 Operating System Credits
Created by @Saieno
Twitch: https://www.twitch.tv/retr0sai
YouTube: https://www.youtube.com/@LetsAllGame
@Raindupon - Xbox, Xbox 360, PlayStation 2, PlayStation 3, and Sega Dreamcast disc template bases.
@ABeezy13 - Hucard, Gameboy, Gameboy Color, Gameboy Advance, Nintendo 64, Super Nintendo template bases.
@WallyWonka - Sega Genesis template base.
@RetroNi - Sony PlayStation Portable and Super Famicom template bases.
MarkusMcNugen on DeviantArt - Nintendo Switch template base.
Bar0011 on DeviantArt - Nintendo 3DS template base.
Omar Sacca (a.k.a. ortho*) - Famicom template base.
415 downloads
- game media
- cart art
- (and 3 more)
-

Auto Play N' Quit - AHK Script by IzzIsHOr
By izzishor
🎯 ATTRACT MODE for BigBox: Auto Play N' Quit (No Plugins, No Hassle!)
Sick of staring at a frozen BigBox playlist? Wanna transform your arcade setup into a living, breathing arcade cabinet that automatically cycles through games like a pro?
Look no further. This lean AutoHotkey script brings ATTRACT MODE to BigBox, no complicated setups, no bloat.
What does it do?
🚀 Launches a game from any BigBox playlist or platform (The one that's opened)
⏳ Waits a solid 5 minutes letting the game’s demo/attract mode run
🛑 Closes the emulator cleanly (using Alt+F4 + forced process kill if needed)
🎯 Brings BigBox back to the front, then scrolls randomly down 2 to 8 games in your list
🔄 Launches the next game and repeats forever, hands-free, stress-free
🎮 Supports all vertical scrolling themes only (vertical = essential for proper down-arrow navigation)
🛑 Exit anytime by pressing Joy8 (Start button) or the ESC key
Why is this awesome?
You get a ATTRACT MODE, cycling games without lifting a finger
Works out of the box with your existing BigBox setup, zero complicated plugins
Customizable ProcessList.txt lets you kill any stubborn emulators or apps that refuse to close
Perfect for cabinets, game rooms, shows, or that “cool factor” when your rig is idle
⚠️ Note:
Your BigBox theme must be vertically scrolling. If you're using a horizontal wheel or grid layout, the Down-arrow navigation won’t behave properly.
You MUST download either the ZIP or the two loose files, the AHK and the TXT, and they can be placed anywhere, but MUST BE in the same folder.
🔧 ProcessList.txt
Just add any emulator or game launcher that needs force-closing to ProcessList.txt separated by pipes, like so:
retroarch|mame|duckstation|pcsx2
Buy me a Coffee ☕: IzzIsHOr
142 downloads
- bigbox autoplay game
- bigbox ahk script
- (and 3 more)
-
Game Size Manager
By RegularRegs
Hey folks,
RegularRegs here (reg0lino on GitHub). I've put together a LaunchBox plugin that I hope some of you will find useful for managing your game libraries, especially when it comes to disk space.
Game Size Manager (v1.0.0).
What it does, plain and simple:
This plugin looks at your games and tells you how big they are.
For games you have installed locally (PC games, ROMs, CUE+BIN sets), it calculates their actual size on your drive. For any game (installed or not), it can also try to fetch the estimated required disk space from the RAWG.io online database. This is handy if you're thinking about downloading something big or just want a ballpark figure. All this info gets put into new custom fields right in LaunchBox, so you can see it in your game list or details panel.
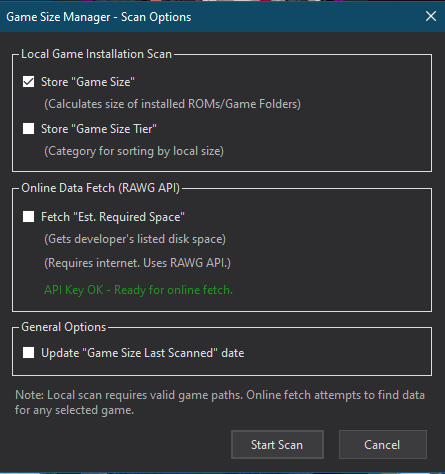
Here's what the Scan Options look like when you run it:
(URL: https://github.com/user-attachments/assets/ec81198e-eff3-4b13-b517-3aeea802eba3 )
(The Scan Options dialog – choose what to calculate and fetch)
And here's an example of the kind of info you'll see in your Game Details:
(URL: https://github.com/user-attachments/assets/c4c037e8-fcd6-4720-a504-1e57ba8f3f48 )
(Example of the new custom fields in the Game Details panel - Sometimes RAWG is inaccurate, but I have mods on for this game)
Core Features:
Local Size Calculation: Checks your actual game folders, ROMs, and disc images (including CUE+BIN). Online Estimated Size: Pulls listed disk space requirements from RAWG.io (you'll need to get your own free API key from them for this part). New LaunchBox Custom Fields: Game Size (the local size) Game Size Tier (a category to help sort by local size) Est. Required Space (the online estimate) Game Size Last Scanned (when the plugin last looked at the game) Easy to Access: Works from the Tools -> Game Size Manager menu in LaunchBox for scanning whole platforms.
(URL: https://github.com/user-attachments/assets/ac4d437a-81c3-4c1f-8bd5-f28e5704273d )
(Accessing via the Tools Menu)
(URL: https://github.com/user-attachments/assets/615e147a-3b9d-4064-93d7-b7c2d75572b6 )
(Platform Actions dialog)
(URL: https://github.com/user-attachments/assets/03b8858d-5f1e-40be-a6a2-bffd9359eba2 )
(Choosing your platform)
Also available via right-click on selected games.
You're In Control: The "Scan Options" dialog (pictured earlier) lets you pick exactly what data to grab each time. Online fetching is off by default and only works if you've set up your RAWG API key. Error Reports: If it can't find a path or get info from the API, it'll list those games out for you. Download & Setup:
Download Link:
(Use the forum's link button for this)
https://github.com/Reg0lino/LaunchBoxGameSizeManager.Plugin/releases
(Look for GameSizeManager_v1.0.0.zip) VERY IMPORTANT - "Unblock" the ZIP File First!
Before you unzip it, right-click the downloaded .zip file, go to Properties. If there's an "Unblock" checkbox at the bottom (under a security warning), check it and click OK/Apply.
(URL: https://github.com/user-attachments/assets/afb89578-4235-42a2-a184-f4836ed882f6 )
(The "Unblock" checkbox in file Properties) Install: Unzip the GameSizeManager_v1.0.0.zip file. You'll get a folder named GameSizeManager. Copy that whole GameSizeManager folder into your main LaunchBox\Plugins\ directory. (The path will look something like LaunchBox\Plugins\GameSizeManager\LaunchBoxGameSizeManager.Plugin.dll) RAWG.io API Key (If you want "Est. Required Space"): This feature uses RAWG.io. You need a free API key from them: (Use forum link button) https://rawg.io/apidocs In the LaunchBox\Plugins\GameSizeManager\ folder, you'll find RAWG_API_KEY.txt and API_DIRECTIONS.txt. Follow API_DIRECTIONS.txt to put your key in RAWG_API_KEY.txt. Restart LaunchBox. How It Works:
Scanning: Whole platform: Tools -> Game Size Manager. Selected games: Right-click, Game Size Manager -> Calculate Game Size(s).... Scan Options: (Dialog shown earlier). Choose what to calculate/fetch. Viewing Data: Add the new custom fields (like Game Size, Est. Required Space) as columns in LaunchBox. Clearing Plugin Data: Use the "Clear Game Size Data" options. Just So You Know:
"Est. Required Space" info depends on RAWG.io. If they don't list it, the plugin will report "Size Info Not Found." Local game size accuracy needs correct game paths in LaunchBox. A detailed log file is created in LaunchBox\Plugins\GameSizeManager\ for troubleshooting.
Known Issues & Future Plans (v1.0.0):
API Data Variations: The "Est. Required Space" feature relies on data from RAWG.io. If RAWG doesn't have storage info listed for a game, or if it's in an unusual format, the plugin will report "Size Info Not Found." I am thinking about fallback scrapes, or just leaving it alone, not sure yet. Multi-File Disc Games (e.g., some PS1, Dreamcast): If your game uses a .cue sheet (like most PS1 CUE+BIN sets) or a Dreamcast .gdi file, the plugin will calculate the total size of all referenced tracks. However, if LaunchBox points directly to a single .bin file (e.g., Track 01.bin) without an associated .cue file that lists all tracks, the plugin will currently only calculate the size of that single .bin file. For accurate sizing of the full multi-track game in such cases, ensure LaunchBox is using a proper .cue or .gdi file that references all parts of the game. Specific Extracted Game Formats (e.g., Original Xbox, Wii U Loadiine): While the plugin attempts to find the root folder for PC-like game structures, some specific console extracted formats (like original Xbox game folders if LaunchBox points to the default.xbe, or Wii U games in Loadiine format if LaunchBox points to an internal .rpx file) might not have their total size calculated perfectly yet. The plugin often defaults to the size of the executable or the RootFolder if set. Future v1.1/v2.0 Goal: We plan to enhance GamePathLogic with more platform-specific rules to better identify the correct root directory for these types of extracted console game formats (e.g., Xbox, Xbox 360, Wii U) to provide more accurate local size calculations. Support for Dreamcast .gdi files (similar to .cue sheets) is also planned. Feedback / Questions?
This is v1.0.0, so feedback is welcome!
GitHub Issues: (Use forum link button) https://github.com/Reg0lino/LaunchBoxGameSizeManager.Plugin/issues Or reply here. Hope it's useful!
All the best,
RegularRegs (reg0lino on GitHub)
License: MIT License (full text in LICENSE.txt with the download).
52 downloads
- files
- organization
- (and 1 more)
(0 reviews)0 comments
Updated
-

Bulk Add/Remove Additional Applications
By JoeViking245
Thanks to the new (since v13.5) plugin feature that supports menu nesting, 2 plugins have been combined into 1.
(Bulk) Add Additional Applications - https://forums.launchbox-app.com/files/file/2866-bulk-add-additional-applications/
(Bulk) Remove Additional Applications - https://forums.launchbox-app.com/files/file/2980-bulk-remove-additional-applications/
These combined plugins have both been overhauled both functionally and visually to 'keep up with the times' and have a smaller footprint plus added features.
This plugin Requires LaunchBox v13.5 (or newer)
If you haven't updated to LaunchBox v13.5 (or newer), you really should. But until then, the original versions of the plugins (for now) still work. (see links above)
Installing:
After downloading the file, open the zip file and copy the contents into \LaunchBox\Plugins\
i.e. D:\LaunchBox\Plugins\BulkAddRemoveAdditionalApps\BulkAddRemoveAdditionalApps.dll
If you didn't use 7Zip to extract the contents,
Navigate to the plugin folder and right-click the file. Select 'Properties' Click "Unblock" and then click OK. If switching to this plugin from either of its predecessors, be sure to remove the older version(s) from your 'Plugins' folder.
Using:
Select one or more games Right-click on one of the selected games Select Bulk Add/Remove Additional Apps to expand 2 more options Select either: Bulk Add Additional Apps Bulk Remove Additional Apps
Bulk Add Additional Apps
The intent of this is to add the same Additional Application to more than one game, all in one shot.
It can also be used to add an Additional App to a single without having Edit the game.
What's new:
UI completely overhauled for that 'modern look' Removed restriction requiring multiple games be selected aka: You can now add an Additional App directly to a single game without having to Edit the game NEW Feature: Add %romfile% to the Command-Line Parameters to insert the "full\path\to\ROM\file.ext" (including quotes) when saved Option: Remove quotes Option: Remove file extension and folder path Tip: press Ctrl+R to insert %romfile% Bonus Feature: Add %title% to insert the games full Title Add %platform% to insert the games platform Name Tip: press Crtl+T or Ctrl+P to insert these (respectively) Hint: You may want to enclose these in quotes if they consist of more than 1 word %platform% = Atari 2600 "%platform%" = "Atari 2600" Huge Thanks to @Headrush69 for the idea of adding the %romfile% option!!! (%title% and %platform% was also his.)
Bulk Remove Additional Apps
The intent of this plugin is to Remove the same* Additional Application for all games in a given Platform, all at one time.
*Same is determined by the Additional Applications Application Name and Application Path. If they match exactly, they are the ‘same’.
Why use this?
Quite possibly you used Bulk Add Additional Apps and you clicked “OK” before realizing you forgot to add in the Command-Line Parameters, or the Additional App is simply not needed anymore.
Using:
When opening, the plugin will default to the selected games' Platform. You can select a different platform using the dropdown box.
By default, the plugin will 'combine' all Additional Apps that have the exact same Application Name AND Application Path, and only display one of those.
When you remove that "one", all occurrences (having the same Name and App Path) will be removed. Regardless of Command-Line parameters.
To separate these out by Command-Line parameters, check Split By Command-line.
Once you click Remove, there's no going back.
Some icons by Yusuke Kamiyamane
1,204 downloads
-

Visual Pinball X – Top Scores (hiscore) Viewer
By JoeViking245
View the Top Scores for your Visual Pinball X Tables
This plugin uses DNA Disturber’s PINemHi app to read a tables top scores that are stored in the nvram files created by VPinMAME. PINemHi currently it supports 425 roms.
New v2.0 Now viewable in Big Box (Requires LaunchBox/Big Box v13.19 or newer)
Instead of scrolling through these (in game)
See this (in LaunchBox)
If you’ve signed up on the PINemHi Leaderboard site, this plugin will also let you view your Personal Top 10 Scores (these scores are tracked separately from the Tables’ top scores) as well as the Best Top 10 Scores on the Leaderboard. Signing up is free and you only need to provide a username. No email address, proof of citizenship nor vaccinations required. (See Top 10 Scores below)
Requirements
LaunchBox/Big Box v13.19 (or newer) This plugin downloaded and setup (see Setting up the plugin below). PINemHi v3.6.3 (included with the plugin download) The game needs to point to a valid Visual Pinball table (i.e. file extension .vpx) This is required to get the ROM info for the table(s). Optional Requirements
Sign up for PINemHi Leaderboards. (see Top 10 Scores below)
Setting up the plugin
Copy the VPXHiScores folder (from inside the zip) into your \LaunchBox\Plugins\ folder (new install) rename New_pinemhi.ini to pinemhi.ini (existing installs) skip to Updating Existing Installs Edit the pinemhi.ini file (\LaunchBox\Plugins\VPXhiScores\PINemHi\pinemhi.ini) Under [paths], edit the path to the Visual Pinball (VP) “nvram” folder located inside your Visual Pinball installation. i.e. VP=D:\Emulators\Visual Pinball\VPinMAME\nvram\ Also edit the path to the "user" folder i.e. USER=D:\Emulators\Visual Pinball\user\ The path MUST end with a slash!! (optional) Under [user], type in your PINemHi Leaderboard name and code. (see Top 10 Scores below) Save and Close pinemhi.ini Updating Existing Installs (if updating from a previous version of this plugin)
The latest PINemHi app is included in the download.
pinemhi.ini and has been renamed it to New_pinemhi.ini so it doesn't overwrite your old settings
After copying the files into the plugins' folder
Navigate to the \VPXhiScores\PINemHi\ folder Open pinemhi.ini Open/Edit New_pinemhi.ini Copy from your original pinemhi.ini under [paths] the path to your Visual Pinball \nvram\ folder the path to your Visual Pinball \user\ folder under [user] your 'name' and 'code' Paste (or just type) these into New_pinemhi.ini Also adjust any other settings you may have changed. i.e. [keys] Note: under [keys] is a feature called "send_button". This allows you to submit your score without needing to exit the table. After saving and closing New_pinemhi.ini, rename your original pinemhi.ini file (just in case. i.e. OLDpinemhi.ini). Then rename New_pinemhi.ini to pinemhi.ini
Using the plugin
LaunchBox
Start LaunchBox. Right click on one of your VPX tables and select Visual Pinball Table HiScores Select View Table High Scores (see below for Starting/Stopping pinemhi_rom_monitor.exe) Big Box
Start Big Box. Go to the Game Details for one of your VPX tables and select VPX HiScores (see below for Starting/Stopping pinemhi_rom_monitor.exe) Navigating the window in Big Box:
Use Left Joy Up/Down or DPad Up/Down to scroll… you guessed it… Up/Down.
Use DPad Left/Right to switch between the score types.
Use your Big Box assigned Back button to close the window.
Right Joy will move the window.
Plugin Updates (new v2.0)
If an update for the plugin is available, the right-click menu will start with (U) i.e. (U) Visual Pinball Table HiScores
(LaunchBox only) When viewing high scores, click the information/support icon and click the Update Available button to take you to the plugins download page.
How it works
To get the top scores for a table, we 1st need to know which VPinMAME rom it’s using. To get this, the plugin searches the table for the name of the ROM that it uses. It will then search VPMAlias.txt to check if it has a ROM alias. The ROM name is then passed to pinemhi.exe which extracts the top scores from the nvram file associated with the ROM.
The plugin searches the tables file directly for the ROM name. Power users: If you use an extracted/modified .vbs and change the cGameName = to a different ROM, be sure to change (at least that part) in the table itself.
Top 10 Scores
To be able to view your Personal Top 10 and Best Top 10 scores, you need to sign up at http://pinemhi.com/hiscores.php. This is where you’ll get your name and code to add to “pinemhi.ini “. (See note #4 under Setting up the plugin [above])
You will also need to have PINemHi’s ROM Monitor (“pinemhi_rom_monitor.exe”) running. This is a tiny executable that runs in the background and detects when a VPX table is loaded and then keeps track of your Personal top scores as well as downloads the Best Top 10 scores for that table.
Please read through “PINemHi LeaderBoard installation and config.txt” located in the plugin folder.
(\LaunchBox\Plugins\VPXhiScores\PINemHi\ PINemHi LeaderBoard installation and config.txt) Some main points in the documentation (for use with this plugin):
Setup your Visual Pinball (VP) and user (USER) path and [user] name and code. Keys Make note of which shortcut keys do which action. There are 6 different hotkeys. Change them as necessary. Controller buttons are also supported. under [keys] is a feature called "send_button". Setting and using this allows you to submit your score without needing to exit the table. Run “pinemhi_rom_monitor.exe”. Other IMPORTANT notes:
As a final note... The pinemhi_rom_monitor.exe was made with AHK (autohotkey). Microsoft Defender will frequently call AHK executables to be a virus/trojan This is a false positive. Feel free to test it with other anti-virus programs There is an option in Microsoft Defender to allow the program to still be used (make an exception for that file)
Starting/Stopping pinemhi_rom_monitor.exe
You can toggle the Rom Monitor On/Off from the Tools menu. Depending on its state, you’ll see this:
Or this:
In Big Box, in the Game Details screen, you’ll see either "Start PINemHi Monitor" or "Stop PINemHi Monitor")
When you launch a Table with PINemHi Rom Monitor running, you’ll get a popup after the table loads showing your Top 10 Scores. Press “L” (default) to hide it. This is a nice indicator that the ROM Monitor is running and that your Personal Top Score will be saved. Alternately, you can set on_at_start=0 in pinemhi.ini to disable the popup.
PINemHi Leaderboard
Along with Personal Top Scores, PINemHi Leaderboard has some other cool features not directly accessible through this plugin like daily, weekly and 5-minute challenges. (These are accessible using the shortcut keys mentioned above.) It tracks Player 1 scores [aka Personal Top 10 Scores] as well as Special Scores (i.e. 20 loops [Back To the Future] or 50 martians killed [Attack From Mars]). You can add up to 9 friends and view each other’s top scores. There are also a number of Badges that can be earned on various tables.
Main Site: http://www.pinemhi.com/
Leaderboard: http://pinemhi.com/hiscores.php
VPForums discussion: https://www.vpforums.org/index.php?showtopic=44580
ROM-less Tables (new v2.1.0)
[Some (most?)] ROM-less table are supported to show local high scores. Thanks goes to @Sbaby (and a little bit of AI ) for doing most the work towards implementing this feature. To see online top scores, your tables will need to be modified. See PINemHi's Main Site and click ROM-LESS CODE SNIPPETS for details.
Special thanks to DNA Disturber for creating PINemHi for the Visual Pinball community and allowing permission to use it here, making this plugin possible!!
115 downloads
-
Launchbox MQTT
By srxz
Version 2.0.1 - From Launchbox 13.19 to the latest.
Version 1.0.1 - Until Launchbox 13.18
So, basically what this does is expose some of the information to a MQTT Topic, or multiple really, this way you can add the Information on your Homeassistant instance or whatever consumer of that topic is.
Requirements:
MQTT Server Installation
Extract to the plugins folder Setup
Open the Launchbox Menu --> Tools --> MQTT Settings Fill the information about your MQTT
Topics:
launchbox/systeminfo
Info:
{ "TotalGames": 14, "TotalPlatforms": 2, "BigBoxRunning": false, "IsBigBoxInAttractMode": false, "IsBigBoxLocked": false, "IsPremium": true, "BigBoxCurrentTheme": null } launchbox/nowplaying
info:
{ "Title": "Donkey Kong Country", "Platform": "Super Nintendo Entertainment System", "Developer": "Rare", "Publisher": "Nintendo", "ReleaseDate": "1994-11-24T06:00:00-02:00", "Rating": "E - Everyone", "LastPlayedDate": "2025-02-04T14:57:47.1845482-03:00", "Genres": [ "Platform" ], "Favorite": false, "PlayCount": 12, "Status": "Playing" }
launchbox/retroachievments (I have no idea why this doesnt work, I personally dont use it so Dont know)
info:
{ "GetGameInfoWithProgress": {}, "TotalPoints": [ {} ], "TotalAchievements": {}, "LastGamePlayed": {} }
Homeassistant
Create the sensors in configuration.yml:
mqtt: - sensor: - name: "LaunchBox Total Games" state_topic: "launchbox/systeminfo" value_template: "{{ value_json.TotalGames }}" icon: mdi:gamepad-variant - name: "LaunchBox Total Platforms" state_topic: "launchbox/systeminfo" value_template: "{{ value_json.TotalPlatforms }}" icon: mdi:gamepad-classic - name: "LaunchBox Now Playing Title" state_topic: "launchbox/nowplaying" value_template: "{{ value_json.Title }}" icon: mdi:gamepad - name: "LaunchBox Now Playing Platform" state_topic: "launchbox/nowplaying" value_template: "{{ value_json.Platform }}" icon: mdi:microsoft - name: "LaunchBox Now Playing Developer" state_topic: "launchbox/nowplaying" value_template: "{{ value_json.Developer }}" icon: mdi:human - name: "LaunchBox Now Playing Publisher" state_topic: "launchbox/nowplaying" value_template: "{{ value_json.Publisher }}" icon: mdi:office-building - name: "LaunchBox Now Playing Rating" state_topic: "launchbox/nowplaying" value_template: "{{ value_json.Rating }}" icon: mdi:star - name: "LaunchBox Now Playing PlayCount" state_topic: "launchbox/nowplaying" value_template: "{{ value_json.PlayCount }}" icon: mdi:counter - name: "LaunchBox Now Playing Status" state_topic: "launchbox/nowplaying" value_template: "{{ value_json.Status }}" icon: mdi:gamepad-circle - name: "LaunchBox BigBox Running" state_topic: "launchbox/systeminfo" value_template: "{{ value_json.BigBoxRunning }}" icon: mdi:play-box-outline - name: "LaunchBox Attract Mode" state_topic: "launchbox/systeminfo" value_template: "{{ value_json.IsBigBoxInAttractMode }}" icon: mdi:motion-play-outline - name: "LaunchBox BigBox Locked" state_topic: "launchbox/systeminfo" value_template: "{{ value_json.IsBigBoxLocked }}" icon: mdi:lock-outline - name: "LaunchBox Premium Status" state_topic: "launchbox/systeminfo" value_template: "{{ 'Premium' if value_json.IsPremium else 'Free' }}" icon: mdi:crown - name: "LaunchBox Current Theme" state_topic: "launchbox/systeminfo" value_template: "{{ value_json.BigBoxCurrentTheme if value_json.BigBoxCurrentTheme else 'None' }}" icon: mdi:theme-light-dark
An example of simple dashboard (i'm horrible designing these):
Code for card:
type: vertical-stack cards: - type: custom:mushroom-title-card title: 🎮 LaunchBox Status - type: custom:mushroom-template-card primary: "Total Games: {{ states('sensor.launchbox_total_games') }}" secondary: "Total Platforms: {{ states('sensor.launchbox_total_platforms') }}" icon: mdi:gamepad-variant layout: horizontal fill_container: true - type: custom:mushroom-template-card primary: "BigBox Running: {{ states('sensor.launchbox_bigbox_running') }}" secondary: "Attract Mode: {{ states('sensor.launchbox_attract_mode') }}" icon: mdi:play-box-outline layout: horizontal fill_container: true multiline_secondary: true - type: custom:mushroom-template-card primary: "BigBox Locked: {{ states('sensor.launchbox_bigbox_locked') }}" secondary: "Premium Status: {{ states('sensor.launchbox_premium_status') }}" icon: mdi:lock-outline layout: horizontal fill_container: true - type: custom:mushroom-template-card primary: "Current Theme: {{ states('sensor.launchbox_current_theme') }}" icon: mdi:theme-light-dark layout: horizontal fill_container: true - type: conditional conditions: - entity: sensor.launchbox_now_playing_status state_not: Idle card: type: custom:mushroom-template-card primary: "Now Playing: {{ states('sensor.launchbox_now_playing_title') }}" secondary: "Platform: {{ states('sensor.launchbox_now_playing_platform') }}" icon: mdi:gamepad layout: horizontal fill_container: true multiline_secondary: true - type: conditional conditions: - entity: sensor.launchbox_now_playing_status state: Playing card: type: custom:mushroom-chips-card chips: - type: entity entity: sensor.launchbox_now_playing_developer icon: mdi:human - type: entity entity: sensor.launchbox_now_playing_publisher icon: mdi:office-building - type: entity entity: sensor.launchbox_now_playing_rating icon: mdi:star - type: entity entity: sensor.launchbox_now_playing_playcount icon: mdi:counter
OBS: This has super limited support, I made this out of curiosity only, I tested it literally 30min so expect bugs or things dont working fully.
49 downloads
- automation
- homeassistant
- (and 1 more)
-
Redream Per-Game VMUs
By Saieno
Redream Per-Game VMUs for LaunchBox
Created by Saieno - @Lets_All_Game on Twitch and YouTube
What it is
A ready-to-use installer package for enabling per-game Virtual Memory Unit (VMU) save file management in Redream; fully integrated with LaunchBox
Why use it
Redream creates four VMU files, and by default all four are shared across all games. This tool creates a vmu0.bin dynamically per-game, while leaving vmu1–vmu3 shared and persistent.
This allows each game to have its own memory card (vmu0.bin), preventing cross-game save data conflicts and minimizing space limitations.
Requirements:
LaunchBox 13.12+ (must be closed during installation) Standalone Redream (latest version) Redream configured with automated default settings in Launchbox Redream needs to be marked as your 'Default Emulator' for the platform More than one Emulator configured within Launchbox ROM filenames with single spaces only Windows 10/11 (not available on Android) What it does
Installs a dynamic launcher (DCBoot.bat) and a minimized shortcut (DCBoot.lnk) Installs a custom AHK script (LaunchGameRedream.ahk) for handling VMUs Copies a blank vmu-default.bin into Redream Modifies Redream Emulator in LaunchBox to hook into the new launcher Installs a custom LaunchBox plugin (PerGameVMUName.dll) for consistent and clean VMU naming Bonus
Full uninstaller included — reverts all changes and cleans up Everything self-contained, no manual file editing required Installer remembers paths via settings.conf for faster reinstalls/uninstalls VMU files are based on the name within LaunchBox for consistency Share and trade per-game VMUs easily from the Redream VMU_Games directory Before You Install
If you already have save data in vmu0.bin, consider moving those saves to vmu1, vmu2, or vmu3 before installing. After installation, Redream will use a new game-specific VMU as vmu0.bin for each game. Once a game is launched, you can transfer your old saves from the shared VMUs (vmu1–3) onto the new per-game VMU within Redream itself.
Known Issues
Filenames with double spaces will not load properly into Redream. Please use a tool like Bulk Rename Utility to clean up ROM filenames before launching. If Redream is the only Emulator configured within LaunchBox, it can cause issues on install.98 downloads
(1 review)0 comments
Updated
-
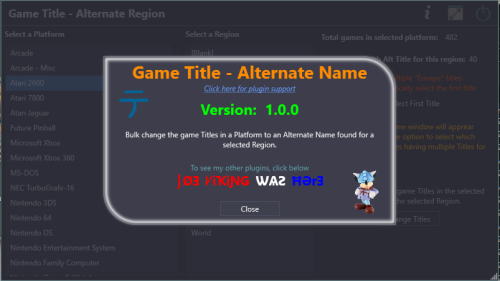
Bulk change game Titles to Alternate Names (by Region)
By JoeViking245
Game Title - Alternate Name
Inspired from a comment by @AstroBob (December 2024)
Challenge accepted. 😎
Some (many?) games have Alternate Names and are saved as such when metadata is scraped from the LaunchBox Games Database. These are generally used for different Regions.
Using this plugin, you can bulk change the game Titles in a Platform to an Alternate Name found for a selected Region.
Prerequisites
Requires LaunchBox v13.19 (or newer)
Installing
Download and extract the contents of the download into your /LaunchBox/Plugins/ folder.
i.e. D:/LaunchBox/Plugins/GameTitle-AlternateName/GameTitle-AlternateName.dll
Using
Start LaunchBox From the Tools menu, select Game Title - Alternate Name Select a Platform Select a Region Only possible Alternate Name Regions for games in that platform will be shown. If the Alternate Name doesn't have a Region. it will be listed as [Blank] Click Change Titles
If a game doesn't have an Alternate Name for the selected Region, nothing will change for that game.
If any of the games have more than one Alternate Name for the selected Region, you have the option to:
(default) manually select the Title for each game having more than one Title for that Region (optional) replace the game Title with the 1st one it finds for the selected Region (check Select First Title)
If you didn't check Select First Title (default):
When clicking Change Titles, after the games that had a single Title for the Region are updated, you will be shown a list of games that have multiple Titles for the selected region. Select a game, then double-click the Title you wish to use.
Updates (internet connection required)
If an (U)pdate for this plugin has been released on the forums,
The plugin title in the Tools menu will show as: (U) Game Title - Alternate Name (The addition of (U) at the beginning) At the top of the plugin window, it will show "Update available" Click the Info/Support icon, then click the Update Available button. This will open the plugins download page in your default browser.
As always, all thoughts, views, opinions, suggestions, requests and comments and welcome.
"Be good Humans." (Brian Phelps)
155 downloads
-
Super Pause Menu
By Chadmando
This is the download page for Chadmando's Super Pause Menu. For installation instructions and further information about Super pause menu please visit the main discussion page.
https://forums.launchbox-app.com/topic/55355-chadmandos-super-pause-menu-64bit-windows/
UPDATE Feb.23/25 - 2.4.0
Added a strategy guide menu! Place any amount of strategy guide files within the strategy guide game folder and a new menu item will be added to the main pause screen called "Strategy Guides". The last open strategy guide page will automatically be bookmarked, available to be recalled during, or even on the next play session. Supported file types are image files including jp2 files within a folder OR a .zip, .cbz, .7z, .cbr, .rar, .pdf, archive, or even a .txt file. The strategy guide filename (minus extension) will be the name used on the Strategy guide menu. The default strategy guide folder will be located in Launchbox\super pause menu\Strategy Guides\[Platform]\[Game Title] or Launchbox\super pause menu\Strategy Guides\[Platform]\[Rom Filname (minus .ext)]. The strategy guide root folder and the sizing attributes can be changed on page 6 of the "Customize Menu" option in the Super pause menu settings (Located in tools -> Super Pause Menu Settings in Launchbox). The conversion process can take a bit of time, the quickest method would be to use non-jp2 images in a folder, rather than an archive. The longest loading time would be an archive file containing a bunch of Jp2 images. .txt conversion can take a bit of time as well (converting it to a multi-"page" image). Added sqlite3 dll to help store more complex information, such as the strategy guide bookmarks. Included imagemagick convert program in resources to convert jp2 images to regular .jpg images that Super Pause Menu can handle. Added folder, .zip, .7z, .rar, .txt support for manuals. Changed the default "Back" menu key to escape, instead of delete to avoid incidental deletion of anything. Added some basic emulator settings for Yuzu emulator (Nintendo Switch). Added some emulator settings for Daphne emulator Added some extra .bat support. If launchbox/bigbox runs a .bat file for an emulator, which then in turns launches an emulator executable (such as may be needed for Daphne), super pause menu will wait 10 seconds for the emulator to launch after the .bat file. Enabled forceful activation to EPSXE emulator Changed the font sizing to all custom profiles so it can fit in "Strategy Guides". Changed font size handling on the main menu to avoid any single menu item taking up multiple lines Super Pause Menu will now delete the temp folder it creates after a play session in the super pause menu folder Added a "Loading..." animation to the Strategy guide and manual selection. Tested with LB/BB version 13.19
UPDATE Jan. 08/25 - 2.3.1
Fixed an issue if someone had an incorrectly labelled .cbr file as a cbz, and vice versa, it will now try opening up the manuals as the opposite file type if there are issues the first time. Added logic so the menu will display the word "Error!" within the gui breifly if the cbr or cbz file has issues opening (ie, no contents in the file). Changed how the menu retrieves the manual pages when "turned" for better performance. Uploaded the proper settings file, accidentally compiled the wrong one into the last package. UPDATE Jan. 08/25 - 2.3.0:
Added CBR and CBZ support for manuals Updated settings program, now has "alternative manual root folder" selection. Will be used for launchbox and attract-mode for CBZ, CBR manuals. Can be used in conjunction with launchbox's pdfs. Updated launchbox dll plugin from .net core 3.1 to 6. Can now push game filepath to the pause menu Updated default emulator profile for mame for the default hotkeys for v 0.273. Ensure your command line parameters for mame are "-keyboardprovider dinput" inside of Launchbox. For attract-mode (and +) Command arguments in would be [name] -keyboardprovider dinput Added a folder in \Super pause menu\Emulators for older emulator hotkey configs. Called "Older and alt emulator configs" Changed the pause/unpause button in mame to F5 to match the new mame default keys. If a game were to be closed externally while the pause menu screen was up, there is potential for the game to be muted on next launch. I added some logic to unmute on the next launch if that were the case. Removed manual folder path option in the attract mode plugin menu, can change the setting in the settings.exe
New CBR, CBZ options on the last page of the Customize menu page. The default root folder is Launchbox\Super pause menu\Manuals, but can be changed. Supporting the standard launchbox filename convention of special characters replaced by underscores, but they can also have the same filenames as your game files. It will look for CBR,CBZ and PDF files. Can be used in conjunction with launchbox's pdf manuals.
UPDATE Jan. 03/25 - 2.2.0:
Added a highlight border for around the selection menu. This can be disabled or enabled on page three of the Customize menu settings in Tools->Super Pause Menu Settings. The border can be used independently of the highlight bar. Pre-loaded sounds into memory to speed up the menu Passed on the new custom hotkeys items to the preview launcher. Added a plugin for attract-mode and attract mode + compatibility. Super Pause menu.nut is now included in the plugins folder, but is not needed for LaunchBox/Bigbox, it can be deleted. Included a Manual file named "Super Pause Menu Manual.pdf" in the Super Pause Menu Folder. Created a new default profile theme with a different background image. The original profile can still be used if wanted, renamed "LB Classic". UPDATE Dec. 12/24 - 2.1.0:
Added a highlighted menu selection bar to more closely match the look of launchbox default menus. The bar is added by default, but can be disabled, or you can change the color if wanted in Tools->Super Pause Menu Settings->Customize menu (page 3). Disabled the highlight bar in my arcade theme. I prefer the look without it. Changed the color of the highlighted font of my gameboy theme to accomodate the selection bar. Changed the color of the highlighted font of my PS1 theme to accomodate the selection bar. Changed the color of the highlighted font of my PS2 theme to accomodate the selection bar. Changed the font size of the default theme to 40 Fixed Y alignment issue on main page with more than 7 items (Old limit) If you want to update from v2.0.0 you can just copy and replace over Super Pause Menu\Super Pause Menu.exe and Super Pause Menu\Settings.exe from the zip file into the Launchbox\Super Pause\ Menu folder. If you want my updated themes copy over whichever .ini files you want from the zip file Super pause menu\Profiles\ into Launchbox\Super pause menu\Profiles\.
UPDATE Dec. 9/24 - 2.0.0:
Fixed a controls menu issue. Added the ability for the user to add their own menu items to the main menu. When the menu item is selected it will execute a customized AutoHotkey script. The menu item can be specific to all games in the emulator or specific to a platform, or even just a single game. For now I maxed it out to 20 custom menu items per emulator, but I can change that if anyone wants the choice in the future. This can be handy for swapping discs, switching out memory packs, changing controllers, etc.
To update to this version from V1.9.9 you can simply replace the old settings.exe and Super Pause Menu.exe from inside the zip file folder name "Super Pause Menu" to your Super Pause Menu folder located in the launchbox folder. -The options are located in the settings program in Emulator hotkeys->Custom Hotkeys.
-Use the drop down menus to choose if you want the script to be specific to the emulator, platform, or game. If the games/platform drop downs are blank, you will need to launch a game with the chosen emulator/platform with the pause menu activated for it to be added to the history. Enter the script you want and save it. The menu label will then be saved to the menu items list. You can choose a another blank item from the Menu Item list if you wish to add another. The items will be displayed in the Menu Item numerical order to the pause menu underneath Save State and Load State (if they are enabled).
-You may want/need to change your font size to fit all your menu items on the screen. This can be located on the third page of the "Customize Menu" option.
UPDATE Nov. 10/24 - 1.9.9:
Fixed a font sizing issue between saving/loading and the main menu Added some limited support for attract mode front end emulator UPDATE Jun. 6/24 - 1.9.8:
Added the ability to add up to 20 custom pictures anywhere on any custom profile, or to use some of launchbox's resources if wanted instead. Launch super Pause Menu Settings from launchbox's tools, when the settings program opens choose your emulator of choice, click on "Customize Menu", you will find Additional Images drop down menu to select an existing or new (blank) image for the profile, then click on the EDIT/ADD/Remove button Added an alignment calculator to get more precise image alignments in both the main menu, and also in the additional images menu. When launched from the additional images menu it will grab the current profile's background image's width and height, as well as the current custom selected image sizing attributes. You can use this to help make more pixel precise alignment measurements, using the pixel sizing of the background image to convert your custom image measurements into a percentage (so it will look the same on different resolutions). This program is independent of the settings program and you can launch as many as needed. Cleaner layout on the "Customize menu" options in the settings program. Updated all my default profiles to include images except for the arcade profile Changed font for gameboy advance emulator Re-fixed menu flickering by adding double buffering Updated the addons .DLL to include more Launchbox/Bigbox images Tested on launchbox/bigbox 13.14 on windows 11 UPDATE May. 22/21 - v1.9.6: Fixed Dinput joystick support, added XY axis input for dinput analog sticks. Added anti-lockup measures to suspended emulators. If the emulator is unable to resume after a suspension, the pause menu will force kill the emulator after 5 seconds. Tweaked the behavior of the pause menu to resume games for better compatibility. Tested in launchbox/BigBox version 11.11.
UPDATE May. 18/21 - v1.9.6: Changed the way the menu launches for better compatibility. Re-compiled the .dll, should have fixed issue where the settings program sometimes would not launch from the tools menu of launchbox. Tested in launchbox version 11.11.
UPDATE Mar. 27/2021 - v1.9.5:
Added multiple monitor support! The pause menu will now detect whichever monitor your emulator is running (if it is the active application) and will automatically open up on that monitor. This came with much more hurdles to overcome with font scaling issues, but I am pleased with the end result. Added a mute emulator option in the settings program under the "Emulator Settings" page. The Pause menu is now more bigbox/launchbox aware, when opened with these launchers it will ignore and not latch on to any external running emulators. Semi-fixed a weird issue where the menu would not launch if the a game was launched twice. I think this is a restriction with of how launchbox handles opening applications before starting a game. Since I am not so saavy with visual basic, I opted for a workaround. The menu will now remain silently open after closing a game. If it detects another launch of the same emulator it will assume it is that same game and reload itself with the same profile, images , layout, etc. From my limited testing so far I have had no issues with the menu not opening anymore. This comes with the added bonus of launching the manual instantly on the second launch. Added context menu items for the pause menu icon in the notification area. Reload, and Settings. Added a Launch/reload Pause menu button to the settings program for testing out new layouts/hotkeys. UPDATE Mar.14/2021 - v1.9.0: Added the ability to simultaneously use the keyboard and joystick to control the menu! The "Menu Keys" menu within the settings program is now separated into two sections. The default joystick mapping is Xinput controller 1, the pause key is the guide button, up and down on the D pad for navigation, A for select and B is for back.
Added a sounds option within Customize Menu to disable/enable navigation sounds, and added a new profile theme for gameboy advance, where it uses the gameboy screen for the save/load screenshots. The background image is not my own creation, just wanted to add something new. I added the new theme to retroarch and visualboy advance emulators.
I think I finally ironed out all the DPI/Scaling issues. Since I have a 4K monitor myself I wanted to make sure it looks the same in 4K as it did in any other resolution. The pause menu should now detect the dpi settings of the monitor of the active window, and adjust accordingly. While testing out I was able to switch resolutions/text scaling on the fly and the menu looked the same after every launch.
UPDATE Mar.10/2021 - v1.8.0: Added a controls menu! When an image exists, a new Controls item will be added to your pause menu. I have also changed the menu font sizes of all the provided profiles to be able to fit all the items on the screen. The menu will look for images placed in \LaunchBox\Super pause menu\Images\Controls\[Platform Name]\ or \LaunchBox\Super pause menu\Images\Controls\[Platform Name]\[Game Name]\ . The images can be any filename with a png, gif, jpg, or jpeg extension. If multiple images exist within the same folder, one will be selected at random. This new setting can be disabled within the settings program. I have personally found the best look is to have a transparent background, as you can see in the screenshot below. I may get my girlfriend to make me up some nice Xbox/PS4 Controller layouts for all my default profiles.
The above example controller image was found here:
https://forums.launchbox-app.com/topic/36435-request-show-controller-mappings-before-launching-game/ Created by The IVI
I also added a new option to use the Cart/Disk 3D or 2D image to replace the menu title.
UPDATE Mar.8/2021 - v1.7.1: Fixed some clock flickering issues that were really bad with 4k resolutions, changed the Default background to Default.png for better consistency, fixed a window sizing issue at the launch of the menu.
UPDATE Mar.7/2021 - v1.7.0: Added sounds to the menu navigation to give it a little more life. The sounds folder is located in Launchbox/Super pause menu/Sounds/Default. Currently the three sound files are for Back, Move, and select. You can replace these files if you like, or if you prefer to have no sounds you can delete this folder altogether. I plan on adding some settings options for this feature in the future.
UPDATE Mar.5/2021 - v1.6.0: Added animated gif support to backgrounds using activeX IE plugin, requested by Krakerman a while back. Semi-fixed broken platform image title option in "Customize menu -> Replace menu title with image if it exists". When used it will look for your platforms clear logo image in \LaunchBox\Images\Platforms\[Platform Name]\Clear Logo\[Platform Name].png, jpeg, or jpg.
UPDATE Feb.28/2021 - v1.5 FIXED: Super Pause Menu wasn't working at all in Launchbox 11.9, but was working in the 11.10-2 beta. The new dll in this version works for both versions of Launchbox.
UPDATE Feb.27/2021 - v1.5: Super pause menu version 1.5, now with a profile switcher! (Upgraded, tested and working with launchbox version 11.0 Beta 2). For best compatibility I would ask that you remove any previous versions the pause menu by deleting the "Super pause menu" folder in your launchbox directory, as well as delete any old versions of "Super Pause Menu.dll" located in launchbox/plugins/ .
With the new profile switcher you can now share a common graphical theme among different emulator profiles, as well it will allow you to link multiple different themes with a single emulator profile.
This is good for emulators that can run multiple systems, such as retroarch. The pause menu will automatically choose the graphical profile associated with whatever platform you are playing on, if you have designated one for it. If no associated profile is designated for that platform, it will load up the desired default graphical profile.
In order to access the profile switcher settings you'll have open launchbox go to -> Settings (the three horizontal lines) -> Super Pause Menu Settings. Double click on an emulator profile to load it's settings and then click on the "Customize Menu Button". There you will see a drop down menu at the top where it says profile:
The default graphical profile for that emulator will be encased in **stars**. To add more profiles to that specific emulator click on "New/Add/Remove". You will then be given a list of profiles you can add to that emulator.
If you've launched a game before with the Super pause menu enabled, it will store the name of the launched game platform and you will see it added to the list on the left hand side.
Highlight any of the platform names and click add>> to associate it with that emulator. For any emulators labeled <Unused> It will automatically create a new theme profile using default settings which you can then modify to your liking.
Once you are done adding your themes, you can close that window and you will see all your selected profiles have been added to the drop down menu. Simply click on one of the drop down names and you can modify any of it's settings within the "Customize Menu" tab.
You can change the default profile by pressing the "Set as default" button. This will be the theme the pause menu reverts to if it cannot find a theme associated with the launched platform game. The default theme will be encased in **Stars**.
320 downloads
-
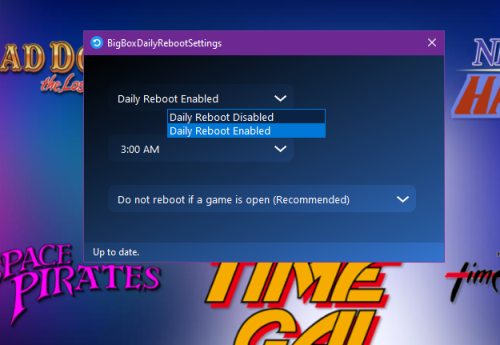
BigBox Daily Reboot
By superrob3000
Plugin that adds automated daily reboot support to BigBox (to prevent any slowdowns or errors when running for days). Daily reboot setup is done directly from LaunchBox. Once enabled, your PC will reboot every day at the chosen time if BigBox is running. The plugin is also smart enough to skip the reboot if you are playing a game at the chosen reboot time.
Tutorial and Demo:
Installation:
Copy BigBoxDailyReboot.dll to your LaunchBox/Plugins folder. Open LaunchBox and choose Tools->BigBox Daily Reboot Settings Set daily reboots to Enabled and choose a reboot time. If your PC is not already booting directly into BigBox, create a shortcut to LaunchBox/BigBox.exe and place the shortcut into your Windows startup folder (to get to the startup folder choose Run from the Windows Start menu, type shell:startup in the command box, and hit OK).
Release History:
1.00:
- Initial release.
1.01:
- Improved detection of games being open at reboot time (Steam games were sometimes not being correctly reported as closed).
- Added optional debug log file.
1.02:
- Added version info to the settings screen.
101 downloads
-
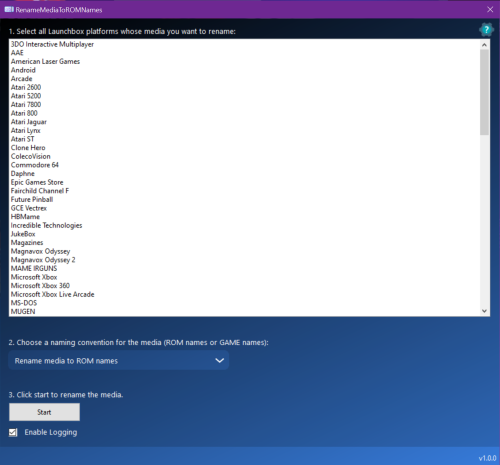
Rename Media Images/Videos as Rom Name or Game Name Format
By superrob3000
A plugin to allow you to switch between ROM name format and Game name format for your media files.
Installation:
Download RenameMediaToRomNames.dll to your PC. Close LaunchBox/BigBox and copy the dll file to your LaunchBox/Plugins directory. It is highly recommended that you make a backup of your LaunchBox/Images and LaunchBox/Videos folders prior to using this plugin.
Renaming game media for entire platforms:
1. Select "Rename Media To ROM or Game Names" from the Tools dropdown in LaunchBox.
2. Select the platform (or platforms) whose game media you want to rename.
3. Choose which format you want to rename the media to (ROM name format or Game name format).
4. Click Start.
Renaming media for individual games:
1. In LaunchBox, select the game or multiple games whose media you want to rename.
2. Right click and select "Rename Media To ROM or Game Names" from the game menu.
3. Choose which format you want to rename the media to (ROM name format or Game name format).
4. Click Start.
Renaming manuals: (new in version 2.0)
To rename game manuals, click the "Include Game Manuals" checkbox prior to hitting the Start button.
FAQs:
Q. Why would anyone want to use this?
A. I actually don't know, but I wrote it because some people on the forums requested it. So if you find this plugin useful please let us know why in the comments 😄.
1,272 downloads


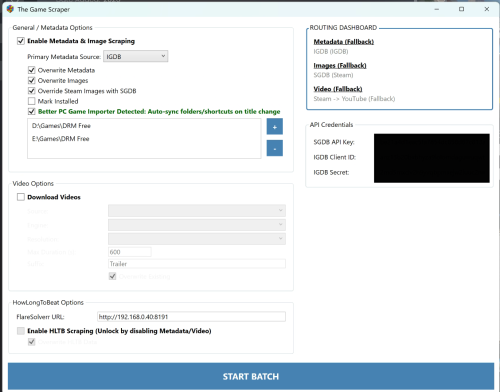


.thumb.png.632d19a4f33f16491745f891e0ea495b.png)
.thumb.png.d8248f4f7e6ac686eebb9c1c4d1c451a.png)
(Disc1)(KeyDisc)(SegaCD).thumb.png.f871615d9008153c8073315db041de44.png)


