Leaderboard


Popular Content
Showing content with the highest reputation since 08/10/2016 in Files
-
Version 2.1.0
20,026 downloads
This is a giant collection of platform logos drawn digitally by hand. This took well over 500 hours of work over 15 months. While console logos exist all over the internet, this collection aims to bring them to a higher level of polish and accuracy. The default logos in BigBox will now come from this set. It was extremely tedious to ensure a very high level of accuracy across thousands of files. So Many Versions! Each included platform has multiple logo variants. Basically, many consoles had different logos for different regions and time periods. There are also smaller variations such as with or without a trademark (tm). There are black and white versions for each of these. With all of these it can add up to over 50 small variations for one platform! This would be impossible to navigate so I’ve split them up into smaller categories. For each format (Normal, Large and SVG) there are Light and Dark folders. For either of those there are: “Color”, “Black & White” and “Just White” (or Just Black respectively). If you wanted to use a minimalistic dark theme, you could use the “Just White” versions for a contemporary look. If you wanted logos for a standard dark theme then you could use “Light - Color”. Official Versions Included Besides the many hand drawn logos, I’ve also curated multiple logos that are the OFFICIAL renderings. Meaning, vector art ripped from official sources such as websites and pdf manuals. Finding official source art in the wild is pretty uncommon and required many hours of digging. Most of the source art was not in color so most of these colors are still generated by me. Some of the platforms with official logos include: Sadly, some of these wasted a lot of my time because I drew them and later found the official versions. The Drawing Process: My process for drawing a logo required many steps. I first did research on each logo. Then I would dig deep for the best references I could find. One rule I had was to never trust any image. I would compare multiple sources and make sure the source I chose was not fan made or some modern re-release that changed the logo. If a better source was found that showed differences from what I drew I would redraw it again (it sucked). I redrew the NEO GEO logo about 5 times before I was finally happy with it. Generally, source art would include box art images, adverts, brochures, and manual scans. Archive.org and Manualslib.com were a huge help for a lot of these scans. I would then use the pen tool in Adobe Illustrator and go to town! Sometimes if my source was really amazing, I could finish the whole logo in an hour and a half or so. Other times it would take much, much longer. Getting the correct color was always challenging and required intelligent guesswork. For example, with the classic Konami logo, I brought in 20 images. Gathered the color from all of those and found the average color for the red and orange. Then I’d tweak it slightly more, usually to improve saturation. When it came to fonts, I would always search for it but rarely found exact matches. If the font was found I’d obviously use it, but If not I’d have to hand draw it. However, a couple of the smaller taglines/subtitles do use a very close match. Hand drawing those fonts would do more harm than good. While drawing a logo I took great care to make things as visually pleasing as possible. Every little section of each letter of each logo was considered. Curves were carefully made to be smooth with as few anchor points as possible. Letters align with each other and angled letters all share the same angle. Hand drawing fonts is very tricky. Many logos were substantially harder than I’d anticipated. The Sega Saturn US logo for instance, drove me insane. It took over 40 hours to draw (not to mention wasted time from failed attempts months earlier). I used Adobe Illustrator to mimic every highlight, tiny color shift, shading and glow. When I was working on this logo, I’d come home from my graphic design day job and then spend 4 hours on it, which would only finish part of one letter. As I worked, I’d have a couple copies of the logo in the same file and a couple times it bottomed out 32GB of ram! Unique Versions This collection brings a few unique logos to the table. I’m just going to list a few. I created multiple new arcade and pinball logos, although previous arcade logos are here too. I highly polished the Daphne logo as it needed some love. I drew a detailed version of the TeknoParrot logo which seems to be uncommon in high resolution. I also created Sega system 16 and 32 arcade logos based on the exact font used in the Sega 32X and Sega CD (Copperplate Gothic Std 31AB stretched horizontally to 130%). The Capcom logos have stylized alternate versions based on a gradated version Capcom rarely uses. There are several other unique logos I could list here. White Outline - Default Versions Since these logos are replacing the default logos in BigBox, Faeran smartly requested that I create versions with white outlines around the outside. That way logos could be seen against any background color. I only made the outline versions for the options I gave to Faeran. I don’t plan on making outline versions for the rest of the variations. That said, the versions I did make are included here. The outline versions don’t look quite as nice in my opinion but they serve a very functional and important purpose. Solid black logos for some systems, like the PSP, would not be visible in certain themes without a white outline. However, theme creators or those wanting to add logos to a single theme, I would still recommend the non-outline versions for the cleanest look. Conclusion I included every platform and version that I wanted to. There are some more obscure ones I could draw but I didn’t see the need to seeing as how I've created 22,000 files as is. If I knew how much work this was going to take, I would've never gotten myself into this (lol). I hope that you guys get a lot of enjoyment out of these. I’m glad I made them and it feels really good to finally be able to upload them. I made these originally for LaunchBox but they can be used elsewhere. I will always appreciate credit if you use them. Needless to say, I don’t own the rights to the logos and these are NEVER to be sold in any way. Thanks Special thanks to Juketstu and Faeran for their valuable feedback. Also, huge thanks again to Faeran and the LaunchBox team for using these as the new defaults for BigBox! If you like what you see here, please also check out my LaunchBox / BigBox logo collection & Pineapple Graphics' Photoreal Controller Vectors:164 points -
Version 0.286
23,407 downloads
**This removes the nag screen that informs you if a rom doesn't work correctly, or if at all, if you use this no nag, then please do NOT go to the mame support site with issues with games, please only use if you understand that there will be no help from anyone at mamedev as you are using a modified version of mame. Contents: mame.exe - Normal Mame with Nags removed. (Note mame no longer carries the 64 in its exe name changed by Devs in 0.229) This version also allows the games Akai Katana and Dodonpachi Saidaioujou to be played. It's advisable to download the full mame official pack and install it, then just overwrite the exe with the replacement, this covers any changes the mame devs may have made to the support files. After you have done this, make sure you copy the folders artwork, ctrlr, cheat, hlsl, ini, folders and the ini files from the root of your original mame folder, and move/copy them to the new install. If you are using your own installed/setup of mame then make sure you also set in the mame.ini 'Skip_gameinfo 1' If you got Launchbox to setup mame for you when asked, you only need to replace the exe and play. As some are not sure about False Positives, and report a virus was detected, As goes for all versions i upload, they are all ran through virustotal before i upload, and if by any chance something did end up with an issue it would be noticed very quickly after upload and would be removed/restricted. 0.285 - VirusTotal - File - 4bcfb12b87f63afa1f0241915d7e812ecbf14e83faa6ed62af1b49582d70930d All NEW versions of the No-Nag will be posted in this download thread only, if you wish to get the new releases every month, either follow myself or the thread, As the download section will not show any new releases.95 points -
Version 2.1.5
150,445 downloads
# WHAT IS IT ? COLORFUL is a complete and coherent high quality graphic set, around a unique design. Made with love in France. I hope you like it ! ? Here are planned development axes: OFFICIAL COLORFUL ASSET : COLORFUL Theme : The main hub, a unique interface for BigBox. Design by me, coded by @faeran COLORFUL Platform Video : Complete 4K video set, with a unique design. COLORFUL Source : To involve the community in the platform video creation. COLORFUL BigBox Startup Video : custom video to match the general design. COLORFUL Hardware Media PNG (1x1) : Taken from my videos, the 1x1 PNG set. (new) COLORFUL Startup Theme : (soon) COLORFUL Pause Theme : (soon) RECOMMENDED COMMUNITY ASSET : Redrawn Platform ClearLogo by @Dan Patrick Colorful "Playlist" PNG set by @Klopjero Colorful custom theme for Android by @Bawnanable Platform Funtech Super A'can & Platform Arcade Kaneko by @evo1man Alternative Colorful Platform ClearLogo Set by @soqueroeu Alternative Startup Theme (Minimal-Colorful) by @Palada Recommended SoundPack with Steam Deck UI by @Phox # HERE IS COLORFUL PLATFORM VIDEO SET: On this page we are talking about COLORFUL Platform Video Set: A complete new series of platform video for our frontend! Colorful is a modern and elegant way to present each platform, with its hardware of the time. With maximum accuracy and future proof. (4K video) # I NEED YOUR HELP : PATREON ? I will make a first batch of 65 systems, according to my personal use. But we are far from covering any game system! If the community doesnt take over the creation, 2 choices: the project stops /or/ I finish it. Problem, creating these videos takes a loooooot of time. And I have to deal with a full-time CGI artist job and 2 young kids. So I opened a Patreon page that could allow me to dedicate days on my work time to continue creating video. I'm not trying to get rich, but like everyone else, I cant spend 1 day/week working for free! I hope you understand. If the project interests you: Here is my Patreon page. # IN DETAIL ? Obviously, Colorful is a direct legacy of my previous video set "Nostalgia". But improved on all aspects: Centred design with colorful background, according to the platform. (theme/logo/box/design) 4K video (3840x2160px) @ 30fps (MP4 H264 AAC) HD video (1920x1080px) @ 30fps (MP4 H264 AAC) Only available in 16:9, but design compatible with 4:3 crop. All designs are completly rebuilt. More care of details. More TV variety and better accuracy. Arcade cabinet fully made in CGI, by myself. More variety and better accuracy. Added characteristic effect on CRT TV. Added platform boot screen. (if existing) All sources will be available soon. (Community effort!) # ABOUT CODEC FORMAT ? Initially, I was thinking of working in H265, more modern for 4K. But after talking with Jason, this is problematic on some old configuration and with Windows Media Player, which doesn't support it. So, I will leave you the choice! 4K | 3840x2160 | mp4 h264 AAC 4K | 3840x2160 | mp4 h265 AAC (only on EmuMovies FTP) HD | 1920x1080 | mp4 h264 AAC - On this download page = Only 4K - h264 - On Download theme videos tools = both, 4K + HD version - On EmuMovies FTP = The 3 versions! # A PREVIEW OF ALL THIS ? Instagram Youtube # A COMMUNITY EFFORT ? Yes, all sources are available on a dedicated page. Everyone can create their own videos that will be included here, in this set. Some rules to follow: - Advertise on this thread which platform you want to achieve. - Post the work in progress on the same thread, for exchange/feedback. - Post the final video + sources on the same thread or by MP. To avoid scattering and centralize everything here. - I will moderate the general quality of your proposals for a coherent result. So, I acting like a modertor on this thread. Do you want to participate? Cool !! I post soon a guideline tutorial ! 🏆 Community Wall of Fame 🏆 @CMOSS @OdinsPlayground @el Fredo @tiualex @AncientCarthage @modjoo # OK, HOW TO DOWNLOAD ? 3 ways : One by one - right here, with the download button at the top right. Automatically - in LaunchBox > Tools > Download theme videos tools > Select "Colorful 4K" or "Colorful HD" By batch - On the Emumovies FTP ://Official/Platform Videos/COLORFUL Platform Video Set by VIKING V2 # SPECIAL THANKS : @Jason Carr for his hard work on LaunchBox/BigBox! @faeran for his huge work on the theme! To all Patreon guys! A GIANT THANKS to all of you!!! ? The whote community for yout support! # SOURCES - COPYRIGHT : Each brand of hardware and software here represented as a tribute. Emumovies for (most) gameplay videos The Vanamo Online Game Museum for (most) photos. If special credit, see .TXT file in the corresponding source archive.89 points -

Version 2.03
15,250 downloads
# WHAT IS COLORFUL MEDIA SET ? COLORFUL is a complete and coherent high quality graphic set, around a unique design. Made with love in France. Hope you like it!! OFFICIAL COLORFUL ASSET : COLORFUL Theme : The main hub, a unique interface for BigBox. Design by me, coded by @faeran COLORFUL Platform Video : Complete 4K video set, with a unique design. COLORFUL Source : To involve the community in the platform video creation. COLORFUL BigBox Startup Video : custom video to match the general design. COLORFUL Hardware Media PNG (1x1) : Taken from my videos, the 1x1 PNG set. (new) COLORFUL Startup Theme : (soon) COLORFUL Pause Theme : (soon) RECOMMENDED COMMUNITY ASSET : Redrawn Platform ClearLogo by @Dan Patrick Colorful "Playlist" PNG set by @Klopjero Colorful custom theme for Android by @Bawnanable Platform Funtech Super A'can & Platform Arcade Kaneko by @evo1man Alternative Colorful Platform ClearLogo Set by @soqueroeu Alternative Startup Theme (Minimal-Colorful) by @Palada Recommended SoundPack with Steam Deck UI by @Phox # HERE IS COLORFUL THEME FOR BIGBOX: On this page we are talking about COLORFUL Theme for BigBox: Design for work with my platform video set, COLORFUL THEME is thought to be used on the big screen (TV) in gaming console mode. Modern, elegant and animated are the key words of this interface. The COLORFUL project is getting too big for me alone. @faeran has taken over the source code of the theme. A BIG THANKS to you for your support and your precious help !! # IN DETAIL ? The main features : 16:9 only. (Works on other ratio, but with black bands) Full 4K asset. (Any resolution must work, 4K assets) Totally responsive. No resolution deformation on text size or placement. Because of the white/black background, some ClearLogo comes with the theme. Gamepad connection indicator & battery level. # RECOMMENDATION ? Any design choice gives limitations. Here are some recommendations for this theme : LaunchBox/BigBox up to date. VLC highly recommended. Design for work with COLORFUL platform video set. (but you can use any video you what) Beware of full white/black ClearLogo. They will be invisible on Light/Dark views! I didnt test this theme on a lowend configuration. There may be slowdown. (Curious to have your feedback on this subject!) # COOL, HOW TO DOWNLOAD ? 2 ways : In Windows : Right here, with the download button. Extract the "Colorful" folder and place it in your "LaunchBox/Themes" directory. (dont rename it!) In BigBox : Option > Theme manager > Found "COLORFUL - Light" or "COLORFUL - Dark". # HOW TO EDIT ? You can now edit this theme within the COMMUNITY Theme Creator, using the COMMUNITY Theme Creator files below (current version from the CTC 2.3): Colorful Light - COMMUNITY Theme Creator Files - 411737560_Colorful-Light-2.03-COMMUNITYThemeCreatorFiles.zip Colorful Dark - COMMUNITY Theme Creator Files - Colorful - Dark - 2.03 - COMMUNITY Theme Creator Files.zip # SPECIAL THANKS ! @Jason Carr for his hard work on LaunchBox/BigBox! Thx man! @faeran for his hardwork on this theme and all other one ! @y2guru for the awsome Community Teme Creator ! To all Patreon guys! A GIANT THANKS to all of you!!! The whote community for yout support! # CREDITS ! @Jason Carr for LaunchBox/BigBox. @faeran for the all theme code. @y2guru for the Community Theme Creator ! @Grila for Grila's Custom BigBox Controls. @eatkinola for Ao.Bigbox.Themer. @RedSnake for Games.Genre Converter. Christian Robertson for Roboto Free Font Set. Impallari for Raleway Free Font Set. # BY FILE, EVERY CUSTOM VIEW SUMMARY (Here in LIGHT. Same principle/animation for DARK) PlatformWheel1FiltersView.xaml PlatformWheel2FiltersView.xaml WheelGamesView.xaml : Wheel2GamesView.xaml : TextGamesView.xaml :87 points -
Version 3.2.6
13,498 downloads
Manuals / How to Refer to my YouTube channel or visit Faeran's Theme Creator Workshop videos to better understand the new features. Dave Paterson - YouTube Development Live Streams - YouTube COMMUNITY Theme Creator - Patreon87 points -

Version 3.4
30,532 downloads
Happy Christmas or Yule brothers! Arcade 3D Boxes 2.0 Important: Press follow button in the upper right corner to get notified for any future updates to this project, future updates to this page will not be pushed to the "What's New" section. I was inspired by the Mame 3D Boxes by @Robin55 and @Reevesad and the work by @spycat and @MadK9 At first I experimented to convert Robin's work to a darker color as it fits my dark colored setup better, one thing let to another and was helped enormously by @Robin55 in the process of automation and more, if it wasn't for all his help and work this project wouldn't have happened, thanks again so much brother! \m/ The 3D boxes are mostly for the Mame set (could include other emulators as well) but only includes Arcade video games, no pinball, fruit machines and such. Features: Covers based on official flyers, instruction flyers or fan art, customized official artwork and more. I've hunted down previously artwork missing from databases and/or very rare flyers, original resolution of these images can be low some times. Each box has a logo for the game, if it was missing I've hunted it down or extracted it from images (I upload these logos to the database as well) Each box has a logo of the company that either developed or published it (some flyers may have a different publisher from another region, bit confusing at times) Each box is manually color corrected, cleaned and optimized Some games have a second alternative version, made from cabinet side art, marquees or from a different region for example Please remember if you miss boxes to also check the naming convention of the file and if it is the same as the most recent version in the database. Any entry with "The" in front (Like The Astyanax) will be included in the QRST pack. NOTE! : After installing the images you have to select all (or any alphabetical range) arcade games (CTRL+A = select all) go to Tools and click 'Refresh selected images', let it load and cache and the games should now display the right 3D boxes. Hope you like Credits Thanks go out to anyone contributing and making art for the launchbox games database. Thanks for any help, encouragement and advice: @Robin55 @spycat @MadK9 @Reevesad @Jason Carr @Kondorito @zetec-s-joe @Fablog @andyco47 @mikty @PoloniumRain Special thanks to: @neil9000 and @Retro808 for those logistics \m/80 points -
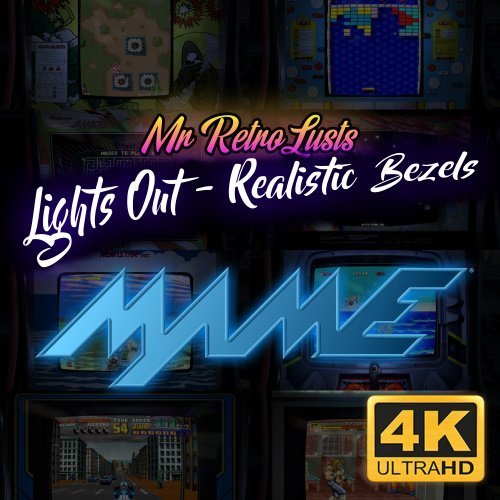
Version 22.0
69,587 downloads
Note: This thread will not be pushed to the front in the "whats new" section, if you want notifications for future updates to this file be sure to follow this page by using the follow button in the upper right corner Part of the "Lights Out - Realistic Bezels" series, for RetroArch bezels in this series see: https://forums.launchbox-app.com/files/file/1950-mr-retrolusts-lights-off-retroarch-bezels/ About: NOTE: This original project uses a reflection and scratch layer to add a realistic effect, it defines the style of the project, this is not for everyone. But please don't request "a clean verion" as I haven't kept the layer formats for all these 2000 games, this project is what it is. Realistic bezels in 3840x2160 resolution for MAME. My goal was to make bezels for around 1300 MAME games I had in my collection but I ended up making many bezels more. I started this project in 2019 and finished it in 2026. I used existing high quality artwork but also cleaned a lot of previously unavailable artwork which @Mr. Do had in his amazing collection. I searched high and low with google images to find existing artwork, which took me to Japanese websites often using google translate and research to get to those obscure images. The quality isn't always as high but I made sure I always used the highest quality I could find. Note: These artwork packs are made for older versions of Mame, if you use Mame 0.226 and upwards and find these files don't work right please see this post as you need to have them in a different lay structure: ============== Installation: Place the zip files inside the packs in mame/artwork/ Also be sure to curve the screen in Mame effects, you can use the preset files I've included in the downloads but they are for an older version of Mame (0.198) so they might not work on newer versions. To learn more about effects in Mame be sure to read this well: https://docs.mamedev.org/advanced/hlsl.html ============== Credits: Most of the artwork used are from the most excellent @Mr. Do & the many team members: http://mrdo.mameworld.info/index.php For NeoGeo artwork much artwork came from: http://www.neogeosoft.com/ For Flyer artwork the amazing: https://flyers.arcade-museum.com/ and https://www.flyerfever.com/ Some artwork used from: https://www.verticalarcade.com/ which has amazing vertical bezels, be sure to pay them a visit. Some artwork used from imbord3rlin3: https://www.arcade-projects.com/threads/high-resolution-scan-database-scans-as-a-free-service.24725/ Photos from Museum of the Game® & International Arcade Museum® https://forums.arcade-museum.com/ For research the great Arcade Database by: http://adb.arcadeitalia.net/ Special thanks to the following people, without them this project wouldn't be what it is: @ArsInvictus John Merrit, @Briball @cmgssilva @Orionsangel @Boz1978 @L4ZYD4NE @Manson976 UDb23 @IainSA TheGuru, Smitdogg, CAG, DrVectrex, tbombaci, italie, MAMEWorld, Ad_Enuff, UDb Raspbear, @destrowade @CKL @Thoggo @Antny @Dreamstate Andyaust @zugswang Spinnhacker, CCF Gameplay, jkburks, Comboman, Tim Lindquist, TrevEB, Aaron Giles, Jumpman1981, @kloug666, Tormod, yaggy, @NightVoice, Dillweed, @NeoKarnage, Vaughan, Zorg, Divemaster, Ad_Enuff, ranger lennier, Kiltron, @damageinc86, AntoPISA78 points -

Version 1.2
20,204 downloads
This theme is a port of the HyperSpin Unified Widescreen Megatheme project, which was originally started by gibbawho and continued by many other talented artists over the years. It’s supposed to bring a unified look (hence the name) across all platforms while giving every platform it’s own individual touch. I’ve tried to stay very close to the original look and feel but also took some creative freedom, especially when it comes to the new fading info panel at the bottom of the screen. This theme was designed for 16:9 screens and display resolutions only. Big Box will automatically scale itself to a 16:9 aspect ratio when you use a different aspect ratio on your machine. Features: Individual Artwork for a lot of different platforms and playlists + some alternatives you can choose from Matches with the Unified platform video set from EmuMovies Fully animated wheel pointer Spinning discs for disc-based platforms Various other custom animations Templates to build your own platform artwork are included as .psd files Brings a small taste of the HyperSpin feeling to your Big Box setup Currently featured Views: Games Text List View: 3D Box Games Vertical Wheel View 1: 3D Box Games Vertical Wheel View 2: 3D Box + static cart/disc Games Vertical Wheel View 3: 3D Box + rotating disc Games Vertical Wheel View 4: Fullscreen video Platform Vertical Wheel View 1: Fullscreen video + scrolling text Platform Vertical Wheel View 2: Fullscreen video without scrolling text More Views are planned, so stay tuned. The theme includes artwork for the following 498 Platforms/Playlists: The theme will also display a default artwork for Platforms/Playlists which are not yet covered or wrongly named. How to install: This theme only works on LaunchBox version 9.4 or higher! Just download the archive and extract it to: “..\LaunchBox\Themes\” Go to the “Plugins” folder inside of the extracted folder and right-click on the .dll file. Choose Properties -> Click on “Unblock” at the bottom of the window. Close the window. If the "Unblock" button isn't there than you are already good to go. Open the Options menu in Big Box -> go to “Views” and change the Theme to "Unified". Change the “Games List View” and “Platforms List View” to one of the currently featured Views that are listed above. Make sure that in the Big Box Options -> Views –> “Show Games List Title” is enabled. Info: Never rename the theme folder! The theme folder has to be named exactly "Unified" or the theme won't work properly! (that's btw. an universal tip for all other themes as well) Known issues: The logo of the Platform/Playlist and the individual video border don't show up in the Game Details screen and the theme displays the generic Big Box logo and metallic video border instead when it gets opened through any other Games View than the Text List View. Tips for tweaking your LaunchBox setup for this theme: In LaunchBox: Tools -> Options -> Cart Front Priorities -> Select all Cart and Disc related entries, deselect everything else. In Big Box: Options ->Transitions -> Change "Game Image/Video Transition” to “Fade” In Big Box: To avoid spinning cart art go to: Options -> Views -> Make sure that „Remember separate View for each platform” is checked. Than go either to the Keyboard Mappings or the Controller Buttons settings and set up a key/button for “Switch View”. Now you can go back to your platforms and switch the games Views for each platform individually on the fly. Use the Unified Platform videos from EmuMovies for an overall uniform look. You can either download them as free user from the EmuMovies website or if you are an EmuMovies premium user you can get them directly through LaunchBox under: Tools -> "Download Platform/Playlist Theme Videos". Individual platform artwork not showing up?: The media files that are inside the “..\LaunchBox\Themes\Unified\Images\Theme\..” folder have to be named exactly like your platforms inside LaunchBox. I've went with the HyperList/RocketLauncher naming conventions for the filenames in this package. If Big Box doesn’t show any individual artwork for a system that is listed above you may need to manually rename the relevant files for that platform in all four sub-folders. Also make sure that in the Big Box Options -> Views –> “Show Games List Title” is enabled! Discs are not spinning / showing up?: Make sure you have the right Games List View selected and Disc images in your Cart Image Priorities enabled (see the tips section of this download description). Thanks and Credits: @ninja2bceen for creating the default and various other pointers All the artists who created the original HyperSpin themes, pointers and other work that helped me to create this theme (please contact me if I have forgotten someone!): Gibbawho @Styphelus Unknown50862 @Klopjero Neonrage @knewlife @Creloce Ghostlost https://www.youtube.com/user/GhostlostGames @ninja2bceen @THK adamg @RetroHumanoid http://retrohumanoid.weebly.com/ Rkh Rondar @scooter1974 Zinger19 Aloner187 @guyverjay MetalThrix SophT Ledgerewskie hoscarconh https://www.youtube.com/user/hoscarconh @viking @bmonomad @Jason Carr77 points -

Version 1.3.2
164,303 downloads
The idea of this set is to place the gameplay video in context, with the hardware of its time. A touch of nostalgia to better understand an unknown material especially for the youngest. Most of the montages use the EmuMovie gameplay videos. The others are mine. This video set is also available in 4:3 ratio here I also share the gameplay videos I create with the help of the community. On EmuMovie FTP : "Upload here > _Video Snap Submissions > Viking (Platform Video)" /!\ IMPORTANT NEWS /!\ Dad of 2 young children, I dont have enough time to make another video. Thanks to him, @dragon57 are nicely create new video for this set. You can find additional videos here. If other people are interested in creating video for this set, here is a Mega link to download a 7zip archive with some source files that will help you stay in the graphical lines. Thank you for your help and your understanding! // VIDEO // Platform = 253 videos Category = 5 videos // INFORMATION // 16:9 format HD resolution : 1920x1080px MP4 format - H264 Codec - AAC audio - most with 30fps EmuMovie or community video integration, unless not available, I created myself the games loop. // INSTRUCTION // There is 2 way to download my videos : Way 1 : The easy one In LaunchBox, go to "tools > Download platform video theme" Select "Viking's Nostalgia (16x9)" Clic "OK" Way 2 : By hand Download files here one by one and copy into : ... / LauchBox / Themes / <theme name> / Videos / Platforms / ... Rename the videos exactly as the name of the desired platform in LaunchBox. Launch BigBox // PREVIEW //69 points -
Version 1.0.5
34,473 downloads
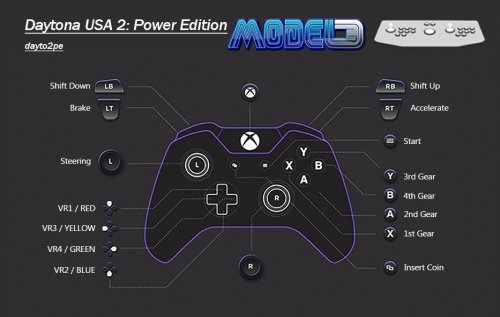
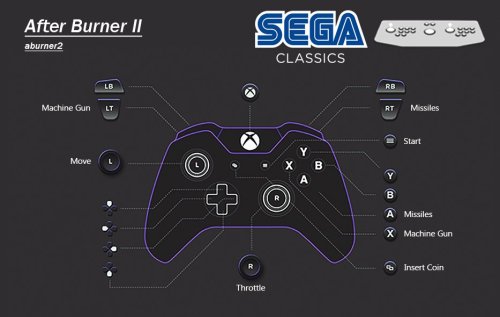
IMPORTANT: I am not working for the Supermodel Team. This is in no way official. It's just me, admiring Ian and the teams amazing hard work. Presenting it in a way that is usable for PC, Controller and Mouse with minimal effort. A lot of people are turned away from this emulator because of the setup. Thinking it's broken or too much hard work. I want to change that and make things easy so people realise just how good Supermodel is. Thank you to @Joejoe for a bunch of cheats and unlocks and checking everything as it's progressed. Thanks to @Baggio for providing the AHK script for Light Guns. Thanks to @Johnny T for various stuff, and @Headrush69 for something I can't remember. Much has changed with this emulator over the past 2 and a bit years. With new features, fixes and the emergence of a new UI, it's safe to say Supermodel has never looked better. So, it's time to flatten everything and create a new standard for the project, at least with it's setup and usage. It's time to strip out what ain't needed. With 2 permanent solutions to the fabled 'light gun indexing' issue, light gun users should no longer need to ask 'why my light gun no worky?' Also, thanks to @Joejoe we now have all unlocks for every game. The last one to fall was Dirt Devils with it's extra track and truck. The main update is the Light Gun AHK script and extra stuff for Dirt Devils. With this pre configuration you will get: Controls Pre Configured. Please see the images provided for button layouts. I have spent many hours on figuring out the best layouts to ensure no clashing inputs and intuitive controls, I could go into detail but again it would need a video an hour long to cover it all. Just know a 'dead zone' of 7% has been added to the analogue sticks to prevent saggy sticks from steering your car for you, or randomly entering directional inputs when you don't want. Also, some games will use force feedback to vibrate your controller. 2 Player Mouse Light Gun Support. The Lost World, The Ocean Hunter, L.A. Machineguns and Start Wars Arcade (yes I have calibrated for both players). By default the mouse indexes have been set to MOUSE1 and MOUSE2. For mouse only users this is generally fine, but light gun users may find their mouse index set to a higher/different MOUSE number. Supermodel also LOVES to make windows switch mouse indexing, more than other emulators, causing your Light Guns just stop working. The new UI has a solution for this, where you essentially shoot/click a box before booting the game, when RAWINPUT is set. This sets the correct indexing and light gun controls for you, ensuring a seamless light gun experience every time you play. However, the UI solution is not currently deployable into LaunchBox. But...thanks to @Baggio we now have an AHK script which will fix your light gun index permanently with LaunchBox (and without). It does require some setup, but once it's done, it's done. It's pretty much a bullet proof solution, pardon the pun. Test Menu Fixes. Every game that needed a test menu fix has had it done. For E.g. the Network Board Not Present issue in Daytona 2, and Feedback Lever issue in Star Wars. This includes setting many of these games Cabinet Type to 'normal' rather than leaving them set to Deluxe. Most of the Deluxe variants have more input options (clutch, fishing line etc) that aren't used or emulated, especially for use with a controller. All games are set to Free Play, Japanese language set to English, and regions have been changed to USA where possible. Analogue Steering Saturation & Analogue Calibration. All of the racing games except Sega Rally 2 have very twitchy steering. I have spent hours sorting out the Analog Saturation to make them more playable. However, the fact is these arcade racers use 1:1 Analog steering. This is TOTALLY NOT how console racers work, unless using a proper analog steering wheel. As the steering is 1:1, it reacts as fast as the stick moves, which again is NOT how console racers work with controllers. If you have the analog stick fully locked to the left and release the stick, the steering will return to centre at the same speed as the stick moving, REALLY really fast. Again... console racers don't do this. There is no current way around this, I have mitigated it, but not removed it. You will have to ease the stick back to centre like you would an analog steering wheel to be able to play effectively. Just be gentle. Sega Rally 2 is fine tho. Enhancements. Some games benefit from having different modes activated. For e.g. Sega Rally 2 'Game Type' set to 'Special' enables 3 laps per stage rather than just the one. Virtua Striker has Golden Goal and Penalty Shootout modes that are off by default, having a longer play time is also preferable in this type of game. There's also little changes like setting Speedometers to MPH from KPH. Please see the table below for more info. Audio Configured (sorta) Left at default the audio is quiet/loud and not balanced for most games as the baseline (not bassline) is not known. It's actually a god damned mystery how these cabs were balanced for audio. Supermodel simply sets it all to max by Default leaving some games really loud and others really quiet. Apparently that's how it was with OG hardware. Meaning the service technician would have balanced these depending on the setup. As you can link certain games like Daytona, audio would have needed to be balanced in accordance, manually. Is there some kinda document or guide out there that's missing, or did the techs just do it by ear? Who fuckin' knows man! There is NO official audio balance standard for Model 3 games, that we know of! So, Audio has been adjusted on a per game basis. This took ages and would probably need a video an hour long to explain. Just know that it was super confusing with the Balance option doing different things per game. I adjusted every games volume to be 'about' the same db. This aspect of the project is the last piece of the puzzle. The audio emulation seems to be getting some attention recently, so gonna hold off to see what happens. I have provided a pre configured Supermodel.ini file for XINPUT and DINPUT. XINPUT (Xbox/Windows) is by far the preferred input method. This is because all XINPUT controllers are the same between controllers with their input IDs. This is great for making pre configurations because it's the same for everyone. If you are unsure as to what input system your controller uses a quick google search should tell you, or this should tell you https://gamepad-tester.com DINPUT is not so great for making pre configs as their input IDs can vary between controllers. So, now here comes a... DISCLAIMER: FOR THE DINPUT PRE CONFIG I USED A PS4 CONTROLLER. IF YOU ARE USING A DIFFERENT DINPUT CONTROLLER YOUR INPUTS COULD BE WRONG AS DINPUT CONTROLERS CAN VARY WITH INPUT IDs. Use X360CE if your DINPUT controller inputs are incorrect, and use the Xinput ini instead - https://www.x360ce.com/ So with that out of the way. SETUP INSTRUCTIONS Download the most recent Supermodel Git version from the official website here - https://www.supermodel3.com/Download.html Download the Sega Model 3 UI from the official GitHub page here - https://github.com/BackPonBeauty/Sega-Model-3-UI-for-20240128-/tree/Segamodel3UIver1122 Download NVRAM & Correct INI file for your controller from this page. Unzip all of this. Transfer/copy all the files from the UI folder into the Supermodel folder. Transfer/copy the correct Supermodel.ini into the Config folder of Supermodel and replace the one already there. Transfer/copy NVRAM files into NVRAM folder of Supermodel. Place ROMs into the ROMs folder in the root of Supermodel. You can use a custom location, but this location will mitigate issues. Start the UI, set your settings to your preference and PLAY! Roms INFO Use as recent as possible MAME NON-Merged ROMS. DON'T USE MERGED ROMS. Split will work but will be missing files needed for controller rumble/FFB. Supermodel is now kept in line with MAME rom updates, if they are to do with Model 3 Games. You can use as old as 0.236. Supermodel is "backwards compatible" to this point. However, 0.263 or newer is best, the reasons why are below: magtruck was updated 0.249 oceanhun was updated 0.253 scudxo was added 0.263 ONLY THESE VERSIONS HAVE BEEN CONFIGURED FOR. dayto2pe daytona2 dirtdvls eca fvipers2 getbassur (Best version for controller usage. It lacks the 'fishing line tension input'. This version was ported to Dreamcast and the only version here) harley lamachin lemans24 lostwsga magtruck (Better dump as of 0.249. Fixes Attract Mode. This is a better dump so it will be the new parent. With the old 'magtruck' parent becoming the clone 'mgtrkbad') oceanhun (New dump as of 0.253. This is a newer version so it will be the new parent. With the old 'oceanhun' parent becoming the clone 'oceanhuna') scud scudplus scudxo (This was found as of 0.263. This is an earlier version with MAJOR gameplay differences and different attract modes) skichamp spikeofe spikeout srally2 srally2dx swtrilgy vf3 vf3tb von2 vs2 vs298 vs2v991 LB PLATFORM XML INSTRUCTIONS Download Sega Model 3 XML from this page. Make sure LaunchBox is closed and not running in the background. Place XML into 'Platforms' folder. It is located in the 'Data' folder. Start LaunchBox Sega Model 3 Platform should appear on the left. Set ROMS Path - Click on any Model 3 game - Press Ctrl + A to select all games - Go to Tools->File Management - Click on 'Change Roms path for selected games' - Select folder where your ROMs are located. Make sure the Emulator is setup and is the default for Sega Model 3 under Associated Platforms. PLAY!!! LIGHT GUN INDEX FIX AHK SCRIPT INSTRUCTIONS You will need to install AHK, or use it portably. Just install it, it's easier. The script uses version v1 / v1.1, but you can just download the new one, v2, and let it prompt to download the older version in addition, on the first load attempt of the script. Download here https://www.autohotkey.com/ Download & unzip the AHK script from this page. Best Practice is to move the Light Gun AHK Script folder with the ahk script inside, into the root of Supermodel Download ControllerRemap Utility v0.0.11.0 here - https://forum.arcadecontrols.com/index.php/topic,108767.0.html (Download is at the bottom of the first post. Before you can unzip it, you will need to rename the file from ControllerRemap.zip.txt ...to... ControllerRemap.zip. Just take the .txt off the file name. THEN UNZIP) Place the ControllerRemap.exe you just unzipped into the Light Gun AHK Script folder next to the LightgunIndexRemap.ahk In LB, right click on a SM3 light gun game and select 'Edit Metadata/Media' Select 'Additional Apps' on the left. Select 'Add Application' at the bottom. Name Application 'Supermodel Light Gun AHK Script' To set Application Path, click 'browse' and select the LightgunIndexRemap.ahk in the Light Gun AHK Script folder you downloaded. Check 'Automatically Run Before Main Application' Hit OK! Repeat above steps (from step 6) for the other 3 Light Gun Games in LaunchBox. But Wait! Theeere's more! You need to set the VID/PID id's of your specific light guns in the AHK script. So we need to... Launch a Game you have set the AHK to with LB, with both light guns connected. If you only have AHK v2, you should get a prompt telling you the script is for v1. It will then ask if you want to download the latest v1.1 version in addition to v2. SAY YES. Wait for it to download. If you need to do this, RESTART YOU PC/DEVICE after v1.1 has installed. Otherwise the script wont work. If you already have v1 or v1.1 you won't get the prompt or need to restart. Now you have (or already have) v1/v1.1 the game should boot up with no script warnings. You wont be able to control anything as the PID/VID is not set. However, by simply booting with the script we have made a log of what they are so you can set them. Exit the game. Open Light Gun AHK Script folder. Inside you will find a list.txt file. Open this and you will see the VID/PID number for the connected light guns, plain as day. Now Right Click & Edit the LightgunIndexRemap.ahk script, with a text editor like WordPad. At the top you will find: *********************************** ; Insert guns ID/PID here *********************************** P1DeviceGunID = VID_0000_PID_1111 P1DeviceGunPID = 1111 P2DeviceGunID = VID_0000_PID_1111 P2DeviceGunPID = 1111 *********************************** Simply replace/edit the ID's in the .ahk script (reference e.g. above) to how they appear in the list.txt file. It's obvious what part of the string you need to use. Don't forget to SAVE the ahk! You should now be able to play with no indexing issues. PHEW! Awesome Feature: Try using WideScreen at the same time as WideBackround. This is essentially a widescreen hack giving a true anamorphic widescreen image. It works really well with most games, apart from Virtua Striker 2 and Sega Bass Fishing. Any questions feel free to ask. Below is a list of everything that I have done per game. YOU DON'T NEED TO DO ANY OF THIS. Consider this the documentation for this pre configuration. Please give this a read! A lot of hard work went into this. Not only have I listed everything that I have done I have also listed any cheats, region change codes and important information. Daytona USA 2: Battle on the Edge daytona2 Daytona USA 2: Power Edition dayto2pe Test Menu Changes: -Language/Game Region set to English/USA. Only achievable by using the Region Change Code. Japan is the default. -Link ID set to SINGLE. Fixes Network Board Not Present. -Setting Region to USA removes the option to switch between the Dennis St. James and the Takenobu Mitsuyoshi soundtracks. (Dennis) is the default when set to USA. However, you can still play the alternate soundtrack version with a really easy cheat that is listed below. Analogue Steering Saturation & Calibration: -Steering was very twitchy due to the Analogue Saturation. The analogue steering is technically 1 to 1 however, there is actually quite a lot of 'dead zone' when you have the steering fully turned. I found you can ease off the control stick about a quarter of the way, from fully locked, before it actually started effecting the steering. I confirmed this in 1st Person view where you can see the drivers hand and steering wheel. I eased of the steering about a quarter of the way before the steering wheel moved and the steering started to react. The 'Input Test' within the test menu did not reflect this, giving values for the entire range of the left stick XAXIS. -So after some extensive testing I have changed the InputJoy1XSaturation to 155% for Daytona 2:BOTE and 165% for Daytona 2:PE, to compensate for this 'dead zone'. This makes the area of the analogue steering XAXIS wider giving way better control, without losing any actual in game steering 'range'. As soon as you ease of the stick the steering will react. -This 'kinda dead zone' would have been present on the original arcade machine hardware, but due to the amount of travel/range left and right on the steering wheel it wouldn't have been noticed (arms don't twist that far). This adjustment is more of a "trueish" 1 to 1 and is much more appropriate for use with a controller. General Info: -Controller will vibrate with this game if you have that functionality. -More racing modes and 'number of laps customisation per difficulty' are available in the test menu when set to USA. Alternate Camera Views (you won't be able to do some of these due to the VR buttons NEEDING to be mapped to the D-Pad): -Press VR1 and VR2 at the same time to get a view from just behind the front left wheel well. -Press VR2 and VR3 at the same time to get a view from just behind the front right wheel well. -Press VR2 while already in VR2 to get a cockpit view. -Press & Hold VR4, and while you are holding it press the other three at the same time to get a sky cam view. -Hold VR2 or VR3 or VR4 and repeatedly tap Start for other alternate views. Cheats: -Hold Start when selecting a transmission for 'Time Lap' mode. No other cars on the track. -Hold Start when waiting for the race to start/load to play the alternate soundtrack. -Hold Start when selecting a track to play the mirrored version. -Light Up Fantasy Amusement Park - Rapidly tap Start during Lap 3 or Lap 4 to light up the road. Unlock Hornet Car - Battle on the Edge Version Only (you won't be able to pull this off due to the VR buttons NEEDING to be mapped to the D-Pad. However, I have provided a save state of just after inputting the code, so you can adjust the stats and use this car): -Before starting the game, move the gear stick into first gear. -At the course selection screen, move the stick into fourth gear. -Then Press View Buttons in this Order: VR1, VR4, VR2, VR4, VR1, VR2, VR2+VR3 (together), and VR1. You only have 8 seconds to pull this off and then quickly select a track, if you don't want to play the beginner course. -If done correctly, you'll get the Hornet in place of the usual selection of cars. The cars stats can be modified using the view buttons and the steering wheel. Again, you only have 8 seconds to do this. Region Change Code: -In the main test menu, Push and Hold Start, then with Start Held, Press GREEN/VR4, GREEN/VR4, BLUE/VR2, YELLOW/VR3, RED/VR1, YELLOW/VR3, BLUE/VR2. -This brings you to a hidden region select screen where you can change to USA and other regions. Dirt Devils dirtdvls Test Menu Changes: -Oversteering issue fixed via calibrating the analogue controls with the 'Calibrate Control Devise' function in the test menu. Gas and Brake have also been correctly calibrated. -Speedometer set to MPH. KPH is the default. General Info: -Region dictated by rom. The parent rom 'dirtdvls' is Export region with no option to change to USA. This is fine as its in English. For USA use rom 'dirtdvlsu'. -Controller will vibrate with this game if you have that functionality. -Hold Shift UP in the Vehicle Select screen to toggle to Manual Transmission. Unlocks: -Additional Track & Truck pre unlocked. This required completion of the game on all tracks. Analogue Steering Saturation & Calibration: -As the analogue controls have been calibrated in the 'Calibrate Control Device' to fix the oversteering issue in the test menu. Even though the steering is 1 to 1 it's still super twitchy so InputJoy1XSaturation = 118 has been added to take the edge off. Emergency Call Ambulance eca Test Menu Changes: -Siren Volume set to 1. It's really annoying otherwise. Default is 7. -Distance set to MILE. METRE is the default. Although, because its the Export version Mile is actually Ft in game because of the metric system or something. ("you's a smart mother f***er") They just didn't label it correctly for the Export version. -Analogue Controls calibrated in the 'Volume Setting' function. Analogue Steering Saturation & Calibration: -As the analogue controls have been calibrated in the 'Volume Setting' within test menu there is NO need to adjust the InputJoy1XSaturation. 4-Way Gear Shifting -By default this game is set to a simple Up / Down gear setup. However, it also has a proper 4 way gear input. You need to edit the Games.xml to activate this. -Under ECA in the Games.xml change the line <input type="shiftupdown" /> to <input type="shift4" /> General Info: -Region dictated by rom. The parent rom 'eca' is Export region with no option to change to USA. This is fine as its in English. Cheat Code to Play as an EMT on Foot with a Stretcher: -On transmission select screen, highlight Manual Transmission -Push Gear shift Up, Up, Down, Down, Up Fighting Vipers 2 fvipers2 Test Menu Changes: -Language/Game Region set to English/USA. Only achievable by using Region Change Code. Japan is the default. General Info: -Controls are set to the Dreamcast port defaults. P=(X), K=(Y), G=(A). The Left Stick and D-Pad are usable at the same time. -A full moves list can be found here https://strategywiki.org/wiki/Fighting_Vipers_2/Moves Region Change Code: -Go to test menu then go into 'Game Assignments' -Set cursor at 'Country' line then press Left, Left, Left, Right, Right, Left. -This will then allow you to change the 'Country' to USA and others. Harley-Davidson & L.A. Riders harley Test Menu Changes: -Game Region set to USA. Only achievable by using Region Change Code. Export is the default. -Cabinet Type set to STANDARD. -Engine Volume set to 5. The default is 8. -Number of Stages set to 5. The default is 4. -Analogue Controls calibrated in the 'Volume Setting' function. Analogue Steering Saturation & Calibration: -As the analogue controls have been calibrated in the 'Volume Setting' in the test menu there is NO need to adjust the InputJoy1XSaturation. Cheats: Extra Music Track -When you select your bike press and hold the foot/rear brake (A). -Then select your transmission with the Start button. Hold the foot/rear brake (A) and the Start button until the race starts. -Now scroll through the music tracks and you'll find one called ''Jingle Bells''. Region Change Code: -Go to test menu then go into 'Game Assignments' -Press Shift Up, Shift Up, Shift Down, Shift Down, View, Music, View, Music -This brings up an additional region select option where you can select USA and other regions. L.A Machineguns: Rage of the Machines lamachin Test Menu Changes: -Language/Game Region set to English/USA. Only achievable by using Region Change Code. Japan is the default. -Cabinet Type set to STANDERED. (Not a typo, it's spelled like this in the test menu) -Calibrated for Accuracy in the 'Aim Set' function. Region Change Code: -In the main test menu push Start, Start, Service, Start, Start, Start, Service, Test. -This brings you to a hidden region select screen where you can change to USA and other regions. Le Mans 24 lemans24 Test Menu Changes: -Language/Game Region set to English/USA. Only achievable by using Region Change Code. Japan is the default. -Special Car set to SKYLINE. The default is NONE Analogue Steering Saturation & Calibration: -Steering is very twitchy due to the Analogue Saturation. Controls are a perfect 1 to 1 however it's still really difficult to control. -So after some extensive testing I have changed the InputJoy1XSaturation to 120%. This makes the area of the analog steering XAXIS 'wider' giving way better control. -You do lose some steering range but the trade off is more than worth it and barely noticeable. Region Change Code: -In the main test menu press Start, Start, Service, Service, Start, Test. -This brings you to a hidden region select screen where you can change to USA and other regions. Lost World, The lostwsga IMPORTANT: -So, I'm bringing the hammer down on this one as I have discovered the issue everyone (inc. myself) has been having. This game has 2 input methods which can only be changed in the Games.xml. 1-The default, which is analog input, so x and y coordinate based. This one doesn't flash as it's analog based (<input type="analog_gun1" />). 2-The alternative light gun input method which flashes the screen and detects where the light gun is pointed, like a traditional light gun game (<input type="gun1" />). -In the Supermodel.ini file the inputs labeled for The Lost World ONLY APPLY when the game has been set to Light Gun input (<input type="gun1" />). When set to the default analog input type (<input type="analog_gun1" />), the inputs are actually the ones labelled as Ocean Hunter, L.A. Machineguns, NOT the inputs labelled as Lost World. With 'InputAnalogTriggerLeft' being the trigger for Lost World, and 'InputAnalogTriggerRight' being the off-screen/reload button for Lost World, under the "Analog Inputs" for Ocean Hunter, L.A. Machineguns input section. Not confusing as shit at all. -This does make sense after the fact, as when set to analog input..... the analog inputs apply.... not the light gun inputs derrrrr. But because of the frankly appalling labelling in the ini file, it has spun me (and seemingly everyone else) till now. As a result of all this confusion I have labelled these inputs correctly in the ini file. I swear this emulator is out to get me..... -InputAutoTrigger in the .ini is ON. This allows you to simply press the reload button to reload. If this is OFF you'd need to hold reload and then press fire to reload. Test Menu Changes: -Language/Game Region set to English/USA. Only achievable by using Region Change Code. Japan is the default. -Calibrated for Accuracy in 'Gun Setting' option. General Info: -Crosshairs are ON in the .ini file. Region Change Code: -In the main test menu press Start, Start, Service, Start, Service, Test. -This brings you to a hidden region select screen where you can change to USA and other regions. Magical Truck Adventure magtruck Test Menu Changes: -Language/Game Region set to English/USA. Only achievable by using Region Change Code. Export is the default. -Christmas Mode is ON. Changes outfits of players. -Analogue Controls calibrated in the 'Device Settings' function. Region Change Code: -In the main test menu press Start, Start, Service, Start, Service, Test -This brings you to a hidden region select screen where you can change to USA and other regions. Ocean Hunter, The oceanhun Test Menu Changes: -Language/Game Region set to English/USA. Only achievable by using Region Change Code. Japan is the default. -Cabinet Type set to STANDARD. The default is DELUXE. -Analogue Controls calibrated for Accuracy in 'Volume Setting' function. Region Change Code: -Go to test menu then go into 'Game Assignments' and press 1P Start, 2P Start, 1P Start, 2P Start, 1P Start, 2P Start, 2P Start -This brings up an extra option. Select USA or other regions. Scud Race / Sega Super GT scud scudxo Scud Race Plus / Sega Super GT Plus scudplus Test Menu Changes: -Language/Game Region set to English/USA. No Region Change Code. USA and other regions selectable from 'Game Assignments'. Japan is the default. -SETTING TO USA CHANGES GAME TITLE TO SEGA SUPER GT. -Link ID set to SINGLE. Fixes Network Board Not Present. General Info: -Controller will vibrate with this game if you have that functionality. Analogue Steering Saturation & Calibration: -Steering is very twitchy due to the Analogue Saturation. The analogue steering is 1 to 1 however there is quite a lot of 'dead zone' when you have the steering fully turned, despite the values the test menu gives you. I found you can ease off the stick about a quarter of the way before it actually started affecting the steering. I confirmed this in 1st Person View where you can see the drivers hand and steering wheel, I eased of the steering about a quarter of the way before the steering wheel moved and the steering started to react. The 'Input Test' did not reflect this, giving values for the entire range of the control stick XAXIS. -So after some extensive testing I have changed the InputJoy1XSaturation to 165%, to compensate for this 'dead zone'. This makes the area of the analog steering XAXIS wider giving way better control, without losing any actual in-game steering 'range'. As soon as you ease of the stick the steering will react. -This 'kinda dead zone' would have been present on the original hardware, but due to the amount of travel from left to right on the steering wheel it wouldn't have been noticed. This adjustment is more of a 'kinda true 1 to 1' and is much more appropriate for a controller. Sega Bass Fishing / Get Bass getbassur IMPORTANT: -Use 'getbassur' over every other version of Sega Bass Fishing. -This version lacks the tension input which is better for controllers. Test Menu Changes: -Language/Game Region set to English/USA. Only achievable by using Region Change Code. Japan is the default. -Analogue Controls calibrated in the Volume Setting function within the test menu. -Game Time and Continue Time have been set to the maximum '3m50s'. Region Change Code: -In the main test menu, select CRT TEST and move to screen 2/2. -Push the Service Button 4 times, exit the CRT TEST. -Go into Game Assignments, push Service Button 3 times, then press and hold Service Button and then press Test. -This brings you to a hidden region select screen where you can change to other regions. Sega Rally 2 srally2 Sega Rally 2 DX srally2dx Standard and DX differences: -The DX version has a different livery (car decals) and some other minor "under the hood" updates. IMPORTANT: -This game will run slow and have graphical glitches if the PowerPCFrequency is left on 49. -Setting to a higher number will fix this. However if set too high the emulator will start to run slow. -PowerPCFrenquency set to 69 in the ini file. This fixes the issue. It's the sweet spot. Test Menu Changes: -Game Region set to USA. Only achievable by using Region Change Code. Export is the default. -Game Mode set to SPECIAL. This enables 3 Laps per stage. The default is NORMAL (1 Lap per stage). -Default View set to BEHIND. The default is Driver. -Speedometer set to MPH. Default is KMH. -Cabinet Type set to TWIN. The CLUTCH and other stuff are NOT used when set to TWIN, which is what we want. The default is DELUXE. -Coin Assignments set to Free Play. This helps with a bug where if you restart the game with credits loaded it may not display any graphics. Setting to Free Play helps with this. Analogue Steering Saturation & Calibration: -Steering is very twitchy due to the Analogue Saturation being 'short'. The analogue steering is 1 to 1 however there is quite a lot of 'dead zone' when you have the steering fully turned, despite the values the test menu gives you. I found you can ease off the stick about a quarter of the way before it actually started affecting the steering. -So after some extensive testing I have changed the InputJoy1XSaturation to 155%, to compensate for this 'dead zone'. This makes the area of the analog steering XAXIS 'wider' giving way better control, without losing any actual in-game steering 'range'. As soon as you ease of the stick the steering will react. -This 'kinda dead zone' would have been present on the original hardware, but due to the amount of travel from left to right on the steering wheel it wouldn't have been noticed. This adjustment is more of a 'kinda true 1 to 1' and is much more appropriate for a controller. General Info: -Controller will vibrate with this game if you have that functionality. Cheats: -Unlock the Delta and Celica Cars - Press View Change and the Handbrake (A+Y) at the same time on the car select. -Better Time Display - Put in your name then hold View Change and Handbrake (A+Y) at the same time until the game starts. -Turn Off Music - Put in your name then hold Start until the game starts. Region Change Code: -In the main test menu using the Service Button:- -Do 4 short presses, 2 long (about 2 seconds per press), 2 short presses, then 1 long press (about 2 seconds). -This brings you to a hidden region select screen where you can change to other regions. Ski Champ skichamp IMPORTANT: -This game has an InputSkiY AXIS Input. Despite this being designated as a Y axis it's actually used for movement on the X axis. -IT'S NOT USED FOR UP AND DOWN MOTION. -It is for turning harder, like digging in the edges of the skis. This is how the original arcade hardware works. -This is assigned to the Right Stick. Move the Right Stick in the same direction as the Left Stick to turn harder. Test Menu Changes: -Language/Game Region set to English/Export. Setting to USA kept crashing the game for me. Only achievable by using Region Change Code. Japan is the default. -Extend Time set to 25s. The game is pretty much impossible to complete otherwise. The default is 20s. -Analogue Controls calibrated in the Volume Setting function within the test menu. -Force Feedback MUST be enabled otherwise you'll get the 'Check Drive Board' error. Preventing you from playing the game. -Setting to Free Play forces a 1st Person perspective. Set to 1coin = 1play. General Info: -Controller will vibrate with this game if you have that functionality. Region Change Code: -In the main test menu press Blue, Green, Blue, Green, Service, Service. -This brings you to a hidden region select screen where you can change to USA and other regions. Spikeout spikeout Spikeout Final Edition spikeofe Test Menu Changes: -Game Region set to USA. Only achievable by using Region Change Code. Export is the default. General Info: -To pick up an item press Beat+Charge+Down (X+A+Down, at the same time). I couldn't figure this out for ages. -There is a surprising amount of moves and combos. Here is a full list https://gamefaqs.gamespot.com/arcade/574616-spikeout/faqs/414 Spikeout Region Change Code: -Set cursor on Game Assignments. -Then press Button3(Charge), Start, Button4(Jump), Start, Start, Start, Button1(Shift), Start, Start. -This brings you to a hidden region select screen where you can change to USA and other regions. Spikeout Final Edition Region Change Code: -Set cursor on TIMER TEST. -Then press and hold the Service Button and enter the following: -Button4(Jump), Start, Button4(Jump), Start, THEN RELEASE SERVICE BUTTON, Button1(Shift), Start, Start, Start, Button3(Charge), Start, Start, Button1(Shift), Start, Test. -This brings you to a hidden region select screen where you can change to USA and other regions. Star Wars Trilogy Arcade swtrilgy IMPORTANT: -Coin Assignments set to Free Play. This helps with a bug where if you restart the game with credits loaded from a previous play session, it may not display any graphics. Setting to Free Play helps with this. Test Menu Changes: -Cabinet Type set to U/R. This prevents an issues with the 'Feedback Lever'. The default is DELUXE -Lever set to Up---Down - Down---Up. This aligns the main game and bonus stages Y axis control inversion. General Info: -The parent rom 'swtrilgy' is USA region. This game has a Region Change Code available but not needed for this version/set. It will be listed below anyway just for reference. Region Change Code: -In the main test menu using the Service Button, -Do 3 short presses, 2 long presses (about 2 seconds per press), 2 short presses then 1 long press (about 2 seconds). -This brings you to a hidden region select screen where you can change to USA and other regions. Virtua Fighter 3 vf3 Virtua Fighter 3 Team Battle vf3tb Test Menu Changes: -Language/Game Region set to English/USA. No Region Change Code, USA and other regions selectable from 'Game Assignments'. Japan is the default. -Show Command set to ON. -Stage Select set to CHALLENGER. The default is OFF. General Info: -Controls set to Dreamcast port defaults. The Left stick and D-Pad are usable at the same time. -A full moves list is here https://virtuafighter.com/commands/?ver=3tb Cheats: Different Costumes - Hold Start and then select your character with any button. Virtua Striker 2 vs2 Virtua Striker 2 '98 vs298 Virtua Striker 2 '99.1 vs2v991 Test Menu Changes: -'vs2 and 'vs2v991'Language/Game Region set to English/USA. No Region Change Code, USA and other regions selectable from 'Game Assignments'. Export is the default. -'vs298' Game Region set to USA. Only achievable by using Region Change Code. Japan is the default. -Game Time set to maximum 3m00s. Default is 2m00s -G Goal Mode (IF THERE'S A DRAW BY THE END OF THE MATCH) = (EXTRA TIME, NEXT GOAL WINS) set to 1m. OFF is the default. (If extra time goes 1m with no goals the match will go to a Penalty Knockout.) -P K Mode (PENALTY KNOCKOUT) Set to REAL. OFF is the default. (This will let penalties go on until there is a clear winner.) Virtua Striker 2 '98 Region Change Code: -Go to test menu then go into 'Game Assignments'. -Then press the Service Button once for about 5 seconds, then press the Service Button three times shortly, then press the Service Button one time for about 5 seconds again. -This brings you to a hidden region select screen where you can change to USA and other regions. Virtual On 2: Oratorio Tangram von2 Test Menu Changes: -Language/Game Region set to English/USA. Only achievable by using Engineers Code. Japan is the default. -Play Time for all options is set to DEATHMATCH (No Timer). The default is 80 secs. General Info: -Using Macro Controls, Turn Left & Right are set to the right stick. Engineers Region Change Code: -In the main test menu press Start, Start, Service, Start, Start, Start, Service, Service, Test. -This brings you to a hidden region select screen where you can change to USA and other regions.68 points -

Version 4.02
16,144 downloads
The CoverBox project is one where my goal is to recreate retro console's boxart as a BigBox Theme. Each theme is designed for 1080p. P.S. I created graphic assets for the star ratings. Please feel free to use them in your theme. With the release of CoverBox 4.0, the theme has been completely ported over to the COMMUNITY Theme Creator. I now included the COMMUNITY Theme Creator files that you can use to load into the CTC to make any edits that you'd like. Please follow these instructions to do so: Make sure you already have a copy of the COMMUNITY Theme Creator, and you have it set up (link below) Download both the Theme files and COMMUNITY Theme Creator files Extract the COMMUNITY Theme Creator files into your COMMUNITY Theme Creator\My Theme Projects folder (don't forget to right click the archive, go into properties, and unblock the file) Open the Theme files zip, go into the Fonts folder and install all the fonts in there. Open the COMMUNITY Theme Creator, you should now find it in the dropdown list of themes Installation Instructions Download the CoverBox - Theme Files.zip file. Right click the file, go to properties and make sure to unblock the file Open the zip file and place the folder into the LaunchBox\Themes folder Select the CoverBox theme in BigBox CoverBox Images List of Supported Platforms Thanks y2guru and his COMMUNITY Theme Creator This theme utilizes Styphelus' System Boxes by Styphelus Anyone who has ever contributed to this project over the years.67 points -
Version 8.5
38,039 downloads
Note: This thread will not be pushed to the front in the "whats new" section, if you want notifications for future updates to this file be sure to follow this page by using the follow button in the upper right corner Here's my collection of Lights Out! Realistic Retroarch bezels. You can find other bezels that are part of my "Lights Out!" series over here: Neo Geo v2 4K - Lights Out - Realistic Retroarch Bezels Capcom Play System I 4K - Lights Out - Realistic Retroarch Bezels Capcom Play System II 4K - Lights Out - Realistic Retroarch Bezels Capcom Play System III 4K - Lights Out - Realistic Retroarch Bezels Sega Naomi 4K - Lights Out - Realistic Retroarch Bezels Mame 4K - Lights Out - Realistic Bezels Sammy Atomiswave 4K - Lights Out - Realistic Bezels Enjoy!67 points -
Version 5.8
14,430 downloads
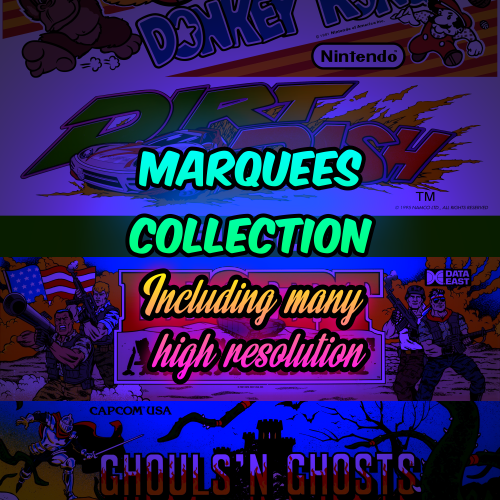
I use the awesome Bigbox function to display marquees on a secondary monitor. For years I've been collecting high res Mame arcade marquees from all over the internet and since the start of this project got huge help from people in the community to expand this collection, please see the credits below. Not all marquees are in 4K but many are, I've down scaled the resolution to max 3840 pixels wide and max 2160 pixels high and saved all in .jpg format for a good size and quality balance. This project includes Naomi and Atomiswave marquees as well as other arcade systems. These marquees go hand in hand with this bezel project: Credits I have forgotten where I got all marquees through the years but I know many came from the legendary @Mr. Do collection see: https://mrdo.mameworld.info/index.php and the many members that create artwork at: https://www.mameworld.info/ubbthreads/ubbthreads.php?Cat= @ArsInvictus is certainly one of the providers as well. A huge thank you to @mOa and @JonnyModlin for providing many many marquees to this collection. Many lower resolution marquees came from the legendary team of AntoPisa at https://www.progettosnaps.net/ Also a huge thanks to the following people and sites: @PapaShine, @Dreamstate, @flanx, imbord3rlin3, @djweevil666, http://adb.arcadeitalia.net/, @THK, https://flyers.arcade-museum.com/, https://www.flyerfever.com/, https://www.recreativas.org/, Ken at https://www.flickr.com/photos/10707024@N04/, zzzaccaria.com, Hasan Tasdemir from Nationaal Video Game Museum for the opportunity to photograph at your amazing museum. https://www.nationaalvideogamemuseum.nl, https://segaretro.org/, @seijurou and all the logo makers and artwork scanners and submitters for the LB database and other databases. Hope you enjoy this collection.65 points -
Version 1.10.0
3,055 downloads
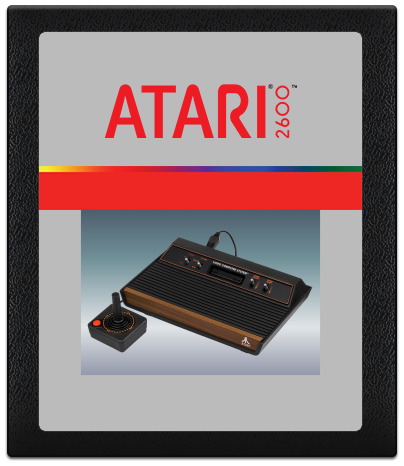
Note: using these requires LaunchBox 9.10 beta 1, or above. The files in the attached archive are the start of my effort to create 'default' images for most of my installed platforms. Copy the archive to your <launchbox install directory>\Images\Platforms directory and extract there. Start Launchbox, select your matching platform names, then refresh all images. Any missing media in your same image categories as mine should now show up (you may have to rename some of the extracted directories if they don't match the platform names in LaunchBox). I modeled most of these on graphic types from EmuMovie assets. Please feel free to make requests, or post your own default images. The archive has files for the following platforms: 3D Nintendo Entertainment System Acorn BBC Micro Acorn Electron Amstrad CPC Amstrad GX4000 Apogee BK-01 Arcade Atari 800 Atari 2600 Atari 5200 Atari 7800 Atari 7800 Homebrew Atari Jaguar Atari Jaguar CD Atari Lynx Atari ST Bally Astrocade Bandai Sufami Turbo Bandai Super Vision 8000 Camputers Lynx ColecoVision Commodore 64 Commodore 128 Commodore Amiga Commodore Amiga CD32 Commodore CDTV Commodore MAX Machine Commodore Pet Commodore Plus 4 Commodore VIC-20 Dendy Dragon 32 Dragon 64 Emerson Arcadia 2001 Entex Adventure Vision Epoch Super Cassette Vision Fairchild Channel F GCE Vectrex Magnavox Odyssey 2 Mattel Intellivision Microsoft MSX Microsoft MSX2 Microsoft XBOX Microsoft XBOX 360 MS-DOS MUGEN NEC PC-8801 NEC PC-9801 NEC PC-FX NEC PC Engine NEC PC Engine-CD NEC SuperGrafx NEC TurboGrafx-16 NEC TurboGrafx-CD Nintendo 3DS Nintendo 64 Nintendo 64 (Japan) Nintendo 64DD Nintendo DS Nintendo Entertainment System Nintendo Famicom Nintendo Game Boy Nintendo Game Boy Advance Nintendo Game Boy Color Nintendo GameCube Nintendo MSU-1 Nintendo Satellaview Nintendo Switch Nintendo Virtual Boy Nintendo Wii Nintendo Wii U Nintendo WiiWare Nokia N Gage Panasonic 3DO Philips CD-I Philips Videopac G7000 Philips Videopac Plus G7400 PopCap RCA Studio II Sega 32X Sega CD Sega CD 32X Sega Dreamcast Sega Game Gear Sega Genesis Sega Master System Sega Mega-CD Sega Mega Drive Sega Saturn Sega SG-1000 Sharp MZ-2500 Sharp X68000 Sinclair ZX-81 Sinclair ZX Spectrum SNK Neo Geo AES SNK Neo Geo CD SNK Neo Geo Pocket Color Sony Playstation Sony Playstation 2 Sony Playstation 3 Sony Playstation Vita Sony PSP Sony PSP Minis SpectraVideo Super Nintendo Entertainment System Super Nintendo Entertainment System (Pal) Tandy TRS-80 Tandy TRS-80 Color Computer Windows WonderSwan WonderSwan Color64 points -

Version 13.8
17,523 downloads
Neon Deluxe Arcade - LaunchBox Theme Note: This thread will not be pushed to the front in the "whats new" section, if you want notifications for future updates to this file be sure to follow this page by using the follow button in the upper right corner. INTRO: In a dark alley lit by black light and neon, an arcade resides; Neon Deluxe Arcade. Neon Deluxe Arcade is a series of themes, if you like you can download these to accompany the complete theme: Neon Deluxe Arcade - Badges Neon Deluxe Arcade - Big Box Theme Neon Deluxe Arcade - Launchbox Theme Neon Deluxe Arcade - Startup Theme (Street) Neon Deluxe Arcade - Startup Theme (Inside) Mr. RetroLust's Realistic Retroarch Bezels (Same style > Dimmed lit retro gaming) Mr. RetroLust's - Mame 4K - Lights Out - Realistic Bezels (Same style > Dimmed lit retro gaming) CREDITS: Huge Thanks to @Grila for the inspiration and his permission and kindness to use his codes for especially the left sidebar and more from his LBPlex Launchbox Theme. Also huge thanks to @Rincewind for the inspiration and his permission and kindness to use his code of the Rincewind Launchbox Theme for full screen background images. I couldn't have made it as it is without you guys! Thanks to @C-Beats for adding the steam achievements to the theme, and the code for clear logos! Thanks to @faeran for the tip about video background transparency and the coding for the play time tracker. @Retro808 for the filters code, thanks man! FEATURES: More than I can mention, you just have to see it in action, one thing I can mention is that it features a bright green and slightly larger cache progress bar so you can't miss it when it's working to make a smooth experience INSTALLATION: Extract folder "Neon Deluxe Arcade LB" to Launchbox/LBThemes. Open Launchbox, go to Tools/Options/(Leftside bar) Visuals/Choose the theme in the dropdown bar. Tip: Tools/Options/Theme/Colors > Choose "Midnight Blue" for anything that was not possible to color change in Launchbox theming. Important: This theme does not use fanart or platform backgrounds but a static 4K quality background, there are 7 backgrounds to choose from in the separate download, the image you want to display should be named "Background-01.jpg" and overwritten in \LBThemes\Neon Deluxe Arcade LB\Images. In order to get it working as you see in the screenshots please set your background settings to: Hope you enjoy, have fun brothers!61 points -
Version 2.3
6,799 downloads
The newest version of this theme requires version 13.4, or higher. Big Details is a new theme that reimagines what the LaunchBox interface can be. Every piece of the interface has been tweaked and adjusted to provide a smooth and modern experience with subtle animations across the theme. The main highlight is the transition to a banner-type horizontal Game Details view. There's a lot to unbundle in this one, and any potential theme developers are welcome to take a peak into the code to get inspiration. Some features of this theme include: Banner style game details view with Uniform Image Grid View with rounded corners and vertically aligned images New controls pop-up that houses the music controls, and image and volume sliders Redesigned top menu bar Dynamic Play button with multiple version support, and states for: Play, Install, Unavailable58 points -
Version 2.6.1
11,436 downloads
Note: This thread will not be pushed to the front in the "whats new" section once updated in the future, if you want notifications for future updates be sure to follow this page by using the follow button in the upper right corner. NEON DELUXE ARCADE - 16:9 ----------------------------------------------------- CREDITS Huge thanks goes out to @y2guru for his Community Theme Creator Software and his endless personal help, also he created the animated wheels for this theme! @Hexxxer for the original inspiration of his FutureState theme. @Rincewind for the inspiration on his use of the icons. @faeranfor explaining the new marquee options in v12. Thanks guys! ----------------------------------------------------- INSTALLATION 1. Download the theme here and place the folder in Launchbox/Themes/ 2. You might need to unblock the zip file or all the .DLL's in the plugin folder. Right click the zip or DLL files, choose properties and at the bottom you click "Unblock". 3. I recommend doing the following to speed up Big Box greatly: - Uncheck all Background Images in Launchbox > Tools > Options > Media > Background Priorities - Set all transitions to "None" in BigBox settings - Use the Clean Up media tool in launchbox/tools/Clean Up Media... (this can really speed up lists with thousands of games and duplicate media) - Defrag the drive that holds your media files Hope you like and enjoy! ? ----------------------------------------------------- LINKS Neon Deluxe Arcade is a series of themes and elements, if you like you can download these to accompany the complete theme, visit this page to see all my other work: https://forums.launchbox-app.com/profile/88501-mr-retrolust/content/?type=downloads_file Arcade stick and buttons sound pack, sounds really good with this theme:57 points -
Version 2.2
58,614 downloads
Inspired by the work of screenzone.fr, I totally redo a very large set of Platform Clear Logo. New ring. New design. HD logo. (1506 x 756 px) PNG format. No drop shadow. ZIP file: GAMES ARCADE logo (77 PNG) ZIP file: GAMES COMPUTER logo (70 PNG) ZIP file: GAMES CONSOLE logo (104 PNG) ZIP file: GAMES HANDHELDlogo (28 PNG) ZIP file: GAMES PINBALL logo (5 PNG) ZIP file: CATEGORY logo (7 PNG) ZIP file: THIRD PARTY APP logo (16 PNG) ZIP file: PLAYLIST logo (13 PNG) ZIP file: BLANK logo : Create your own logo. (2 PSD) Browse the forum thread for alternatives from other users ! Browse the forum and ask for update on the good tread ! Instruction : Copy/past *.PNG file in your ...\ LaunchBox \ Themes \ <Theme name> \ Images \ Platforms \ Clear Logo. Rename the png file exactly as the name of the desired platform as in LaunchBox. Launch "BigBox" and go into "option". Refresh "wheel image cache".55 points -
Version Updated at 0.283
10,115 downloads
UPDATE 09/01/2026 All of Namco System 12 had it's controls updated at some point. This caused the map files to be incorrect. This has now been sorted. Only the .cfg have been updated, so just grab those if updating! Also, War: Final Assault has had digital analog applied so the crosshair doesn't snap back to centre. It plays like a proper FPS now. UPDATE: Its been 2 years since I "finished" this, and its taken until now for the MAME burnout to lift. But it's back to add some more games and overall improvements. Thanks to past me futureproofing the project, now me only needed to add 35 games. Stuff I missed first time around and stuff that's been added to MAME over the past 2 years. However, about 100 games need fixing. Thanks to help from the community I was able to easily identify which ones I messed up with double inputs or left the test menu on like a dumbass! MAME of course have changed some stuff and hopefully I've caught everything that pertains to this project. Improved platform xml, with almost all games now having a DB entry. I've also made a bunch of Hardware Playlists! Most of the popular ones beyond what LB creates. Stuff like Capcom ZN, Cave 68000, Seta 1st Generation and a bunch of Sega stuff just to name a few. Open to suggestions to add more! This is the bit you really want to pay attention to with the update! CHDs and the size of this build when culled. So, just to break this down: 3571 Non-Merged Roms (No CHD's) = 15.5GB 3571 Games in Merged Roms (No CHD's) = 16.7GB A culled Non-Merged set is actually smaller in size than a culled merged set. Due to merged including "all versions in one zip", independently, they are overall larger in size. Despite non-merged roms including bios files per rom, making it larger for a full set, a non-merged set ends up being overall smaller when culled like this. Not by much! But, I still fully recommend non-merged as they "just work", being overall smaller in size is an unexpected but added bonus. Now, CHD's. Exactly what is needed is in the documentation. For a full set, for this list of games, it's 110GB! However, 65GB (OVER HALF) of this is Rhythm games. Only 48 of them, Beatmania being the main offender. Another 12GB is occupied by ONE GAME....Fire Fox. A LaserDisc game that probably isn't wort the 12GB. These have been configured and added to the project for completeness. But, I have added these to a playlist (also in documentation) so you can easily delete/not use/exclude these Rhythm games from your build. They don't translate well to a controller anyway, so ya really not missing out on much, but saving 65GB across 48 games. Fire Fox is in that playlist also, do what you want. However.... A Non-Merged Culled set with all CHD's for this list (excluding Rhythm + Fire Fox) = 49 GB I had to double take the first time I calculated this. Almost all of MAME Arcade, 1G1R "ish", excluding games better emulated outside of MAME and oversized CHDs, fits into just under 50GB. Amazing! These figures will of course increase as time goes on, this is just a snapshot of now! Namco System 23 and Model 2 will be added once they are in a better state. They are really, really close to running well enough to add. --END OF UPDATE-- If you want show your appreciation and support the project and myself please check put my Patreon https://www.patreon.com/warpedpolygon No need to use the importer with the provided custom platform xml. I fully recommend using this to get the most out of what's been done. If you have been following along you know what the score is. If you are new here, let me explain what all this is. MAME is awesome, however like many other emulators it doesn't know what your use case is, how can it. So, it's defaults are more of a 'one size fits all... but not perfectly' kind of deal. As a result getting things setup can be a mine field. This isn't just down to MAME defaults, plenty of games present you with a bunch of hoops to jump through just to play the damn thing. This, on top of figuring out controls, (which is the main point here) can be a very frustrating experience. Even google can come up short sometimes leaving you to fumble around in the dark. Removing this frustration is the whole point of the project. I see lots of github requests for MAME that aren't emulation issues, they're configuration and setup issues. This project should alleviate the rage of most users. FOR CONTROL PAD USERS. So, let's just get into the stuff you wanna hear. To keep it simple I'm gonna list what IS here and what ISN'T here: WHAT IS HERE Every working Parent ROM has been configured. Although, some games listed as NOT WORKING do indeed work to some degree. These have also been configured to future proof the project. Clones and/or preferred versions have been identified, configured and added in ADDITION to their parent counterparts. This could be an uncensored Japanese version, control hack, translation or even a sequel. In some instances an entirely different game can be a clone version. This is such an important part of the project. All English region Names/Versions have been configured. You may know a game by a completely different name depending on your region. All English versions with different names have been configured. So, if it's Buck Rogers: Planet of Zoom, or just Zoom 909 to you, you'll be able to find it. It'll have that title in game also. I haven't just duplicated the parent version and changed the name in LB. All games have been tested and controls configured for XINPUT Controllers. This has been done per game. Some games needed ages spent on them to figure what the hell was going on. Robocop 2 has diagonals that need mapping to the second player joystick, despite being a one player game. So, you can imagine the time and testing that went in. Multiplayer games set to work with maximum players. Pretty much 70% of 4 player games were setup for 2 players by default. Games that remove the character selection for 4 players have had their 2 player versions also added so you have the choice. Multi screen games set for both one and two screen use. You will have the choice to launch the 1 screen or 2 screen version without having to set everything up. These maybe listed a 1 and 2 player variants. All analog games have had their sensitivity checked and changed if needed. Yes, the trackball Sonic game works just fine despite what people say. Every configured game has a control layout image. Working Prototypes are here. English set for Japanese only games wherever possible. There's more than you think. Unlockable/hidden content pre unlocked. Keep in mind some cheats for hidden content are a one time use and don't save to NVRAM. Fighting game button layouts are setup to all be the same. Exactly the same as Street Fighter 2 on SNES for 6 button fighters. Light gun games set for controller AND mouse usage. Inaccurate games have been calibrated. Widescreen games set to pixel aspect. Technical hoops already jumped through. Much, much, much more. WHAT ISN'T HERE Mah-jong games that use a Mah-jong panel. These simply have too many inputs to map to a controller. Mah-jong games that use a joystick are here. Japanese quiz games. Gambling and video poker games. Basically anything with a BET, HOLD input system. Japanese clone versions, UNLESS they are preferred or have additional content. Truly non working games that simply black screen. Any arcade platforms better emulated outside of MAME for e.g. Sega Model 2 & 3. ABOUT THE PLATFORM XML A lot of work has gone into making sure these games are all accounted for in the xml. There were a bunch of roms that weren't recognised by the importer or games that simply haven't yet been added to the Database. I have made sure that these have been added and named correctly before I start changing/updating the database. Also, I have gone the extra mile and added version info in the title of the game if there are multiples of the same game. So, you will see The Simpsons (2 Player) and The Simpsons (4 Players) as separate versions for extra convenience. PlayChoice-10 games and mega play games have also had this info added to the title so you know exactly what version is being selected, despite sharing the same name as other versions/games. MAME SET ADVICE AND MERGED ROMS Despite my previous statements, Non-Merged is the best for sooo many reasons. I plead with you, just go non merged and you'll have a better time. However, merged will work just fine as long as you have your bios setup correctly. INSTRUCTIONS Download CFG, NVRAM and Control Layout Images Put CFG and NVRAM files in the cfg and nvram folders of MAME Use Images however you want. I like to put these in the Screenshot - Gameplay images folder so they display in the side bar. If you don't use a gameplay screenshots this is a nice solution outside of BigBox. This has been made for use with XINPUT controllers. If you aren't using an XINPUT controller you can use DS4windows or it's alternative. USING THE ARCADE PLATFORM XML Download the Arcade.xml Backup your old xml just in case if you have one. Make sure LaunchBox is not running Place Arcade.xml into Data->Platforms folder in LaunchBox Start LaunchBox. The Arcade platform should be showing now. Select all games in the Arcade platform (Ctrl+A), then go to Tools->File Management->Change ROMs Folder Path for Selected Games (Merged Only) It will say some roms are missing, they're not, just in other zips. Make sure to change paths for these also, when asked. Find your ROMs folder and select it. Don't forget to set your emulator path and set it as the default for Arcade platform. PLAY!!! This project will be kept up to date moving forward. If you have any info, suggestions or whatever just holler in the comments.53 points -
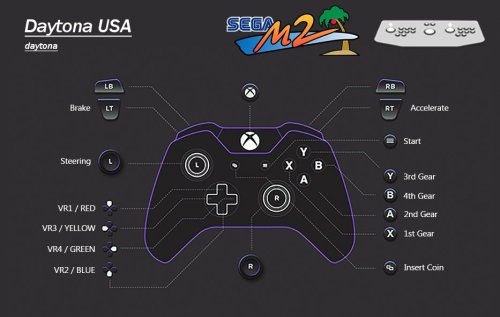
Version 1.0.4
24,332 downloads
UPDATE: Added cheats to the table below. Another huge thanks to @Joejoe for providing these. UPDATE 2: Fixed ManxTT lack of engine sound and Danger Screen at startup. Dynamite Deka 2 Added. UPDATE 3: Using new LUA scripts that include cheats, a scanline option and more refined widescreen scripting. Added DINPUT control configuration using a PS4 controller. More fixes in change log. You can use F5 to toggle between 16:9 and 4:3 when using widescreen scripts. UPDATE 4: Quite a Big One A whole bunch of inputs moved for better play. Gears are on the face buttons now, fighters have had some inputs moved. Images updated of course. All of the other Daytona USA versions/hacks have been added. ManxTT fixed properly properly. I promise. Changed the rom to the twin version 'manxttc' and set to twin in test menu. No more stupid error every time you turn, which caused a Japanese voiced error audio sample to be played...every time you turned. Very annoying....but it's gone now. ManxTT and Over Rev should now track straight when not holding the stick. This was an error on my part. Now fixed. Full Fat 1440x1080 60FPS 30s Videos have been added. Freshly made by me, clean high quality videos. Clear Logos & Flyer Fronts. I made the other Daytona clear logos up to match the normal one, came out nice actually. Also made up some flyers for some of the Daytona hacks and Sega Rally. Every game has a bespoke clear logo & flyer. No doubles. Custom Platform XML provided. In the description of every game will be my emulation notes for that game & any cheats. Genres/categories/no. of players had been adjusted so auto playlists with catch them correctly. DINPUT better configured. I'm not gonna lie, after looking at what I had previously done I was disgusted. This is now configured just as good as the xinput version. So you know the drill with these releases. The intention is to take these awkward to set up emulators, and make them as plug and play as possible for those using a PC, controller, mouse and light guns. Here is the follow up to the Supermodel project I completed a little while ago. The Model 2 setup was far more forgiving and didn't make me want to trash my computer. That's not to say there aren't some interesting and awkward things going on that needed some attention, however these were far more easy to fix. As per usual many hours have been put into this project with much testing and in the case of getting 2 Player Mouse support, a lot of calibrating. This has only been configured for the parent rom versions only. 1G1R Instructions - Super Simples -Download Model 2 Emulator -Use MERGED ROMS. imma say it again MERGED ROMS. -Download Pre Config File Folders On This Page (Make sure you select your correct input type) -Place in Model 2 folder and replace any files. -Widescreen scripts are being used as default. If you only want 4:3, replace the scrips with the 4:3 ones provided in Scripts Folder. -DONE!!!!! What this configuration will give you: 2 Player Mouse Support for Light Gun Games - Resolution Specific 1920x1080 - If You Change Resolution It Will Be Inaccurate I cant tell you how awkward and difficult it was to get this to work. Due to RawInput being a must for 2 mice, the calibration doesn't scale into different resolutions. This means you can't calibrate it using the auto calibration (shooting targets) in its test menu, as it'll be inaccurate no matter how perfectly you shoot those calibration targets. You can't even calibrate at native resolution to make it 1 to 1 and then increase the resolution. Thankfully Virtua Cop 1 & 2 both have a manual adjustment feature meaning I could off set the adjustment to get PERFECT pin point accuracy. Behind Enemy Lines was awkward but not impossible to get accurate, as it doesn't display where your actual in game cursor position is on screen. Only X and Y coordinates are displayed, which was just enough info to get it accurate. Gunblade on the other hand gives you absolutely no on screen info at all when calibrating, it's as accurate as I can get it. What is really weird is that some of these games are accurate out the box with RawInput off, but needed recalibrating when I enabled RawInput. But now if you turn off RawInput it is still accurate after calibrating for RawInput. That's great as switching between the two is seamless and retains accuracy. Best of both worlds, as having RawInput off for single player gives you more mouse sensitivity. No Screen Flash for Virtua Cop 1 & 2 and House of the Dead LUA scripts are included as standard to remove the screen flash that would happen every time you pull the trigger. All the other Light Gun Games don't have screen flash by design so all of these shooters do not flash. Controls Configured with Images for Every Game All controls have been pre configured for both players. I have also made images for the layout of every game. Controls were tested the most. I found some strange/broken controls that needed some thought. Sky Target has a broken up and down analogue input, however simply mapping this as a digital input to the left stick up and down is a perfect workaround. Desert Tank benefits from no analogue inputs also, I have got it to control exactly like the vehicles in Halo which is neat. Aside from that there are various racing games that have inverted pedals that needed the Invert option checked in the control calibration options. All Games In English - All Games Free Play This speaks for itself. All test menus adjusted to let these games play in English and in Free Play mode. Test Menu Fixes and Unlocked Hidden Game Modes Network Board Not Present.....Done. Unlocking all game modes in Virtua Striker....Done. Calibrating analogue inputs in 'Volume Adjustment' (Yeah I thought it was to do with audio too) so controls are correct and use the entire travel of the analogue range so racing games aren't twitchy....Done. A whole bunch of tweaks from CRT modes giving better brightness to extending game times among a shed load of other crap that enhances the experience in some way.....Done. Optional 16:9 Anamorphic Widescreen LUA Scripts Put these in the scripts folder and boom...proper widescreen no stretching. These work way way way way better than the temperamental widescreen option in the EMULATOR.INI file, which only works half the time depending on how your graphics are scaling etc etc etc etc. Just use the LUA scripts instead for better results and no headaches, I command it. I love this feature, House of the Dead and Gunblade even allow you to shoot into the 16:9 space. DOCUMENTATION / CHECKLIST. THIS HAS BEEN DONE FOR YOU Behind Enemy Lines bel -Calibrated and WORKING. -Calibrated for RawInput 2 Players -Set to Free Play Gun Adjustment Values for Accuracy When Using RawInput at 1920x1080: 29 MIN GUN 1 X 0e MIN GUN 1 Y d5 MAX GUN 1 X f2 MAX GUN 1 Y Daytona USA daytona -Link ID set to 'SINGLE'. Default is 'MASTER' which causes the game to give the Network Board Not Present error preventing you from playing the game. -Country set to 'USA', this changes the language to English. 'Japan' is the Default. -Set to Free Play -Apparently setting Cabinet Type to Deluxe displays correct colours due to it's display type. Dead or Alive doa -Nation set to 'USA', this changes the language to English. 'Japan' is the Default. -Set to Free Play Desert Tank desert -Country set to 'USA', this changes the language to English. 'Japan' is the Default. -Controls took a while to figure out. It is actually better to use digital inputs and NOT use analogue input with this game. Turning the turret is on the right stick with accelerate being up on the left stick. -Set to Free Play Dynamite Baseball 97 dynabb97 -No English option that I know of. -Innings Per Credit set to MAX (3) -Analogue 'Bat' input calibrated in 'Volume Settings'. Which is actually analogue calibration, I assumed it was audio settings, not realising analogue range is expressed in 'volume' also. -Set to Free Play Dynamite Cop dynamcop -Set to Free Play Dynamite Deka dyndeka2 -Japanese version of Dynamite Cop. This version varies with character models and is even more insane than the English Version. Even though this is 1G1R, I consider this to be a separate game due to its differences. -Set to Free Play Fighting Vipers fvipers -Country set to 'USA', this changes the language to English. 'Japan' is the Default. -Display Type looks best set to 'Projector'. Although this is darker, using 'CRT' increases the saturation to the point blacks are -Set to Free Play Gunblade NY gunblade -Country set to 'USA', this changes the language to English. 'Japan' is the Default. -Calibreted both analogue guns in 'Aim Set'. RawInput is on to allow for 2 player mouse support. Due to RawInput implementation this calibration is RESOLUTION SPECIFIC - 1920x1080 -Set to Free Play Gun Adjustment Notes - Resolution Specific 1920x1080: Due to no x or y coordinates being shown it is almost impossible to get this pin point getting the on screen crosshairs to line up. I gave it my best shot. You are welcome to try. House of the Dead hotd -Country set to 'USA', this changes the language to English. 'Japan' is the Default. -Calibrated both guns in 'Aim Set'. RawInput is on to allow for 2 player mouse support. Due to being RawInput this calibration is RESOLUTION SPECIFIC - 1920x1080 -Blood set to 'Red'. The Default is 'Green' -Set to Free Play Manual Gun Adjustment Values for Accuracy When Using RawInput at 1920x1080: ADXMIN = 259 ADYMIN = 119 ADXMAX = 581 ADYMAX = 438 Cheats: NOTE: LEFT refers to player 1's gun RIGHT refers to player 2's gun New Costumes (2 players): At title screen after entering at least 1 credit (2 credits for 2 players game), pull the triggers: LEFT, RIGHT, LEFT, RIGHT, LEFT, RIGHT, START Player 1 Plays as Super G: This code must be done at the title screen, after entering at least one full credit. The following code must be entered very quickly in order to work properly. LEFT, LEFT, RIGHT, LEFT, LEFT, START. Sophie Costumes (2 players): At title screen after entering at least 1 credit (2 credits for 2 players game), pull the triggers: LEFT, RIGHT, RIGHT, LEFT, LEFT, RIGHT, START Show Your Score: Put your coins in and press Left x3 Right x2 then press the start button... remember this has to be done very quickly. Have fun. LEFT, LEFT, LEFT, RIGHT, RIGHT, START Indianapolis 500 indy500 -Steering, Gas & Brake analogue inputs calibrated in 'Volume Settings'. Which is actually analogue calibration, I assumed it was audio settings, not realising analogue range is expressed in 'volume' also. -Set to Free Play Pace Car: Hold the start button, blue view button and brake until you chose your start your race. If you are holding the buttons, the door of your trailer will go up. Reversed Tracks: Hold the shift lever down while starting a game. Secret Camera View: When in the fourth view during a race, press any two view change buttons simultaneously Super-Charged Engine When selecting your transmission, select Manual. Head toward the pit in gear 6. when you exit, you will be in gear 1. DO NOT CHANGE GEAR! From now on, you will have a super charged engine Last Bronx lastbrnx -Set to Free Play -Display set to 'CRT'. This looks brighter and better than 'Projector'. ManxTT Superbike manxtt -Cabinet Type changed to TWIN. This skips the Danger screen and fixes the lack of engine sound. -Country set to 'USA', this changes the language to English. 'Japan' is the Default. -Start is View Change -Set to Free Play Motor Raid motoraid -Country set to 'USA', this changes the language to English. 'Japan' is the Default. -Bank, Accelerate and Brake analogue inputs calibrated in 'Volume Settings'. Which is actually analogue calibration, I assumed it was audio settings, not realising analogue range is expressed in 'volume' also. -Set to Free Play Change Bike Colour to CPU Bike Colour: In order to use the CPU Bike Colour, enter the following code at the Select Player screen: Punch, Kick, Kick, Punch, Punch, Kick, Kick, Punch. Note: The Select Player screen is monochrome, so you will not be able to see the colour change until the game starts. Extra Stage: Segal First play the Practice Mode. The easiest stage. ''Yenda,'' will then be selectable. Next, highlight Yenda at the stage-select screen and enter the following code with handlebar button: Punch, Kick, Kick, Punch, Kick, Kick, Punch, Punch, Kick, Kick. The ''Segal'' stage will now be selectable. Ues Segal Weapons in Any Stage Ordinarily, the Needles and Hammer weapons can only be used in the Segal stage. To access these weapons in any other stage, enter either of the following codes at the Select Player screen: Needles - Kick, Kick, Punch, Kick, kick, Punch, kick, Punch, Punch, Kick. Hammer - Punch, Kick, Punch, Kick, Punch, Punch, Kick, Punch, Punch, Kick. Over Rev overrev -Country set to 'USA', this changes the language to English. 'Japan' is the Default. -Steering, Gas & Brake analogue inputs calibrated in 'Volume Settings'. Which is actually analogue calibration, I assumed it was audio settings, not realising analogue range is expressed in 'volume' also. -Set to Free Play Three Additional Cars: At the 'car selection' screen, press the brake. Pilot kids pltkids -Set to Free Play Rail Chase rchase2 -Country set to 'USA', this changes the language to English. 'Japan' is the Default. -Set to Free Play Gun Calibration Notes: Due to how this game works no calibration is needed or available. Sega Rally Championship srallyc -Country set to 'USA', this changes the language to English. 'Japan' is the Default. -Set to Free Play Sega Rally Pro Drivin' (HACK) srallyp -Think "Sega Rally Remix" with a turbo button when playing this hack. That is exactly what it feels like. -Country set to 'USA', this changes the language to English. 'Japan' is the Default. -Set to Free Play Sega Ski Super G skisuprg -Country set to 'USA', this changes the language to English. 'Japan' is the Default. -Swing and Inclining analogue inputs calibrated in 'Volume Settings'. Which is actually analogue calibration, I assumed it was audio settings, not realising analogue range is expressed in 'volume' also. -Incline inputs were foot pedals on the OG HW intended to be worked independently for jumping and doing tricks. I have set these to the triggers as it's by far the best place for them. -Set to Free Play Sega Touring Car Championship stcc -Country set to 'USA', this changes the language to English. 'Japan' is the Default. -Set to Free Play Sega Water Ski segawski -Country set to 'USA', this changes the language to English. 'Japan' is the Default. This needed the following engineers code to be input into the main test menu -Slide analogue input calibrated in 'Volume Settings'. Which is actually analogue calibration, I assumed it was audio settings, not realising analogue range is expressed in 'volume' also. Set to Free Play Sky Target skytargt -Country set to 'USA', this changes the language to English. 'Japan' is the Default. -Analogue inputs calibrated in 'Volume Settings'. Which is actually analogue calibration, I assumed it was audio settings, not realising analogue range is expressed in 'volume' also. -This game when using an analogue input for up and down is broken. You will ascend only to drop down when you go past a certain threshold with the analogue input. Setting this to a digital input solved the issue. -Set to Free Play Sonic Championship schamp -Set to Free Play -Display set to 'CRT'. This looks brighter and better than 'Projector'. Super GT 24h sgt24h -Country set to 'USA', this changes the language to English. 'Japan' is the Default. -Steering, Gas & Brake analogue inputs calibrated in 'Volume Settings'. Which is actually analogue calibration, I assumed it was audio settings, not realising analogue range is expressed in 'volume' also. -I/O Type left on Default (C) which has inverted pedals. I inverted the controls in the emulator to compensate. You can set I/O Type A which doesn't use inverted pedals but I opted for the former. -Set to Free Play Top Skater topskatr -Analogue inputs calibrated in 'Volume Settings'. Which is actually analogue calibration, I assumed it was audio settings, not realising analogue range is expressed in 'volume' also. -Set to Free Play Play as a Surfer: Press the Left Select button three times, Right select button three times, and then the Left Select button thirteen times. Hidden Track: First chose Advanced Level (doesn't matter which character). Then, right before the board is unlocked, move the board up. Then when the game starts going, miss the first jump on purpose and crash right into the fence on the left side of the church. If you do it right you'll find yourself in the hidden track. Play as Body Boarder: At the course select screen press and hold down the start button. Then at the character select screen press the Right select button six times, the Left select button six times, Right three time, Left three times, Right four times, and the finally let go of the Start button. Super Deformed Mode: At the stage select screen, press the Left select button nine times, the Right select button nine times, the Left select button four times, the Right select button four times, and the Left select button five times. Now lean the board forward and press the Left and Right select buttons simultaneously three times. Virtua Cop vcop -Country set to 'USA', this changes the language to English. 'Japan' is the Default. -Calibrated for RawInput 2 Players. Due to being RawInput this calibration is RESOLUTION SPECIFIC - 1920x1080 -When using RawInput this game must be recalibrated for accuracy. However the 'Gun Adjustment' option didnt work correctly (inaccurate). So I had to use 'Manual Gun Adjustment' instead, using the ability to offset to get pin point accuracy. If RawInput is turned off it will be inaccurate. -Set to Free Play Manual Gun Adjustment Values for Accuracy When Using RawInput at 1920x1080:: ADXMIN = c1 ADYMIN = 24 ADXMAX = 234 ADYMAX = 1a3 Virtua Cop 2 vcop2 -Country set to 'USA', this changes the language to English. 'Japan' is the Default. -Calibrated for RawInput 2 Players. Due to being RawInput this calibration is RESOLUTION SPECIFIC - 1920x1080 -When using RawInput this game must be recalibrated for accuracy. However the 'Gun Adjustment' option didn't work correctly (inaccurate). So I had to use 'Manual Gun Adjustment' instead, using the ability to offset to get pin point accuracy. If RawInput is turned off it will be inaccurate. -Set to Free Play Manual Gun Adjustment Values for Accuracy When Using RawInput at 1920x1080: ADXMIN = 210 ADYMIN = 36 ADXMAX = 582 ADYMAX = 422 Virtua Fighter 2 vf2 -Version set to 2.1 -Display type set to 'Projector'. 'CRT' looks undersaturated and washed out. -Country set to 'USA', this changes the language to English. 'Japan' is the Default. -Set to Free Play Virtua Striker vstriker -Country set to 'USA', this changes the language to English. 'Japan' is the Default. -Match Time set to MAX 3min -G Goal Mode (IF THERE'S A DRAW BY THE END OF THE MATCH) = (EXTRA TIME, NEXT GOAL WINS) Set to MAX Time 1m. OFF is the default. (If extra time goes 1m with no goals the match will go to a Penalty Knockout.) -P K Mode (PENALTY KNOCKOUT) Set to REAL. OFF is the default. (This will let penalties go on until there is a clear winner.) -Set to Free Play Play as FC Sega: Press start on teams starting with the letters of F-C Sega France; Colombia; Spain; England; Germany; Argentina Virtual On von -Time set to 'Deathmatch' (no timer) -Set to Free Play Wave Runner waverunr -Country set to 'USA', this changes the language to English. 'Japan' is the Default. -Analogue inputs calibrated in 'Volume Settings'. Which is actually analogue calibration, I assumed it was audio settings, not realising analogue range is expressed in 'volume' also. -Set to Free Play Zero Gunner zerogun -Set to Free Play52 points -

Version 2.1b
3,290 downloads
This is a collection of incredible vector drawings graciously donated by Pineapple Graphics (Aka Snowway22) https://www.instagram.com/pineapple.graphics/ https://www.etsy.com/shop/PineappleGraphicsShp https://www.reddit.com/user/Snowway22/ These drawings take Snowway 10 to 15 hours each! I found this artist on Reddit accidentally and was instantly blown away by the quality of his work. Having a lot of experience in Adobe Illustrator myself, I was shocked to find that these were vector and not 3D models. His artwork showcases very clever techniques to sell the 3D effects including stunning imitations of various materials. Snowway said, “I ended up really enjoying the process and just kept going. I work as a graphic designer so I can make stuff like this in between ‘real’ work stuff. Everything for my job is rush rush. So, it’s really nice to relax, listen to some music, take my time and get lost in the detail. “ I told Snowway about LaunchBox and how this kind of artwork would be a huge boon for the frontend community. He was willing to contribute and even asked for suggestions on more controllers to draw. I gave him a list and some references to help. He said that he’d get to most of them, but he doesn't want to be rushed. I said take your time! Snowway later said, “If you could in any way shout out or plug my Instagram however or to whoever… that would be amazing. I, of course, don’t make any money from that but it’s been a fun hobby and the validation is a good motivator.” Guys, show your appreciation to this artist and enjoy his awesome work! Most of the “favorite” platforms are represented here. Feel free to suggest things here but just know that these drawings take a lot of time. While I’ve made carefully chosen suggestions based on what systems I think are most important and that people actually play, Snowway is the one crafting the art. I will continue to post more as this project grows! The current list of included platforms is as follows: Arcade (multiple versions) Analogue Pocket (Black and White) Atari 2600 (also paddle controllers) Atari 7800 (Controller and Joystick) Atari Jaguar Atari Lynx Atari VCS 2021 Bandai Wonderswan Color (2 Colors) Colecovision Commodore 64 (Mouse and Keyboard Variants) GCE Vectrex Logitech Steering Wheel Mattel Intellivision Microsoft Xbox Microsoft Xbox 360 Microsoft Xbox One Microsoft Xbox Series (Also Elite Controller) NEC TurboGrafx-16 / CD / DUO (also Turbo Express) Nintendo 3DS Nintendo 64 / DD Nintendo DS Nintendo Entertainment System (Also Dog Bone & Zapper) Nintendo Famicom Nintendo Game & Watch (Mario & Zelda) Nintendo Game Boy Nintendo Game Boy Advance (Original and SP) Nintendo Game Boy Color (5 colors!) Nintendo Switch (Original, OLED, Light, Pro Controller + more) Nintendo Virtual Boy Nintendo Wii Nintendo Wii U Nintendo GameCube Nintendo Super Famicom Panasonic 3DO Playdate SNK Neo Geo AES SNK Neo Geo CD SNK Neo Geo MVS SNK Neo Geo Pocket Color Sega Dreamcast (US and PAL) Sega Game Gear Sega Genesis / 32X / CD (3 & 6 button) (also Sega Nomad) Sega Master System Sega Saturn (Original & 3D Controller) (Japan versions also) Sony PS Vita Sony PSP Sony PlayStation (Original, Dual Analog and DualShock) Sony PlayStation 2 Sony PlayStation 3 (also boomerang prototype & move controller) Sony PlayStation 4 Sony PlayStation 5 Super Nintendo Entertainment System (US and PAL)52 points -

Version .1
29,560 downloads
What's different in 2.0? *This replaces the old version of Refried entirely. DO NOT merge this new version with the old one. *All platform addon themes from the first version of Refried have been merged into one single addon called "Queso Fresco" (because it tastes great on top of refried beans...that's why). Therefore all of those older addon themes are no longer needed. *Requires Launchbox 9.4 or above to function properly *Revised Install instructions (please read them below if you are just starting out with the theme) *Added custom controller icons for play modes in the game description on some systems...this will get finished in the future *More great additions made by Ghostlines to the theme *Added the fullscreen video view to all platforms (view 4) *Improved the artwork slightly for the Big Box options menus Important note**If you install this theme,and the artwork does not display properly for a platform on your system,then more than likely it is a naming conflict between your platform and the files in the theme. To fix this issue,you must locate these files and change the name to your actual platforms name: 1.Images/Theme/Background/(name of your platform that is mislabeled) 2.Images/Theme/VideoBorder/(name of your platform that is mislabeled) If you install the Queso Fresco addon as well,then you must also rename the custom view xaml files to your platform name. I set out to make an alternate version to the beautiful Unified theme,with modifications here and there,yet,as I worked on it more and more,I started to go a different direction slightly...and thus Refried was born. This theme is built to focus on artwork,and showcase each system in bright colorful high definition artwork. I have drawn all new original arcade cabinets,and designed custom borders for each platform,which set each system apart from each other,while maintaining a unified appearance across the board. The main difference between this,and many other themes that are out there...are the video borders. When using the Default theme,all video borders are the same size across the entire theme...but,when using the addons,the video borders will then fit the system properly...so that the video for Game Boy Advance,will fit the GBA Video Border...and the PSP video,will fit the PSP Video Border. In other words,by using the custom view addons,it allows the theme to represent the system perfectly...rather than the same size border for everything. This theme is more than capable of running without a single addon theme installed,and only using the Default...the addons are merely to extend the experience of each system,with special added artwork,and tweaks.On the other hand,the Addons rely on the Default themes structure,and will not work without the default theme installed. There are multiple views included with the default theme,including - 1.Border with No Box/Cart/Disc Art 2.Border with Box/Cart/Disc Art 3.Border with Box/Spinning Cart/Disc Art 4.Full Screen Video w/Centered enlarged wheel 5.Border Text List View with Box/Cart/Disc Art The Queso Fresco addon has 5 views - 1.Special Artwork/Special Border with No Box/Cart/Disc Art 2.Special Border with Box/Cart/Disc Art (With wheel fade) 3.Special Border with Box/Cart/Disc Art (No wheel fade) 4.Full Screen Video w/Centered enlarged wheel 5.Special Border Text List View with Box/Cart/Disc Art **If the system has CD's/Discs,then the Disc will spin in Views 2 and 3...but,if the system has carts or floppies,then they will not spin in views 2 and 3. The Arcade portion of the Queso Fresco addon has 5 views - 1.Dynamic Marquees with Character Artwork 2.No Dynamic Marquees with Character Artwork 3.Dynamic Marquees with Advert/Flyers 4.Full Screen Video w/Centered enlarged wheel 5.Text List View with Advert/Flyers/Cabinets With the Queso Fresco addon installed,the arcade platforms are capable of displaying Video Marquees for each game,as well as regular marquees, in the marquee area of the cabinets (Some samples are included,and more are on the way)* Any Video Marquees must be placed in "LaunchBox/Themes/Unified Refried/Images/Theme/Addons/_Arcade/Video Marquees/" and must be in mp4 format In order to make this work properly,you must go into LaunchBox options,and change the priority for Cart Back Image to Arcade - Marquee,and uncheck anything else. Installation: 1.Download the Default theme (Unified Refried) ,and place it in your "Launchbox/Themes" folder 2.If you have not done so,you will need to unblock the Plugins...This does not have to be done for every addon theme,as unblocking them once,in the default,is all that is necessary...excerpt taken from unified description - 3.Set the theme to "Unified Refried" in Options/Views/Theme 4.If installing any of the addons,simply unzip the addon,and open the folder that was created. In this case we will use the Queso Fresco addon as an example. 5.Place the two folders (Images and Views) into the Unified Refried default theme folder,merging the folders when prompted. 6.That's it! ....When you load up Big Box,the artwork should be changed to the Queso Fresco alternate art. Pictures of Installation process for those that need them...If this is your first time using Refried you can skip step 1 Thanks @RetroNi for the use of his Logo set. @CriticalCid for his theme Unified,as I used alot of his coding as a base for the assembly of this theme. @kyoken @neil9000 @bundangdon @zetec-s-joe @Retro808 @Porl Hendy for their feedback during testing. @faeran for his help early on in the development stages. @Jason Carr because I used a bit of code from his Redux version,and took on some of his ideas from the changes he made @NJDave71 for his HelperControl plugin @bmonomad @Suhrvivor for their work on the Community Star Ratings,Favorites,and Play Mode code,which formed the base for implementing it into this theme @Ghostlines for his additions to the theme Examples: Current Platform list covered by the theme - Arcade Consoles Handhelds Computers Pinball Ghostlines Additions Current Playlists covered by the theme - Collections Genres Developers Favorites The Platform/Playlist video set can be found here... The Platform/Playlist Logo set can be found here...50 points -
Version (201 Games)
15,460 downloads
Sharing some theme videos and video snaps I made for Windows games. More to come as soon as I make them. Follow me or this thread to get notified when new content is added. How to add them to your LaunchBox and BigBox: Download the zip files. If you only want the new content, download only the zip file labeled as NEW. Extract to LaunchBox's root folder. Content will be extracted to its proper folders. Done! Theme videos and video snaps will show up on BigBox and LaunchBox. Just make sure your game's name matches the video's file name. For an optimal experience, use BigBox themes like the Unified ones and change the transitions to Fade or Quick Fade. List of Games: 99VIDAS 20XX Ace Combat 7: Skies Unknown Actraiser Renaissance Alan Wake II Alice: Madness Returns AM2R (Another Metroid 2 Remake) Another World Asphalt Legends Unite Assassin's Creed Unity Assassin's Creed Origins Assassin's Creed: Shadows Asseto Corsa Baldur's Gate III Banjo-Kazooie NEW Batman: Arkham Knight Beyond Two Souls NEW Black Myth: Wukong Blazing Chrome Blood: Fresh Supply Blue Estate: The Game Broforce Bully: Scholarship Edition Call of Duty Call of Duty 2 Call of Duty: Black Ops IIII The Callisto Protocol NEW Castle of Illusion Starring Mickey Mouse (2013) Catherine Classic Celeste Chrono Trigger Clair Obscur: Expedition 33 Cotton Reboot! Cult of the Lamb Cuphead Cyberpunk 2077 (2 Theme Videos) Dark Souls: Remastered Dark Souls II: Scholar of the First Sin Dark Souls III Dead or Alive 6 Dead Space Dead Space 2 Dead Space 3 Dead Space (2023) Demons of Asteborg Detroit: Become Human NEW (3 theme videos and snaps, one per main character) Devil May Cry 4 DMC: Devil May Cry Devil May Cry 5 Diablo IV Doom (Original and Ultimate) Doom II Double Dragon Gaiden: Rise of the Dragons Double Dragon Neon Dr. Mario 64 Dragon Ball FighterZ Dragon Quest XI S: Echoes of an Elusive Age: Definitive Edition Duke Nukem 3D (Atomic, Megaton and 20th Anniversary World Tour) Duke Nukem: Zero Hour Elden Ring The Elder Scrolls III: Morrowind: Game of The Year Edition The Elder Scrolls IV: Oblivion: Game of The Year Edition Deluxe The Elder Scrolls V: Skyrim: Special Edition Fallout 3: Game of The Year Edition Fallout: New Vegas: Ultimate Edition Fallout 4: Game of The Year Edition F.E.A.R.: First Encounter Assault Recon Final Fantasy VII Remake Intergrade Final Fantasy VIII: Remastered Final Fantasy IX Final Fantasy XIII Final Fantasy XIII-2 Final Fantasy XV: Windows Edition Flashback Forza Horizon 5 Gears 5 Genshin Impact God of War Grand Theft Auto III (Original and Definitive Edition) Grand Theft Auto: Vice City (Original and Definitive Edition) Grand Theft Auto: San Andreas (Original and Definitive Edition) Grand Theft Auto: Liberty City Stories Grand Theft Auto: Vice City Stories: PC Edition Grand Theft Auto IV: The Complete Edition Grand Theft Auto V Guitar Hero III: Legends of Rock Guitar Hero: World Tour Heavy Rain NEW (2 theme videos, original and new logos) Helldivers II HeXen: Beyond Heretic (4:3 and 16:9 video snap) Honkai: Star Rail Horizon Zero Dawn: Complete Edition Horizon Forbidden West: Complete Edition The House of the Dead: Remake Ion Fury The King of Fighters XV Kingdom Come: Deliverance Kingdom Under Fire: The Crusaders (2 themes) Kingdom Under Fire: Heroes Kung Fury: Street Rage: Ultimate Edition The Legend of Zelda: Ocarina of Time League of Legends Life is Strange Lies of P Lightning Returns: Final Fantasy XIII Lords of the Fallen NEW (2 Theme videos) Lost Ark Lost Planet (2 Themes, for Extreme Condition and Colonies) Manhunt Manhunt 2 Mario Kart 64 Marvel's Spider-Man Remastered Marvel's Spider-Man: Miles Morales Marvel's Spider-Man 2 Marvel Cosmic Invasion Max Payne Max Payne 2: The Fall of Max Payne Middle-Earth: Shadow of Mordor Minecraft Mirror's Edge Monster Hunter World Monster Hunter Rise Monster Hunter Wilds (2 theme videos) Mortal Kombat 1 Mother Russia Bleeds Mystical Ninja Starring Goemon Need for Speed: Underground Need for Speed: Underground 2 Need for Speed: Most Wanted (2005) Need for Speed: Carbon Need for Speed: Hot Pursuit Need for Speed Heat Nex Machina NieR:Automata Ninja Gaiden Sigma Ninja Gaiden Sigma 2 The Ninja Saviors_ Return of the Warriors NEW Nioh: Complete Edition Nioh 2: The Complete Edition The Other Worlds Overwatch Outrun 2006: Coast 2 Coast Perfect Dark Persona 3 Reload Prince of Persia Prince of Persia: The Sands of Time Prince of Persia: Warrior Within Prince of Persia: The Two Thrones Quake Quake II Ratchet & Clank: Rift Apart Resident Evil Resident Evil 2 Resident Evil 3: Nemesis (Default and NA logo) Resident Evil 6 Resident Evil 2 (2019) Resident Evil 3 (2020) Resident Evil 4 (2023) Returnal Ridge Racer Unbounded Rise of the Tomb Raider River City Girls Shadow of the Tomb Raider Shadow Warrior Classic Shovel Knight: Treasure Trove Silent Hill 2 Skullgirls 2nd Encore Slipstream Star Fox 64 Star Wars: Episode 1: Racer Sonic Unleashed Soul Calibur VI Starfield Stellar Blade Street Fighter 6 Super Mario 64 Teenage Mutant Ninja Turtles: Shredder's Revenge Tekken 7 Tekken 8 Terminator 2D: No Fate Tomb Raider I (Old and NA logo) Tomb Raider II (Normal and NA logo) Tomb Raider III: Adventures of Lara Croft Tomb Raider: The Last Revelation (Normal and NA logo) Tomb Raider: Chronicles (Normal and NA logo) Tomb Raider: Anniversary Tomb Raider: Legend Tomb Raider: Underworld Tomb Raider (2013) Tomb Raider I-III Remastered Turok Turok 2: Seeds of Evil UnMetal Valfaris Vampire Survivors Warhammer 40,000: Boltgun The Witcher 3: Wild Hunt Wolfenstein 3D Xeno Crisis Yooka-Laylee Yooka-Layle and the Impossible Lair Previews: Technical Details: Theme videos go from 1080p to 4k60, encoded with HEVC for optimal file size. Video snaps go from 540p60 to 720p60. Encoded using x264 for compatibility and performance. Theme videos' audio is 160 kbps aac, video snaps 96-160 kbps aac.48 points -
Version Beta 2
9,589 downloads
PCSX2 Configurator Next for LaunchBox PCSX2 Configuartor Next is a plugin for LaunchBox that allows users to easily configure PCSX2 on a per-game basis. The plugin also allows for pre-optimised configs to be downloaded from right within LaunchBox for a whole host of popular PS2 games, from Zombeaver's excellent PS2 Configuration Project. Installation The plugin is easy to install and simply needs to be downloaded and extracted. The archive contains a folder called "PCSX2 Configurator Next", this should be placed in the root of the "Plugins" in the user's LaunchBox directory. Any previous versions of the plugin should be removed before attempting to install this version. General Usage The plugin is relatively straight forward to use, but has been changed significantly from previous versions. You will first need to have PCSX2 (1.5.0 development build) setup as an emulator in LaunchBox. Then right click on a PS2 Game and choose "PCSX2 Configurator" from near the bottom of the context menu. This will present a menu of options: "Create Config" - Creates a new config for the game in question based on the users current PCSX2 settings, If a config already exists this will overwrite that config with a new one. "Download Config" - This will download one of Zombeaver's Config and set it up to be ready to play for the selected game, this will be greyed out if now config is available, and will change to "Update Config" if a new update is available for the downloaded config. "Remove Config" - This will remove the current config for the selected game, and will be greyed out if there is no current config. "Configure With PCSX2" - This will open PCSX2 with the config for the selected game loaded, allowing you to customise your config for the selected game (Downloaded Config's can also be tweaked). Once a game has a created config this can also be done using LaunchBox's built in "Configure" from the games context menu. Both these options will be greyed out if there is no config for the selected game. There is also a "settings.ini" file created in the plugins folder ("%LaunchBoxDir%/Plugins/PCSX2 Configurator Next"), this can be tweaked manually but most settings don't need to be touched in most cases. Some people may wish to change the "GameConfigsDir" which is where the created configs are stored, this deafults to the users PCSX2 "inis" directory. There is currently no inteface to modify these settings, but that is planned in a future version. Version Info and The Next in The Name This version of the plugin is the successor to the original PCSX2 Configurator plugin, with a completely re-worked codebase from that version, and full compatibility with LaunchBox.Next (which is now the current version of LaunchBox). The main reason "Next" was added to the name is to initially seperate it from that (now discontinued) verison of the plugin. This release is currently in Beta and the "Next" from the name will probably be dropped eventually for a stable release with more features. Credit and Support I have personally put a lot of time and effort into all versions of this plugin, with it essentially being my free-time pet project for the last year and a half. Though I know the plugin would not be what it is today without Zombeaver who really helped me to bring this plugin to the next level, by allow me to integrate his PS2 configurations into it as well as creating artwork and helping me test the plugin. I would also like to say a big thank you to spectral, neil9000, and kmoney for helping me out with testing, and of course Jason Carr for making LaunchBox and implementing some of my requested changes into the plugin engine. I intend to keep working on this plugin, and fix any reported bugs as well as update the plugin with new features. So if you have any problem or feature request's hop over to the plugins thread on the forums and let me know. The project is also open sourced under the MIT license and can be found on my github. UPDATE (JUNE 2020): This Plugin is now in maintenance mode, and is nearing end of life. I am currently working on a standalone version that will serve the same purpose, which will also be made to work with LaunchBox. The progress of that can be found here48 points -
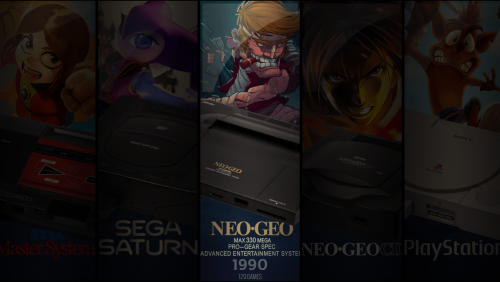
Version 2.1
10,215 downloads
Welcome to Faeran's BannerBox. A horizontal banner based theme, inspired by 80s retro. This theme requires that you be running LaunchBox 11.10 or later due to its reliance on the new wheel. The following info is now considered legacy: Download banners created by the community in this thread: BannerBox Community Banner Thread - Platform Media - LaunchBox Community Forums (launchbox-app.com) Looking to create your own theme? Learn how by: Following me on Twitch: https://www.twitch.tv/retrofaeran Subscribing to me on Youtube: https://www.youtube.com/channel/UC2C5q0Muy-ehYpZUIIdJ94Q CREDITS ---------------------------- Theme was created by @faeran Theme was created using the COMMUNITY Theme Creator by @y2guru Theme uses some amazing artwork by Rachid Loft. Find his work at: https://rachidlotf.com/46 points -
.thumb.png.83dcf83ef17bd58458b90edd83312ca3.png)
Version 1.9.5
8,985 downloads
A beautiful Launchbox's BigBox theme with "console mini" style menus for your platforms! Features of this theme: Main view: Simple text flat version that runs fast and looks great. Optional "Classic Mini" view for many systems (WIP). Improved original design of some "Classic Mini" (Such as PSX and Genesis). Classic Mini style views for consoles that do not have an oficial Mini version (such as PS2, WII, X360, PSP, 3DS, GBA, GB, ATARI and many more!). Platform/console selection with video (you need to download the video first from regular launchbox menu). This new version features improved compatibility with newer versions of LaunchBox, several font fixes, and new visualizations and formats. The background music was removed to avoid a bug with CTC that occurs when launching a game directly from the game list (maybe I'll put them back in a next update). A bunch of other small adjustments were also made. You can check some Videos of the theme in action on my Youtube Channel If you'd like to support my work and help me dedicate more time to it, you can support me on: https://www.patreon.com/Exodus_cl . -44 points -

Version 2.2.5
5,744 downloads
The inception of this project was catalyzed by observing the theme presented by exodus_cl. Inspired, I set out to architect a theme that would not only epitomize the unique ethos, ambience, and distinctiveness of each gaming platform I personally had the experience of using, but also pay reverence to their original design principles. Delving deep, I recreated and sometimes re-imagined themes of official mini consoles. Concurrently, I envisioned and formulated how other platforms, not originally themed by their respective manufacturers, might have been conceived. A nuanced observation would reveal that each Atari platform, while retaining its distinct character, embodies a similar ambience. This pattern can be observed across platforms like Nintendo and SEGA. For contemporary consoles, my approach gravitated towards capturing the essence of their dashboards, trying to evoke a profound sense of nostalgia. Distinctive views have also been crafted for platforms like PS2 and Xbox, reminiscent of the Demo Disks prevalent during their era. Theme Features: Aesthetic Integrity: Each console view crafted is a celebration of its unique vibe, endeavoring to pay the highest tribute to its original design. Dashboard Designs: Faithful recreations of existing Mini-Console dashboards are accompanied by imaginative conceptions of those that remain uncharted by official designers. Nostalgic Inclusions: Optional views are available replicating the classic Demo Disks for platforms like PS2 and Xbox. Auditory Experience: Background music encapsulates either iconic tunes from system games or melodies crafted using the genuine hardware. Re-imaginative Themes: Mini console themes, including those for the original Playstation and Sega Genesis, have been re-envisioned to seamlessly blend with the overarching theme. Regional Nuances: Alternate views tailored for specific regions encompass platforms like Famicom, Super Famicom, and the Sega Mega Drive series, to name a few. Universal View: A generic default games view is present, suitable for any console devoid of a custom design. UI Recreation: Emulating the ethos of newer consoles, UIs like the Xbox 360 Blades, PS3 XMB, and the WiiU Gamepad have been faithfully recreated. Recommended Configuration: Startup View: Platforms Games List View: Horizontal Wheel 1 Platforms List View: Platform Wheel 1 View Consistency: Ensure separate views are maintained for each platform. Please refrain from bypassing the game details screen, as bespoke game details screens have been designed in alignment with the native console/platform system menus where pertinent. Critical Information: Within each custom platform, the Game Details View Menu is subtly concealed, simulating the initiation of a game. To reveal this concealed menu, one must navigate either up or down whilst in the Game Detail View. Specific View Instructions: The primary view for most platforms aligns with the Horizontal Wheel 1 view. However, specific cases are outlined as: Systems devoid of a custom view should adopt the CoverflowGamesView. For the Playstation 2 Demo Disk View, resort to the HorizontalWheel2GamesVIew. Platforms like the Microsoft Xbox One, Nintendo Wii, WiiU, and Playstation Vita are best represented by the WallGamesView. For the Microsoft Xbox Demo Disk, Playstation 3, and Playstation Portable, the WheelGamesView is recommended. To ensure the Sega Master System/Sega Mark III/Sega SG-1000 Card Games are displayed appropriately, annotate "Card Media." at the conclusion of the Metadata Notes section for each game. Navigational Caution: When interacting with the WiiU, restrict your navigation downwards to prevent the game title from overlapping with other games. Supported Platforms with Distinct Themes: Duplicate listings are for accommodating particular naming conventions. 3DO Interactive Multiplayer Arcade Atari 2600 Atari 5200 Atari 7800 Atari Jaguar CD Atari Jaguar Atari Lynx Bandai WonderSwan Color Bandai WonderSwan ColecoVision Commodore 64 Commodore Amiga CD32 Commodore Amiga MAME Mattel Intellivision Microsoft Windows Microsoft Xbox 360 Microsoft Xbox One Microsoft Xbox MS-DOS NEC PC Engine CD NEC PC Engine NEC PC-FX NEC TurboGrafx-16 NEC TurboGrafx-CD Nintendo 3DS Nintendo 64 Nintendo DS Nintendo Entertainment System Nintendo Famicom Nintendo Famicom Disk System Nintendo Game Boy Advance Nintendo Game Boy Color Nintendo Game Boy Nintendo GameCube Nintendo Super Game Boy Nintendo Switch (Longbox Alt View) Nintendo Virtual Boy Nintendo VirtualBoy Nintendo Wii U Nintendo Wii Nokia N-Gage Panasonic 3DO Panasonic 3DO Interactive Multiplayer Philips CD-i PC Games SNK Neo Geo AES SNK Neo Geo CD SNK Neo Geo Pocket Color SNK Neo Geo Pocket Sega 32X Sega CD (Longbox Alt View) Sega Dreamcast Sega Game Gear Sega Genesis Sega Mark III Sega Master System Sega Mega CD JP Sega Mega CD Sega Mega Drive 32X Sega Mega Drive JP Sega Mega Drive Sega Saturn JP Sega Saturn (Longbox Alt View) Sega SG-1000 Sega Super 32X Sony PSP Sony Playstation 2 Sony Playstation 3 Sony Playstation 4 Sony Playstation Portable Sony Playstation Vita Sony Playstation Steam Super Famicom/Nintendo Super Famicom Super Game Boy Super Game Boy 2 Super Nintendo/Super Nintendo EU Super Nintendo Entertainment System Windows WonderSwan Color WonderSwan Xbox 360 (Metro Theme) Regional Specificities: Ensure the naming convention for region-specific views aligns precisely with the following: Sega Mark III Sega Mega Drive Sega Mega Drive JP Sega Mega CD Sega Mega CD JP Sega Mega Drive 32X Sega Super 32X Sega Saturn JP Nintendo Famicom Super Famicom or Nintendo Super Famicom Super Game Boy Super Game Boy 2 Super Nintendo or Super Nintendo EU NEC PC Engine NEC PC Engine CD Sony PlayStation Regional Specificities: Your PlayStation game cases will automatically adjust based on the region you've specified in LaunchBox North America: Set region to North America Japan: Set region to Japan (This is the default setting) PAL: Set region to Europe DreamCast Regional Specificities: Your Dreamcast game cases will automatically adjust based on the region you've specified in LaunchBox North America White: Set region to North America (This is the default setting) North America Black: Set region to North America Alt European: Set region to Europe Japan White: Set region to Japan Japan Black: Set region to Japan Alt Nintendo Switch Advisory: Every effort has been expended to ensure standard box art is visually appealing. Nonetheless, for an optimized aesthetic, please download the Square Switch Game Library Images and supersede your existing Front - Box Art. Platform selection Generic GameList View Supported Platforms Mini View (This one is Sega Saturn) Region Alternate Platforms Mini View (This one is Sega Saturn JP) Alternate Demo Disk View (This one is Playstation 2) ----------------------------------------------------- Added Nokia N-Gage Platform View Video Demonstration Nokia N-Gage Platform Theme.mp4 ----------------------------------------------------- Added Sega CD alternate view, Horizontal View 2, which features North American Longboxes. Make sure to set your region for the game correctly for the box art you have. North America region will show Long Boxes. Mega CD does not have this alternate view. Added new Platform View for long requested Philips CD-i. It's based on the Philips CD-i 1.0 Shell As usual, pushing up or down while in the Game Details screen will show additional details and the Game Details menu. If a game has a video, it will automatically fade in while in the Game Details screen. Video Demonstration MiniConsoleTheme222.mp4 ----------------------------------------------------- Added new Xbox 360 Metro Style Theme Note: "Microsoft Xbox 360" is Blades, "Xbox 360" is Metro. Name your Platform accordingly. The Platform Logo Intro no longer replays when exiting from the Game Details Screen back to the Dashboard. It will reset if you exit the Dashboard back to the Platforms View, so it will play again when entering the same platform again. Added a generic Wall view that can be used for all platforms. Note: Nintendo Wii is using Wall View 2 for the alternate Video view. Additionally, the Game Details Screen will be the same themed one you'd usually see for each platform that has one. Video Demonstration MiniConsoleTheme221.mp4 ----------------------------------------------------- Updated code base for latest version of LaunchBox (13.12) Updated Nintendo Wii View to feature Screenshots by default. Added Nintendo Wii alternate view, Wall 2, which features videos for the games. WARNING! The alternate Wii View (Wall 2) requires a high-spec PC. Performance WILL be diminished. Video Demonstration MiniConsoleTheme220.mp4 ----------------------------------------------------- Nintendo Famicom Disk System Demo Video NintendoFamicomDiskSystem.mp4 Screenshots ----------------------------------------------------- Added long requested alternate views (Horizontal Wheel 2) for Nintendo Switch and Sega Saturn with Long Box Art. ----------------------------------------------------- Sega Saturn is region based and intended for just the Box Art images and not Box Art that contains images including the case itself. North America - Long Plastic Jewel Case Europe - Black Edge Long Cardboard Box Japan - Small Jewel Case ----------------------------------------------------- MS-DOS View: ----------------------------------------------------- Platform View Demo: Redesign_Mini_Console_Theme.mp4 The Platform View has undergone a complete overhaul inspired by the COLORFUL theme, incorporating the same vibrant colors found in COLORFUL Platform videos. The new Platform View has been adjusted to seamlessly accommodate any Platform video, resulting in a colored border surrounding the video for a cohesive and visually appealing theme experience. ----------------------------------------------------- Audio Adjustment Script: To assist with adjusting the volume of the Background Music for the theme, I've created a PowerShell script which will allow you to adjust the volume however you like! Feel free to check out the post here: ----------------------------------------------------- Nintendo Game Boy View: A brand-new Nintendo Game Boy view has been introduced to replace the existing Nintendo Game Boy view. This new view is designed to more accurately represent the Nintendo Game Boy platform, addressing the previous view's closer resemblance to the Nintendo Super Game Boy. Nintendo Super Game Boy Views: As a result of the Nintendo Game Boy view replacement, three distinct Nintendo Super Game Boy views have been introduced: North America Super Game Boy View (Nintendo Super Game Boy): Tailored to North American users, this view captures the essence of the North American Super Game Boy experience. PAL Regions Super Game Boy View (Super Game Boy): Designed specifically for PAL regions, this view provides a unique representation of the PAL Super Game Boy setup. Super Game Boy 2 View (JP Regions) (Super Game Boy 2): For users in Japanese regions, the Super Game Boy 2 view has been created to replicate the JP Super Game Boy experience. ----------------------------------------------------- Default Coverflow View and Default Game Details View Revamp: In addition to the Platform View overhaul, both the Default Coverflow View and Default Game Details View have undergone a complete redesign. These views have been transformed to align seamlessly with the COLORFUL style, while still preserving the distinctive backgrounds and colors associated with each platform. ----------------------------------------------------- Arcade/Steam/Intellivision/Dreamcast Case Video Demo Version-2.0.0-Overview.mp4 Arcade/MAME View: Imagine walking into a dimly lit room, only to be greeted by the vibrant glow of neon lights, screens reflecting off sleek surfaces and rows of brightly colored cabinets. The energizing cacophony of game sounds, chiptunes, and playful challenges fills the air, beckoning players to try their hand at conquering pixelated realms. This was the magic of a 90s arcade – a sanctuary for gamers, where stories were not just told but lived, one coin at a time. Diverse Cabinet Showcase: Just as arcades offered a smorgasbord of games, this view boasts over 48 unique arcade cabinets, each presenting a doorway into the past. Variants Included: The 90s arcade was never just about the joystick and buttons. Racing wheel games that simulated high-speed chases and light gun cabinets that brought first-person shooter scenarios to life were all the rage. This view recreates these specialties, ensuring that every gamer finds their niche. Atmospheric Navigation: It's not just about the games; it's about the experience. As you navigate from one cabinet to another, the shifting atmosphere and audio ambiance transport you back in time, simulating the sensation of wandering through an arcade, deciding where to drop your next coin. Detailed Reflections: Attention to detail is key. The glow of the game screen softly reflecting off the control panels, especially in the game details screen, doesn't just add to the visuals—it revives memories of intense focus and fingers dancing over buttons in rhythmic gameplay. Arcade BIOS Game Details Menu: To round off this authentic trip down memory lane, the game details menu mirrors the look and feel of an Arcade BIOS. It's not just about playing; it's about immersing oneself in the entire arcade ethos. Notes: "Screenshots", "Marquees", "Clear Logos", and "Videos" are utilized for the view. The cabinet style is designated by the game "Publisher" metadata. Racing cabinets are designated by the "Racing" and "Driving / ..." variant genres and Lightgun cabinets are designated by the "Shooter / Gun" genre. If you wish to manually change the cabinet to fit a specific aesthetic for a game, here are the supported publishers you can update the metadata for the specific game to: "Arika" "Atari Corporation" "Atari Games" "Atari" "Bally Midway" "Capcom Co., Ltd." "Capcom" "Cave (AMI license)" "Cave (Atlus license)" "Cave (Capcom license)" "Cave (Nihon System license)" "Cave" "Data East Corporation" "Data East" "Irem Corp." "Irem" "Konami Industry Co. Ltd." "Konami" "Midway Games" "Midway" "Namco" "Nintendo R&D3" "Nintendo" "SNK Corporation" (This is the red SNK cabinet) "SNK" (This is the MVS cabinet) "Sega AM1" "Sega AM2" "Sega AM3 R&D Division" "Sega Enterprises Ltd." "Sega" "Taito America Corporation" (Black Buttons) "Taito Corporation Japan" (Red Buttons) "Taito Corporation" (Red Buttons) "Taito" (Black Buttons) "Williams Entertainment" "Williams" Steam/PC Games/Windows/Microsoft Windows View: Especially designed for Windows/PC Games/Steam enthusiasts, this view is inspired by the UI of the Steam Deck. Currently, I'm harnessing the metadata provided by LaunchBox, but hopefully in the future I'll be able to integrate the Steam, GOG, and Epic metadata for a richer experience. Until then, I'm confident you'll love what you see. Steam Deck Inspiration: This view is designed after the Steam Deck version of Steam OS. Library View: A seamless browsing experience to navigate through your games. Game Details View: Get all the information you need about a game with a visually appealing presentation. Overlay Menu: An intuitive overlay menu for the Game Details Menu, so you get all the additional details without any hassle. Notes: "Box - Front", "Clear Logo", "Screenshots", "Videos" and "Banners" are utilized for this theme. Unfortunately Fan Background and Steam/Epic/GOG metadata is not available for me to use for the theme currently. Screenshots are utilized first, then Banners as a fall back. Mattel Intellivision View: This view brings the nostalgia right to your fingertips. Every time you select a game, the Controller Overlay will change to match that specific game. This is perfect for those who love authenticity. But there's more! This view also includes the iconic "My Intellivision" track from Intellivision Lives! which will hopefully set the mood. Classic Console Presentation: Experience the nostalgic Mattel Intellivision console front and center. Dynamic Controller Overlays: Game-specific controller overlays are showcased, ensuring that the controls displayed are accurate for each game if available. Accurate Cartridge Port: With the Mattel Intellivision's cartridge port usually on the side of the console, its been placed at the top with accurate cart insertion depth! "My Intellivision" Theme Song: Fans of Intellivision Lives! will be delighted to hear the "My Intellivision" theme song incorporated into the theme. Note: The Controller Overlays are handled via the "Arcade - Controls Information" metadata. Dreamcast Region Specific Game Cases: Now, your Dreamcast game cases will automatically adjust based on the region you've specified in LaunchBox. Here's a breakdown of the region-specific cases: North America White: Set region to North America (This is the default setting) North America Black: Set region to North America Alt European: Set region to Europe Japan White: Set region to Japan Japan Black: Set region to Japan Alt Note: Changing regions for games is best handled via LaunchBox by selecting all games you'd like to change to a specific region, then mass editing the Region field and updating them. Supported Views (Switch View key may need to be mapped in BigBox): To help with the initial configuration of the Theme, if a Platform attempts to utilize a view that is not supported, a customized view displaying supported options will appear. For example, the default view for the theme is Horizontal Wheel 1, however not all platforms utilize this view and a screen displaying the supported views for the specific Platform will be displayed. Note: Supported Views allows for BigBox wide Search, results will just need to be set to Fullscreen CoverFlow. The Platform View Searching works as expected, and so does Game Detail Menu options like Related Games, etc ----------------------------------------------------- Acknowledgments and Credits: I wish to express my profound gratitude and acknowledgment to the following individuals and entities for their invaluable contributions and inspirations that greatly enriched this project: Files and Design Elements: y2guru: For their always impressive and incredibly helpful Community Theme Creator application. faeran: I am grateful for his provision of the Unified CTC files, which were instrumental in shaping the Coverflow view with its accompanying backgrounds. viking: For the base arcade cabinets from the COLORFUL Hardware CAD designs, and for the inspiration from the COLORFUL theme! Dan Whelan: For allowing me to use their remastered N-Gage Boot Animation WIP for the animated background, and their enthusiasm for remastering N-Gage assets and UI elements. Music Contributions: VinsCool: For his original piece "Voyager 1" rendered on Atari TIA and recorded using genuine hardware. RushJet1: For the evocative track "5-bit Thief," crafted on Atari 2600 TIA. BlueElectric05: Contributed the unique "Bytey" track, created on Atari 2600 TIA and classified under originals. newcoleco: For "ColecoVision - Original Music 1," which enlivened the project with its nostalgic tones. I extend my warmest appreciation to all the contributors for their dedication, talent, and passion that have immensely enriched this endeavor.43 points -
Version 1.3.0
159,674 downloads
A set of 155 (with more to come) platform videos,that I have created to match perfectly with my Refried theme. I have used the same character,Background,and border art in the videos,that is in the theme, for the majority of the videos. I am sure it's obvious where the influence came from for the theme,but, this whole thing started out as an alternate version to the Unified theme,which sort of took off and became something slightly different overall. While I do have plans for about 60+ more videos to add to this set,I am afraid I cannot take requests,at least until the project,as a whole, is completed. A special Thank you to @RetroNi for allowing me to use his white bordered logo set,with a few changes,for the titles in these videos...As well as @CriticalCid for giving me the unspoken inspiration to even start this project in the first place! Samples - Super Nintendo Entertainment System - Sega CD - AAE - Capcom CPSIII - Pinball FX2 - Nintendo Virtual Boy - Microsoft MS-DOS - The Main Theme can be found here... The Logo set can be found here...43 points -
Version 1.3
22,675 downloads
This theme was designed to add as little overhead as possible, while giving a clean and simplistic view of the content. RetroFresh works with your own media and uses them as its centerpiece. Hope you guys enjoy. This theme was ported over to the COMMUNITY Theme Creator, and is the only version still supported. Both the theme and the Theme Creator files are supplied, just in case you would like to make any changes with the theme. Installation Instructions Extract 'RetroFresh - Theme.zip' LaunchBox/Themes folder. Open Big Box, go to Options/Views, select the RetroFresh theme. Video Demonstration The views I made are as follows: RetroFresh If anyone finds any issues, please let me know.42 points -
.thumb.png.7dc1d1010e44cf7eb774510ee178f1b4.png)
Version 1.1.0
2,414 downloads
This is probably my 3rd (and last) go at making a 3D box art set for the NES. There are many 3D boxes out there for the NES, but what makes this one special is the higher quality source images used and my favorite part, authentic retail spines used on all boxes (except some unlicensed prototypes that never even had box art to begin with). A lot of NES 3D boxes out there have the annoying NES logo on the spines, like this: I used to prefer that NES spine logo, but it now annoys me to no end. I wanted a complete set with authentic retail spines for all games, so I headed to thecoverproject.net and found a boatload of high quality boxes WITH retail spines, but not for every game so I just filled in the blanks, created retail spines for those without them. I even created box images for unlicensed and prototypes games. 888 games in total, some alternate covers here and there. The new 3D box template is larger than the old one since I was working with ultra high quality 2D images from the cover project. Here is the new box: As you can see, much better and of course, authentic. The dimensions are 903x1401, so its quite a large set but it looks great in Big Box. I do have a complete 2D set WITH Back, Left Spine and Front images. The dimenions on those are 3366x2100, and its almost 6GBs in file size so it will be a massive upload. I'll see if I can upload it after I upload this. I included as PSD template for those that want to create their own 3D boxes. Enjoy!42 points -
Version 1.4
5,709 downloads
LBPlex is a theme that mimics Plex Media Server's website interface. Two versions are included in the package: LBPlex - which has the default item spacing on the sidebar and list view, and LBPlex Condensed - which has much tighter item spacing on the sidebar and list view. I have also replaced the volume "knob" with a regular slider. NOTES: All the colors in this theme are hard-coded with the exception of the Foreground (text) color in the LaunchBox Options\Legacy\Theme\Colors menu. The Background Opacity slider in the LaunchBox Options\Visuals\Boxes menu has no effect right now. A fix is in-coming so this will work at a later date. Update: If you run the latest LaunchBox Beta (8.7-beta-1 or above) this is fixed. The Fade Background slider in LaunchBox Options\Images\Default Background will adjust the brightness of the theme background image. Enjoy41 points -

Version 1.9.0
1,792 downloads
"Omni" is a prefix meaning "all", in that regard this theme strives to do "all the things" in ONE theme! Omni has both a content view selector and game details selector that lets you choose the content view and details view that looks best to you. There are 15 different configurations to choose from! All of these settings are saved in a ThemeValues.xaml file that allows you to customize them EVEN MORE! NOTICE: Omni requires LaunchBox v13.12 or greater!40 points -
Version (69 Games)
26,723 downloads
Sharing some theme videos and video snaps I made for this console. Focusing mainly on exclusive and temporary exclusives. How to add them to your LaunchBox and BigBox: Download the zip files. If you only want the new content, download only the zip file labeled as NEW. Extract them to LaunchBox's root folder. Content will be extracted to its proper folders. Done! Video snaps and theme videos will show up on LaunchBox's details panel and BigBox's views depending on your preferences. For an optimal experience, use BigBox themes like Unified and change the transitions to Fade or Quick Fade. Previews: List of Games: 1-2-Switch Advance Wars 1+2: Re-Boot Camp Animal Crossing: New Horizons ARMS Astral Chain Bayonetta 3 Bayonetta Origins: Cereza and the Lost Demon NEW Cadence of Hyrule: Crypt of the NecroDancer Featuring The Legend of Zelda NEW Captain Toad: Treasure Tracker Cruis'n Blast Donkey Kong Country: Tropical Freeze (2 theme videos) Fast RMX Fire Emblem: Three Houses Fire Emblem Engage Golf Story Hyrule Warriors - Age of Calamity The House of the Dead: Remake Kirby and the Forgotten Land Kirby Fighters 2 Kirby Star Allies The Legend of Zelda: Breath of the Wild The Legend of Zelda: Link's Awakening The Legend of Zelda: Skyward Sword HD NEW The Legend of Zelda: Tears of the Kingdom Luigi's Mansion 2 HD NEW Luigi's Mansion 3 (2 theme videos) Mario & Sonic at the Olympic Games Tokyo 2020 Mario + Rabbids Kingdom Battle Mario + Rabbids Sparks of Hope Mario Golf: Super Rush Mario Kart 8 Deluxe Mario Party Superstars Mario Strikers Battle League Football (normal & NA variation) Mario Tennis Aces Marvel Ultimate Alliance 3: The Black Order Metroid Dread Metroid Prime Remastered Monster Hunter Generations Ultimate Monster Hunter Rise New Pokémon Snap New Super Mario Bros. U Deluxe Paper Mario: The Thusand-Year Door NEW Pikmin 3 Deluxe Pikmin 4 Pokémon Brilliant Diamond Pokémon Legends: Arceus Pokémon: Let's Go, Eevee! (normal + anime's song) Pokémon: Let's Go, Pikachu! (normal + anime's song) Pokémon Scarlet Pokémon Shield Pokémon Shining Pearl Pokémon Sword Pokémon Violet Princess Peach: Showtime! NEW Shin Megami Tensei V Splatoon 2 Splatoon 3 Super Mario Bros. Wonder Super Mario 3D All-Stars Super Mario 3D World + Bowser's Fury Super Mario Odyssey Super Mario Party Super Mario RPG Super Smash Bros. Ultimate Triangle Strategy Xenoblade Chronicles: Definitive Edition Xenoblade Chronicles 2 Xenoblade Chronicles 3 Yoshi's Crafted World Technical Details: Video themes are 1080p, encoded using HEVC for optimal file size. Video snaps go from 540p to 720p60 and are encoded using x264 for compatibility. Video themes' audio is 160 kbps aac, video snaps 96-160 kbps aac. Looking for a title not on the list? Check out the PC Games Theme Videos thread, it has a lot of theme videos for Windows games that are also on the Switch:40 points -
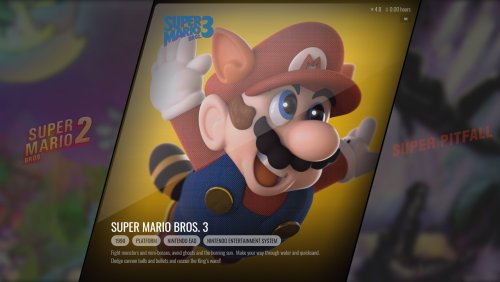
Version 1.2
2,361 downloads
A stylish, background heavy focused theme with inspiration from the unreleased Aura 4k theme by iGarikoitz. The theme itself uses your clear logo images, fanart - background images, screenshot images, and game video snaps to create this completed theme. There is a number of white platform clear logos made by Dan Patrick and 100+ platform/playlist/category backgrounds are included that I have curated with the ability to add your own. This theme will gracefully fall back to different images to make sure something is always displayed. Requirements LaunchBox must be on version 13.22 or higher (or you'll get errors) Theme is made for a 16:9 aspect ratio Views Platform Wheel 1 - The main platform wheel for this theme Text Filters View - Used primarily when viewing other filter sections Horizontal Wheel 1 - The main game view for this theme Horizontal Wheel 2 - An alternate game view that uses your screenshots and video snaps Text Games View - Mostly used for the Game Details Menu view, but could be used as a game view Things to Note 100+ Platform Backgrounds have been included in this theme. You can include your own by placing them in the following folders (The file name needs to match the name of your platform, category, or playlist): Platform Images: LAUNCHBOX\Themes\VisioN\Images\Platforms\Fanart Category Images: LAUNCHBOX\Themes\VisioN\Images\Platform Categories\Fanart Playlist Images: LAUNCHBOX\Themes\VisioN\Images\Playlists\Fanart White Platform Clear Logos have been included by Dan Patrick. You can add your own by placing them into the following folders (The file name needs to match the name of your platform, category, or playlist): Platform Images: LAUNCHBOX\Themes\VisioN\Images\Platforms\Clear Logo Category Images: LAUNCHBOX\Themes\VisioN\Images\Platform Categories\Clear Logo Playlist Images: LAUNCHBOX\Themes\VisioN\Images\Playlists\Clear Logo You can add your own Game Backgrounds that are specific to this theme. You can place them into the following folder (file name must either be based on the game's title, replacing special characters, or named after the LaunchBox Game ID. Check folder for some examples.) LAUNCHBOX\Themes\VisioN\Images\Games\Game Background\[platform name] For Theme Developers There are a number of features in this theme that have never been done before. You can examine the code to learn the following: Use of a progress bar with the game count bindings that provides dynamic visual feedback of where you are in your game list as you are navigating around Use of the Index Visibility binding to provide animation triggers. This allows you to provide smooth animations to any element when opening and closing the alpha-numeric index The use of FlowImage (and its bindings) to provide performant image fallbacks. Using FlowImage over an Image element increases performance by loading images in an off-thread, provides better disposal logic, and doesn't lock the file that is located on the hard drive. The use of an item offset converter, which allows you to display images (or metadata) for games that are (+ or -) around the game or platform that is selected. Thanks to Dan Patrick - for use of his white clear logo pack iGarikoitz - for the initial concept inspiration for this theme39 points -
Version 1.5.1
3,082 downloads
This theme requires LaunchBox 13.2 or newer This theme is more to show off what is possible with LaunchBox theming and see where we can break the mold. I asked the question, "Could you recreate the Steam interface inside of LaunchBox?" This theme is my answer. Changes from Default: EVERYTHING... (no really...) The images do a pretty good job at showing off the new features this theme provides, the basic run down is as follows: The theme basically has two completely different looks depending on if you are using List view or Image view Image View Game Details is horizontal similar to the Steam UI and utilizes a shelf system to drop down game details, achievements, and leaderboards List view utilizes a single list of games similar to the traditional side bar (the ACTUAL side bar was moved to a drop down menu) List view's Game Details is full sized and takes the space that typically the image view AND details would take in our default themes NOTE: The Game Details Panel CAN be resized, the handle for it is invisible, but is located between the Play button and where image view starts (or the rest of the details are listed in list view). This size change IS remembered so should only need to really do it once. DISCLAIMER: It is ENTIRELY possible to "break" this theme by hiding some views via the View Menu. Hiding GameDetails or the Sidebar can make it difficult or impossible to do much within the theme and should be left on at all times.38 points -
Version 1.2.0
6,183 downloads
Hello everyone! My Name is Filipe and i've been making some themes for emulationstation, specially for the Retropie version. I've bought a license on the last Black friday sale and started to messing with Launchbox and i loved it! it's such an awesome frontend! I started to learn about custom themes and made a port of one of my ES themes to Launchbox. I hope you like it! Special thanks for @CriticalCid for all the help and for his awesome theme, without it, i surely wouldn't understand XAML for sure!38 points -
Version 2.3
35,909 downloads
If you are a fan of the 80's, lasers, neon, fast cars and cyber punk then this is the theme for you! All you Cyber Punks Stay Rad. Instructions: Extract CityHunter 2 to "LaunchBox\Themes" Choose CityHunter 2 in Options > Views > Theme Set Video Playback Engine to VLC or WMP in Options > Videos Theme Files: CityHunter 2 (theme) Video Files: Akira - Neo Tokyo Blame! CityHunter CityHunter 2 Cyber Punk 2077 Eva - 01 Flash Back 2012 - Scanlines Flash Back 2012 The Grid VHS Grid Clear Logo Wheel Set and Banners Banners Clear Logos37 points -

Version 1.0.2
37,032 downloads
Banner set specially designed for my BarTop theme. Of course, you can use it with the theme of your choice. 143 platform images (split into multiple folder, for lightest .zip files) ---- ARCADE system -------------------------------------- 25 platform ---- COMPUTER system --------------------------------- 31 platform ---- CONSOLE system ATARI --------------------------- 8 platform ---- CONSOLE system NINTENDO -------------------- 21 platform ---- CONSOLE system SEGA --------------------------- 11 platform ---- CONSOLE system SONY + MICROSOFT ------- 10 platform ---- CONSOLE system OTHER ------------------------- 43 platform High resolution (3K pixel if I have found a good source ^^) All transparent PNG files Sources are multiple. I worked on all images. Some more than others. For missing platforms, feel free to ask, with a HD photo, on the good forum thread. Instruction : Copy/past *.PNG file in your ...\ LaunchBox \ Themes \ <Theme name> \ Images \ Platforms \ Banner. Be sure that the file name is the same, between your platform and image. Launch "BigBox" and go into "option". Refresh image cache. Changelog : v.1.0 = Initial upload with 3 platform archive - Total : 143 platforms. v.1.0.1 = Update ARCADE folder. v.1.0.2 = split into multiple ZIP files, for faster download.36 points -
Version 1.0.2
2,007 downloads
Hi all, This is my collection of MS-DOS 3D big boxes I created for my eXoDOS set. It’s a mix of both US and European boxes, basically everything I could find. Enjoy!36 points -
Version 1.5.2
25,031 downloads
# WHAT IS COLORFUL? COLORFUL is a complete and coherent high quality graphic set, around a unique design. Made with love in France. I hope you like it ! ? Here are planned development axes: OFFICIAL COLORFUL ASSET : COLORFUL Theme : The main hub, a unique interface for BigBox. Design by me, coded by @faeran COLORFUL Platform Video : Complete 4K video set, with a unique design. COLORFUL Source : To involve the community in the platform video creation. COLORFUL BigBox Startup Video : custom video to match the general design. COLORFUL Hardware Media PNG (1x1) : Taken from my videos, the 1x1 PNG set. (new) COLORFUL Startup Theme : (soon) COLORFUL Pause Theme : (soon) RECOMMENDED COMMUNITY ASSET : Redrawn Platform ClearLogo by @Dan Patrick Colorful "Playlist" PNG set by @Klopjero Colorful custom theme for Android by @Bawnanable Platform Funtech Super A'can & Platform Arcade Kaneko by @evo1man Alternative Colorful Platform ClearLogo Set by @soqueroeu Alternative Startup Theme (Minimal-Colorful) by @Palada Recommended SoundPack with Steam Deck UI by @Phox # WANT TO CREATE VIDEO? YOU ARE IN THE RIGHT PLACE! On this page we are talking about COLORFUL RESOURCES. Have you considered creating a new Platform/Category/Playlist video for Colorful? This is the place to be! Done, by and for the community. You will find below my guideline and quick tutorial. If you are tempted by the adventure, please respect the rules below! Thx !! # READY FOR ADVENTURE? FOLLOW THE GUIDE! Before we start going into the technique, let's set up some basics on how we're going to do it. The idea is not to make me a tyrant, but to keep an overall coherence of design, style and to centralize uploads/downloads on a single page. The basic principles : On this Resources Page, you will find: 1 archive = 1 platform sources. (From me or from you) On the Platform Video Page, you will find: 1 file = 1 video. (From me or from you) Here are the rules to follow: ONLY use this forum thread for ALL that concerns the video creation. Form start to finish. Please, not used the comment section below. Announced on what platform(s) you want to work. (New or rebuild) Post your work in progress! This is very important, to have feedback from community and me. Follow the guideline below. There can be several videos from the same platform. I will add your credits. But keep the same background color please, for theme integration. Don't be susceptible if we make comments. ? At the end, send me your video and source files. I will upload them to the corresponding pages, with your credits. Here, I will act as a moderator. The goal of all these rules is to keep the set consistent, allow the community to take part in creation and centralize everything for ease of use. About software, I used Photoshop and After Effect in their old version (CS6) and without any plugin, to maximize compatibility with your systems. You can use other software of course, but try not to use plugins. # GUIDELINES? I created these guidelines, based on my experience with NOSTALGIA. They have a whole purpose and I ask you to respect them. Here is the principle: You can find these construction lines, as guides, in the Photoshop (.PSD) files, in each Platform archive. The goal is to let the design breathe, while allowing great versatility of use. Whether in full screen, in 4:3 or 1:1, this video set remains usable. I have created a theme around this set, but I hope it will not be the only one! A word for the wise ... # WHAT ARE THE STEPS ? Briefly, the steps I follow for each video. Find photo sources for each element of the montage. I try to put the credits in each archive. Carry out the editing in Photoshop, keeping a layer structure common to each platform. From Photoshop, save each layer group in separate PNG files. Find a Gameplay video (EmuMovies for most) and the boot section (Youtube for most) Go to After Effect, gather everything in 4K and render a "master" video file. (understand heavy one) Use VidCoder to make my different outputs (4K h264 / 4K h265 / HD h264) and size compression. <UPDATE> A quick word for the arcade cabinet: It's too hard to find good photo sources. So I made them all in full 3D (CGI). If you have the knowledge, go there! Otherwise, I create my renderings so that they can be edited in Photoshop. ? # IN DETAIL, PHOTOSHOP ? I'm not going to do a beginner tutorial for Photoshop. Here's how I sort my slaps. It would be good to respect this nomenclature, always to maintain consistency. And post on this forum thread your work in progress ! Once the editing is finalized, I export these slaps in 4 PNG files, to go under After Effect. (see text in the left column above) Why in PNG and not directly use the PSD? Because I noticed "more file corruption with the PSD. In the context of exchange with the community, the PNG is much more universal for people not using the Adobe suite. # IN DETAIL, AFTER EFFECT ? Here it is more difficult to explain yourself with words or pictures. But here is the basic principle: The Mask Layer will be used for the Gameplay video. And post on this forum thread your work in progress ! I let you open the files to better understand. If the need arises, I will come and fill this part. # IN DETAIL, VIDCODER ? (update aug 23, 2022) To optimize the size of the videos and multiply the formats, I use the free and open-source VIDCODER. (also on Microsoft Store) It is rather simple, allows batch processing, and as there are finally few "moving" elements in my videos, the optimization is pretty good. I created and tested 3 profiles that you can import and use. Here they are : VidCoder_Viking_Setting_Update.zip # AT THE END, SHARING ! Once finished, send me the files directly: Video in the 3 export formats from VidCoder. Your source archive, trying to keep the same structure as mine. I take care of the conformation of the names, the addition of the credit, and the upload on the right pages. Thank you in advance ! # SPECIAL THANKS : @Jason Carr for his hard work on LaunchBox/BigBox! To all Patreon guys! A GIANT THANKS to all of you!!! ? The whote community for yout support! # SOURCES - COPYRIGHT : Each brand of hardware and software here represented as a tribute. Emumovies for (most) gameplay videos The Vanamo Online Game Museum for (most) photos. If special credit, see .TXT file in the corresponding source archive. (soon) # PLATFORM COVERED / CREDITBOARD : See video release post for more details !36 points -
Version 2.2.2
2,962 downloads
Pulse is dark, responsive BigBox theme. No need for custom images. 125 device images and 135 cropped clear logos included. Views use: Clear logos, Videos, Fan art, Box Art, 3D Box Art and device images. Made with: Community Theme Creator for BigBox 1.0.8.99 by y2guru Views included (Version 1.1): System HorizontalWheel1 HorizontalWheel2 HorizontalWheel3 PlatformWheel1 PlatformWheel2 PlatformWheel3 PlatformWheel4 TextFiltersView TextGamesView Views (Version 2.0) GameDetailsView HorizontalWheel1GamesView HorizontalWheel2GamesView HorizontalWheel3GamesView PlatformWheel2FiltersView (Viking's Colorful platform videos are recommended) PlatformWheel3FiltersView SystemView TextFiltersView TextGamesView TextListView WallGamesView Wall2GamesView (If you want this to look good please remove all the title screenshots from games) Fonts included: BarlowSemiCondensed-ExtraBold BarlowSemiCondensed-Medium BarlowSemiCondensed-Regular Barlow Semi Condensed - Google Fonts Remember to refresh wheel images from BigBox options AND INSTALL THE FONTS! Special Thanks to @Dan Patrick and @bundangdon who helped me a lot with useful feedback. Dan also provided some icons and clear logos. There were others who gave me feedback, so thank you all for your help. Screenshots and video preview uses videos and images made by others, including platform videos by @viking Not taking any requests for missing assets. Video Preview Version 2.0 Version 1.135 points -
Version 1.0.0
7,651 downloads
Hello my friends.TV BOX LOADING.zip It is with great joy that I bring you a small idea that I had in creating small splashscreens for each platform when the platforms started up. There are a total of 121 different systems. As soon as I have created more, I will update the post. Hope you like it.35 points -
Version 1.0.0
53,432 downloads
Main Menu Themes Video 1080P Cinematic 4K Theme Games SNES35 points -
Version 1.0.0
8,090 downloads
This is a big one folks! Nintendo Wii 2.5D front box art "Hyperreal" set. All regions. Aiming for a complete set. 1913 images. Due to the size, I have zipped each letter of the alphabet separately. Any errors or omissions, please let me know and I will rectify. I'll likely update this set soon once RVZ dats are available. See the screenshots for examples. Why these images? Short of proper 3D model box support in Launchbox, I find that "2.5D" is often the best box image type. 3D boxes can be good though the angle that they tend to be at makes the cover art a bit less clear, and all the spines can give an overall cluttered appearance which can be distracting from the artwork. The standard scraped box-front images tend to just look like jpg computer images and not the actual physical product. By 2.5D I mean that the image is of the actual front artwork, within the original box (not a "clean" reconstruction) and facing head on. This set is created using a photo-realistic Nintendo Wii hard plastic case template (not a vector model), complete with the plastic cover overlay, within which the artwork sleeve is inserted. There is some subtle lighting and shadow effect. I'm aiming to create the most realistic sets out there, and am open to any feedback or suggestions. PS Check my other 2.5D sets. I'm planning to do some more; any platform requests, let me know. Was going to attempt NES next.34 points -
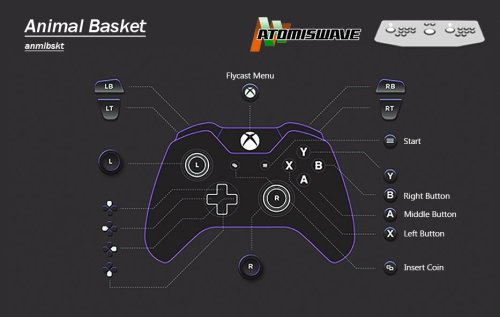
Version 1.0.1
8,178 downloads
UPDATE 1 - Added Extreme Hunting 2, KenJu & Force Five UPDATE 2 (11/08/2024) - Major update to folders for easy placement into the root folders of RA & LB. Everything is soooo much easier. Lightgun games can now be simply switched between Controllers & Lightguns. Inputs & Images are the same as the standalone pre config for consistency. Issue mitigations with content directory .cfg files. NEW install video coming very soon. The old one is now outdated. Lets not mess about with this one. If you are familiar with what I do then you know you are getting a quality pre configuration that has been researched and tested to death. I spend hours doing this so you don't have to. Creating configurations for play....not display. As you are most likely aware, arcade platforms are a pain to setup. Controls aren't standardised and changing settings via test menus can be tiresome. What this pre configuration gives you: Firstly I want to talk about audio separately. More to the point just how ear bleedingly loud these games are and how they care not for your main device volume. So I have lowered the volume on a per game basis in their test menus so you don't have to reach for the volume control or wince every time you start a game. Most of these games are in MONO by default. I have changed all of these to be in STEREO. Controls have been scrutinised and tested and revised and tested again. I haven't just set whatever. If a fighting game has a modern port or counterpart I have mapped it to the default layout for that modern version. Everything else has been mapped to be as intuitive as possible, and I have provided layout images so you need never be lost with buttons again. -2 Player Mouse/Light Gun Ready -All Extra & Hidden Characters unlocked. There are 7 games with unlockable content -Censored content like blood is now uncensored -Analogue Volume adjusted for the racing games. This ensures a 1:1 analogue range for the steering and pedals on a controller (makes racers steering less twitchy) -All games in English -All games set to Free Play -Controls pre configured with layout images for reference and frontends. -Light gun games calibrated for both players -Audio lowered on a per games basis -All games in Stereo -Sega Clay Shooting has native widescreen and has been setup for 16:9 INSTRUCTIONS: I have only configured for the parent versions Download RetroArch Files - Control Images & PlatformXML Place unzipped config & saves folders into the root folder of RetroArch Place unzipped Data & Images folders into the root of LaunchBox ENJOY!!! Intuitive controls and everything unlocked. Here is the documentation for this configuration. Everything I have done on a per game basis is listed here. I have also provided any passwords, engineers codes, cheat codes and important information here also. This is a consolidation of information. Animal Basket anmlbskt -Area set to Other, Language set to English. Default is Japan/Japanese -Audio set to Stereo. Default is Mono -Audio Volume set to 5. Anything above that is way too loud. Default is 15 -Difficulty set to Normal. Default is Easy -Coin Assignments set to Free Play Block Pong-Pong blokpong -Area set to Other, Language set to English. Default is Japan/Japanese -Audio set to Stereo. Default is Mono -Audio Volume set to 10. Anything above that is way too loud. Default is 15 -Location set to Normal -Coin Assignments set to Free Play Demolish Fist demofist -Area set to North America, Language set to English. Default is Japan/Japanese -Audio set to Stereo. Default is Mono -Audio Volume set to 10. Anything above that is way too loud. Default is 15 -Coin Assignments set to Free Play Dirty Pigskin Football dirtypig -Audio set to Stereo. Default is Mono -Audio Volume set to 11. Anything above that is way too loud. Default is 15 -Game set to 4 Players. 2 is the Default. -Coin Assignments set to Free Play Dolphin Blue dolphin -Area set to North America, Language set to English. Default is Japan/Japanese -Audio Volume set to 10. Anything above that is way too loud. Default is 15 -Coin Assignments set to Free Play Extreme Hunting xtrmhunt -Light Gun for mouse calibrated and accurate for RawInput 2 Players -Per game .cfg used for 2 Player mouse support -Audio Volume set to 10. Anything above that is way too loud. Default is 15 -Coin Assignments set to Free Play Extreme Hunting 2 xtrmhnt2 -Now playable in Flycast as of 03/2023 -Light Gun for mouse calibrated and accurate for RawInput 2 Player -Game Mode set to 'Full Tour' -Per game .cfg used for 2 Player mouse support -Audio Volume set to 10. Anything above that is way too loud. Default is 15 -Coin Assignments set to Free Play Faster Than Speed ftspeed -All cars unlocked. Type IX, X, XI and XII are selectable without having to unlock them -Audio Volume set to 10. Anything above that is way too loud. Default is 15 -Game Mode set to Single Race. Default is Pre-Set -Analogue input calibrated in I/O Test. This ensures the 'analogue volume' covers the entire controller input range. (Makes driving games steering less twitchy) -Speedometer set to MPH. Default is KPH -Coin Assignments set to Free Play Fist Of The North Star fotns -Area set to North America, Language set to English. Default is Japan/Japanese -Audio set to Stereo. Default is Mono -Audio Volume set to 10. Anything above that is way too loud. Default is 15 -Coin Assignments set to Free Play Guilty Gear Isuka ggisuka -Area set to North America, Language set to English. Default is Japan/Japanese -Coin Assignments set to Free Play -Audio Volume set to 10. Anything above that is way too loud. Default is 15 -Unaware of any unlocks. Please let me know if there is Guilty Gear X ver. 1.5 ggx15 -Area set to North America, Language set to English. Default is Japan/Japanese -Coin Assignments set to Free Play -Audio Volume set to 10. Anything above that is way too loud. Default is 15 -Unaware of any unlocks. Please let me know if there is King of Fighters Neowave, The kofnw -All 7 extra characters unlocked via Password. -You need to hold start then select the character on the following characters - K' = Young Geese Juhn = Kim Maxima = Ramon Whip = Vanessa Chris = Orochi Chris Shermie = Orochi Shermie Yashiro = Orochi Yashiro -Blood is On -Area set to Other. This allows Blood to be enabled in the Game Settings. Language set to English. Default is Japan/Japaneese -Audio Volume set to 11. Anything above that is way too loud. Default is 15 -Coin Assignments set to Free Play Passwords for Test Menu: ASF4 A4DQ F35S L568 - Unlocks all characters and Geese CM09 VIWM 1AHC 56ZL - Unlocks all characters except for Young Geese King of Fighters XI, The kofxi -All 5 extra characters unlocked. Normally takes multiple days of power on to unlock as its on a time release Scroll all the way to the left or the right of the character select screen to find extra characters: Adelheid Jazu Silver Gai Hayate -Area set to Other, Language set to English. This allows Blood to be enabled in the Game Settings -Blood is on -Audio set to 3. This game is ridiculously loud, stupid loud even. So 3 believe it or not is the best setting. Default is 15 -Coin Assignments set to Free Play Knights of Valour: The Seven Spirits kov7sprt -Area set to North America, Language set to English. Default is Japan/Japanese -Audio Volume set to 9. Anything above that is way too loud. Default is 15 -Coin Assignments set to Free Play Maximum Speed maxspeed -Analogue input calibrated in I/O Test. This ensures the 'analogue volume' covers the entire controller input range. (Makes driving games steering less twitchy) -Audio Volume set to 10. Anything above that is way too loud. Default is 15 -Coin Assignments set to Free Play Metal Slug 6 mslug6 -Red Blood enabled -Area set to North America, Language set to English. Default is Japan/Japanese -Audio Volume set to 10. Anything above that is way too loud. Default is 15 -Coin Assignments set to Free Play NeoGeo Battle Coliseum ngbc -All 5 extra characters unlocked, which required the machine to be active for at least 74 days since power-on: Scroll all the way to the left or the right of the character select screen to find extra characters: Athena King Lion Mars People Mizuchi Neo-Dio -Area set to North America, Language set to English. Default is Japan/Japanese -Audio Volume set to 9. Despite the volume being reduced this is still a loud game. This is due to the balance of the audio, music is really loud but if I bring it down to a tolerable level you can't hear the sound effects. A compromise had to be made. Default is 15 -Coin Assignments set to Free Play Ranger Mission rangrmsn -Light Gun for mouse calibrated and accurate -Reload is Input Light Gun Aux A, NOT Input Light Gun Reload. -Audio Volume set to 6. Another offensively loud game. Default is 15 -Coin Assignments set to Free Play Rumble Fish 2, The rumblef2 -All 3 extra characters unlocked. Greed Hazama Beatrice To play as Beatrice, move the cursor to Hazama, then press Upx4, Rightx2, Downx4, Leftx2, and finally Down. -Time Attack and Survival Mode unlocked To play Time Attack mode, hold both punch buttons and then press Start at the Title Screen. To play Survival mode, do the same but holding both kick buttons instead. -Area set to North America, Language set to English. Default is Japan/Japanese -Audio Volume set to 2, yes 2. My ears are bleeding, whats with these games being savagely loud. Default is 15 -Coin Assignments set to Free Play Rumble Fish, The rumblef -Greed character unlocked via password SINKORSWIM. You need to do the following on the character select screen: Highlight Orville, then press Rightx2 Highlight Typhon then press Left Highlight Boyd then press Leftx3 Highlight Zen and press Rightx2 Press Up Greed should appear -Area set to North America, Language set to English. Default is Japan/Japanese -Audio Volume set to 3. Oww my freeekin ears. Default is 15 -Coin Assignments set to Free Play Samurai Spirits Tenkaichi Kenkakuden / Samurai Showdown VI samsptk -Area set to North America, Language set to English. Default is Japan/Japanese -Voice changed to English -Coin Assignments set to Free Play -Audio Volume set to 10. Anything above that is way too loud. Default is 15 Sega Bass Fishing Challenge Version A basschal -Unplayable in RA at the moment due to unique controls. Playable in Flycast Standalone Sega Clay Challenge claychal -Light Gun for mouse calibrated and accurate. Did not register trigger properly until calibrated. -You can only shoot when moving the mouse due to mercury switches in the real light guns for the cabinet. They detect if you have the rifle pointed up-ish. So as a result you can only shoot when the mouse is moving. Like real trap shooting you have to track the target and shoot. There is an Infrared Gun Type option in the game bios however this doesn't work -Setup for 2 player mouse use. Using RawInput -Aspect Ratio set to Wide. Please adjust your RetroArch scaling settings to 16:9 and save a game override. One will be provided -Reload is Input Light Gun Aux A, NOT Input Light Gun Reload -Audio Volume set to 10. Anything above that is way too loud. Default is 15 -Coin Assignments are unavailable. Requires coins to be input Sports Shooting USA sprtshot -Light Gun for mouse calibrated and accurate for both players. -Setup for 2 player mouse use. Using RawInput -Auto Reload is On -Reload is Input Light Gun Aux A, NOT Input Light Gun Reload. -Audio Volume set to 10. Anything above that is way too loud. Default is 15 -Coin Assignments set to Free Play Sushi Bar sushibar -Area set to North America, Language set to English. Default is Japan/Japanese -Audio Volume set to 10. Anything above that is way too loud. Default is 15 -Coin Assignments set to Free Play WaiWai Drive waidrive -Unplayable in RA due to unique controls. Playable in Flycast Standalone32 points -
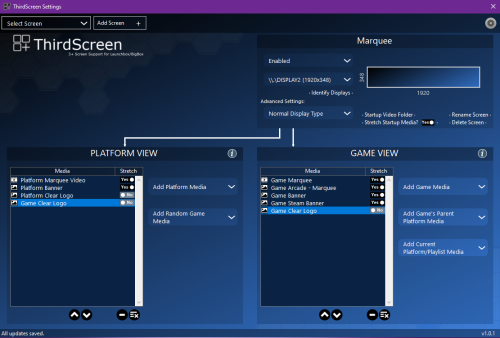
Version 6.0.2
3,078 downloads
This plugin adds enhanced Marquee capabilities plus support for unlimited screens. - Enhanced Marquee Capabilities: Adds support for Platform Video Marquees, Playlist Video Marquees, and Platform Category Video Marquees. Adds support for Marquee Startup Videos. Adds support for animated gif files. Fixes marquee shift issue for TeknoParrot games. Marquee(s) will work in LaunchBox, not just in BigBox. Adds optional blur-fill background effect when media is not stretched to fit the entire screen (as of v2.0.10). - Support for a 3rd screen or unlimited additional screens each displaying their own priority based list of media. - Each screen has access to ALL media that has been imported to LaunchBox (all images, all videos, plus rotating 3D box models!) - Graphical user interface for setting up screens. Your theme files do not get modified. - Ability to stretch or not stretch based on the media type being shown on each screen. - Screens are tracked by GPU port stable IDs, so nothing will ever break due to Windows re-ordering display numbers. Demo Videos: Installation: *** Before installing, please make sure you are using the latest version of LaunchBox. Version 13.0 or higher is required. *** Download ThirdScreen.zip to your PC. Right click on the zip file and extract all files. Close LaunchBox/BigBox and copy the Plugins and ThirdParty folders to your LaunchBox directory. Adding a new screen: 1. If you are setting up your main Marquee screen, you'll first need to disable the Marquee in BigBox settings in order to transfer control of it over to ThirdScreen. Open BigBox. Hit escape to go to BigBox settings. Go to Options->General->Marquee Screen and set it to "None". 2. Select ThirdScreen Settings either from the Tools dropdown in LaunchBox or the settings screen in BigBox. 3. In the ThirdScreen Settings app choose "Add Screen" in the upper left. 4. Give this screen a name. If this is your main marquee, make sure "Start with typical marquee media" is checked - this will start you off with the typical expected media for a main marque (e.g. marquee videos, marquee images, banner images, clear logos, etc...). Then hit Continue. 5. Click "Identify Displays" and take note of the name displayed on the desired display. Then choose the corresponding display name from the "Choose Display" drop down menu. Choosing which media shows on each screen: 1. Select a screen from your list of existing screens. 2. Add desired media to both the game and platform views for this screen. (Tip: You can hover over most drop down boxes and controls to get a more detailed description of what each one does). 3. Adjust the priority of each media item up or down (items higher on the list have higher priority). ThirdScreen will search the selected game or platform's media starting from the top of the list and working its way down until it finds something to display. 4. For each media item in your views you can choose whether or not to stretch fill the screen. If set to No, then the item will be uniformly stretched (aspect ratio will be preserved). If set to Yes, the media will be stretched to fill the entire screen (aspect ratio will not be preserved). (Your choice will depend on the type of media and the screen dimensions. For example, Marquee videos/images will look best stretch filled on a bar type display but not on a 16:9 aspect ratio display. Video snaps will look best stretch filled on a 16:9 aspect ratio display, but not on a bar type display.) Adding startup videos or images for each screen: 1. Select a screen from your list of existing screens. 2. Click "Startup Video Folder" to open the startup folder for this screen. Copy any media you want to be displayed at startup for this screen into this folder. Video files and static images are supported. If there is more than one item in the folder, ThirdScreen will choose one of them randomly to display at startup. Adding Platform Marquee Videos, Playlist Marquee Videos, and Platform Category Marquee Videos: 1. In LaunchBox select Tools->"Manage Platform/Playlist Video Marquees" 2. From here you can add and manage video marquee files for Platforms, Playlists, and Platform Categories. Once added, they will be available for display using the ThirdScreen Plugin. FAQs: Q. How many screens are supported? A. As many as you want. The only limit is the number of hdmi or display ports on your PC. Q. Can I use this Plugin if I only have a single marquee screen? A. Yes, if you don't have a third screen you can still use this for your main marquee. That will get you the added benefits of platform marquee videos, animated gif support, marquee startup videos, etc. Q. If I choose to display 3D box models, how can I rotate them? A. The 3D box models will be self-rotating. They will continuously spin while being displayed (no need for any user input). Q. In Game View, what's the difference between "Add Game's Parent Platform Media" and "Add Current Platform/Playlist Media"? Which one should I choose? A. It just depends on your preference when viewing Playlists. When scrolling games in a platform wheel, it will not make any difference which of the two dropdown lists you chose from. When scrolling games in a playlist wheel choose "Add Game's Parent Platform Media" if you want the media to change depending on the type of game (for example, the playlist might be a mix of NES, Wii, and Arcade games). Choose "Add Current Platform/Playlist Media" if you instead want to always display the Playlist's media (for example the marquee or theme video from your Favorites playlist). Q. Will my Theme xaml files get modified? A. No, the plugin never touches your theme files. You are free to switch and add new themes whenever you want. Q. How can I delete/modify media in LaunchBox if it is currently being displayed by ThirdScreen? A. You might sometimes run into a situation where you want to delete or modify a game's media files, but LaunchBox gives you an error because the media is in use. No problem, just temporarily disable ThirdScreen when in LaunchBox. Open the ThirdScreen settings app, click the gear icon in the upper right, and choose "Disabled when in LaunchBox". Q. Why doesn't Platform view work for my marquee(s) when in LaunchBox? A. This has been fixed with version 2.0.6 of this plugin as long as you are on LaunchBox version 13.1-beta-6 or higher.. Troubleshooting Steps: 1. Make sure you are using the latest version of this plugin. 2. If this is your main marquee screen, please first double-check that you have disabled your marquee in BigBox settings. The ThirdScreen plugin will not attempt to use your marquee display if BigBox is using it. 3. If some image or video you've added isn't showing up when you expect it to, double-check that it is categorized correctly in LaunchBox. It's very easy to add media in LaunchBox and then forget to change its image or video type (I do that all the time). 4. If you are having an issue, please enable logging for both the ThirdScreen plugin and LaunchBox/BigBox, and then send me the log files after you try the thing that isn't working. The log files will be in the LaunchBox/Logs folder. To enable logging do the following: For ThirdScreen: Tools->ThirdScreen Settings, click the gear icon in the upper right and choose "Debug Log File Enabled". For LaunchBox/BigBox: Tools->Options->General->Debugging, check "Enable Debug Logs". 5. If LaunhBox/BigBox will not start at all after installing the dll files, make sure you are on version 13.0 or higher of LaunchBox and also try disabling any Pen or TouchScreen devices listed in Device Manager (there is currently a known conflict with the Windows Pen driver which is affecting some users). (Edit: This has been resolved in v2.0.13) 6. If animated gif files aren't displaying for you, try running LaunchBox/BigBox with admin privileges. (Edit: This has been resolved in v2.0.11) 7. If you are having issues with the ThirdScreen settings app reporting an incorrect resolution and/or your marquees being incorrectly sized, clipped, or off-center then it is most likely caused by dpi scaling. ThirdScreen v2.0.14 and higher should fix most scaling issues in both Win10 and Win11. 8. This plugin tries to fix any marquee-shift issues when a game changes the main screen resolution. As of version 4.0.0 you can select between medium mode, aggressive mode, or disabled. Medium is the default mode and is recommended. If a game changes the screen resolution, medium mode will reposition all marquees to their correct locations. Aggressive mode also hides the BigBox window to ensure it does not end up covering one of the marquee screens. While aggressive mode works perfectly on mine and many other setups, some people have reported that it can interfere with game loading or exiting (including BigBox remaining hidden after exiting a game). If you run into those types of issues you should set the option back to medium mode or disabled. In LaunchBox, go to Tools->ThirdScreen Settings. Then click the gear icon in upper right and select "Medium Shift Handling". ------------------------------------- Enjoy, and please follow the file to be notified of updates.32 points -
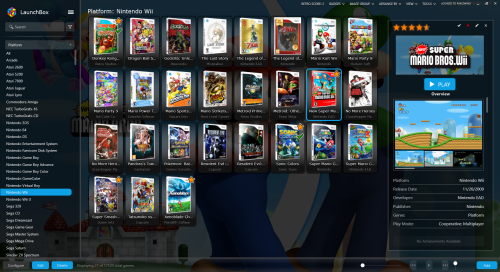
Version 4.6
5,029 downloads
This started out as all I wanted to do is make the background image, when selecting a game fill the whole space. So after looking at the default theme and the great LBPlex theme (credit to @Grila) I managed to get all the bits I preferred and made a theme to my liking. Hopefully your like it too . And now with updates from the Default Plus theme (credit to @faeran). **NEW** Now you can have any colour you wish by simply changing the "selected Item background" colour. (see below screenshot)32 points -
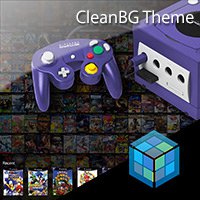
Version 1.1.2
15,122 downloads
Clean Theme with large systems. Video: Instructions: Extract archive in "LaunchBox\Themes" Choose CleanBG (or CleanBGnosystems) in Options > Views > Theme I advise to disable "show Filters Favorite Games" in Option > Views. I advise to change Options > Transitions > Filters Game Boxes Transition to "Slide Vertical" Files: CleanBG.zip: theme CleanBGnosystems.zip: theme without plateforms images32 points -
Version 1.0.0
2,109 downloads
A simple startup and shutdown screen theme revolved around clear logos and fanart artwork, with a big progress bar on the bottom. (You need LaunchBox version 9.2 beta or newer for this theme to work). How to install and setup: - Download the zip file of the theme and extract it to LaunchBox's root folder. - Open LaunchBox, go to Tools --> Options, Click on the Game Startup tab on the left, then change the Startup Theme to Big Logo. Any feedback is much appreciated. Enjoy!32 points -
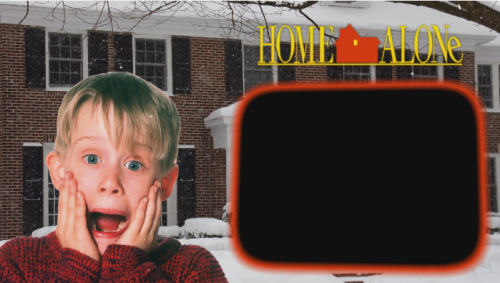
Version 1.0.0
30,968 downloads
how to use this is where i have put them :\LaunchBox\Videos\Sega Genesis\Theme for some reason when i upload it put a _ where it should be a space like this Sonic_the_Hedgehog_3 it should be this Sonic the Hedgehog 3 the videos should be named the same as game in lauchbox hope this helps some people32 points


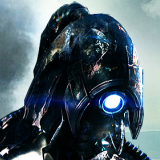


.thumb.png.9332e12cab6cec0213b9ffd456a9a968.png)


.thumb.png.83dcf83ef17bd58458b90edd83312ca3.png)


.thumb.png.7dc1d1010e44cf7eb774510ee178f1b4.png)