Third-party Apps and Plugins
261 files
-
Mame No-Nag 0.287 Final Version.
By MadK9
For a continuation of these nonags, i point you towards, @yashijoe's version as of 0.288 and for future versions.
If you wish to compile your own versions scroll down a little to get information on how to do so.
As with all things, the end has to eventually come. With 0.287 being the final version of no nags that i will release. I had lost interest in everything to do with emulation quite awhile back, but carried on regardless each moth with the no-nags.
I'm hoping someone else will pick up the gauntlet and release nags each and every month. while not difficult to do they take some time to compile and test.
So with that i bid you all farewell..
Final thanks as always go out to @KnC @JoeViking245 and CBeats for advice and help along the way..
Ok guys, here is a DiY solution for you to make you own nonags and add the 2 games back to mame.
This guide was tested by a couple of people and they managed to create workable mame nonags.
Just follow the guide and please read it carefully, it may seem there is a lot of thing to do, its not much really
the first part is just setting up the compiler which you will only need to do once. The rest is just editing 4 files, then compiling.
If you have issues please be concise and have images i cant read your screens.. I will try to help you solve them, remember when
i started doing this, i knew nothing as well.
Please let me know your success’s or failures...
Good luck peeps..
Mame-NoNag-Tutorial.txt
**This removes the nag screen that informs you if a rom doesn't work correctly, or if at all, if you use this no nag, then please do NOT go to the mame support site with issues with games, please only use if you understand that there will be no help from anyone at mamedev as you are using a modified version of mame.
Contents: mame.exe - Normal Mame with Nags removed. (Note mame no longer carries the 64 in its exe name changed by Devs in 0.229)
This version also allows the games Akai Katana and Dodonpachi Saidaioujou to be played.
It's advisable to download the full mame official pack and install it, then just overwrite the exe with the replacement, this covers any changes the mame devs may have made to the support files.
After you have done this, make sure you copy the folders artwork, ctrlr, cheat, hlsl, ini, folders and the ini files from the root of your original mame folder, and move/copy them to the new install.
If you are using your own installed/setup of mame then make sure you also set in the mame.ini 'Skip_gameinfo 1'
If you got Launchbox to setup mame for you when asked, you only need to replace the exe and play.
As some are not sure about False Positives, and report a virus was detected, As goes for all versions i upload, they are all ran through virustotal before i upload, and if by any chance something did end up with an issue it would be noticed very quickly after upload and would be removed/restricted.
0.287 - VirusTotal - File - 93503ebe367eb4715938c202aa48e1b0b18b512634efdeaca26f90f03cec4f2c
All NEW versions of the No-Nag will be posted in this download thread only, if you wish to get the new releases every month, either follow myself or the thread, As the download section will not show any new releases.
24,237 downloads
-

Community Theme Creator
By y2guru
Manuals / How to
Refer to my YouTube channel or visit Faeran's Theme Creator Workshop videos to better understand the new features.
Dave Paterson - YouTube
Development Live Streams - YouTube
COMMUNITY Theme Creator - Patreon
13,719 downloads
- bigbox
- custom bigbox themes
- (and 1 more)
-
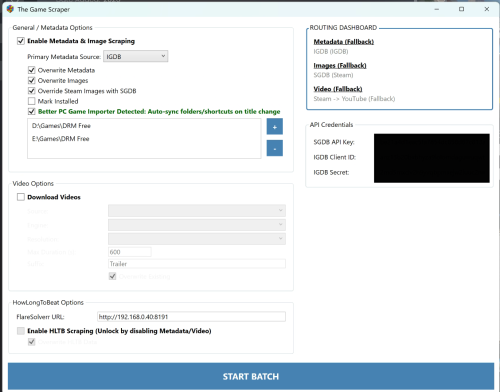
The Game Scraper
The Game Scraper for LaunchBox
The Game Scraper helps fill in missing metadata, artwork, trailers, play times, and useful custom fields for your LaunchBox games.
It is especially helpful for PC games that were added manually instead of imported from Steam, but it can also help with console, handheld, arcade, and mixed libraries by using sources like Steam, IGDB, SteamGridDB, MobyGames, ScreenScraper, YouTube, and HowLongToBeat.
This guide is organized by how much control you want.
Basic user: you just want metadata, images, and videos with the least amount of setup.
Intermediate user: you want to tune the main Batch Settings tab and choose where your data comes from.
Advanced user: you want full control with the Custom Workbench.
The Game Scraper has come a long way since being a Steam metadata/media downloader. Its complexity has ballooned, making it very difficult for me to test everything. If you run into a problem, please message me first. If you like what this does and use it, please provide a 5-star review!
Install The Plugin
Close LaunchBox.
Extract The Game Scraper into your LaunchBox Plugins folder.
Reopen LaunchBox.
Select one or more games.
Right-click and choose The Game Scraper.
Files That Come With The Plugin
These are the normal files you may see in the plugin folder.
TheGameScraper.dll - The main plugin file. LaunchBox loads this to add The Game Scraper to the right-click menu.
DiscoveryData.json - Built-in mapping data used to normalize Discovery Tags and player-perspective labels from Steam and IGDB source terms.
SteamKit2.dll - Support file used for deeper Steam lookup features.
ZstdSharp.dll - Support file included with the current SteamKit2 package. Keep it if it was included in your download.
WindowsShortcutFactory.dll - Support file for shortcut/path handling and Better PC Game Importer-style PC game cleanup.
yt-dlp.exe - Required for YouTube video searching and downloading.
ffmpeg.exe - Required for video merging and video format handling.
deno.exe - Used by the video tools for some YouTube challenge handling. Keep it if it was included in your download.
TheGameScraper.pdb - Optional. Only useful for debugging.
Files The Plugin Creates
The plugin also creates a few files and folders while you use it.
config.json - Stores saved settings, source choices, credentials, overwrite choices, video options, and Custom Workbench routes.
TheGameScraper.log - The main troubleshooting log. It records what the plugin tried, downloaded, skipped, and sent to the Fixer.
Basic User: Just Get Metadata, Images, And Videos
Use this path if you want the plugin to clean up your games without thinking about every source and every field.
This is the best first run for most people.
Basic API Setup
For the best Auto experience, add your IGDB and SteamGridDB credentials before running a batch.
Steam does not need an API key, but IGDB and SteamGridDB do.
SteamGridDB API key: needed for SteamGridDB artwork.
IGDB Client ID and Secret: needed for IGDB metadata, keywords, themes, videos, and player perspective.
This matters because Auto mode can use Steam first for PC games, then use IGDB and SteamGridDB to fill gaps or handle non-Steam games.
If you are scraping mostly PC games that Steam can easily identify, you can try Auto without these. If you are scraping console, handheld, arcade, retro, non-Steam PC games, or a mixed library, you should add IGDB and SteamGridDB first.
Where To Get The Keys
SteamGridDB API key: get it from your SteamGridDB API preferences page:
https://www.steamgriddb.com/profile/preferences/api
IGDB Client ID and Secret: follow IGDB's official setup guide:
https://api-docs.igdb.com/#account-creation
Quick IGDB Credential Steps
Sign in or create a Twitch account.
Enable two-factor authentication on the Twitch account.
Open the Twitch Developer Portal from the IGDB setup guide.
Register an application.
Set the application type to Confidential.
Use localhost for the OAuth Redirect URL if you do not have another redirect URL.
Create a new client secret.
Copy the Client ID and Client Secret into The Game Scraper.
After entering credentials, use Check API Status. The status lines under each provider tell you whether the plugin sees what it needs.
Best Simple Setup
Select a small group of games in LaunchBox.
Right-click and open The Game Scraper.
Stay on Batch Settings.
Add your IGDB Client ID and Secret if you plan to use IGDB.
Add your SteamGridDB API key if you plan to use SteamGridDB artwork.
Click Check API Status.
Set Primary Metadata Source to Auto.
Turn on Enable Metadata & Image Scraping.
Turn on Download Videos if you want trailers.
Set video Source to Steam for the easiest Auto workflow.
Leave overwrite options off for your first run.
Click START BATCH.
If the Fixer appears, review the games it could not confidently match.
For a simple first run:
Auto + IGDB + SteamGridDB + Steam videos is the easiest starting point.
Auto mode follows this workflow:
For PC/Steam-style games, it starts with Steam for metadata, standard images, and Steam videos.
If Steam cannot confidently identify the game, it can check IGDB when IGDB credentials are configured.
If Steam identifies the game but some details are missing, IGDB can safely fill gaps when the IGDB match is verified.
If Steam artwork is missing, SteamGridDB can fill standard artwork when a SteamGridDB API key is configured.
If a Steam video is not found, Auto can fall back to YouTube.
For non-Steam games, console games, arcade games, handheld games, and retro platforms, Auto uses IGDB for metadata, SteamGridDB for standard artwork when configured, and YouTube for videos.
What Basic Mode Can Add
The plugin can fill in:
Title, developer, publisher, notes, series, release date, rating, play mode, genres, and community rating.
Box/front cover, banner/header, fanart background, clear logo, and gameplay screenshots.
Trailers from Steam or YouTube.
HowLongToBeat play times.
Discovery Tags and Player Perspective custom fields.
Installed status for PC games, if you enable that option.
Intermediate User: Customize The Main Tab
Use this path if you want more control, but you still want the normal batch screen to do most of the work.
The main Batch Settings tab is where you choose the main source, video behavior, overwrite behavior, API keys, and extra options.
What Changes When You Pick A Source Instead Of Auto
When you choose a source directly, the plugin stops using Auto's full fallback chain and follows the source you picked.
Steam
Metadata comes from Steam.
Fields filled from Steam can include Title, Developer, Publisher, Release Date, Genres, Notes/Description, Play Mode, Controller Support, Community Rating, and Discovery Tags from Steam tags when Discovery Tags are enabled.
Images come from Steam's standard store/library artwork: Box - Front from the portrait library image, Clear Logo, Fanart - Background from the Steam hero image, Banner from the Steam header image, and up to 5 Screenshot - Gameplay images.
Image sizes are usually consistent because Steam uses fixed artwork types. The portrait box art uses Steam's library_600x900_2x image, the hero is the wide library_hero image, the banner is the smaller Steam header image, and screenshots use Steam's full screenshot URLs.
Videos come from Steam when Steam video downloading is selected.
IGDB
Metadata comes from IGDB.
Fields filled from IGDB can include Title, Developer, Publisher, Notes/Description, Series, Age Rating, Wikipedia URL, Video URL, Release Type, Release Date, Community Rating, Genres, Play Mode, Discovery Tags from IGDB themes/keywords when Discovery Tags are enabled, and the Player Perspective custom field.
Images come from IGDB when Override Steam Images with SGDB is off: Box - Front from the IGDB cover, Fanart - Background from the first IGDB artwork image, and up to 5 Screenshot - Gameplay images.
IGDB image sizes are different from Steam. Covers use IGDB's cover_big size, artwork uses IGDB's 1080p size, and screenshots use IGDB's screenshot_huge size.
IGDB does not provide the same standard logo/banner set that Steam does in the normal main-tab workflow. Turn on Override Steam Images with SGDB if you want SGDB to fill standard artwork instead.
Videos use the IGDB-linked YouTube video first when IGDB has one, then fall back to a YouTube search.
MobyGames
Metadata comes from MobyGames.
Fields filled from MobyGames can include Title, Developer, Publisher, Notes/Description, Series, Age Rating, Region, Release Type, Max Players, Release Date, Community Rating, Genres, Play Mode, and Alternate Names when MobyGames has them.
Images come from MobyGames media candidates for the normal LaunchBox categories: Box - Front, Clear Logo, Fanart - Background, Banner, and up to 5 Screenshot - Gameplay images when those items are available.
Image sizes vary because MobyGames media is submitted per game, platform, and region. The plugin prefers better regional matches and larger images when it has choices.
Videos still use the normal video setting, such as YouTube, if video downloading is enabled.
ScreenScraper
Metadata comes from ScreenScraper.
Fields filled from ScreenScraper can include Title, Developer, Publisher, Notes/Description, Series, Age Rating, Region, Release Type, Max Players, Release Date, Community Rating, Genres, Play Mode, and Alternate Names when ScreenScraper has them.
Images come from ScreenScraper media candidates for the normal LaunchBox categories: Box - Front, Clear Logo, Fanart - Background, Banner, and up to 5 Screenshot - Gameplay images when those items are available.
Image sizes and styles vary by platform, region, and language. Your ScreenScraper region and language settings help decide which version is chosen.
Videos come from ScreenScraper's normalized video when ScreenScraper video downloading is selected.
SteamGridDB Override
This is not a metadata source. It only changes the standard artwork pass.
When enabled, SGDB can replace the normal source artwork with Box - Front, Fanart - Background, and Clear Logo from SteamGridDB.
SGDB artwork is usually cleaner and more uniform than older provider media, but it does not fill every LaunchBox image category from the main tab.
Manual
Manual mode is for games you already know need human help.
Instead of trying to choose a match automatically, the plugin sends the game to the Fixer so you can pick the correct result, paste a supported source URL or ID, or enter a better search term.
Use this when Auto keeps finding the wrong game, when a title has many versions, or when you already have the exact Steam, IGDB, SteamGridDB, MobyGames, ScreenScraper, HowLongToBeat, or YouTube page you want to use.
Main Tab Options Explained
Enable Metadata & Image Scraping
Turns on the normal metadata and image pass.
Overwrite Metadata
Allows the plugin to replace existing text fields in LaunchBox. Leave this off if you only want to fill blanks.
Overwrite Images
Allows the plugin to replace existing image files. Leave this off if you want to keep your current artwork.
Override Steam Images with SGDB
Uses SteamGridDB for standard image categories when possible. This is useful when you prefer SteamGridDB artwork styles or want better artwork than Steam provides.
Mark Installed
Marks selected PC games as installed after scraping. Non-PC games are skipped for this option.
Discovery Tags
Adds a custom field with useful tags from Steam and IGDB. These can help you build LaunchBox playlists around themes, features, or style, and are integral to the Discovery Curation Center plugin.
Better PC Game Importer Sync
If Better PC Game Importer is installed, this can help keep renamed PC game folders, shortcuts, and LaunchBox paths in sync after cleanup.
Video Options
Download Videos
Turns on trailer downloading.
Source: Steam
Best for a simple PC setup. Steam videos come directly from the Steam Store when available.
Source: YouTube
Useful when Steam does not have a trailer or when you want YouTube results. YouTube matching is careful and may skip games when it is not confident.
For older games, try changing the YouTube suffix from trailer to gameplay if trailers are hard to find.
Source: ScreenScraper
Useful for retro games when ScreenScraper has a direct normalized game video.
Resolution
Chooses the video height requested for YouTube or Steam downloads.
Max Duration
Used for YouTube searches so long videos, reviews, and playthroughs are avoided. Videos exceeding this length will be ignored.
Overwrite Existing
Allows existing videos to be replaced.
HowLongToBeat Options
Turn on Enable HLTB Scraping if you want LaunchBox custom fields for:
HLTB - Main Story
HLTB - Main + Extra
HLTB - Completionist
HLTB - Co-Op
HLTB - Vs.
Length Category
Length Category is created from the best available main play time. If Main Story is missing, the plugin tries Co-Op, then Vs.
The length categories are:
Quick (< 5h)
Standard (5-15h)
Extended (15-30h)
Long (30-60h)
Massive (60h+)
These categories can help you build playlists like quick games, long games, or massive games.
FlareSolverr is optional. Normal HowLongToBeat use does not require it, but you can enter a FlareSolverr URL as a fallback if HowLongToBeat blocks normal access in the future.
Other API Credentials
Some sources work without keys. Others need your own credentials.
IGDB and SteamGridDB are covered in the Basic setup above because they are useful for Auto mode. Add these other credentials only when you use the related features:
MobyGames API key: needed for MobyGames metadata and images.
ScreenScraper user and password: needed for ScreenScraper metadata, media, and account quota checks.
Use Check API Status after entering credentials. The status lines under each provider tell you whether the plugin sees what it needs.
The Fixer
The Fixer opens when The Game Scraper cannot confidently match or download something.
That is a good thing. It means the plugin is asking before it puts questionable data into your library.
The Fixer can help with:
Metadata with no match.
Low-confidence matches.
Missing artwork.
Ambiguous HowLongToBeat results.
Missing videos.
Other scraping problems.
Depending on the tab, you can:
Pick from possible matches.
Paste a Steam, IGDB, SteamGridDB, MobyGames, ScreenScraper, HowLongToBeat, or YouTube URL when supported.
Type a better title or search term.
Skip the row.
Retry selected rows.
Purge scraper-added data for rows in that tab.
Purge is meant for scraper-added data. It does not wipe your game title, platform, launch path, emulator, favorites, play stats, or normal LaunchBox-owned settings.
Advanced User: Custom Workbench
Use Custom Workbench when you want to choose the source for each kind of data instead of choosing one main source for the whole scan.
This is for users who want control over the final library look and are comfortable deciding where each field should come from.
Example Workbench setup:
Metadata from IGDB.
Ratings from Steam.
Box art from SteamGridDB.
Screenshots from MobyGames.
Retro logos or title screens from ScreenScraper.
Custom Workbench is for metadata and image routing. Videos and HowLongToBeat are controlled from the normal Batch Settings sections, not from Workbench source rows.
How Custom Workbench Works
Open The Game Scraper.
Choose Custom Workbench.
Pick a Default Source if you want to quickly set many rows.
Review the Metadata rows.
Review the Images rows.
Set any row you do not want to Skip.
Set overwrite options carefully.
Click START BATCH.
Each row uses the source you choose for that row. If you route a field to one source and that source does not have the data, the plugin will not quietly swap to a different source for that field.
That makes the Workbench predictable. It also means you should choose sources intentionally.
Workbench Metadata Rows
Depending on your configured credentials, the Workbench can route metadata such as:
Title
Description
Developer
Publisher
Release Date
Genre
Play Modes
Series
Community Rating
Discovery Tags
Player Perspective
Workbench Image Rows
Depending on your configured credentials, the Workbench can route images such as:
Box / Cover
Box - Back
Box - Spine
Box - 3D
Cart - Front
Cart - Back
Cart - 3D
Disc
Banner
Hero / Fanart Background
Logo
Icon
Screenshots
Screenshot - Title Screen
Advertisement Flyer
Bezel
Arcade Marquee
Arcade Cabinet
Arcade Control Panel
Arcade Circuit Board
Manual
The Workbench shows a short source summary for each row so you can see what kind of media that source usually provides.
Screenshot Limit
The Workbench can download multiple screenshots. Use Screenshot Limit when you want to cap how many screenshots are downloaded per game.
Leave it blank if you want the Workbench to download everything the selected source provides for that row.
When To Use Each Advanced Source
Steam
Best for PC store metadata, Steam tags, official artwork, banners, logos, and screenshots.
IGDB
Best for broad game metadata across many platforms, especially non-PC games.
SteamGridDB
Best for polished artwork, alternate covers, grids, heroes, logos, and artwork rescue passes.
MobyGames
Best for platform-aware metadata, release context, covers, screenshots, and physical media scans.
ScreenScraper
Best for retro and arcade media, regional artwork, cartridges, discs, wheels/logos, title screens, flyers, manuals, and arcade/retro image categories.
Advanced Advice
Use Auto for broad cleanup. Use Custom Workbench for targeted passes.
For example, you might run Auto first to fill the basics, then run Custom Workbench later only for box backs, cartridge art, manuals, or alternate logos.
Be careful with overwrite options. The Workbench is powerful, and overwrite settings apply to the rows you route.
Troubleshooting
A Game Went To The Fixer
The plugin was not confident enough to choose automatically. Pick the right match, paste a direct URL, enter a better title, or skip it.
YouTube Videos Do Not Download
Make sure deno, yt-dlp, and ffmpeg are up to date. Also include a cookies file in your plugin root. If it still fails, check the log.
YouTube is not a games database. We rely entirely on search to match. The plugin is designed to search for the game and platform, when it is not a PC game, then the suffix in the settings. For instance, Metal Gear Solid Sony PlayStation Trailer. This will likely not get you the correct result since trailers were not really a thing back then. Changing the suffix to Gameplay will likely get you something, but you will need to play around with it. YouTube is meant as a source of last resort. The plugin will actively try to verify and reject videos that do not match to prevent false positives. When in doubt, use Manual mode and supply the URL directly.
A Source Does Not Appear
Some sources only appear after you enter the required credentials. Add the credentials, check API status, close and reopen the plugin if needed, and try again.
Existing Images Or Data Did Not Change
Check the overwrite options. With overwrite off, the plugin usually tries to preserve what you already have.
HowLongToBeat Stops Working
HLTB access can change over time. The plugin uses normal direct access first. If that fails and you have a FlareSolverr URL configured, it can try that as a fallback.
Large Fixer Queues Feel Slow
Large batches can create large review queues. Work through one tab at a time, use paging, and avoid huge purge operations unless you are ready to wait.
Something Looks Strange
Open the full log from the summary window or check TheGameScraper.log in the plugin folder. The log shows what source was used, what was skipped, and why something went to the Fixer.
Good First Runs
PC Steam Cleanup
Mode: Auto
IGDB credentials: Added
SteamGridDB API key: Added
Metadata and images: On
Videos: On
Video source: Steam
Overwrite metadata: Off
Overwrite images: Off
Overwrite video: Off
PC Artwork Upgrade
Mode: Auto or Steam
Metadata and images: On
Override Steam Images with SGDB: On
SteamGridDB API key: Added
Overwrite images: On only if you want to replace existing artwork
Retro Metadata And Media
Mode: Auto, IGDB, MobyGames, or ScreenScraper
Add credentials for the source you want
Metadata and images: On
Videos: Optional
Use the Fixer for uncertain matches
Advanced Physical Media Pass
Mode: Custom Workbench
Route box backs, spines, carts, discs, flyers, manuals, or title screens to MobyGames or ScreenScraper
Set unrelated rows to Skip
Use overwrite carefully
Quick Source Cheat Sheet
Source Best For Needs Credentials Steam PC metadata, Steam artwork, Steam trailers No IGDB Console, handheld, arcade, retro, non-Steam metadata Yes SteamGridDB High-quality artwork upgrades Yes MobyGames Platform-aware metadata, covers, screenshots Yes ScreenScraper Retro and arcade media, regional art, direct retro videos Yes YouTube Trailer fallback and manual video help No API key, but video tools are needed HowLongToBeat Play-time custom fields No Manual Send games to the Fixer so you can choose or paste the right match yourself Depends on the source you choose Final Recommendation
If you are new, start with Auto and a small batch.
If you want to tune the normal experience, stay on Batch Settings and adjust sources, videos, overwrite options, and credentials.
If you want full control, use Custom Workbench for focused passes after your library already has the basics.
777 downloads
-
RomM server plugin
By ByakkoKa
Hello everyone, I'm proud to present a new RomM server plugin for LaunchBox. Currently, it offers a complete solution, both synchronizing your server and updating it with LaunchBox data, as well as functions to install and uninstall games. Please take advantage of it and provide your feedback.
https://github.com/phscezario/launchbox-romm-plugin
## 🎉 v1.0.0 — First Stable Release! After a lot of work, the plugin now reliably syncs metadata, cover art, and keeps your LaunchBox library in sync with your RomM server. 🚀 --- ## 🎮 LaunchBox RomM Plugin — Release Notes ### 🆕 What's New #### 📋 Metadata Sync (RomM → LaunchBox) Sync now auto-fills LaunchBox game metadata from the RomM server: - Release date, max players, play mode - Video (YouTube), Wikipedia, ESRB - Community rating and votes - Synopsis / notes - Genres, companies, game modes - LaunchBox ID (LaunchBoxDbId) Priority: **LaunchBoxMetadata > ScreenScraper > IGDB > RomM Metadata**. #### 🖼️ Automatic Cover Art Download - Box - Front cover art is downloaded automatically from the RomM server - Only downloads if the game has no existing cover in LaunchBox - `ForceReload` runs after sync so images appear immediately #### 🧹 Orphan Image Cleanup - When a game is removed from the RomM server, the sync removes the game from LaunchBox and deletes its associated images - Cleanup happens **after** the full sync completes, preventing partial deletions on failure #### ⚙️ KeepLocalData Flag New setting that controls overwrite behavior: - `KeepLocalData = true` — only fills empty fields, preserves existing data - `KeepLocalData = false` — overwrites all fields #### 🔄 Cover Art Upload (Update RomM Metadata) `Update RomM Metadata` now also sends the Box - Front cover from LaunchBox back to the RomM server. ### 🐛 Fixes - Fixed cover download failing due to unencoded spaces in RomM's timestamp parameter (`?ts=...`) - Fixed image path by using LaunchBox's `GetNextAvailableImageFilePath` instead of hardcoded paths ### ⚡ Improvements - `dataManager.ForceReload()` runs automatically after sync — no more restarting LaunchBox to see images - Detailed logging of downloaded image paths for easier debugging --- ### How to Update 1. Replace the `RomM LaunchBox Integration` folder in your LaunchBox Plugins directory 2. Launch LaunchBox and configure `KeepLocalData` in plugin settings if desired 3. Run `RomM: Sync roms list from server`
37 downloads
-
GuideVault LaunchBox Connector
This package installs the GuideVault LaunchBox Connector plugin using a LaunchBox-root folder structure. Extract or drag the contents into the folder that contains LaunchBox.exe, and the included files will land in the correct LaunchBox plugin, third-party, and media asset folders.
The connector links LaunchBox games with GuideVault manuals, strategy guides, and magazines. It supports library sync, scoped manual/strategy guide/magazine sync, match review, badge support, and opening matched GuideVault content directly from LaunchBox.
Requires a running GuideVault server. GuideVault server v0.9.260 or newer is recommended.
More info located here:
https://guidevault.net
https://buymeacoffee.com/andrewbuilds
My other website:
https://shreddergaming.com
10 downloads
- guidevault
- launchbox
- (and 13 more)
(0 reviews)0 comments
Updated
-
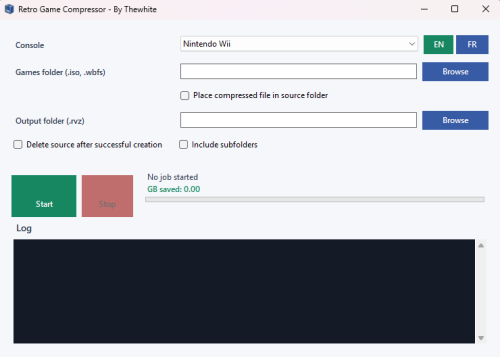
Retro Game Compressor (AIO compressing tool)
By thewhite
Hello everyone,
Here's a Windows tool called Retro Game Compressor. This is a standalone program; do not place it in the plugins folder.
The goal of this application is to simplify the compression of retro games with an all-in-one interface. Instead of manually using multiple command-line tools, the program lets you choose a console, select the source folder, choose the output folder, and start the compression from a clean graphical interface.
Designed to be portable and standalone on Windows 11, the application doesn't require manual installation of the .NET runtime. The necessary compression tools are grouped in a "tools" folder.
Currently supported systems and formats:
- PlayStation: converting .cue / .ccd / .toc to .chd
- PlayStation 2: converting .iso / .cue / .ccd / .toc to .chd
- PlayStation Portable: converting .iso / .cso to .chd and .iso / .chd to .cso
- Sega CD / Mega-CD: conversion from .cue / .ccd / .toc to .chd
- Sega Dreamcast: converting .gdi / .cue to .chd
- Sega Saturn: converting .cue / .ccd / .toc to .chd
- TurboGrafx-CD / PC Engine CD: converting .cue / .ccd / .toc to .chd
- Panasonic 3DO: converting .cue / .iso to .chd
- Nintendo GameCube: Converts .iso / .gcm / .gcz to .chd / .rvz
- Nintendo Wii: Converts .iso / .wbfs to .rvz
- Xbox 360: Converts .iso to .zar
Additional Features:
- English and French interface
- Automatic detection of included tools
- Option to replace the compressed file in the source folder
- Option to delete the source file after compression
- Subfolder management
- Progress bar indicating the number of files remaining
- Displays the space saved in GB
- Temporary conversion workflow if needed, for example, from WBFS to ISO then RVZ, or PSP CSO/CHD conversions via temporary ISO files
**If compression methods are missing for other consoles, I will add them. Please note that consoles using the zip format will not be included.
46 downloads
(2 reviews)0 comments
Updated
-
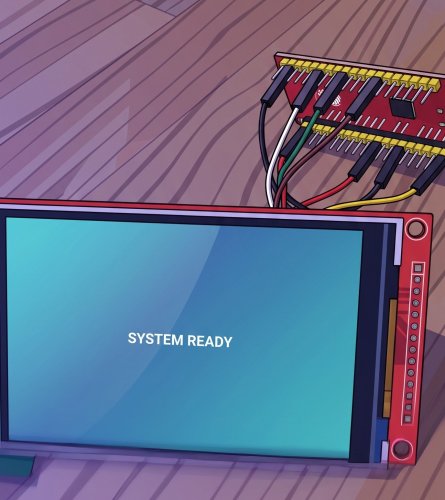
Pixel Arcade Display | ILI9488 + ESP32 = Cheap Clear Logo Marquee
By izzishor
# Pixel Arcade Display
Who said it was impossible?!
Shows the Clear Logo and Platform you select in LaunchBox on a small
ILI9488 screen driven by an ESP32.
Updates instantly.
The plugin hands the logo's file path to a tiny local proxy, which reads it off disk and streams it to the ESP32.
LaunchBox plugin ──> arcade-imgproxy.exe ──> ESP32 + ILI9488 screen
(sends logo path) (reads file, RGB565) (displays it)
1. Wiring (ILI9488 → ESP32 NodeMCU-32S)
Display | ESP32 - W I R I N G
-----------------------------
VCC | 3.3V
GND | GND
CS | GPIO21
RESET | GPIO4
DC | GPIO27
MOSI | GPIO23
CLK | GPIO18
LED/BL | GPIO32 and
---
2. PC side (LaunchBox)
Everything lives in one folder: `LaunchBox\Plugins\PixelArcade\`
Put PixelArcade folder from LaunchBox Plugin in the Plugins folder of LaunchBox:
- `PixelArcade.dll` (the plugin)
- `arcade-imgproxy.exe` (the image proxy)
- `config.ini` (shared settings)
- `default.png` (shown when nothing is selected — drop in any 480x320 image)
- `install-service.bat` / `uninstall-service.bat` (optional auto-start)
**Edit `config.ini`** if needed. Defaults work when the proxy runs on the
same PC as LaunchBox.
Run `arcade-imgproxy.exe` — or right-click `install-service.bat` →
**Run as administrator** to auto-start it hidden at every boot.
Restart LaunchBox so it loads the plugin.
---
3. ESP32 side (ESPHome)
Put `pixel-arcade.yaml` and `arcade_image.h` in the same ESPHome folder.
Edit the **`substitutions`** block at the top of `pixel-arcade.yaml`:
- `wifi_ssid`, `wifi_password` — your WiFi
- `device_ip`, `gateway_ip` — the static IP you want + your router IP
- `proxy_host` — the **IP:port of the PC** running the proxy
(e.g. `192.168.1.60:8090`)
---
Done
Select a game in LaunchBox → its logo appears. Deselect / exit → default image.
Sources included (`arcade-imgproxy.go`, `PixelArcadePlugin.cs`). Do whatever
you want with it.
9 downloads
(0 reviews)0 comments
Updated
-
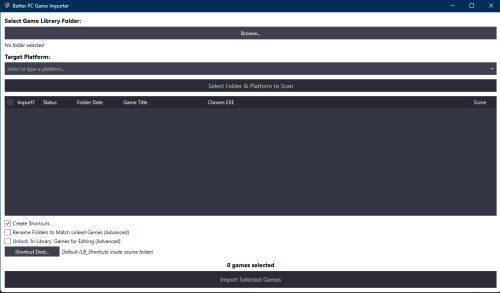
Better PC Game Importer
Better PC Game Importer
Better PC Game Importer is a LaunchBox plugin that makes it easier to add non-store PC games to your LaunchBox library.
Instead of importing games one at a time, the plugin scans your game folders, compares them against your existing LaunchBox library, shows you what it found, and lets you import new games or fix broken links in bulk.
Why Does This Exist?
LaunchBox works great for many platforms, but importing standalone PC games can still be tedious, especially when the games were not installed through Steam, GOG, Epic, or another storefront.
PC game folders are often messy. They may contain multiple executables, launchers, uninstallers, setup files, redistributables, or shortcuts. If games are moved, renamed, or reinstalled, LaunchBox links can also break.
Better PC Game Importer is designed to help with that. It scans your folders, finds the most likely game executable, checks whether the game is already in your LaunchBox library, and tells you what action is needed.
Key Features
Bulk importing — Scan and import many PC games at once.
Library matching — Detects when a scanned folder appears to match an existing LaunchBox game.
Executable detection — Helps pick the actual game executable instead of installers, uninstallers, or support tools.
Broken-link repair — Finds games whose LaunchBox path no longer works and helps relink them.
Duplicate-install warnings — Flags cases where the same game may exist in more than one location.
Storefront protection — Recognizes games managed by Steam, GOG Galaxy, Epic Games Store, EA App, Ubisoft Connect, or Xbox/Microsoft Store and leaves them alone.
Optional shortcut creation — Creates organized .lnk shortcuts instead of pointing LaunchBox directly at scattered executables.
Optional folder renaming — Renames game folders to match the cleaned-up LaunchBox title.
Requirements
LaunchBox version 13.26 or later.
Windows.
WindowsShortcutFactory, which is bundled with the plugin.
Installation
Extract the release archive directly into your root LaunchBox folder.
The plugin should be placed here:
LaunchBox\Plugins\BetterPCGameImporter\ After installation, open LaunchBox and go to:
Tools > Better PC Game Importer Basic Usage
Open LaunchBox.
Go to Tools > Better PC Game Importer.
Add one or more folders that contain your installed PC games.
Choose the LaunchBox platform you want to import into.
Click Scan Folders.
Review the results grid.
Fix any incorrect titles using the dropdown in that row.
Choose your import options.
Click Import Selected Games.
Import Options
Create Shortcuts
Creates .lnk shortcuts for imported games instead of linking LaunchBox directly to each game executable.
This is useful if you want all LaunchBox PC game links organized in one central shortcut folder.
Rename Folders to Match Linked Games
Renames the actual game folder on disk to match the selected LaunchBox title.
This is optional and intended for users who want cleaner folder names. (While optional this plugin uses folder name for logic and I do this is something the user should do and its benefits should be explained)
Unlock “In Library” Games for Editing
By default, games that are already correctly linked are locked so they cannot be changed by accident.
Enable this option if you intentionally want to edit or relink games that are already in your library.
Status Meanings
Status What It Means In Library (Locked) The game is already in LaunchBox and appears to be linked correctly. No action is needed. New Game The plugin did not find a real existing LaunchBox entry for this folder. It can be imported as a new game. Update Link The game can be linked or relinked to a LaunchBox entry. Update Link (via Path) The folder matched an existing LaunchBox game by its saved path. Update Link (Path Mismatch) LaunchBox already has this game, but the saved path appears to be broken or points somewhere else. Duplicate Install Found The game may already exist in another working location. Review it manually before changing anything. Storefront (Ignored) The game appears to be managed by a storefront launcher, so the plugin leaves it alone. Reviewing the Results Grid
After scanning, each row represents one detected game folder.
The grid lets you review:
Whether the game will be imported.
The detected status.
The folder date.
The matched or editable game title.
The current LaunchBox link, if one exists.
The selected executable.
The match confidence score.
Before importing, review the rows carefully and adjust any titles that do not look right.
Storefront Games
Games managed through storefront launchers are intentionally ignored.
This includes games from:
Steam
GOG Galaxy
Epic Games Store
EA App
Ubisoft Connect
Xbox/Microsoft Store
These games are usually better left managed by their original launcher, so Better PC Game Importer locks them to avoid accidental changes.
Duplicate Installs
If the plugin finds that a game may already exist in another working location, it marks the row as Duplicate Install Found.
This prevents a good LaunchBox link from being replaced by mistake.
When this happens, review the game manually and decide which install location you want to keep.
Logging
The plugin writes scan, match, and import activity to:
ImportLog.txt The log is saved next to the plugin and can help explain why a game was classified a certain way.
Integration: The Game Scraper
Better PC Game Importer also includes integration support for The Game Scraper plugin.
When a game folder is renamed through that workflow, Better PC Game Importer can help keep LaunchBox’s stored game path in sync.
46 downloads
(0 reviews)0 comments
Updated
-
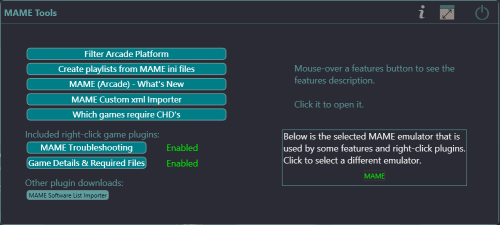
MAME Tools
By JoeViking245
MAME Tools - a JoeViking plugin conglomeration
7 plugins combined into one. This is a one-stop-shop collection of several of my MAME related plugins, plus a couple that have never officially been released.
Admittedly, these are mostly one-off plugins. But they do fully serve their intended purpose when needed.
Plugins included from the main menu:
Filter Arcade Platform - A post 'MAME Arcade Full Set Import Wizard' clean up tool Create Playlists from MAME ini Files MAME (Arcade) - What's New MAME Custom XML Importer (first official release) Which MAME Machines Require CHDs (new) Included Right-click game plugins:
MAME Troubleshooting Dependency Files and Details Viewer Bulk Add ADB Additional App (new v1.0.2)
Requirements:
LaunchBox version 13.19 or newer mame.exe installed as an emulator If you have previously installed any one of these individual plugins, remove them from the Plugins folder before proceeding.
Installing:
Exit LaunchBox
Download and extract the contents of the zip file to /LaunchBox/Plugins/
e.g. D:\LaunchBox\Plugins\MAMEtools\MAMEtools.dll
Using:
On first launch, the plugin will attempt to get your installed MAME emulator. If you have multiple copies/versions installed, you can change which one to use by clicking it and selecting a different one.
Go to the Tools menu and select MAME Tools Mouse-over the plugin buttons for a brief description Click a plugin button to start that plugin When in a plugin, mouse-over the ? at top for more details For the right-click plugins, click the button to enable/disable that plugin When enabled, the plugin will then be available in the menu when right-clicking a game
Plugin Descriptions:
Filter Arcade Platform - A post 'MAME Arcade Full Set Import Wizard' clean up tool
(initial release: April 24, 2024)
Used the MAME Arcade Full Set Import Wizard?
Discovered that maybe you shouldn't have unchecked some of the Game Types and Filters?
Rather than deleting your Arcade platform and re-running the wizard, use this to bulk remove one or more of those types or filters from your collection.
Create Playlists from MAME ini Files
(initial release: February 17, 2021)
Generate Playlists in LaunchBox from MAME's .ini files. The same ones MAME uses in its UI to apply filters used to categorize viewing of your games.
MAME (Arcade) - What's New
(initial release: October 30, 2025)
See what new Arcade machines (games) were added to a specific MAME release.
Import some or all of those games from your updated MAME ROM set, into your LaunchBox collection.
MAME Custom XML Importer
(initial implementation: November 29, 2020)
Import games from a custom xml file into any Platform (new or existing) and set the Emulator for the imported games to whatever you want, regardless of the Platforms default Emulator (if importing to an existing one).
Which MAME Machines Require CHD's
(initial release: just now)
The intent is to give you an overview of all the games that require a CHD and their emulation status.
Right-click game plugins:
MAME Troubleshooting
(initial release: June 25, 2025)
Launch an Arcade game using stand-alone MAME, all you see is a flicker of a black screen and it goes right back to LaunchBox?
Use this plugin to help figure out why it isn't launching from LaunchBox.
Dependency Files and Details Viewer
(initial release: June 17, 2025)
The intent of this plugin is to show what files (other than the game's ROM) are required for the game to run and to give some details about the original Arcade machine.
Bulk Add ADB Additional App
(1st release 6/17/2026)
Adds an Additional App to the selected game(s) that is a direct link to the machine on the Arcade Database website.
The link will appear in the Game Details panel near the icon link(s) to the Games Database, Wikipedia, YouTube etc.
Enable it in MAME Tools settings.
Select one or more games that use MAME ROMs. Right-click and select Bulk Add ADB Additional App.
Special Thanks:
The MAME Development Team for... well... MAME! https://www.mamedev.org/
motoschifo and his Arcade Database (ADB) website and API https://adb.arcadeitalia.net
As always, all thoughts, views, suggestions, comments and accolades are welcome.
108 downloads
- mame
- troubleshooting
- (and 6 more)
-
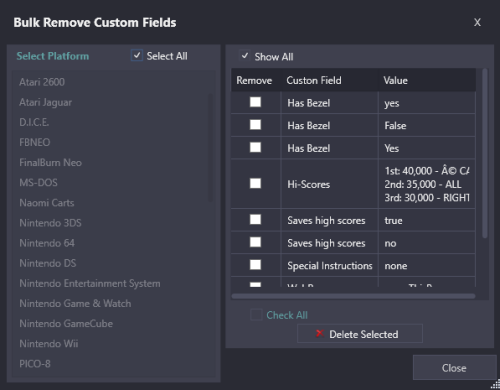
Bulk Remove Custom Fields
By JoeViking245
Bulk clear Custom Fields Values or remove the Custom Field entirely from LaunchBox.
Inspired in part by this BitBucket ticket (and the rest out of boredom)
https://bitbucket.org/jasondavidcarr/launchbox/issues/8475/mass-delete-remove-custom-fields
Notes about Custom Fields:
Custom Fileds are comprised of a Name and a Value. When you edit a game and look in the Custom Fields section, every Custom Field [Name] in your entire LaunchBox collection will be available. Whether a Value is assigned to it for that game, or not.
Only Custom Fields that have a Value assigned to it somewhere in your LaunchBox collection will actually exist.
aka, if you're seeing a Custom Field Name, something somewhere in your collection has a Value assigned to it.
Installing:
Download and unblock the zip file. Copy the contents of the zip into /LaunchBox/Plugins/ i.e. D:\LauncBox\Plugins\BulkRemoveCustomFields\BulkRemoveCustomFields.dll
How to use:
Start LaunchBox, click Tools and select Bulk Remove Custom Fields
Select a Platform to get a list of all Custom Fields [that have an associated Value] for that platform.
Or check Select All to get a list of all Custom Fields from all Platforms.
Example #1:
To remove all Custom Fields whose Name is "Has Bezel" and their Value is "yes" (lowercase "y")
Check Show All [to show ALL distinct Custom Field Names and Values]
Check the box next to "Has Bezel" "yes"
Click Delete Selected
Example #2:
To remove all Custom Fields whose Name is "Has Bezel", regardless of their Value
Un-Check Show All [to show ONLY the Custom Field Name]
Check the box next to "Has Bezel"
Click Delete Selected
To remove a Custom Field entirely from LaunchBox, check Select All and follow Example #2.
Options:
Select All
Show all Custom Fields for every Platform
Show All
Show Custom Fields Names and Values
CAUTION: If you click Delete Selected and then click Yes, those selected are now GONE!
Reprise: If you had LaunchBox's Automatic Backup feature enabled, you can use the Restore Data Backup to bring them back.
Q: Why is it listing the same Custom Field more than once?
A: It's not. Custom Fields are CasE sENsiTiVe. A Custom Field with the Name Saves High Scores is different from Saves high scores. Same goes for Custom Field Values. True is not the same as true.
107 downloads
-
FKeys: Custom Field Hotkeys
I found it annoying that there were no hotkeys for doing things like flagging games as favorite or broken and also that there are limited badge attributes available even if hotkeys were available. Using the mouse or the edit metadata function when parsing through large collections for pruning is tedious, so I wrote this plugin to allow for breezier flagging while using the keyboard for navigation.
This adds three custom badges (F1, F2, F3) created using "Custom Badges" by jayjay. Enable them under View > Badges > Plugin Badges.
When a game is selected in the UI, pressing F1, F2, or F3 will assign the custom field and badge. Pressing it again will set the same field to false. To remove the field, use CTRL+F1/F2/F3.
Badge icons won't always show up immediately. The hotkeys can be used on multiple games at once.
Source files for Visual Studio are included, no permission necessary to modify or use in any way you like.
2 downloads
(0 reviews)0 comments
Updated
-

Mame No-Nag 0.288 Final Version
By yashijoe
Thanks to Madk9 documentation!!!
This build eliminates the warning messages that appear when a ROM has compatibility issues or fails to load entirely.
By using this modified version, you acknowledge that MAME's official support team will not assist with any game-related problems — do not contact mamedev for troubleshooting, as this is not a standard release.
Package contents: mame.exe — standard MAME build with warning screens disabled.
This build also unlocks Akai Katana and Dodonpachi Saidaioujou, two titles otherwise unavailable in the official release.
Recommended installation method: download and install the official MAME package first, then replace only the executable with this one. This ensures all support files reflect the latest changes made by the development team.
Once installed, copy the following folders from your original MAME directory to the new installation: artwork, ctrlr, cheat, hlsl, ini — along with any .ini files located in the root folder.
If you are running a custom MAME setup, add the following line to your mame.ini:
skip_gameinfo 1
If you used Launchbox's automatic MAME configuration, simply swap the executable — no further steps required.
Regarding antivirus false positives: every file uploaded here is scanned via VirusTotal before release. Any legitimate issue slipping through would be caught quickly and the file removed or restricted immediately.
0.288 - VirusTotal - File - fd21651efc954890ab3ccd10226b04ff5834b6b0fc037eee6f56a88079d130bc
313 downloads
-
BigBox Trackball & Spinner Wheel Support
By Fursphere
Trackball & Spinner Support for BigBox Navigation. Supports X & Y axis (configurable) to simulate up/down/left/right menu movement. Option menu support to configure speeds and behavior.
Its not perfect, but it does work pretty well. It disables itself when a game is launched.
If there is interest in the source, I can put it up on github or something. Just ask.
6 downloads
-
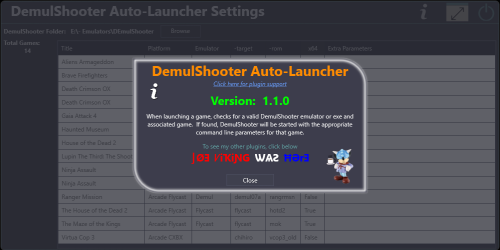
DemulShooter Auto-Launcher
By JoeViking245
Automatically start DemulShooter when launching a game.
When launching a game, this plugin will check for a valid DemulShooter emulator or exe and associated game. If found, DemulShooter will be started with the appropriate command line parameters for that game.
This reduces the need for customized Additional Apps, batch files or AutoHotkey scripts to run DemulShooter. (See Notes)
NEW: v1.1.0 Self launching exe's (e.g. 'Windows' games) are now supported.
If you don't have a lightgun or have never setup DemulShooter, there's really nothing more to see here.
Requirements:
LaunchBox v13.19 or newer DemulShooter installed and setup** The plugin file (RunDemulShooter.dll) "settings.txt" in the plugin's folder and edited/saved (see below) **See DemulShooter documentation for setting it up and its supported emulators & ROMs.
https://github.com/argonlefou/DemulShooter/wiki
Installing and Using:
Extract the contents of the zip file to the /Plugins/ folder e.g. D:\LaunchBox\Plugins\RunDemulShooter\RunDemulShooter.dll In that plugins folder, create a new "settings.txt" file. In the file, add "demulshooter = full/path/to/DemulShooterFolder" (without quotes) e.g. demulshooter = E:\My LightGun Files\DemulShooter The path can be a relative path to LaunchBox. Start LaunchBox (optional: Start QMamehook or MAME Hooker or your alternative Hook flavor of choice) Launch a valid DemulShooter emulator/game.
Adding Custom Command-line Parameters per-game: (new v1.1.0)
To add custom parameters per-game, go to the Tools Menu and select "DemulShooter Auto-Launcher Settings"
This will load all supported games found in your collection.
Here you can set the folder for your DemulShooter.
The folder value will be saved to an xml file [RDSsettings.xml] (along with any game-specific custom command-line parameters).
The folder path will be saved as a relative path (to LaunchBox) to keep things portable.
Double-click on a game to view and modify the command-line parameters passed to DemulShooter for that game.
Make your changes and click Save to save them.
Default Parameters:
If the game's emulator is TeknoParrotUI, -noinput will be added to the parameters System 357 games will also have -pname=rpcs3.exe added to the parameters
How it works - What it does
When a game is launched, the plugin will...
(A) Check if the game is an exe (no emulator) The games Title will be checked against "the list" (B) Check the game's emulator against a list of supported emulators Check the game's ROM file against a list of supported games for that emulator Check if DemulShooter.exe (or DemulShooterX64.exe) is inadvertently already running and then kill the process Check for custom command-line parameters Start DemulShooter.exe (or DemulShooterX64.exe) with the corresponding parameters Examples:
Game: Silent Hill: The Arcade
ROM file: SilentHill.xml
Emulator: TeknoParrot
Launches: DemulShooter.exe -target=ttx -rom=sha -noinput
Game: Ninja Assault (US)
ROM file: ninjasltu.zip
Emulator: Flycast
Launches: DemulShooterX64.exe -target=flycast -rom=ninjasltu
Game: Manic Panic Ghosts
ROM file: manicpnc.zip
Emulator: Demul
Launches: DemulShooter.exe -target=demul07a -rom=manicpnc
Game: Razing Storm
ROM file: RazingStorm.xml
Emulator: TeknoParrot
Launches: DemulShooterX64.exe -target=rpcs3 -rom=razstorm -pname=rpcs3.exe -noinput
Support emulators:
Demul (Demul 07a or newer) Model2 Emulator emulator.exe emulator_multicpu.exe Flycast TeknoParrot Linux Loader (new v1.2.0)
Notes:
TeknoParrot games must use TP as the emulator (TeknoParrotUI.exe) and the ROM must point to the game's xml file. The xml file must be named for the games ROM (as TP names them). e.g. for Luigi's Mansion Arcade, "LuigisMansion.xml" Games that are standalone executables are not recognized by this plugin. (v1.1.0) Checks for all games DemulShooter supports. When launching a game, a check is done to see if DemulShooter is already running (e.g. if it didn't shut itself down from a previous launch). If it is, it will kill the existing process. This avoids the "Dude! You can't start DemulShoorter because it's already running".
Big special thanks to @magicray1028!! Without Ray's support, guidance and testing, I most likely would have never created this.
As always, all thoughts, views, suggestions, comments are welcome.
67 downloads
-

Missing Games Checker Plugin
By AgentJohnnyP
Missing Games Checker (MGC) is a LaunchBox plugin designed to help users identify missing games in their collection based on platform metadata. It provides an easy-to-use interface that lets you view owned and missing games, and export the results.
VERSION 2.0.1 IS HERE! The SQLite & Quality-of-Life Update!
MGC has been completely rebuilt from the ground up to utilize LaunchBox's modern SQLite database. Gone are the heavy XML parsers and loading bars. V2.0 brings instant load times, a highly optimized 1.3MB footprint, and powerful new collector tools!
V2.0.1 is a rapid follow-up release with a few additional features and fixes. (See the v2.0.1 changelog for all the details)
Instructions for Using the Missing Games Checker (MGC) v2.0:
Requirements:
LaunchBox v13.19 or higher. (v13.18 and lower should use MGC v1.2) Games in LaunchBox. The LBMissingGamesCheckerPlugin.dll file. Installation and Usage:
1. Install the Plugin:
Download the latest release of the MGC plugin from this page. Make sure LaunchBox is closed. Unblock the downloaded zip file (Right-click on the zip -> Select Properties -> Click or Check "Unblock" if available) For help on Unblocking files, check out this article. Open the zip file and place the `LBMissingGamesCheckerPlugin.dll` file into your LaunchBox\Plugins folder (example R:\LaunchBox\Plugins). 2. Access the Plugin:
Launch LaunchBox, then access the Tools menu and find Missing Games Checker(v2.0). 3. Using the Plugin:
Select a platform from the dropdown menu and click Check It! MGC will display a list of games owned and a list of games missing from your collection based on the LaunchBox metadata. You can export the list of missing games to a CSV file for easy reference. NEW FEATURES!!
4. Filtering & Options:
Export Missing Games to LaunchBox: Use the new Export feature for the Missing Games list to safely save a new "[Platform] Wishlists" category in your sidebar. From here you can download metadata and media for games you don't even have yet! Delete the platform direct from LaunchBox or override it with a new Wishlist based on filters! Regional Filtering: Use the Region dropdown to strict-filter missing games (e.g., North America only). Toggle the "Include games with unknown regions" checkbox to catch database entries lacking region data. Quick Column Filtering: Quickly sort through large columns of data with the Select All/None option in the column filtering options panel. Platform Completion Status: See how many games you have/don't have at a glance with colour coded feedback that calculates the percentage of your missing titles. Real-time Search: Use the search boxes above the grids to instantly filter the view. New Right-Click Menu: Right-click on any missing game and find options to copy the games title/platform data to the clipboard or do an instant search on eBay for that missing game to add to your collection!!
5. Additional Features from v1.2:
Filter games by Released status if you only want to check released titles. Sort columns by clicking on the column header. Filter select columns by clicking on the filter icon in the column header. If the filtered column has multiple values (ie. North America, Japan) the row will still show if any of the filters are not applied. All values need to be unchecked in the filter to hide the row. *Note: Filtering one column works well. Multiple column filtering may produce incorrect results. Export to CSV if you need to apply better filtering *Will enhance in a future release Window resizing (Right edge only) Click on the highlighted cell data for links to video URLs, Wikipedia links, and the game on the LaunchBox DB (where available).
Extra Notes:
The Owned Games list is pulled from YOUR collection. If fields are missing information, make sure your collections metadata is up to date. Check out this LaunchBox Video on how to do that. The Missing Games list is pulled from the local LaunchBox.Metadata.db file. If you find information is missing, visit the LaunchBoxDB website to see how you can contribute! I've worked HARD to make the plugin as robust and efficient as I can. That being said, some computers may experience delays in processing the metadata at the start, processing any large collections' of games, and filtering/sorting large lists. Please be patient! Once you begin a process, it will complete! But the UI may become unresponsive during processing. As mentioned, filtering works well on one column at a time. Filtering one column, then another may have incorrect data shown. You can click the Reset button in the filter panel to reset the list, or just "Check It!" again to refresh the list again. NO data is modified in this plugin. Data is compared from the local Database file (which updates automatically by LaunchBox) and your collection data reported from LaunchBox. Troubleshooting/Updates:
New to v1.2 - DebugLog
Click on the "Bug" to open the debug log. If you have issues, provide the relevant debug log here for review.
If you've confirmed the above and are still having issues, please provide the following:
Click the "Export to CSV" button for the Missing Games table and save the .CSV file. Attach the .CSV file to a post here. (Optional) Attach a screenshot of the app with the error message. I'll review the information and post a fix/suggestion as soon as possible.
Also, if you would like to have MGC perform additional tricks, let me know!! I do appreciate the feedback and will enhance the plugin over time based on your findings/suggestions.
Special Thanks
A huge thanks to the LaunchBox team and their API documentation for making this project possible, as well as Jason's helpful video tutorial.
Check out the source code on GitHub if you're interested.
Cheers! 🍻
641 downloads
-
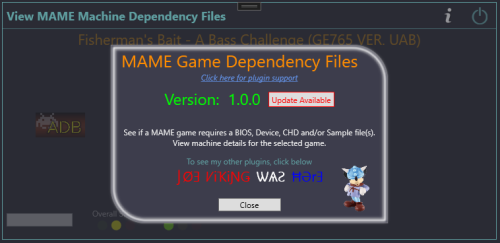
MAME Machine Dependency Files and Data Viewer
By JoeViking245
May 2026
This plugin has been moved into the MAME Tools plugin along with several other on my MAME related plugins.
Install and use MAME Tools instead of this plugin for continued support.
Thanks for looking.
The original intent of this plugin was to have a way to check if a specific MAME machine required 'other' files to be able to run. The only way I knew how to find this was to navigate to the Arcade Database (ADB), look up the game and then check the MAME Required Files section. (I've yet to see another source with this information spelled out.)
After doing some investigation into the available MAME parameters and outputs they provide, I was able to deduce this info and threw it into this plugin. I also wanted to give users quick access to the machine (game) on ADB. Pursuing this I found that they had a couple API calls available and so added the Machine Details section. Unfortunately, none of the calls gave the 'required files' data.
Really, this isn't very practical unless you have an incomplete curated set of Merged ROMs and need to see what else is needed for "the game" to run. Or... you're just curious to see details about a machine and want to know "what makes it tick".
Features:
Shows files other than the main ROM that are required to run the game (if any). BIOS, Device and CHD and [optional - not required] Sample See the games' Overall and Emulation status. (Good, Imperfect, Preliminary) If it's not "Good", see why. e.g. "sound - unemulated" "graphics - imperfect" Direct link to the machine on the Arcade Database (ADB) View details about the machine. ROM Genre
Title Players
Short Title nPlayers
Clone of Language
Manufacturer Input Controls
Series Input Buttons
Year Screen Orientation
Status Screen Resolution Works in platforms whose ROMs are MAME, but the emulator is not. e.g. platform emulator = DEMul, SuperModel, FBNeo, Model2 etc.
Requirements:
LaunchBox 13.19 (or newer) MAME Arcade machines only. Will not work with MAME's Software Lists. The game(s) being checked must be using MAME ROMs. (e.g. filenames generally 2 to 13 characters with no spaces) The MAME emulator (or variant [e.g. mameui.exe]) installed in LaunchBox If the games' emulator is not MAME or one of its variants, the plugin will attempt to scan your installed emulators for one that is. RetroArch (with any MAME cores) does NOT count as a MAME emulator nor variant. An internet connection to view the Machine Details and navigate to Arcade Database.
Installing:
Extract the contents of the download to /LaunchBox/Plugins/ e.g. D:\LaunchBox\Plugins\MameRequiredFiles\MameRequiredFiles.dll
Using:
Right-click an Arcade game and select MAME Machine Dependency Files View which dependency files are required to run the game (if any) Click the Arcade Database logo (ADB) to navigate directly to the game on the ADB website Hover the mouse over Status to see why the LEDs are Yellow (Imperfect) or Red (Preliminary) Click Machine Details to view details about the machine (mostly duplicative of what you should already have/know)
Acknowledgements:
The MAME Development Team for... well... MAME!
https://www.mamedev.org/
Information in the Machine Details section is scraped from
Arcade Database by motoschifo
http://adb.arcadeitalia.net/
58 downloads
(0 reviews)0 comments
Updated
-
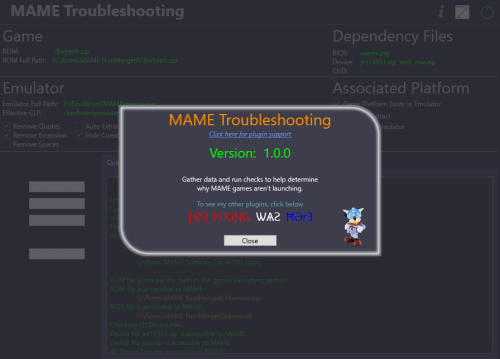
Arcade Games Won't Launch (stand-alone MAME) - Troubleshooting
By JoeViking245
May 2026
This plugin has been moved into the MAME Tools plugin along with several other on my MAME related plugins.
Install and use MAME Tools instead of this plugin for continued support.
Thanks for looking.
Question: "When I try to launch an Arcade game using stand-alone MAME, all I see is a flicker of a black screen then it goes right back to LaunchBox. Why?"
Answer: "Because something is wrong with your ROMs and/or something is wrong in your settings."
This plugin gathers data and provides checks to help you determine what that something may be.
Features:
Shows the required dependency files needed (if any) Launches the game in MAME and captures the command window output that you never see. (Potentially useful 'Why the game isn't launching' data) View the emulators Running Script. (Typically never contains "the issue". But doesn't hurt to look.) Verifies ROM and dependency (BIOS & Device) file(s) exists and are accessible to the emulator when launching**. If found, checks and verifies the zip file contents (all inner files exist and CRC32's match). If a CHD is required, this only verifies the file exists and is accessible to the emulator when launching**. ** "accessible to the emulator when launching" The plugin looks for the "rompath" setting per MAME's order of prescience. This dictates which folders MAME will scan for ROMs and dependency files.
This will NOT "fix it" for you. But should tell you everything you need to deduce "why" you can't launch a MAME game via LaunchBox. Once you know why, all you need to do is fix that part of the equation.
Requirements:
Requires LaunchBox 13.19 or newer Requires the games emulator to be mame.exe Only works with MAME Arcade machines. No software lists Only works with ROMs that are .zip (Not .7z)
Since MAME is generally an all-or-nothing type of thing, this is essentially a one-off plugin. But if needed, it should provide sufficient information in a one-stop-shop to resolve your MAME launching issues.
Installing:
Extract the contents of the downloaded zip file into your /LaunchBox/Plugins/ folder. e.g. D:\LaunchBox\Plugins\MAMEtroubleshooting\MAMEtroubleshooting.dll
Using:
Start LaunchBox Right-click an Arcade game and select MAME Troubleshooting.
Read through the Quick Analysis tab Click Test Game to capture and see MAME's command window Output If it indicates the game launches fine and you know it doesn't, click it again to see if it tells you a different story. Note: clicking a 3rd time won't change the answer it showed the 2nd time. Click Running Script to view the emulators Running Script. This usually is never the issue. But doesn't hurt to look. Click Check ROM(s) to scan the contents of the games ROM and Dependency (if any are required) zip files. This verifies the contents of the zip files and cross-checks those contents' CRC32 value against what MAME says they should be. (Works with both Merged and Non-Merged sets) For games requiring CHD files, it will only check that they are accessible to MAME and provide the files size. It won't do a hash check. Click Save Report to create a text file of all the produced data that you can share with your friends and family. Files are saved to /Plugins/MAMEtroubleshooting/Reports/[rom_name].txt (or /Reports/[rom_name] (Clone of [parent_rom]).txt) Once created, 2 icons will appear to open the txt file or open the /Reports/ folder. Once you've studied all the data and see "the issue", fix it and play games. 😎
103 downloads
- mame
- black screen
- (and 1 more)
-
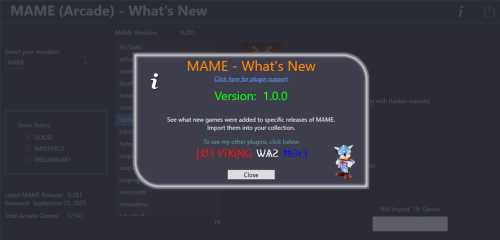
MAME (Arcade) - What's New
By JoeViking245
May 2026
This plugin has been moved into the MAME Tools plugin along with several other on my MAME related plugins.
Install and use MAME Tools instead of this plugin for continued support.
Thanks for looking.
See what new Arcade machines (games) were added for a specific MAME release.
Import some or all of those games from your updated MAME ROM set, into your LaunchBox collection.
The intent of this plugin is to be able to see what new Arcade machines were added in the latest release of MAME.
Then, along with your updated ROM set, provide a means of importing just those new machines into your LaunchBox collection without having to reimport the entire set or attempting to Scan for Added ROMs (which doesn't really work with the Arcade platform anyway).
Features:
See what new Arcade (ONLY) games were added specific MAME release Hyperlink to Arcade Games Database site for selected game Filter games by Status (Good, Imperfect, Preliminary) Import the new games (from your updated MAME ROM set) (Optional) Add an Additional Application direct link to the Arcade Database for the game
A huge and special thanks to motoschifo and his Arcade Database (ADB) website!
All data used comes direct from the Arcade Database and is what makes this plugin possible.
http://adb.arcadeitalia.net
Prerequisites:
Requires LaunchBox version 13.19 or newer. Nothing else if you only wish to see what new games were added. If you wish to import the new games An updated MAME romset [containing those ROMs]
Installing:
Copy the contents of the zip file into your /Plugins/ folder
e.g. D:\LaunchBox\Plugins\MAMEarcadeWhatsNew\MAMEarcadeWhatsNew.dll
Using:
In LaunchBox, go to Tools and select MAME (Arcade) What's New
The plugin will attempt to find your MAME emulator
If found, the MAME Revision field will populate with your MAME's version and populate the games for that revision
To see new games that were added in a different release
Change the number in the MAME Revision field Must be formatted 0.xxx e.g. 0.281 Press Enter Un-check/check the Show Status checkboxes to see only ROMs with those status(es)
Click a ROM to see brief details about that game
Click the Arcade Database logo to navigate to that game on ADB
Existing: as seen below the game details refers to, if the game exists anywhere in your collection.
Checks across ALL games in ALL platforms (by ROM filename).
Below it will show the platform it is in (if "existing")
This is useful if you're checking previous releases for that hidden gem you didn't know you were missing
Importing:
If you've updated your MAME set, you can import the new ROMs into your collection.
All new ROMs shown will be imported. You can multi-select games to add just those games selected. If you wish to import just a single game, close the plugin. Then in LaunchBox, press Ctrl+N to add a new game.
Click Add Games Select a platform (Arcade is set by default if exists) (optional) Un-Check Use Platforms Default Emulator Select an emulator to assign to the games being imported from the dropdown list Select the folder containing your ROMs (default is the folder your game files are in for the selected platform) If you keep a curated set separate from your MAME fullset, you can select the folder your fullset is in. Then after importing, have LaunchBox copy the ROMs and reset the game ROM path. **(see more below) If you've already placed your new ROMs in your curated set folder, select that. (Optional) Check the box Add link to ADB as Additional App Click Import Games
Importing Notes:
Games already existing (based on ROM filename) in the platform (step 2) will not be imported Games whose ROM file doesn't exist (step 4) will not be imported After import, a report will show the # of games added and/or skipped Anything in the games Title that is in (parenthesis) will get moved to the games Version field e.g. "Hacha Mecha Fighter (bootleg with Raiden sounds)" Game Title will be saved as "Hacha Mecha Fighter" Game Version will be set to "(bootleg with Raiden sounds)" (Optional) Add an Additional Application direct link to the Arcade Database for the game This will appear as an "Arcade Database" clickable link in the Game Details section (except for LaunchBox version 13.24). Game data set when importing:
Title Platform ROMs application path Date Added/Modified Associated Emulator Version (if available)
Getting Metadata and Images:
After importing, in LaunchBox select all the newly added games Hint: Click Arrange By and select Date Added. Select the 1st new game. Hold down Shift then click the last, new game. Go to Tools - Download - Update Metadata and Media for selected games When asked "Would you like to update games with existing metadata and/or media?" Select "Yes, but do not replace and existing fields and media" Selecting otherwise will remove the Version data (if exists)
Metadata Notes:
If importing from the latest MAME revision, when you go to Download/Update metadata, the game(s) may not be found.
** Copying the new imported games ROM files to a different ("curated") folder:
To Copy the ROMs and reassign their location (as seen by LaunchBox)...
After importing, (in LaunchBox) select the newly added games Copying: Go to Tools - File Management and select Export ROM Files from Selected Games to New Folder Have LaunchBox copy the ROMs to the Folder your curated set is in Reassigning: With those games still selected, go to Tools - File Management and select Change Roms Folder Path for Selected Games Change to the Folder your curated set is in
Plugin Updates:
If an Update for this plugin has been released on the forums,
- The Info/Support icon will flash red.
- Click the Info/Support icon, then click the Update Available button.
This will open the plugins download page in your default browser.
Again, a big thanks to the Arcade Database and all its contributors!
As always, all thoughts, views, suggestions, comments and accolades are welcome.
91 downloads
-
Create Playlists from MAME category ini files
By JoeViking245
May 2026
This plugin has been moved into the MAME Tools plugin along with several other on my MAME related plugins.
Install and use MAME Tools instead of this plugin for continued support.
Thanks for looking.
Create Playlists from MAME category ini files for your Arcade Platform.
This plugin allows you to generate Playlists in LaunchBox from .ini files. The same ones MAME uses in its UI to apply filters used to categorize viewing of your games.
To be clear:
This doesn't really expand much on the already available Arcade/MAME Playlist building feature in LaunchBox. But if there's a rare instance you come across a MAME category ini file that has a 'pre-built' "filter" list and isn't already available in LB, well here you go. Regardless, this was actually a just-for-fun, 'let's see if I can' type of thing. And figured I'd just put it out here for whatever reason.
..now on with the show..
Only games that actually exist in your Arcade Platform will be added to the created Playlist. So say you choose “Control.ini” and Select “Joystick 8-way”, there are 6827 roms listed with that ‘filter’. If your Arcade Platform only has 1007 of those 6827, only 1007 will be imported into the new Playlist.
Many of these files can be found at www.progettosnaps.net. (Specifically here) And several more at https://mameinfo.mameworld.info/ (Look for the “MAMEUI 0.2xx Category-, Version and Alltime inifiles” link). There’s probably other sources available out there too.
These files are typically (and should be) stored in the ../MAME/ini/folders/ folder.
Requirements:
This plugin file. Place it inside the ../LaunchBox/Plugins/ folder. Your MAME/Arcade Platform MUST be named “Arcade”. v3.0 A valid .ini file (or set of files) to read from. (see possible sources above) (sample from “Controls.ini”)
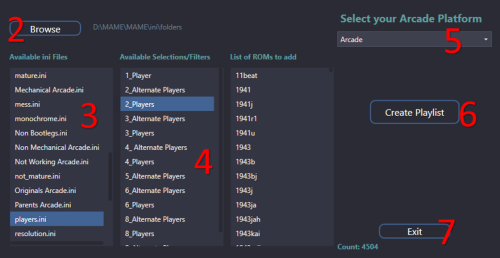
[FOLDER_SETTINGS] RootFolderIcon mame SubFolderIcon folder [ROOT_FOLDER] [Dial] 2mindril 720 720g 720gr1 ..... [Joystick 8-way] 10yard 10yard85 10yardj 1941 ..... How to use:
First download and unzip the file. Copy “Create Arcade Playlists.dll” to you LaunchBox/Plugins folder. Right click the file and select Properties. Check the box to “Unblock” (if present) then click OK. Now start LaunchBox.
In LaunchBox, select “Tools”, then “Arcade Playlists from ini” (near the very bottom). [not to confused with "Create Missing Arcade/MAME Playlists.."] When the plugin loads, it will attempt to automatically locate your ../ini/folders/ location and populate the “Available ini files” section. If it wasn’t able to find it or you want to look in a different location, click “Browse” and navigate to the folder you want to use. Click on the ini file you want to use. This will populate the “Available sections/filters”. If there are no ‘[Sections]’ below “[ROOT_FOLDER]”, that means there are only rom names listed, and those will be added to the “List of roms to add” area. Click on one the “Available sections/filters” you want to use. This will add all the roms for that selection to the “List of roms to add” area. Select the Platform that has all your Arcade games. If it's called "Arcade", it will be selected automatically. (new v3.0) Click “Create Playlist” to create the playlist. Click Exit or create more. (new look v3.0)
Once Exited, select Playlist or Platform Category and expand Arcade to see the new Playlist.
Notes:
This does not work with Additional Apps (mainly clones).
This adds “Arcade” to the beginning of the selected section/filter for its “Unique Name:” (to maintain consistency). The “Nested Name” will be the same as selected section/filter.
The Playlist will be added to the “Arcade (Category)” of the Platform Categories list.
If you click Create Playlist and you don’t have any existing games that match, an empty Playlist will not be created.
If a Playlist of the same name already exists, either delete your existing Playlist or edit it and change the name. It will not be overwritten nor modified.
1,236 downloads
-
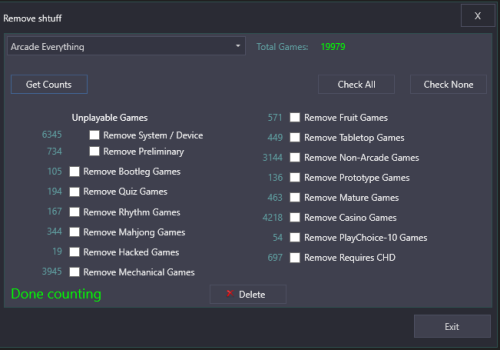
Filter Arcade Platform - post MAME Arcade Full Set Import Wizard
By JoeViking245
May 2026
This plugin has been moved into the MAME Tools plugin along with several other on my MAME related plugins.
Install and use MAME Tools instead of this plugin for continued support.
Thanks for looking.
Dilemma:
"Oh snap! I used the MAME Arcade Full Set Import Wizard, unchecked all filter boxes and now I have a bunch of extra junk in my Arcade platform."
Solution(s):
Option 1: Delete the Arcade platform and re-import again (this time paying attention to the boxes you decide to un-check).
This is actually a super easy and relatively fast process. And you won't need to re-download images again (assuming you downloaded some and didn't delete the media also when deleting the platform).
Option 2: Run this plugin and check the boxes to have those filter types removed from your collection and click Delete.
Plugin Features:
Show you the number of 'games' you have in each filter type. (unplayable, bootleg, quiz, rhythm, mahjong etc.) Check the boxes for the filter type(s) you wish to remove and click Delete to remove them from your LaunchBox collection. Click the number next to the filter type to show a list of the 'games' included with that filter. (shows ROM name and game Title) (optional) Create a text file of "the list" (for whatever reason) (optional) Create a playlist from "the list"
Notes:
You don't need to have used the MAME Arcade Full Set Import Wizard to make use of this plugin.
When launched, the plugin will attempt to load the platform "Arcade". If that's not found or you want to check a different platform that uses MAME ROMs, select the platform from the drop-down list then click Get Counts.
"Total Games" only takes into account your Main Games. No Additional Apps (clones) are accounted for in that number.
When clicking Delete to remove the games in the selected filter type(s), if a game being removed has Additional Apps, those will be removed too. No ROMs will be deleted from your system. Only the entries in your LaunchBox collection.
It won't delete any images associated with the removed games. But most likely, the 'junk' won't have any anyway. If they did, it's nothing that a suitable application of Clean Up Media located in the Tools menu couldn't take care of.
The Save to Text File option saves the file to ..\Plugins\FilterArcadePlatform\Output\[filter_type].txt
The Add to Playlist option will name the new playlist "Arcade type-[fileter_type]" and place it under the category "Arcade". If your selected platform is named something other than "Arcade", it' will name the playlist and put it under the category using your platforms actual name.
RE: Game Counts:
Some games fall into multiple filter types. i.e. some (but not all) Fruit games are also included in with Casino games. So don't try to add the numbers up and have them make sense. "Remove Preliminary" refers to Emulation Status and only includes games that are marked as Preliminary AND are not included any of the other filter types.
Example Usage:
Using the Import Wizard, un-check Skip games unplayable in MAME Once done, from the Arcade platform Search for source:model3 Select all the resulting games Press Ctrl+E to start the Bulk Edit Wizard Select the Field "Platform" Set the Value to (type in) "Sega Model 3" (without quotes) Save From here, you can Do "Option 1" (above) and your Sega Model 3 games will [now] be safe. Or, using the plugin and have it remove the remaining "Unplayable Games". Have the Import Wizard include "Bootleg", "Hacked" and "Prototype" games Use the plugin to create playlists of those respective filter types Select the playlist "Arcade type-Bootleg" created in example (2) and... well, I don't know. Attempt to play them, I guess.
Beyond that (if that), it's not very practical. But may have some merits.
166 downloads
-
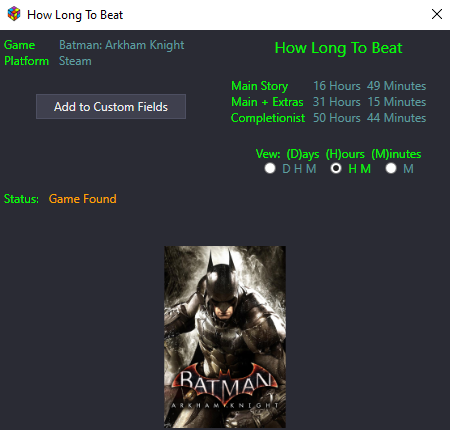
How Long To Beat (HLTB)
By JoeViking245
View how long it takes to complete a game and optionally save these times as Custom Fields for viewing in the game details. Also displayed are what other platforms (if any) the particular game is available on.
All data comes direct from How Long To Beat. Be sure to log in there to save, compare and share times. Without them, this plugin wouldn't be here.
The 3 types of timed gameplay this plugin gets are:
Main Story (just run to the end) Main + Extras (Main Story plus Additional Quests/Medals/Unlockables) Completionist (complete 100% of everything)
What makes this plugin different from other HLTB plugins and apps?
It works Result are 'live' With some luck and little-to-no fear of website updates, it will still work next week, next month, through the end of the year and beyond... without any updates required (fingers crossed)
Requirements:
LaunchBox and the plugin file.
Installing:
Download and extract the contents into your /LaunchBox/Plugins/ folder
i.e. D:/LaunchBox/Plugins/HLTB/HLTB.dll
Using:
Select a game Right-click and select How Long To Beat If the game is not found, follow the onscreen instructions to help narrow down results (optional) Click Add to Custom Fields The Custom Fields names will be: HLTB Main Story HLTB Main + Extras HLTB Completionist Reinstated v2.2.2 (informational) Platforms that the game is available for are shown No longer provided. If platform data is unavailable, a Box-Front image is shown instead. Select a radio button for how you want your times to be displayed and saved. (Days-Hours-Minutes, Hours-Minutes or Minutes only)
New in v2.0.0
HLTB Viewer and Playlist creator (Requires HLTB times to have been saved to Custom Fields)
- View and sort HLTB games by title or Time To Beat
- Launch a game directly from Viewer
- Create playlists
Creating Playlists:
From the Tools Menu, select HLTB Viewer. Select a platform Select one or (preferably) more games Click on the HLTB Time column header to sort by Times. Click again to reverse the sort. Click Create Playlist (This will open a new Window) Set the playlists Title, Nested Name and Category (Category is optional) Click Create Playlist
Playlists will be static. If you add more games to your collection, just add the HLTB times to the games Custom Fields (right-click game option) and then in the Playlist Creator, check the box Add to Existing Playlist. Select the playlist.
Notes about the names and platform category
[Unique] Name - No other playlist can have 'this' name.
Nested Name - what shows in the sidebar. (i.e. HLTB 30-60 Minutes)
Category - The [Platform] Category it will be nested under. (i.e. Arcade How Long To Beat)
To get the Nested Names to sort properly, edit the playlist and set the Sort Title. In the image above, '30-60' sort title is set to "2". '1-2 Hours' is set to "3". etc.
Plugin Updates: New version 2.3.0
The plugin will indicate if an update is available for download.
If an update is available, the plugin title in the Tools Menu and in the Right-Click menu will begin with (U) i.e. (U) How Long To Beat (LaunchBox only) Open the information/support window and click the Update Available button to take you to the Downloads page
Remember to Like and Subscribe and check out my other.....🤣. Just go have some fun and be good humans. 😎
1,589 downloads
-
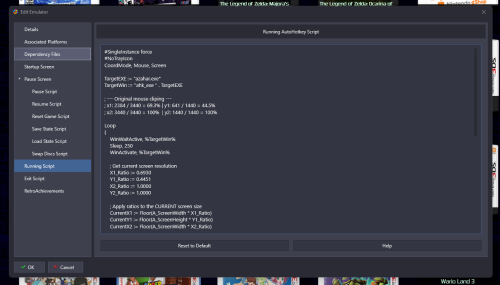
nintendo 3ds Mouse Clip 3DS (Hybrid screen) emulator
Hello!
This is AHK script of old times, that used to clip mouse to specific portion of the screen when using 3DS Emulator. Citra/Azahar..etc.
But user had to calculate specific position on the screen x/y/z where to lock mouse and it was different for every resolution.
Now it got upgraded so it will automatically do that. It should be compatible with any resolution i tested a few.
It requires Default Hybrid in emulator, no custom screen changes to hybrid positioning.
Any 3ds emulator should work as they use the same hybrid default screen.
Usage:
Copy paste entire script to "Running script" In emulator tab of Launchbox!
Its using {{{StartupEXE}}} so NO script editing is required it should work on any emulator, but only within Launchbox/BigBox , otherwise startupexe would need to be edited to real exe name.
P.S!
Holding ESC for 2 seconds will close emulator!
Have fun!
0 downloads
(0 reviews)0 comments
Updated
-
Launchbox Doctor - Audit Tool
By -McFly-
LaunchBox Doctor v1.0
Repair, audit, and verify LaunchBox installations
Author: Mcfly
LaunchBox Doctor scans your LaunchBox installation and repairs common structural issues that can break LaunchBox, BigBox, or large collections.
It was built specifically for large libraries and multi-drive setups, including collections using junctions, symbolic links, or split storage across multiple drives.
What LaunchBox Doctor Does
LaunchBox Doctor performs several checks and repairs:
• Detects missing or broken symbolic links / junctions
• Repairs missing game folder links
• Detects missing or invalid media paths
• Verifies LaunchBox XML structure integrity
• Identifies orphaned or unreachable content
• Identifies missing Platform and Playlist videos
The script can recreate missing junctions automatically if the source folders exist.
Why This Exists
Large LaunchBox collections (especially multi-drive setups) often use:
• Junction links
• Symbolic links
• Split storage across drives
• Network shares
If one of those links breaks, LaunchBox may suddenly show missing games, empty platforms, or startup errors.
LaunchBox Doctor helps identify and repair those problems quickly.
Typical Problems This Script Fixes
Examples of issues LaunchBox Doctor can detect or repair:
• Platform suddenly showing 0 games
• Games missing after drive letter change
• Broken LaunchBox\Games junctions
• LaunchBox failing to load certain platforms
• Broken symlink libraries after drive reconnect
• Incorrect folder mappings
Safety
LaunchBox Doctor is designed to be non-destructive.
The script:
• Does not delete games
• Does not modify ROM files
• Only recreates missing links when the source exists
If a required source folder cannot be found, the script will skip it and report the issue instead of making changes.
Requirements
• Windows
• PowerShell
• Administrator privileges (required for junction creation)
LaunchBox / Bigbox itself should not be running while the script runs.
How to Run
Place the script anywhere and run it with PowerShell as an Administrator inside that location:
powershell -ExecutionPolicy Bypass -File .\LaunchBox-Doctor-v1.0.ps1 Follow the prompts to select your LaunchBox installation and check paths.
The script itself can be updated with these paths using Notepad, although last-run paths are remembered. Example Use Case
Example scenario:
You store games across multiple drives:
H:\LaunchBox\Games K:\More\Games J:\Games LaunchBox Doctor can detect if a junction under LaunchBox\Games has broken and automatically recreate it pointing to the correct location. Typical Output
See example image.
Recommended Usage
Run LaunchBox Doctor if you experience:
• Missing platforms
• Empty game lists
• Broken junction libraries
• Problems after moving drives
• Issues after rebuilding storage
• Missing Platform or Playlist videos
It can also be useful as a quick audit tool for very large LaunchBox installations.
Notes
If you use:
• NAS storage
• Multiple SSD/NVMe drives
• Junction-based libraries
this script can save a lot of time when troubleshooting missing content.
Feedback
This tool was written to support large LaunchBox collections.
If you find bugs or have improvement ideas, feel free to post feedback.
42 downloads
(0 reviews)0 comments
Updated
-
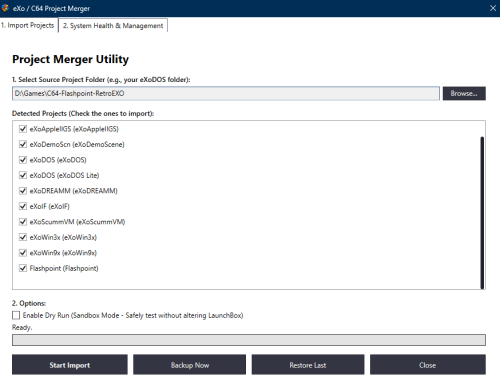
C64 Exo Flashpoint Merger
Project Merger Plugin for LaunchBox
The Project Merger Plugin is a high-performance utility designed to integrate massive retro-gaming collections—including the eXo collections, C64 Dreams, and Flashpoint—directly into your LaunchBox library.
Rather than moving or duplicating terabytes of data, this plugin utilizes symbolic links (symlinks) and surgical XML injection to make external collections behave as if they were natively installed within your LaunchBox directory 🛠 Requirements
LaunchBox Version: 13.26 or higher
If merging Flashpoint and you want the images then download the Flashpoint image archive from the flashpoint site (https://download.unstable.life/ultimate-direct/14_packed/) and extract them to your flashpoint directory. This is only required if you have Flashpoint Infinite. Flashpoint Ultimate comes with the images.
❓ Why This Plugin Exists
When you know how Launchbox works the concept of merging installs is not difficult. However, it is a pain to do and can cause issues if you mess things up. I wanted a way to automate the process and merge the projects in to an existing launchbox install in a way that would not change the users existing library, be neatly organized, have a small storage footprint, and be non destructive to the original project files.
📂 Supported Projects
The plugin is fingerprinted to recognize and process the following specific directory structures:
eXo Collections: eXoDOS. exoDOS Lite, eXoWin3x, eXoWin9x, eXoAppleIIGS, eXoScummVM, eXoDREAMM, eXoDemoScn, and eXoIF. Can be merged in either individual projects or if you've already merged exo projects. C64 Dreams Flashpoint: Support for both Ultimate and Infinite. 📖 How to Use
Extract the content of the archive to your /plugins/ folder. Download and follow the instructions to install/unpack your desired projects (exo, c64, and/or flashpoint). Start launchbox and go to the tools menu and select the plugin. In the plugin window browse to your source project folder. If you have multiple projects select the root folder that contains the project sub folders. The plugin will auto populate with the projects available for import. There is a "Dry Run" option enabled by default if you'd like to see get an idea of whats about to happen otherwise uncheck that option. Click start import. The plugin will create a backup of your parents and platform xml files prior to making changes. These can be found in the plugin directory. You will get a UAC prompt about half through the process. This is required to create symlinks. A full import of all the projects on a destination NVME takes about 10 minutes.
If you run in to issues or want to remove a project the second tab is for you. You can get a very basic idea of what the condition of the install is in, repair it, or uninstall one or multiple projects. Additionally, If there is ever an update you simply update the project at the source and select repair on the second tab.
💻 How does it work?
Retro Exo and C64 Dreams are simply just highly curated Launchbox libraries by themselves. They both utilize a custom project folders at the root of their Launchbox folders. With this in mind and remembering our goal of small storage footprint and wanting to keep the source intact we can move over dependencies and symlink anything else. In broard terms the games and media themselves are all still at their source while things like emulators and config files are copied over. You could technically play a game on exodos and then pick it back up where you left off on your merged launchbox folder. There are also dependent plugins for C64 Dreams and Retro Exo that get added in as well. I include these in the plugin folder because depending on which version of the project you are importing you may have an out of date version so the plugin contains the most up to date for you.
Flashpoint is a little different. It looks similar to Launchbox but it is not Launchbox thus we must convert it to something Launchbox can understand. There are over 200k titles in Flashpoint. The plugin scans the source Flashpoint directory finds the sql database and converts it in to a Flashpoint.xml. It does the same for the playlist json files converting them to xml files. Additionally, the images folder is nothing like what Launchbox needs. Thus it finds all images in the Flashpoint folder and creates symlinks of them to your destination Launchbox directory. Finally, we extract ClifP from the plugin folder to bridge Flashpoint and Launchbox and actually run the games.
To get the archive imported without conflicting with the users current library we rename the platforms to identify them as purely the project they represent, ie MS-DOS = eXoDOS, AppleIIGS = exo AppleIIGS, etc... Additionally, to keep it clean we create "master platform categories" such as "Retro Exo" and nest all the projects/platforms under the master platform category. IE: Retro Exo (Master Category)>eXo DOS (Project Category)> "exo dos platform and playlists go here". The plugin does all the xml injections and edits in the background.
⚠️ WARNING
Flashpoint Scale: Flashpoint is incredibly resource-intensive, featuring approximately 200,000 titles and nearly 500,000 images. It's recommended you use an SSD as your destination Launchbox install for best performance.
StableBit DrivePool Incompatibility: During development, it was identified that StableBit DrivePool does not handle large volumes of individual files and symbolic links effectively. Attempting to use this plugin on a pooled drive can and will cause system crashes that wont resolve after a restart. I spent about 24 hours in windows recovery and physically unplugging drives to get my system to boot again. Please ensure you are targeting a standard physical drive to maintain system stability.
A final word on compatibility. While I tested several games across all the projects during the course of development I cannot guarantee that this is truly 100% working. Thus any and all feedback is appreciated.
Eventually I plan on creating a custom media pack for this plugin so everything has, icons, clear logos, and videos.
33 downloads
- flashpoint
- c64dreams
- (and 3 more)
-
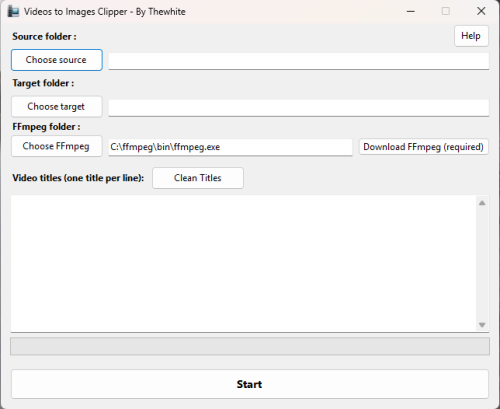
Videos to images clipper
By thewhite
Hi, here's my latest tool;
🎬 Videos to Images Clipper – Extract Screenshots from Your Videos with Ease
Videos to Images Clipper is a lightweight and user-friendly Windows application designed to extract high-quality screenshots from video files. It automatically captures images at key moments - First image, 25%, 50%, and 75% of the video's duration or a specific frame.
This tool is especially useful for LaunchBox users who want to generate screenshot quickly and efficiently from their game videos.
✨ Key Features
📸 Automatic Screenshot Extraction
Captures images at ¼, ½, and ¾ of each video.
📂 Batch Processing
Processes multiple videos based on a list of titles.
🔎 Smart Title Matching
Matches video filenames with titles entered by the user.
🧹 Clean Titles from LaunchBox
Extracts and cleans titles from copied tables from the LaunchBox Audit window.
🌐 Recursive Folder Scanning
Searches for videos in all subfolders of the selected source directory.
🧰 Automatic FFmpeg Integration
Detects FFmpeg on your system or downloads it directly within the application.
🛠️ Supported Video Formats
mp4, m4v, mkv, avi, mov. 📖 How to Use
Select the Source Folder
Click Source and choose the directory containing your videos. Subfolders are included automatically.
Select the Destination Folder
Click Destination to specify where the extracted images will be saved.
Enter or Paste Titles
Paste game titles into the textbox, one per line.
You can copy data directly from the LaunchBox Audit window.
Clean the Titles
Click Clean Titles to remove headers and keep only the relevant titles.
Install or Locate FFmpeg
If FFmpeg is not detected, click Download or browse to its installation folder.
Start the Extraction
Click Start to generate screenshots at 25%, 50%, and 75% of each matching video.
Once finished, you can move the images to the platform's image folder (Screenshot - Gameplay). Run a platform audit to detect the new images.
🖼️ Output Example
For a video named:
Assassin's Creed.mp4 The application generates:
Assassin_s Creed-01.jpg Assassin_s Creed-02.jpg Assassin_s Creed-03.jpg 💻 System Requirements
Windows 10 or Windows 11
.NET Desktop Runtime 6.0 or later
FFmpeg (automatically detected or downloadable within the application)
🚀 Feedback and Contributions
Feedback, suggestions, and bug reports are welcome! Feel free to share your experience and ideas to improve the software.
Thank you for trying Videos to Images Clipper!
18 downloads


.thumb.png.632d19a4f33f16491745f891e0ea495b.png)
.thumb.png.d8248f4f7e6ac686eebb9c1c4d1c451a.png)
(Disc1)(KeyDisc)(SegaCD).thumb.png.f871615d9008153c8073315db041de44.png)


