Third-party Apps and Plugins
252 files
-
MAME to Classics extraction Scripts
By ci2own
This file contains a few .bat files to extract the "Classics" from MAME Merged Romset. There are files for the next Systems:
Atari Classics
Capcom Classics
Capcom Play System
Capcom Play System II
Capcom Play System III
Data East Classics
Irem Classics
Konami Classics
Midway Classics
Namco Classics
Nintendo Classics
Sega Classics
SNK Classics
Taito Classics
Williams Classics
How to use it?
Just place the .bat files into your MAME Merged Romset and execute each file. It will create a folder for each System.
150 downloads
-
PCSX2 Configurator Next
By alec100_94
PCSX2 Configurator Next for LaunchBox
PCSX2 Configuartor Next is a plugin for LaunchBox that allows users to easily configure PCSX2 on a per-game basis. The plugin also allows for pre-optimised configs to be downloaded from right within LaunchBox for a whole host of popular PS2 games, from Zombeaver's excellent PS2 Configuration Project.
Installation
The plugin is easy to install and simply needs to be downloaded and extracted. The archive contains a folder called "PCSX2 Configurator Next", this should be placed in the root of the "Plugins" in the user's LaunchBox directory. Any previous versions of the plugin should be removed before attempting to install this version.
General Usage
The plugin is relatively straight forward to use, but has been changed significantly from previous versions. You will first need to have PCSX2 (1.5.0 development build) setup as an emulator in LaunchBox. Then right click on a PS2 Game and choose "PCSX2 Configurator" from near the bottom of the context menu. This will present a menu of options:
"Create Config" - Creates a new config for the game in question based on the users current PCSX2 settings, If a config already exists this will overwrite that config with a new one.
"Download Config" - This will download one of Zombeaver's Config and set it up to be ready to play for the selected game, this will be greyed out if now config is available, and will change to "Update Config" if a new update is available for the downloaded config.
"Remove Config" - This will remove the current config for the selected game, and will be greyed out if there is no current config.
"Configure With PCSX2" - This will open PCSX2 with the config for the selected game loaded, allowing you to customise your config for the selected game (Downloaded Config's can also be tweaked). Once a game has a created config this can also be done using LaunchBox's built in "Configure" from the games context menu. Both these options will be greyed out if there is no config for the selected game.
There is also a "settings.ini" file created in the plugins folder ("%LaunchBoxDir%/Plugins/PCSX2 Configurator Next"), this can be tweaked manually but most settings don't need to be touched in most cases. Some people may wish to change the "GameConfigsDir" which is where the created configs are stored, this deafults to the users PCSX2 "inis" directory. There is currently no inteface to modify these settings, but that is planned in a future version.
Version Info and The Next in The Name
This version of the plugin is the successor to the original PCSX2 Configurator plugin, with a completely re-worked codebase from that version, and full compatibility with LaunchBox.Next (which is now the current version of LaunchBox). The main reason "Next" was added to the name is to initially seperate it from that (now discontinued) verison of the plugin. This release is currently in Beta and the "Next" from the name will probably be dropped eventually for a stable release with more features.
Credit and Support
I have personally put a lot of time and effort into all versions of this plugin, with it essentially being my free-time pet project for the last year and a half. Though I know the plugin would not be what it is today without Zombeaver who really helped me to bring this plugin to the next level, by allow me to integrate his PS2 configurations into it as well as creating artwork and helping me test the plugin. I would also like to say a big thank you to spectral, neil9000, and kmoney for helping me out with testing, and of course Jason Carr for making LaunchBox and implementing some of my requested changes into the plugin engine. I intend to keep working on this plugin, and fix any reported bugs as well as update the plugin with new features. So if you have any problem or feature request's hop over to the plugins thread on the forums and let me know. The project is also open sourced under the MIT license and can be found on my github.
UPDATE (JUNE 2020): This Plugin is now in maintenance mode, and is nearing end of life. I am currently working on a standalone version that will serve the same purpose, which will also be made to work with LaunchBox. The progress of that can be found here
9,599 downloads
-

MAME 0.224 No-Nag
By MadK9
There was no real change to last months codebase for Warnings.
This could be the last No-Nag i release as the Mame devs maybe adding a softer option for game warnings, some code was added in the previous release but was rolled back just before release, notes were added in mame 0.223 as to what may be acceptable in future builds, the following are the notes as posted. As this may or may not appear in the next release i will wait until then to make a decision on future versions.
-Revert "ui: allow to skip warning popup at start" [Vas Crabb] * This reverts commit 74f456df945cd1720dc4d6bc105f64c13e62ced8. * I will allow the feature with the following conditions: - No skipping red warnings. - A key-value map of device shortnames and yellow warnings must be stored in the .cfg file, along with a timestamp of the last time the system was run and the last time a warning was shown. - On starting a system, the map of device shortnames and yellow warnings must be built and compared to the one loaded from the .cfg file. If it doesn't match, if the system hasn't been started in seven days, or a yellow warning hasn't been shown in 14 days, the warning is not to be skipped. There is an added option in the TAB menu in game to see any Warnings that have been suppressed on loading a game, showing if the rom has any known issues, please use this option to check the game/rom before using any online forums for help with the game/rom in question
NOTE: This does NOT interfere with the Leaderboards at all.
**This removes the nag screen that informs you if a rom doesn't work correctly, or if at all, if you use this no nag, then please do NOT go to the mame support site with issues with games, please only use if you understand that there will be no help from anyone at mamedev as you are using a modified version of mame.
mame64.exe - Normal Mame with Nags removed. For Version 0.224
Its recommended to download the full 0.224 official pack and install it, then just overwrite the exe with the replacement, this covers any changes the mame devs may have made to the support files.
After you have done this, make sure you copy the folders artwork, ctrlr, cheat, hlsl, ini, folders and the mame.ini file from your original mame folder, and move/copy them to the new install.
For those of you on old installs make sure in the mame.ini file you have the following set.
Skip_gameinfo 1
261 downloads
-

MAME 0.223 No-Nag
By MadK9
Sorry for the delay, i was moving at the time of release.
This could be the last No-Nag i release as the Mame devs maybe adding a softer option for game warnings, some code was added in this release but was rolled back just before release, and the release notes added information as to what may be acceptable in future builds, the following is the notes as posted. As this may or may not appear in the next release i will wait until then to make a decision on future versions.
-Revert "ui: allow to skip warning popup at start" [Vas Crabb] * This reverts commit 74f456df945cd1720dc4d6bc105f64c13e62ced8. * I will allow the feature with the following conditions: - No skipping red warnings. - A key-value map of device shortnames and yellow warnings must be stored in the .cfg file, along with a timestamp of the last time the system was run and the last time a warning was shown. - On starting a system, the map of device shortnames and yellow warnings must be built and compared to the one loaded from the .cfg file. If it doesn't match, if the system hasn't been started in seven days, or a yellow warning hasn't been shown in 14 days, the warning is not to be skipped. There is an added option in the TAB menu in game to see any Warnings that have been suppressed on loading a game, showing if the rom has any known issues, please use this option to check the game/rom before using any online forums for help with the game/rom in question
NOTE: This does NOT interfere with the Leaderboards at all.
**This removes the nag screen that informs you if a rom doesn't work correctly, or if at all, if you use this no nag, then please do NOT go to the mame support site with issues with games, please only use if you understand that there will be no help from anyone at mamedev as you are using a modified version of mame.
mame64.exe - Normal Mame with Nags removed. For Version 0.223
Its recommended to download the full 0.223 official pack and install it, then just overwrite the exe with the replacement, this covers any changes the mame devs may have made to the support files.
After you have done this, make sure you copy the folders artwork, ctrlr, cheat, hlsl, ini, folders and the mame.ini file from your original mame folder, and move/copy them to the new install.
For those of you on old installs make sure in the mame.ini file you have the following set.
Skip_gameinfo 1
***If you use this no nag, then please do NOT report game issues or rom issues to mame support
162 downloads
(0 reviews)0 comments
Updated
-
CleanImages
By Axenn
Description:
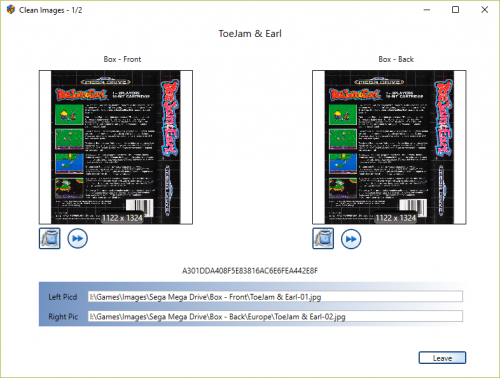
Scan images for a game, find duplicate then ask (see screenshot) to the user for what to do. How to use:
Right click on a game, then choose the plugin When the scan is finished you can make defile images, you will have resolution, location, mediatype to Help you to decide what to do. Images are trashed, not destroyed. By click on the image you could see it in big picture mode. Versions:
14/09/2018 Big update 1.1.0.0 + 1.1.0.1 New boxes for multi-game selection Fixed: debug mode Fixed: update progression French translation ok (i hope) Separation gui/process, GUIs come from another depository, you could also use it if needed, everything is free and under gnu licence. Fixed problem on window for manual manage images.
10/09/2018 First release 1.0.0.2 Note:
As you can see from the screenshot, I have the same image in two locations, the fun part is that I didn't do that willingly, but it was fine to make an example. The strange string is the md5 sum of the first file. By click on arrow you change the picture I'm really happy to see people downloading my work, i feel useful Ii'm not really good in english if you see some errors, please be welcome to feedback them to me.. Todo:
Close multi-game window automatically at ending process (with timer choice) Show filename pics at the top of them.
Debug version : verbose in log file located in ./Logs/
505 downloads
-
Future Pinball Loader for Launchbox
By JaysArcade
EDIT: I hope the file was useful to the community in the past, but it's no longer needed to launch FP tables in Launchbox. See @sundogaks post here about launching tables.
This zip contains a simple AutoHotKey executable and script that will help with loading Future Pinball tables.
The Problem: Future pinball requires the /open "Drive Letter:\full path\table_name.fpt" /play /exit commands to be specified individually for each table, otherwise the table will not load. Launchbox currently will not launch Future Pinball on its own without doing a little extra work in each table's settings. You have to manually enter this on each table which can be time consuming if you have a lot of tables to load.
Usage: Simply place the FP.exe file in your Future Pinball folder and point to it instead of the Future Pinball executable when setting up Future Pinball as an emulator in Launchbox. That's it.
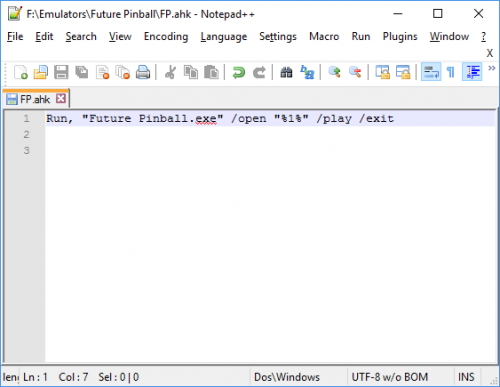
Roll your own: If you are un-trusting and don't want to use the files in the zip (I don't blame you), you can download AutoHotKey and compile your own. The code is below. I've also included the non compiled FP.ahk so you can compile that if that suits you. That way you can open it in an editor to check the code before compiling.
Run, "Future Pinball.exe" /open "%1%" /play /exit
1,508 downloads
-
GamestreamLauncher (For Custom Scripts, Multiple Monitors, Miners, etc)
By loueradun
GamestreamLauncher is a simpler launcher application to help assist with operations to be completed before and after a gamestream session. This can be used to launch any application, but I find it works great with BigBox as a launch point for my PC and emulator games.
Workflow on Gamestream Session start:
Disable GPU Miner through Awesome Miner if running Disable non-primary monitors if present Run a custom script Launch Game (BigBox) Workflow on Session end:
Run a custom script Enable non-primary monitors that were previously disabled Enable the GPU Miner through Awesome Miner if it was previously disabled Close the Gamestream session gracefully Installation:
Copy the extracted folder to your desired location. Run GamestreamLauncher.exe to configure the launcher. Add a custom game in Geforce Experience that points to GamestreamLauncher.exe. The launcher is configured with the config utility when launching it for the first time. You can run the config utility again by deleting the user.config file that can be found at %localappdata%\GamestreamLauncher under the proper version.
Known NVidia GameStream issues this launcher will resolve:
Launching a game while a miner is active GameStream will "flicker" when multiple monitors are active during the stream - https://forums.geforce.com/default/topic/1022778/gamestream/flickering-with-gamestreaming-on-new-windows-builds-/ The launcher is open source and can be found on github here: https://github.com/loueradun/GamestreamLauncher
69 downloads
- launcher
- gamestream
- (and 1 more)
(0 reviews)0 comments
Updated
-
EpicFail ScummVM Launcher NEW
By epicfail
Version 4.0.0
Now works with the ThirdParty folder. Also added a way to convert the BatRunner roms to launch straight from Launchbox instead of running through the batrunner and bat files. This feature is new.
Version 3.4.0
Big changes in this one. Some may like it, some may hate it. I now rewrite your ini file to help you out and maintain portability.
New game menu item to Configure ScummVM. ScummVM will open with that game selected. No need to scroll through a big list to find/guess the specific game to configure. When using my menu items to configure scummvm, I will automatically rewrite absolute paths as relative paths to your ini file. I also gave you the Configure ScummVM from the Tools drop down. During generation of the *.bat launchers I will check that you have the emulator set up, if not I will fix it for you. Can't change ScummVM path or launcher path now. Just go with it, life will be better. Simple and Advanced modes. Advanced mode is what your used to. Simple mode is one click setup, creates full list of launchers, and emulator creation. It will ask if you want to filter the non english languages. It should be easy if it works the way I intend.
click on the Tools->ScummVM Import Tool (simple) click on the Tools->Import->Rom Files to import the bat files as ScummVM games. Now scummvm can be portable easily in 3.3.1-plugin, you can rewriting the ini file. One click will read every single setting out of the ini file and find all absolute paths, check if the path is valid, than convert then to be relative to the launchbox directory.
I owe you guys some new instructions.
Updated with relative path for better travel!
ONLY the DLL is updated... See the update note below lots of new stuff.
uses launchbox built in ScummVM by default uses a local scummvm.ini by default, import existing to a local or create new fresh local scummvm.ini, all built in find and remove existing epicfail files. better rom names for smoother mass import BatRunner.exe installed from gui, must stay in your launchbox folder, point to it as your scummvm emulator. (BatRunner.exe is just the ScummVMimport.dll renamed and move to the launchbox main directory. Will prompt you when you create your launcher bat files. So its automatic you won't have do any thing to create it) Just point to it as the application for you scummvm emulator if your using the bat files. Updated filtering with priority duplicate control. ------------------------------------------------------------------------------------------------------------------
Older Version 2.0.5 from the videos ScummVMLauncher.exe
NEW AND IMPROVED - NOW WITH RETROARCH FEATURE
This is the scummvm launching system I use with launchbox. Most importantly this allows you to get art and videos for BB. It works for me, so I'm sharing it.
SETUP LAUNCHERS:
Put these ScummVMLauncher.exe files in your scummvm directory same directory as your scummvm.exe. I'm using 1.9.0.2-win32 currently. If you already setup my old launcher you can just delete the files and the launchers folder.
This is how I use it.
1st is to open your ScummVM and do a "Mass Add" if you don't know what that is hold the shift button down and the add button on scummvm will change. You could skip this if you already have your games loaded in scummvm, but I recommend starting fresh. After that close the scummvm program and assuming you have the microsoft .net framework installed run the ScummVMLauncher.exe. From the window, select Tools->load scummvm.ini this will attempt to automatically find your file in %appdata%ScummVM/, if its not there just navigate to the directory that you keep it and select your scummvm.ini file, then select open. This will grab the scummvm.ini file selected and parse it. You should see the gui populate and look similar to the screenshot. The gui should be intuitive. Filter the games the way you want to. Select Tools->Generate Launchers SETUP IN LAUNCHBOX:
Setup the emulator for ScummVM and pick the ScummVMLauncher.exe file as the executable. import roms - pick the launchers folder to import. Enjoy in BB, with art and videos!
11,720 downloads
-
Online Video Links
By SsjCosty
This plugin allows you to add online videos to your game, which will appear on the game's menu both in LaunchBox and BigBox. Mainly, it supports YouTube and Steam videos. The videos get played by LaunchBox's portable VLC distribution, so you don't have to worry about having the right video player installed.
LaunchBox Interface
There is a new menu item on the game's menu in LaunchBox, allowing you to manage your game's video links, which can be seen in the following screenshot, along with two sample video links. Once you open the video manager dialog, follow the on-screen instructions (and click "More info") to add, edit or remove your video links.
BigBox Interface
In BigBox, the video links can be played from the game's "Additional Apps/Versions" menu, as exemplified here:
The project is available on GitHub.
341 downloads
-

MAME 0.222 No Nag
By MadK9
NOTE: This does NOT interfere with the Leaderboards at all.
**This removes the nag screen that informs you if a rom doesn't work correctly, or if at all, if you use this no nag, then please do NOT go to the mame support site with issues with games, please only use if you understand that there will be no help from anyone mamedev as you are using a modified version of mame.
mame64.exe - Normal Mame with Nags removed. For Version 0.222
Its recommended to download the full 0.222 official pack and install it, then just overwrite the exe with the replacement, this covers any changes the mame devs may have made to the support files.
After you have done this, make sure you copy the folders artwork, ctrlr, cheat, hlsl, ini, folders and the mame.ini file from your original mame folder, and move/copy them to the new install.
For those of you on old installs make sure in the mame.ini file you have the following set.
Skip_gameinfo 1
***If you use this no nag, then please do NOT report game issues or rom issues to mame support
235 downloads
-

Mame 0.221 No-Nag
By MadK9
NOTE: This does NOT interfere with the Leaderboards at all.
mame64.exe - Normal Mame with Nags removed. For Version 0.221
Its recommended to download the full 0.221 official pack and install it, then just overwrite the exe with the replacement, this covers any changes the mame devs may have made to the support files.
After you have done this, make sure you copy the folders artwork, ctrlr, cheat, hlsl, ini, folders and the mame.ini file from your original mame folder, and move/copy them to the new install.
For those of you on old installs make sure in the mame.ini file you have the following set.
Skip_gameinfo 1
230 downloads
(2 reviews)0 comments
Updated
-

gog.com Plugin
By wasili
Update: With it's 10.11 Release Launchbox has native support for importing games from gog.com that should work better that this I will still leave this up here in case somebody using an older version of Launchbox might want this.
Plugin for importing games from gog.com.
Readme and source code on github.
Probably won't work on 32 bit systems.
Thread:
327 downloads
-
KioskBox
By BetaLeaf
A Kiosk Mode Shell Replacement for LaunchBox BigBox.
Source Code: https://github.com/BetaLeaf/KioskBox.
README: https://github.com/BetaLeaf/KioskBox/blob/master/README.md
If you have any issues, suggestions, or feedback, please use the Github Issue Tracker: https://github.com/BetaLeaf/KioskBox/issues/new/choose
44 downloads
(0 reviews)0 comments
Updated
-
Platform Consolidation Script
By ikinsey
I had a lot of duplicate MS-DOS games, and when I tried to use the "Consolidate roms for MS-DOS" tool, it would just say "The selected platform is not an emulated ROM-based platform." But I had so many duplicates that not consolidating them was not an option. So I wrote a script that imitates what the tool did for my PlayStation library.
It seemed to work for me; now I only see one entry per game and I have the option of "additional apps" for the others.
Usage instructions:
- Download Python: https://www.python.org/downloads/
- Double click on the script or run it via command line `python path/to/file`
- Enter a full path to the platform you wish to consolidate
- Note: the platform should not have been consolidated already (i.e., it should have no additional apps for any game)
- Platform XML files are located at LaunchBox\Data\Platforms
- Script will generate a file called {file name}-consolidated; backup your previous XML file and then rename the new file to take its place
- Make sure to remove all other XML files for the newly consolidated platform from the Data\Platforms folder or Launchbox may use one of those old/undesired files
Here is the original question I asked on the forums about solving this:
46 downloads
- platform
- consolidation
- (and 1 more)
-
vidswitch
By ninken
So I wrote a quick command line tool, that does what I personally think that Launch box should do.
We should have options on how a program is executed.
It’s written in C# and is on Github feel free to use any of this code to give launchbox some application launching options.
https://github.com/ninken/vidswitch/releases/tag/1.0
Vidswitch is a simple command line application that allows you to launch a application maximized on any monitor, and can rotates that monitor. (Requires Dotnet 4.0 or higher)
Parameter 1 - Display Number [ 1, 2, 3, 4, .... ]
Parameter 2 - Rotation [ 0, 90, 180, 270 ]
Parameter 3 - Application to launch
Example: vidswitch 2 90 "c:\windows\system32\notepad.exe"
Result: Launches notepad.exe on display 2, flips the monitor 90° and maximizes Notepad.
After Notepad closes, it returns the monitor back to it's starting orientation.
65 downloads
(0 reviews)0 comments
Updated
-

Mame 0.220 NoNag
By MadK9
mame64.exe - Normal Mame with Nags removed. For Version 0.220
mamearcade64.exe - Normal Mame with all Mess systems removed, and with NoNags
Its recommended to download the full 0.220 official pack and install it, then just overwrite the exe with the replacment, this covers any changes the mame devs may have made to the support files.
After you have done this, make sure you copy the folders artwork, ctrlr, cheat, hlsl, ini, folders and the mame.ini file from your original mame folder, and move/copy them to the new install.
For those of you on old installs make sure in the mame.ini file you have the following set.
Skip_gameinfo 1
856 downloads
-
MAME 0.219 No Nag
By MadK9
mame64.exe - Normal Mame with Nags removed.
mamearcade64.exe - Mame Arcade ONLY emulation. (No MESS systems).
Its recommended to download the full 0.219 official pack and install it, then just overwrite the exe with the replacment, this covers any changes the mame devs may have made to the support files.
After you have done this, make sure you copy the folders artwork, ctrlr, cheat, hlsl, ini, folders and the mame.ini file from your original mame folder, and move/copy them to the new install.
.
336 downloads
-
Batch file to Auto-Generate .m3us
By fromlostdays
The new m3u auto generator for Launchbox is a great tool, but it also got me wondering if I couldn't create m3u files for every one of my Sony Playstation titles (including single disk games) and would that work in Retroarch? Something just appeals to me about the uniform file extension on import in Launchbox, and of course, if I wanted to launch games outside of the Launchbox environment I'd need some static m3us. I also wanted to have m3us with relative paths to the cue files, for simplicity sake.
So I asked on Stack Overflow and, not long after, some genuis had posted a working batch script. I figured I'd share it. I also tested whether or not single cue m3us would work in Retroarch, and it turns out they do.
Important:
Your games directory should look like this:
Main Directory/[Game Name]/[whatever name].cue
e.g Sony Playstation/Chrono Cross/disk 1.cue, disk 2.cue
The bat file should be run from the main directory The bat file will name the m3u after the directory the cue files are in and place it in that same directory The bat file will create m3us in every subdirectory which holds at least 1 cue file (it doesn't single out multidisk games as it is now, so be aware of that) The bat file should work with any system provided it has the above directory set up and utilizes cue files The m3us list relative paths to the cue files, not absolute paths. So continuing the above example, I ran the file in my "Sony Playstation" directory, and within the "Chrono Cross" directory an m3u file was generated and listed relative paths to all the cue files in that directory and was automatically named "Chrono Cross.m3u" (after the folder name, not the cue file(s) names or anything else in the folder).
Lastly, the Stock Overflow user wrote a batch script for both NTFS and FAT hard drives. Apparently the code is different for each. I personally have not tested the FAT version as my drive is NTFS. If anyone wants to check the code, the user also left a thorough explanation that is absolutely unreadable to me. See here: https://stackoverflow.com/questions/60049048/need-a-batch-file-to-create-and-name-m3us-in-subdirectories
Hope it helps!
421 downloads
-

MAME 0.218 No Nag
By MadK9
As @NJDave71 is no longer creating No Nags for Mame, here are 2 replacements.
mame64.exe - Normal Mame with Nags removed.
arcademame64.exe - This is a slimmed down version of Mame to just cover Arcade only (please note it only covers Arcade)
Its recommended to download the full 0.218 official pack and install it, then just overwrite the exe with the replacment, this covers any changes the mame devs may have made to the suppot files.
After you have done this, make sure you copy the folders artwork, ctrlr, cheat, hlsl, ini, folders and the mame.ini file from your original mame folder, and move/copy them to the new install.
Tnx to KnC for this.
514 downloads
-

mame MAME No Nag
By NJDave71
MAME 0.218 NO NAG
It’s time for MAME 0.218, the first MAME release of 2020! We’ve added a couple of very interesting alternate versions of systems this month. One is a location test version of NMK’s GunNail, with different stage order, wider player shot patterns, a larger player hitbox, and lots of other differences from the final release. The other is The Last Apostle Puppetshow, an incredibly rare export version of Home Data’s Reikai Doushi. Also significant is a newer version Valadon Automation’s Super Bagman. There’s been enough progress made on Konami’s medal games for a number of them to be considered working, including Buttobi Striker, Dam Dam Boy, Korokoro Pensuke, Shuriken Boy and Yu-Gi-Oh Monster Capsule. Don’t expect too much in terms of gameplay though — they’re essentially gambling games for children.
There are several major computer emulation advances in this release, in completely different areas. Possibly most exciting is the ability to install and run Windows NT on the MIPS Magnum R4000 “Jazz” workstation, with working networking. With the assistance of Ash Wolf, MAME now emulates the Psion Series 5mx PDA. Psion’s EPOC32 operating system is the direct ancestor of the Symbian operating system, that powered a generation of smartphones. IDE and SCSI hard disk support for Acorn 8-bit systems has been added, the latter being one of the components of the BBC Domesday Project system. In PC emulation, Windows 3.1 is now usable with S3 ViRGE accelerated 2D video drivers. F.Ulivi has contributed microcode-level emulation of the iSBC-202 floppy controller for the Intel Intellec MDS-II system, adding 8" floppy disk support.
Of course there are plenty of other improvements and additions, including re-dumps of all the incorrectly dumped GameKing cartridges, disassemblers for PACE, WE32100 and “RipFire” 88000, better Geneve 9640 emulation, and plenty of working software list addition
Please visit @MadK9
Happy Gaming
2,241 downloads
-
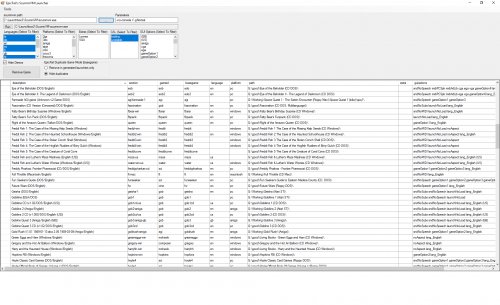
Mame NoFiller Version 2
By Lordmonkus
Requirements:
A complete Mame Non Merged rom set for the version you are downloading. You must have this downloaded to your hard drive to use the batch file. If you have a seedbox you can use the included NoFiller v2 - *.txt file to copy / paste to a filter and only download those files if you don't want to use your own internet bandwidth downloaded a complete Non Merged rom set.
What is this ?
This is a batch file for people who only want to have a clean and streamlined set of games in their Arcade platform. It will copy out a curated set of roms from a full Mame rom set. The list of games selected was based off of input from people here on the forums, discord and my own personal experience playing these games growing up in the arcades back in the 80s and 90s. There are 434 rom files that will be copied out but there are some duplicates of a few games that have 2 or 4 player versions such as TMNT or Gauntlet for example, you can pick which one you want to use in your setup. (see below)
This is not the end all be all set of games of course but it is a good solid base to build your own personal set from rather than trying to pare down a complete set of roms. I tried not to include games that had really funky controls or light gun games though I did include some trackball and spinner games.
Included in the zip file you will find a batch file, spreadsheet document and 2 text files (1 list of roms and 1 list of games). The spreadsheet will allow people an easy way to maintain and add games as required. The rom list will make it easy to download only those files if you use a seedbox to get your roms from a torrent and the games list will let you compare what you have imported into Launchbox to see if anything is missing.
How to use this:
First you will need to download the Non-Merged rom set that the batch file was made with, using a different set than the bat file was intended for may or may not cause incompatibilities in roms. Then simply copy the batch file into the folder with all of the roms and double click the bat file, it will make a new folder within that folder and copy all of the roms into that newly created folder. From there you can copy that new folder of roms to anywhere you like and import them into Launchbox, be sure to update your rom path in your mame.ini to point this rom set location. You can now do whatever you like with your full set you downloaded, it is no longer needed for the NoFiller set to function, though you may want to keep a backup just in case.
Extra Notes:
Games that have problems importing into LB, will need to be imported individually.
Akai Katana - akatana.zip
Crossed Swords 2 - crswd2bl.zip
KaGeKi - kagekiu.zip
Sailormoon - sailormnnu.zip
Wrestlefest - wwfwfestu.zip
Games that have more than 1 rom file for 2 player or split screen variant.
darius2 (3 screen)
darius2d (2 screen)
gauntlet (4 player)
gauntlet2p (2 player)
ssriders (4 player)
ssridersabd (2 player)
tmnt (4 player)
tmnt2pj (2 player)
xmen (4 player, 1 screen, pick any character)
xmen6pu (6 player, 2 screen, coin slot determines character)
List of games in this batch file.
1,390 downloads
-

Steam Tools Plugin
By Nielk1
This is a test release of Steam Tools for LaunchBox.
To install, unzip the contents of the ZIP into LaunchBox's Plugins folder. This plugin now supports being in a subfolder.
Current Features:
Basic Steam game import functionality Options Menu Automatic custom field if using LB Premium for use in playlists Optional automatic Hiding of uninstalled Steam games Optional automatic Un-Hiding of installed Steam games Background task for automatic updating of Installed/Uninstalled fields Basic loading of Metadata from Steam Option to download Clear Logos, Steam-Grid, and Header (as Fanart) images from Steam Source Code: https://github.com/Nielk1/LaunchBoxSteamToolsPlugin
565 downloads
-
Reset Play Count to zero - Plugin
By JoeViking245
Edit:
This is now a builtin LaunchBox feature as of release 10.7-beta-1.
Resets a games Play Count to 0 (zero).
Place the "ResetPlayCount.dll" file into your ..\LaunchBox\Plugins\ folder.
*edit* Right click ResetPlayCount.dll, select Properties and click "Unblock".
Start LaunchBox.
Select just one, multiple or all (Ctrl+A) games. Right-click and then click on "Reset Play Count" located at (or near) the bottom of the popup menu.
There is no "Please Confirm" nor "Play Counts have been reset to 0 (zero)" message boxes. It just does it as soon as you click it. (V1.0)
*edit* Version 1.1 adds a confirmation message box.
ResetPlayCount.dll - 6KB
98 downloads
(2 reviews)0 comments
Updated
-
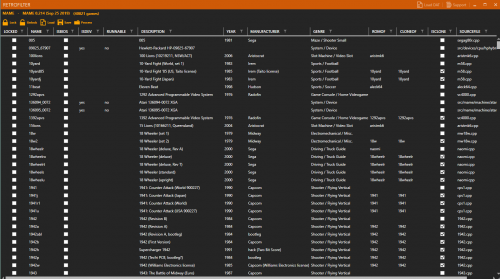
RetroFilter
By Cpasjuste
Here is a very little utility i made to work on a database file (mame dat's and emulationstation gamelist.xml as of now).
This allow you to remove clones, filter neogeo/cps... games etc. and either export the resulting database file to be used in clrmamepro, or copy the filtered rom's from a source folder to a destination folder.
Here is a (crappy) video i made to show how to make a neogeo database with clones removed, from latest mame database: https://www.loom.com/share/201bb24881134311b63898561ded1e4c
Source code: https://github.com/Cpasjuste/retrofilter
164 downloads
-
Bulk Custom Command-Line Editor - plugin
By JoeViking245
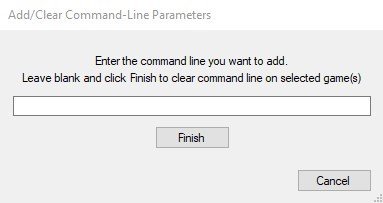
Bulk Custom Command-Line Editor
Use this to set (or clear) the Custom Command-Line Parameter for the selected games.
The would be the same as selecting a game, click Edit, go to the Emulation tab and check "Use Custom Command-Line Parameters:" and entering in a command line. But for multiple games all at once.
This will not change anything for the Emulator itself (i.e. Edit Emulator). This is only for the selected games' Custom Command-Line.
Setting up:
1) Copy "BulkEditCommandLine.dll" into your LaunchBox\Plugin folder.
2) Navigate to the folder, right click the dll file, click Properties then click Unblock.Using:
3) Start LaunchBox
4) Select a game (or games), right click and choose "Bulk Command Line Editor"
- Type in the command line and click "Finish" (or hit Enter)
- To clear the Command-Line for the selected game(s), leave blank and click "Finish"
- To exit without making changes, click "Cancel"
402 downloads
- plug-ins
- command-line parameters
- (and 1 more)