Platform Bezels/Overlays
213 files
-
.thumb.png.534442babdbd0c8c152a22c276d13276.png)
-
Game Boy Pocket/Light Overlay - "Subtle Dark" Series
By poisongoomba
Use this overlay coupled with Retroarch's gb-light-shader.cgp and the results are amazing!
From my in progress "Subtle Dark" series. Perfect for hiding those black bars, while not making too much of a statement.
156 downloads
(1 review)0 comments
Updated
-
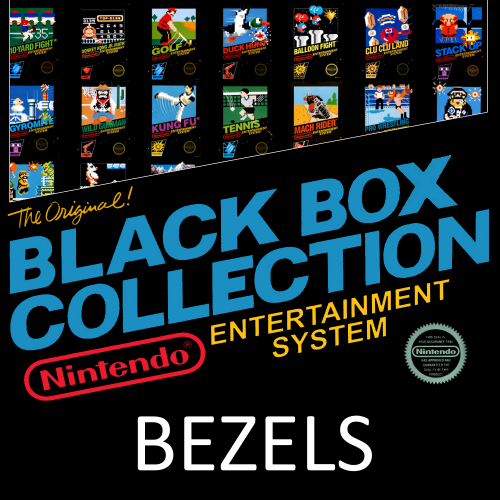
NES Black Box Games Bezels and Configs for Retroarch
By MetalVinnie
Here are the NES Black Box bezels I created for Retroarch. There are three sets for 3 different configurations: NoTV, TV, and ThickTV.
Download and unzip to your RetroArch\overlays folder. Set them up through Retroarch.
You can also download the playlist and playlist clear logo here:
Also, @CTRL-ALT-DEFEAT generously made an awesome theme video to go along with the playlist and bezels. Download it here:
1,462 downloads
-
My 1080p Overlays.zip
By y2guru
I wanted to give back with some of my own Platform overlays/bezels I use via Launchbox & Retroarch
My_1080p_Overlays.zip
819 downloads
(2 reviews)0 comments
Updated
-
Unified Bezels Collection
By ci2own
Unified Bezel Set for more than 200 Systems to use with RocketLauncher.
What means Unified Bezel Set? I would tell is a Set with same Style Bezels so all system bezels will look similar.
Each system has at least 4 variants: NoTV, ThinTV, ThickTV and Blur. All in 16:9 and 1920x1080.
Preview file here: Unified Bezels Project (15-05-2017) (Preview).pdf
Obviously Handheld Systems due to screen dimensions will have another different Bezel Style. Check my Handheld Bezels (Full Device) post here:
1,205 downloads
(1 review)0 comments
Updated
-
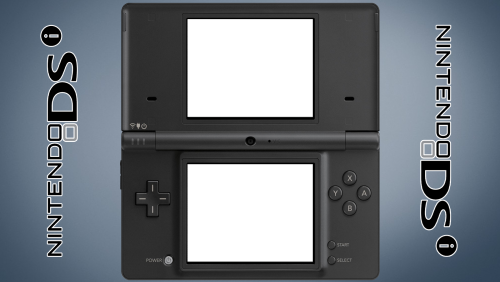
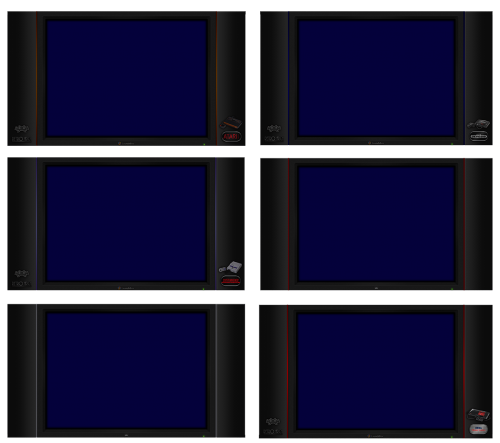
Nintendo DS/DSi Bezel
By Retro808
Nintendo DS/DSi Bezels for use with Retroach. 3 Colors of the DSi handheld with one background for all three.
Also there is a Retroarch cfg file if you simply place the extracted folders in your overlay folder of RA the .cfg inside will allow you to hot key switch between the three colors something I learned from @JamesBaker. Also credit to Orion's Angel youtube channel for showing me how to set up the custom video settings. The .cfg is set to default the red image first. If you prefer to have another color as the default edit the .cfg and change the color names in the order you want. You must use the name of the .png.
654 downloads
(1 review)0 comments
Updated
-
 (1 review)
0 comments
Updated
-
Unified Theme Overlays Pack (+200 in 3 versions)
By Kondorito
Following @CriticalCid awesome Unified theme project, and so you can seamlessly transition from the theme to the emulator, this pack consists of each of the +200 system backgrounds, made as overlays in 1080p, 3 variations each.
IMPORTANT (In case you will be using these pngs with Retroarch):
Overlays require at least one image (.png) and a configuration file (.cfg) in order to activate them. The configuration file should have the exact same name as the image file. DO NOT use spaces in the filenames (for this pack you will need to remove the spaces from the file names). These files (the png and its corresponding cfg) should be placed together in the libretro overlay folder. In order to activate an overlay, go to the RetroArch Settings menu. Find the Onscreen Display submenu. From this menu you can activate the Overlay system and select which overlay file to display.
Example:
4:3 with integer scale
4:3 with integer scale and a drop shadow
4:3 full screen
1,426 downloads
-
4K Retroarch bezels/overlays
By Arcanthur
I designed some overlays for my 4K TV since I couldn't find any at that resolution at the quality I was looking for. I'm in the process of creating more systems in Photoshop, but the console themed designs take quite a while at 4K resolution. Many of these are inspired by the consoles design, so they aren’t 100% accurate to the source, they are just formatted to look nice as bezels/overlays. These overlays are designed to maximize screen real estate (IE no integer scaling), so there is no gap on the top and bottom of the screen. Use standard 4:3 aspect ratio or custom scaling. So, I won't be creating designs for consoles / handhelds that display primarily in 16:9, as doing that requires shrinking the game.
I use the CRT_Geom shader with these settings changed and the screens are curved exactly where they need to be:
CRT Geom Curvature Radius: 3.00
CRT Corner Size: 0.00
CRT Geom Sharpness: 3.00
20,509 downloads
-
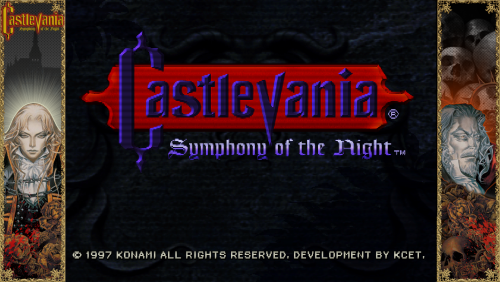
Castlevania: Symphony of the Night - Bezel Overlay
By nadonate
A 16:9 bezel/overlay themed for Castlevania Symphony of the Night (PS1)
Designed for use with retroarch or launchbox. Unzip and drop into 'overlays' folder for retroarch use. (Mednafen PSX Core)
387 downloads
(1 review)0 comments
Submitted
-
CRT Overlays
By eatkinola
These overlays are meant to mimic a CRT screen for 16:9 displays. They include a hazy glass effect but no scanlines -- that's left up to you using RA or MAME shaders however you want. This set meets my needs, but if it's missing a platform you'd like let me know and I can probably throw it together. There are three downloads here:
BARREL: bezel designed for barrel distortion FLAT: bezel designed for no barrel distortion WSSL: widescreen edge-fade with scanlines The BARREL and FLAT downloads also include bezels without platforms; instead there is an alpha cutout you can use to make your own for other platforms, games, etc.
909 downloads
(1 review)0 comments
Updated
-
MAME Atari 5200 Software System Custom Artwork File
By spycat
The standard issue of the Atari 5200 software system artwork file, a5200.zip limits all games to a common, generic bezel. That's how MAME does software system external artwork by default.
This is essentially an expanded version of a5200.zip, that will allow each game (it caters for the games associated with the Bezel Project Atari 5200 pack) to display it's own bezel at launch.
Note that this is for MAME standalone only and is not compatible with RetroArch.
Once downloaded, the file MAME Atari 5200.zip should be unzipped.
The artwork file in the download is a5200.zip and it contains the multi-view lay file.
The game bezels themselves are not included, due to permission from the Bezel Project to distribute them not sought, so you will need to download the pack and drop the bezels into the artwork a5200.zip yourself.
You will also need to set LaunchBox Custom Command-line Parameters to allow MAME to match the correct bezel for each game. This is explained in the download.
The a5200.zip artwork file will work whether you are emulating using direct media calls (games with the long naming and a52 extension) or emulating using a software list.
45 downloads
(1 review)0 comments
Submitted
-
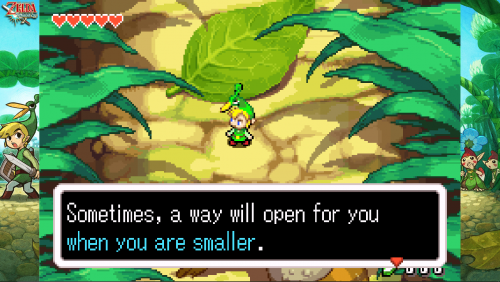
The Legend Of Zelda - The Minish Cap GBA - Bezel Overlay
By ASR-94
A 16:9 overlay/bezel for The Legend Of Zelda - The Minish Cap (GBA)
You can use it with retroarch or launchbox via a retroarch core. Unzip into the overlays folder in retroarch to use
If anyone have any questions or have a issue with the overlay feel free to comment
159 downloads
- minish cap
- retroarch
- (and 7 more)
(1 review)0 comments
Updated
-
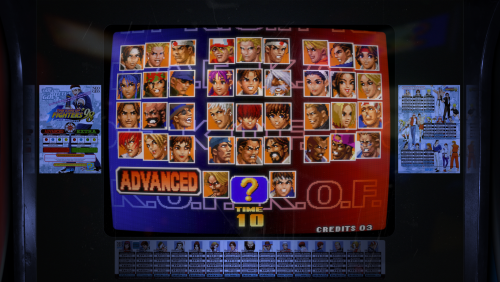
Neo Geo v2 4K - Lights Out - Realistic Retroarch Bezels
Neo Geo v2 4K - Lights Out - Realistic Retroarch Bezels
This is an upgrade to my previous Neo Geo bezels where I only used top or bottom strips, in this version I used as much instruction artwork from the mvs kits as I could possibly find including side art. Contains restored and translated artwork as well.
This is part of the "Lights Out - Realistic Retroarch Bezels" series:
https://forums.launchbox-app.com/files/file/1950-mr-retrolusts-lights-off-retroarch-bezels/
If you like these in Mame format go to: Mame 4K - Lights Out - Realistic Bezels
==========================================
FEATURES
- All in 3840x2160 pixels for high detail
- 152 unique bezels
==========================================
INSTALLATION
The following steps are for users of 3840x2160 displays only. This setup will save you countless hours adjusting them yourself, but be sure not to rename any files or folders and follow below instructions. IMPORTANT: If you use another resolution you'll have to manually adjust the position and size of the game screen yourself.
1. Place the contents in the folder "RetroArch/config/FB Alpha 2012 Neo Geo" to the folder of the core that you use, as you can see I use the FB Alpha 2012 Neo Geo core.
2. Within this folder rename the following config file "SNK - Neo Geo" to the name of the folder where your NeoGeo games are stored. This file will automatically give all the NeoGeo games without artwork the generic bezel.
3. Place the contents from "RetroArch/overlays/_MR.RETROLUST/NeoGeov2" to it's like named structure within RetroArch.
Done & Enjoy! \m/
==========================================
CREDITS
Mr.DO: http://mrdo.mameworld.info/mame_artwork_ingame.php
NeoGeosoft: http://www.neogeosoft.com
1,342 downloads
-
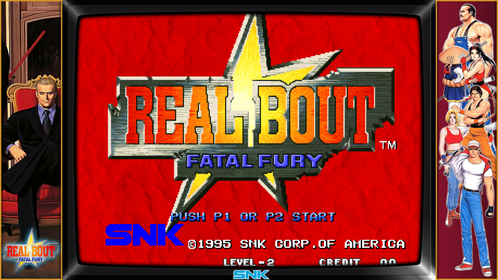
package overlays: fatal fury & real bout.
By dmdgc
package overlays: fatal fury & real bout (1920x1080) for mame. with snk frame and screen mask .
327 downloads
(1 review)0 comments
Submitted
-
Sega Naomi 4K - Lights Out - Realistic Retroarch Bezels
Sega Naomi 4K - Lights Out - Realistic Retroarch Bezels
Excuse me for the bad quality video, my editing software really sucks (take that Pinnacle Studio 20, time to switch to better software), there is a clip in the video of Gun Survivor that freezes frame.
Please note: The bezel for 18 Wheeler is connected to "18wheelu" and Airline Pilots to "alpilotj" as the other roms didn't work for me for some reason. If for whatever reason you want to connect the bezels to other roms you'll have to rename the files and within the config files as well.
This is part of the "Lights Out - Realistic Retroarch Bezels" series:
https://forums.launchbox-app.com/files/file/1950-mr-retrolusts-lights-off-retroarch-bezels/
==========================================
FEATURES
- All in 3840x2160 pixels for high detail
- 37 unique bezels
==========================================
INSTALLATION
The following steps are for users of 3840x2160 displays only. This setup will save you countless hours adjusting them yourself, but be sure not to rename any files or folders and follow below instructions. IMPORTANT: If you use another resolution you'll have to manually adjust the position and size of the game screen yourself.
1. Place the contents in the folder "RetroArch/config/Flycast" to the folder of the core that you use, as you can see I use the Flycast core.
2. Within this folder rename the following config file "Sega Naomi" to the name of the folder where your Sega Naomi games are stored. This file will automatically give all the Sega Naomi games without artwork a generic bezel.
3. Place the contents from "RetroArch/overlays/_MR.RETROLUST/Sega Naomi" to it's like named structure within RetroArch.
Done & Enjoy! \m/
==========================================
CREDITS
Hasan Tasdemir from Nationaal Video Game Museum for the opportunity to photograph at your amazing museum.
https://www.nationaalvideogamemuseum.nl
1,424 downloads
(1 review)0 comments
Updated
-
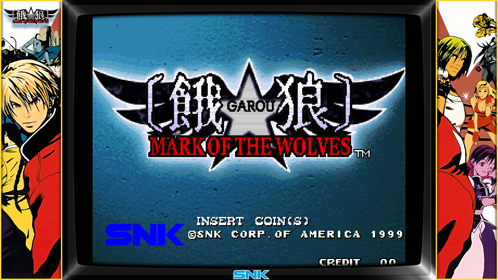
package overlays:garou,last blade,svc.
By dmdgc
package overlays:garou,last blade,svc (1920x1080) for mame. with snk frame and screen mask .
334 downloads
(1 review)0 comments
Submitted
-

Retrorama Overlay pack
By harryoke
as requested by @cbee69
Phill's work is amazing, glad to share.
Overlays for 76 systems included.
383 downloads
-
Launchbox 1080P Home System TV Overlay
By soqueroeu
Hello everyone!
I made this Overlays to use simultaneously with Retroarch + Launchbox, as it contains their logos. Obviously they can be used for Retroarch alone, of course!
I thank the original creators for each material used!
They are all 1080p overlays based 4:3 displays. Use to your home console systems
INSTRUCTIONS:
Unzip to Retroarch's overlays folder
SCALING SETTINGS:
Integer Scale: OFF
Aspect Ratio: Custom
Custom Aspect Ratio (X Position): 310
Custom Aspect Ratio (Y Position): 68
Custom Aspect Ratio (Width): 1300
Custom Aspect Ratio (Height): 975
Shader: anyone for flat screen
Have a good time!
380 downloads
-
(RevA)-220213-185550.thumb.png.50964ba215b076b2e04652751070ac9e.png)
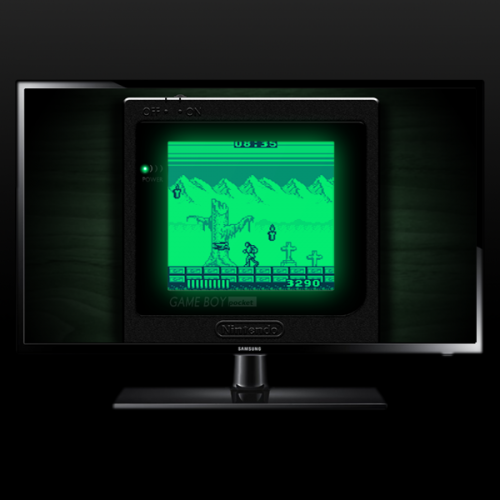
reflection lights SOQUEROEU TV Backgrounds
By soqueroeu
Soqueroeu TV Backgrounds
Backgrounds for Mega Bezel Shader on Retroarch
----------------------------------------------------------------------------
NOTE: This new package requires updated Retroarch versions (1.9.8 or higher) and Shader Mega Bezel pack V 0.9.097 (2022-01-05 Rev 2) or later.
-------------------------------------
This is about my original TV backgrounds for use in conjuction with HyperspaceMadness Mega Bezel Reflection Shader.
I think lots of people would be pleased to play old games using an actual CRT TV, so I created my own project as a nice way to have a simulated TV… INSIDE your actual TV or monitor. Believe me, this works pretty well!
Please consider my work with this project as complete. New backgrounds may or may not eventually appear. Feedback is really welcome.
I hope everybody enjoys SOQUEROEU – Mega Bezel TV Backgrounds!
-----------------------------------------
What is SOQUEREU - Mega Bezel TV Backgrounds?
My TV backgrounds are meant to be used with Retroarch. They are not conventional screen overlays: included presets automatically load configurations for Mega Bezel Reflection shader to obtain maximum retro-feeling. In fact, they are designed to work as an addon to the shader and cannot be used standalone like standard overlays as they don’t have any trasparent region for tube.
Why?
My idea is to develop special backgrounds to be used while playing close to big screens. Taking inspiration from other designers projects, I started creating my own backgrounds in Photoshop featuring simple TV images. They are intended to as little space for the image tube as possible, bringing comfort for those who play close to big screens.
Users may find several spots to improve my work, after all I’m still tranining my skill with graphical tools! Btw, I tried to develop a wide variation of colors and shapes, so they wouldn’t result repetitive. I hope people will enjoy playing games and customizing their experience with my assets.
What is Mega Bezel Reflection Shader?
This is a collection of special shaders with lots of customization possibilities, as well as beautiful real-time tube reflections! They were developed by HyperSpaceMadness, with feedback from many people who like old games. In my opinion, this is one of the biggest contributions to the retrogaming emulation scene.
Requirements
Retroarch 1.9.8 or later with simple presets enabled. Slang shaders previously installed in your Retroarch (download from Retroarch’s update menu). Shader Mega Bezel pack V 0.9.097 (2022-01-05 Rev 2) or later. Features (v2.1)
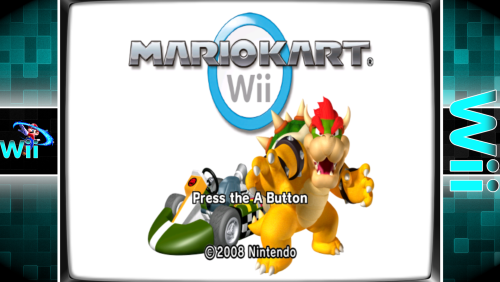
All backgrouns 16:9 @ 3840x2160 (4K) png format; Day and night presets for a comfortable experience (Night need normal preset for reference); No need for additional advanced preset adjustments; Flat and curve screen presets (NEW); Some graphics have color variations (NEW); Generic graphics for systems without their own TV (NEW); Added Nintendo Wii 16x9 preset (NEW); Added Sega Dreamcast preset (NEW); Systems included:
3DO Atari 2600 NEC PCE Super Grafx NEC PC Engine NEC PC Engine CD NEC PC Engine Duo NEC PC-FX NEC Turbo Duo NEC Turbo Grafx 16 NEC Turbo Grafx CD Nintendo Famicom Nintendo Famicom FDS Nintendo GameCube Nintendo N64 Nintendo NES Nintendo Super Famicom Nintendo Super Game Boy Nintendo Super NES Nintendo Wii (4x3 and 16x9) Sega Dreamcast Sega Mark III Sega Master System Sega Saturn Sega SG-1000 Sega CD Sega Genesis SNK NeoGeo AES Sony Playstation Sony Playstation 2 (4x3 only) To learn more about Mega Bezel Shader, please visit HSM's Forum Libretro page .
-------------------------------------------
How to use these backgrounds?
This guide assumes that you already use Mega Bezel shaders. It means you must have the Mega Bezel shader pack previously installed. If you haven't used these special shaders yet, look for additional information further down in this document.
These backgrouns are in 16:9 @ 3840x2160 format. Presets will always use the Standard version of Mega Bezel. Please note, there are no presets with Advanced parameter in this package.
Shader presets use relative path. You can then unzip this pack to any folder from the Retroarch root folder if you wish. If you choose a location other than this guide, consider the locations you determine to find shader presets.
1 - Inside the downloaded .zip you will see a folder called Soqueroeu-TV-Backgrounds_V2.1. Unzip this folder to Retroarch/shaders/
2 - When a game is running, load a shader preset. Find presets in one of these directories:
Retroarch/shaders/Soqueroeu-TV-Backgrounds_V2.1/presets/TV-Console
Retroarch/shaders/Soqueroeu-TV-Backgrounds_V2.1/presets/TV-Console-Night
Once applied, a shader preset might look like this:
NOTE: Some shader generated bezels are combined with a bezel built into the graphic. If you want more freedom to create your own bezel, you can use "solid" graphics available for some of them. This may require editing the file paths in the preset.
Beginning Users
if it's your first experience with Mega Bezel Shaders, here the complete instructions:
1 - You must have Retroarch 1.9.8 or later (you will not be able to load in previous versions).
2 - You will need Slang shaders previously installed in your Retroarch. Download them from Retroarch's update menu.
NOTE: You will only be able to see the Slang Shaders in the Retroarch download list if video drivers is set to Vulkan. It may be necessary to save changes and restart your Retroarch.
3 - You will need Shader Mega Bezel pack. Find the links on the MegaBezel page.
4 - If you have previous versions of Mega Bezel installed, you need to delete the old shader pack. Do not overwrite files, this can cause crashes.
5 - After downloading Mega Bezel pack, see inside the .zip there is a folder called bezel. Copy this folder into the following directory: Retroarch/shaders/shaders_slang.
6 - After downloading the TV Backgrounds pack, inside the .zip you will see a folder called Soqueroeu-TV-Backgrounds_V2.1. Unzip this folder to: Retroarch/shaders.
7 - Open Retroarch and go to driver options (Settings>Driver>Video). Set the video driver to Vulkan. It also works with GLCore, but seems to be faster with Vulkan.
8 - Still in Retroarch, go to Settings>Video>Scale. Set integer value scale to OFF. Set the screen aspect ratio to match your monitor, for example 16: 9.
9 - When a game is running, load a shader preset. Find presets in one of these directories:
/Retroarch/shaders/Soqueroeu-TV-Backgrounds_V2.1/presets/TV-Console
/Retroarch/shaders/Soqueroeu-TV-Backgrounds_V2.1/presets/TV-Console-Night
Note: A shader preset can take between 5 and 10 seconds to load. On first use, small stutters may occur when navigating through the parameter menus. The loading time can also be a little longer. This happens because the shader is caching the changes. Wait and trust!
10 - If any background appears upside down, access the shader parameters and modify the Flip Viewport Vertical option, in the [FLIP & ROTATE] section.
11 - If you want to change shader parameters, you should know that MegaBezel offers several customization options. Once you have desired result, you can save preset to Core (active core), content directory or whole system. I recommend you save by applying to platform/console folder contents, as each system operates with different display resolutions and a customization may present unwanted results for some other core.
IMPORTANT: When saving a preset, make sure you have the Simple Presets feature set to ON. This will save a preset that has a reference to the preset you loaded, along with any parameter changes you made. This is what will keep your presets loading correctly when the shader is updated in the future.
Have a good time!
1,308 downloads
-
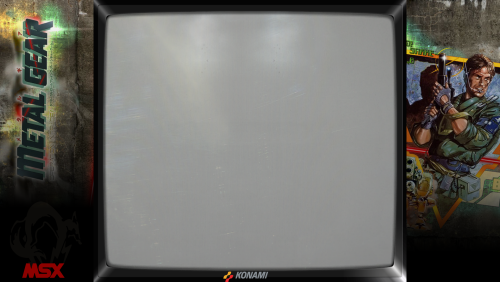
MSX2 Metal Gear Pack
By ScissorShiv
Bezels for the MSX 2 system:
Metal Gear (MSX2) ....this is the best version of the initial Metal Gear IMO
Metal Gear 2 (MSX2)
Cheers!
83 downloads
(1 review)0 comments
Submitted
-
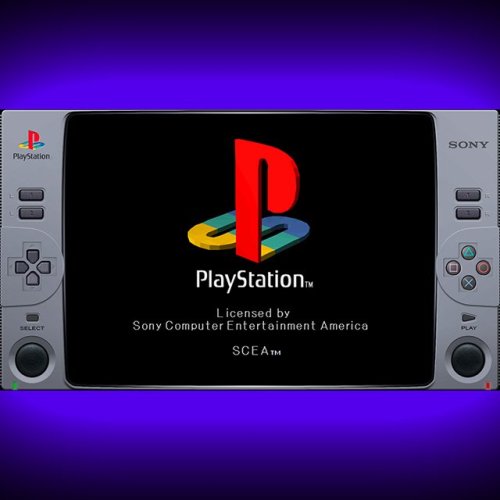
Playstation 1 - Animated Overlay for Retroarch
By fercho
Created this idea , of an hybrid animated control with a Classic Playstation 1 console style.
Full HD 1920x1080 Resolution 16:9 Screen Ratio Animated Buttons
Recommended Video scale settings: (for a 16:9 screen ratio monitor)
SETTINGS >> VIDEO >> SCALING
INTEGER SCALE: OFF ASPECT RATIO: 4:3 CROP OVERSCAN: ON Use this setting on fullscreen and you should be good to go.
NOTE: Buttons should be responsive to touch/mouse clicks, But was intended to be used as a decorative/cosmetic overlay/border. DO NOT use on systems without hard controls (joypads/keyboards) as it doesn´t have access to the retroarch menu, you'll be stuck! (Mobile compatibily coming in the future)
See it in action:
548 downloads
-
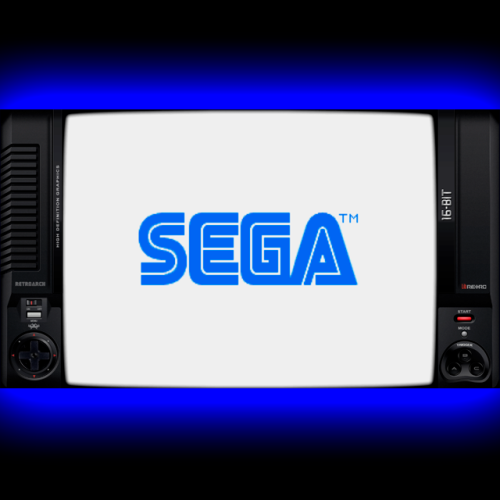
Sega MegaDrive - Animated Overlay for Retroarch
By fercho
Decorative and animated border- overlay for Retroarch,
Based on the original Sega Megadrive console design.
3 AND 6 BUTTON OVERLAYS
Click on the MODE button to switch
RECOMMENDED VIDEO SETTINGS
For a proper full screen display on a 16:9 screen:
SETTINGS \ VIDEO \ SCALING \ INTEGER SCALE: OFF ASPECT RATIO 4:3 CROP OVERSCAN: OFF ENABLE BUTTONS ANIMATION
SETTINGS \ ON-SCREEN DISPLAY \ ON-SCREEN OVERLAY
Set : SHOW INPUTS ON OVERLAY TO : PHYSICAL (CONTROLLER)
RECOMMENDED 6 BUTTON CONFIGURATION
INSTRUCTIONAL VIDEO: https://www.youtube.com/watch?v=gw38OqigS8o&t=140s
For a proper distribution in the buttons for the 6 button mode,
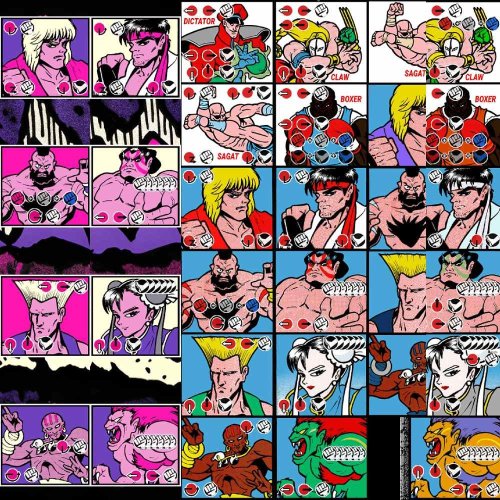
Mortal Kombat and Street Fighter games were taken as main example.
For MORTAL KOMBAT games overlay controller mapping is:
X and A are set for High and Low Punch, Y and B are for Run and Block, Z and C are High and Low Kick For STREET FIGHTER games overlay controller mapping is:
X Y Z are light, medium and hard punch A B C are light, medium and hard kick RETROARCH BUTTON INPUT CONFIGURATION
For the defaults 3 button configuration, recommended mapping should be
Overlay A button should be Retroarch Y button Overlay B button should be Retroarch B button Overlay C button should be Retroarch A button
RECOMMENDED SETTINGS FOR THE 6 BUTTON MODE
- First set your controller in the main input settings, to match your game pad:
SETTINGS \ INPUT \ PORT 1 CONTROLS
- LOAD ANY 6 BUTTON GAME
Open the main menu
quick menu \ controls \ port 1
Step in the each button and press left/right to change options
set the buttons like this:
A BUTTON = C B BUTTON = A X BUTTON = Z Y BUTTON = X L BUTTON = Y R BUTTON = B - GO BACK (press backspace on the keyboard )
MANAGE REMAP FILES \ SAVE GAME REMAP FILES
(this way input mapping should be done for each 6 button game)
- OR
Store your 6 button roms in a dedicated folder
and instead choose: SAVE CONTENT DIRECTORY REMAP FILE
( THIS WAY YOU DONT HAVE TO DO THIS FOR EVERY GAME )
388 downloads
(1 review)0 comments
Updated
-
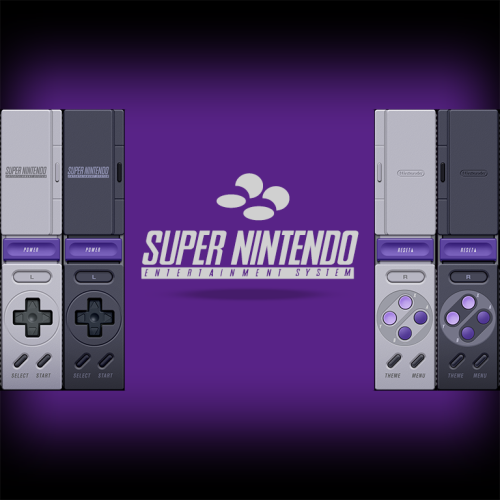
Super Nintendo - Animated Overlay for Retroarch (UPDATE)
By fercho
UPDATES IN NEW VERSION
New elements arrangement. No more black empty sides on ultra wide displays.(set the "AUTO SCALE OVERLAY" option to ON for non wide displays). Optimized fonts in panels and buttons. Redesigned face buttons (A B X Y L R). Corrected main grey color brightness. Corrected purple color (blue removed). Redesigned side panels. In-screen bezel removed (won't interfere with shaders) Selectable Dark theme addition. CONFIGURATION TIPS
RETROARCH VIDEO DRIVER:
Use Vulkan or any Open GL driver (DirectX drivers are buggy withanimated overlays)
VIDEO SCALING:
Set the screen scaling to 4:3 in a 16.9 display to get a fullscreenperfect overlay fit.
Otherwise set the video scaling manually to fityour device display.
- Integer Scale set to OFF
OVERLAY SETTINGS:
Set the "AUTO SCALE OVERLAY" option to ON in non wide displays.(square displays like crt tv's, vga monitors, lcd panels, etc.) Otherwise you'll get displaced controls. Set Overlay Opacity to 1.0 Set Show Inputs on Overlay to: Physical(Controller) Set Show Inputs from Port to: 1 CREDITS
Special thanks to Reddit user Kuroiryuu for the dark theme idea, and help in color and font optimizations.
Overlay config created with the RetroPad editor by Valent-in.
Nintendo logos by Dan Patrick and David Pustansky.
692 downloads
-
retroarch Mr. RetroLust's Mame 4K Bezels - non official retroarch conversion - (4K and 1080p only!!)
By klyze_pt
First of all i wanna thank @Mr. RetroLust, you can find the official post here Mr. RetroLust's - Mame 4K - Lights Out - Realistic Bezels with his awesome work.
This is just a mass scripted conversion of Mr. Retrolust work added a Mega Bezel shader and some manual tweaks for retroarch, all credits to @Mr. RetroLust and Mega Bezel Community.
First a warning, this is for 4K and 1080P resolutions only!! it wont work as intended in other screen resolutions.
Instructions:
1- Choose and unzip your config.zip (1080p or 4k) to the retroarch folder, it has the individual game cfgs for finalburn neo and mame cores already has the "mega bezel shader pack" included.
regardless of what core run what, the rom names are shared, so for the sake of simplicity, with the exception of the core main .cfg files (MAME.cfg / FinalBurn Neo.cfg) all the other game individual .cfg files are exactly the same.
2. extract "shaders_v110.zip" to the shader folder, it has the default retroarch ":\shaders\shaders_slang\" shaders and the mega bezel special shaders in ":\shaders\shaders_slang\bezel\Mega_Bezel\Presets\", this pack presets in the klyze folder
Or you can go to Mega Bezel Community and add the latest version manually, just dont forget to add my presets.
Games with flat overlay have a dedicated flat shader, but some look good with either flat or curved, so its up to you.
2a. if you think the mega bezel shader is too taxing for your pc just download "Normal Shaders pack" and overwrite the megabezel ones.
3. unzip all the "overlays_partX.zip" files and place them in the overlay folder ":\overlays\Arcade4k\"
This was tested in a clean retroarch install, so if you have a retroarch with some weird settings you may have to adjust the main core cfgs yourself.
Again, this was a mass conversion, so you may find some unexpected issues i missed, so just give me some feedback.
1,458 downloads
- real bezels
- 1080p
- (and 2 more)
.thumb.png.0143038bf35d857bbdebee35c3dc47b2.png)