Third-party Apps and Plugins
205 files
-

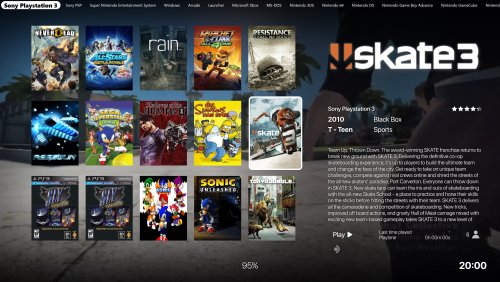
Community Theme Creator
By y2guru
Manuals / How to
Refer to my YouTube channel or visit Faeran's Theme Creator Workshop videos to better understand the new features.
Dave Paterson - YouTube
Development Live Streams - YouTube
COMMUNITY Theme Creator - Patreon
11,276 downloads
- bigbox
- custom bigbox themes
- (and 1 more)
-

Mame No-Nag Updated Monthly, Current Version:
By MadK9
**This removes the nag screen that informs you if a rom doesn't work correctly, or if at all, if you use this no nag, then please do NOT go to the mame support site with issues with games, please only use if you understand that there will be no help from anyone at mamedev as you are using a modified version of mame.
Contents: mame.exe - Normal Mame with Nags removed. (Note mame no longer carries the 64 in its exe name changed by Devs in 0.229)
It's advisable to download the full mame official pack and install it, then just overwrite the exe with the replacement, this covers any changes the mame devs may have made to the support files.
After you have done this, make sure you copy the folders artwork, ctrlr, cheat, hlsl, ini, folders and the ini files from the root of your original mame folder, and move/copy them to the new install.
If you are using your own installed/setup of mame then make sure you also set in the mame.ini 'Skip_gameinfo 1'
If you got Launchbox to setup mame for you when asked, you only need to replace the exe and play.
As some are not sure about False Positives, and report a virus was detected, As goes for all versions i upload, they are all ran through virustotal before i upload, and if by any chance something did end up with an issue it would be noticed very quickly after upload and would be removed/restricted.
0.265 - https://www.virustotal.com/gui/file/1f8fd667e2d48c3f7f7323bda3c798b3dd824cad8f7ee0af7a274766f83044f1?nocache=1
All NEW versions of the No-Nag will be posted in this download thread only, if you wish to get the new releases every month, either follow myself or the thread, As the download section will not show any new releases.
14,253 downloads
-
(Bulk) Add Additional Applications
By JoeViking245
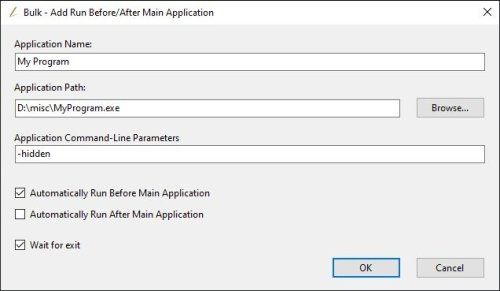
(Bulk) Add Additional Applications A.K.A. (Bulk) Add Run Before/After Main Application
(July 10, 2023)
This plugin is no longer supported. But [for now] still works.
Please see its successor: Bulk Add/Remove Additional Applications
The intent of this plugin to add the same Additional Application to more than one game, all at one time. More specifically, it is to add an Additional Application you want to run Before and/or After the selected games.
*Works with LaunchBox versions 10.14 and newer.*
Setup:
Download and extract "Bulk Run Before-After.dll" from the zip file and place it in your Plugins subfolder of LaunchBox. Right click the dll file, select Properties, and click "Unblock" (if it's there) and click OK.
Using the plugin:
Select more than one game (or all of them) in your Platform. Right click on one of the selected games and select "Bulk Run Before/After Main Application". Fill in the Application Name, Path to the program, any necessary Command Line Parameters and then check the appropriate box if you want it to run Before or After (or both or none) the Main Application. Click OK You should probably test this on only 2 or 3 games first BEFORE you decide to do your entire Platform. There is no [bulk] undo (See Additional Notes).
Additional Notes:
Once you click "OK", the Additional Application is added to each game you had selected. There is no Bulk Edit or Bulk Remove**Additional Application(s). (at least by me)
It does require that you give it an Application Name and an Application Path.
It will verify that your Application Path points to an existing file but it will not check if there's an existing Additional Application with the same Name.
**If you clicked OK when you should have clicked Cancel, you can remove them with this plugin: (Bulk) Remove Additional Applications
647 downloads
-
(Bulk) Remove Additional Applications
By JoeViking245
(Bulk) Remove Additional Applications
(July 10, 2023)
This plugin is no longer supported. But [for now] still works.
Please see its successor: Bulk Add/Remove Additional Applications
The intent of this plugin is to Remove the same** Additional Application for all games in a given Platform, all at one time.
**Same is determined by the Additional Applications Application Name and Application Path. If they match exactly, they are the ‘same’.
Why use this? Quite possibly because you used the Bulk Add Additional Applications plugin and you clicked “OK” before realizing you forgot to add in the Command-Line Parameters or it's simply not needed anymore.
Setup:
Download and extract "BulkRemoveAdditionalApps.dll" from the zip file and place it in your Plugins subfolder of LaunchBox.
Right click the dll file, select Properties, and click "Unblock" (if it's there) and click OK.
Using the plugin:
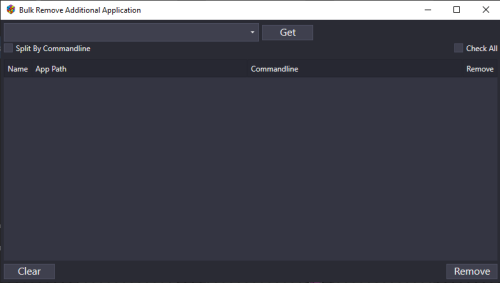
- Click Tools and select "Bulk Remove Additional Apps".
- Click the dropdown box and select a Platform.
- Click Get to show the Additional Apps for that Platform.***
- Check the Remove box(s) for the Additional Apps you wish to delete.
- Click Remove to delete/remove all occurrences of those selected Additional Apps.****
*** The plugin will 'combine' any Additional Apps that have the exact same Name AND App Path, and only display one of those. When you remove that "one", all occurrences (having the same Name and Path) will be removed.
***Example: You used the Bulk Add Additional Applications plugin to add an Additional App to 245 different games. You named it “My Run-Before App” and set the Application Path to “D:\MyApps\RunBefore.exe”. This plugin will only display it in the list once, instead of 245 times. (Because they all “have the exact same Name AND App Path”.)
**** Once you click Remove, the apps you had selected will get removed/deleted forever. There is no undoing this once OK is clicked! (unless of course you have your backup file that was created with the LaunchBox built-in Automatic Backup feature.)
269 downloads
-
Add To Games DB
By UnderwoodNC
*** Updated for Initial Support for LaunchBox v.Next ***
AddToGamesDb: A plugin to help automate the process of submitting all of your game information and images from your collection to the LaunchBox Games Database.
About the Plugin
This plugin makes use of an application traditionally used in automated testing (Selenium) to automate the process of submitting games to the LaunchBox Games Database. It will open an instance of your default browser (provided that browser is either Chrome or Firefox. If some other browser is your default, it will try to open Chrome), and attempt to submit the selected game to the LaunchBox Games Database based on the information provided in your collection.
If the game does not exist in the database, it will create a new game entry and submit it to the database. If you have added additional information or images to a game that already exists in the database, it will enter the title and platform, then pause to let you choose the existing game, then add any additional information from your collection to the LaunchBox Games Database. Installation Instructions
Note: For this plugin to work, you will need to have either Chrome or Firefox installed. If you have both installed, it will use whichever you have set as your default browser. If you are using Firefox as your default browser and have enabled Firefox Profiles, please note that this will run under the default profile. For any and all other cases, Chrome is the preferred browser.
Unzip everything to the Plugins folder. Usage Instructions
Note: If, in editing your collection, you are prompted to download an update for the LaunchBox Games Database, afterward you will need to close and re-open LaunchBox for the plugin to detect the changes.
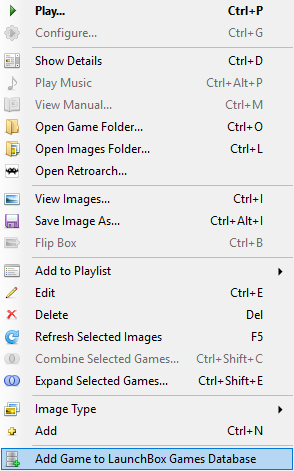
Open LaunchBox and browse to a game that is either missing from the Games Database, has additional information not in the database, or has images not in the database -- right click that game, and select the appropriate option, it will show either: Add Game to LaunchBox Games Database Update Game in LaunchBox Games Database Add New Images to LaunchBox Games Database The first time you run the plugin, you may be prompted to login to LaunchBox Games Database. If so, the plugin will pause here to allow you to login as normal. Check "Remember Me" to skip this step going forward. Your login information is not read or stored in the code, it is stored in Chrome or Firefox's normal AppData cache on your system. If you do not login, the plugin will time-out after 5 minutes and close the browser. Depending on the game, you may be prompted with a screen that identifies similar titles and you will be asked to either select the correct title, or click the button to add a new game. If so, the plugin will pause here until you make your desired selection, then automation will resume for the remainder of the process. Logging
By default, the logging is only set to a general "Info" level and up that contains generic start and submission successful messages, along with any errors encountered. If you continue to encounter an error somewhere along the way, please take the following steps:
Browse to the plugin's folder -- LaunchBox\Plugins\AddToGamesDb Open NLog.dll.nlog in Notepad or another text editor. Scroll down to the bottom and find the <rules> section of the configuration. Find this line: <logger name="*" minlevel="Info" writeTo="file" /> And change it to this:
<logger name="*" minlevel="Trace" writeTo="file" />
Try to submit the problem game, if it is a particular game causing the issue, or another game in general otherwise.
Browse to the log file in the plugin's folder -- LaunchBox\Plugins\AddToGamesDb\log\AddToGamesDb.log
Feel free to post the error and preceding trace either on the plugin's support page or PM me either the entire log or the part pertaining to the last issue, whichever is easier for you. From there, I'll investigate and make any updates necessary.
Supported Fields
Auto-population of the following fields is currently supported:
Name/Title Platform Release Date ESRB Developers Publishers Genres Wikipedia URL Overview Max Players Cooperative Images Known Issues
Context Menu (right-click menu) does not refresh on Audit window. If you update the information for a game in LaunchBox (clicking Edit from the right-click menu for the game), you will need to click away from the game (click some other game, for example), and then right-click on the updated game again for the context menu to update. Even without doing so, however, the correct process should run even though the text and icon on the menu haven't yet updated. A lot of work has gone into stabilizing the initial release and this latest release, but if you encounter any issues, please let me know and I will be glad to work with you to update the plugin accordingly.
Thanks, Jason, for providing your amazing software and thanks again to Jason, the LaunchBox staff and the community for your support in developing this plugin.
2,382 downloads
-
All Killer - Some Filler list for Lightgun Games
By JaysArcade
This is an All Killer - No Filler style bat file for lightgun games. Simply place the bat file in you roms folder and double click to run. It will automatically create a lightgun folder and copy the lightgun roms to that folder. List was created by me Jay Thompson, and is probably missing some good games (Terminator 2 is missing for example) but it will get you started. Let me know if there are any games that obviously belong in here that I missed. The original lists exclude Lightgun Games and Trackball Games as part of the no filler mantra. A lot of folks have lightguns on their cabinet so I felt it in the best interest of the community to go ahead and make this.
Interested in more All Killer-No Fillers lists? Check out this thread at byoac - http://forum.arcadecontrols.com/index.php?topic=149708.0 .
And this one by @lordmonkushttps://forums.launchbox-app.com/files/file/282-no-filler-mame-rom-copy-182/ .
180 downloads
(0 reviews)0 comments
Submitted
-
All Killer No Filler Mame Rom Copy
By Lordmonkus
These bat files will copy all the roms and bios files from a split rom set as of Mame v.170 rom set. Using this on a rom set not 170 you may have missing roms so use with care if your set is different.
First off I did not create this at all, I am merely packaging this into one file for easy download and distribution. I got these files from http://forum.arcadecontrols.com/index.php/topic,149708.msg1563036.html#msg1563036 and they were created by the user BadMouth and he deserves all the credit for these files and the work put into them.
In this package you will find bat files and txt files of the same name, these are exactly the same files but with different extentions. Open the txt files if you wish to view exactly what the bat files are going to do.
To use these files simply copy the bat files into your Mame rom folder and run each bat file. Each bat file will then create a folder with a name matching the bat file and copy the roms from your Mame roms into the corresponding folder for easy organization. It does not move your files so you will still have an intact full Mame rom set.
If you do not wish to have separate folders simply use the _NoFiller.bat to copy them all in one shot into a folder created by the bat file.
630 games including those commented out. The batch file may contain more than this since I included multiple versions of a few games so the user could pick which works best for them. (2 or 4 player version, Budweiser Tapper or Root Beer Tapper, etc)
I'm using split sets, these numbers may vary depending on type of set and compression method.
2,923 downloads
-
Arcade Classics Windows 10 Desktop Theme
By malarrya
This is the ONLY Windows 10 Arcade Classics Desktop Theme available anywhere (that I could find)! I know this is not specifically LaunchBox related but it is retro-gaming related so I though I would share.
NOTE - YOU DO NOT NEED LAUNCHBOX TO USE THIS THEME.
I created this desktop theme for Windows 10 from 33 images and 30 wave files found around the internet and use them for my arcade cabinet. I take no credit for any of the images or sounds but thought I would share the theme in case anyone's interested. I put the Sound Scheme and Images together to create an ARCADE CLASSICS WINDOWS 10 DESKTOP THEME. Most images are 1920x1080 except for 2 that are a bit bigger and don't look that good scaled down.
IN ORDER TO GET THE SOUND SCHEME AND DESKTOP THEME TO WORK TOGETHER:
1. Place the Arcade Classics Folder containing the WAV files into your %WINDIR%/media folder. Press WINDOW KEY + R then type in %WINDIR%/media to open the folder.
2. Double-click on the ARCADE CLASSICS THEME file (Arcade Classics.deskthemepack). It should connect the sound scheme to the desktop theme.
I also included a VBS script that makes the desktop wallpaper rotate to the next random image and a shortcut to this script that makes it easy to double-click and run the script. You WILL NEED TO EDIT THE SHORTCUT depending on where you move the VBS script but I included it for completeness. Put the VB-SCRIPT wherever you'd like then edit the shourtcut to point to the vb-script. I have my script in my ../Hyperspin/ folder and the shortcut on my desktop but you can place it in your Launchbox directory or wherever you'd like.
Enjoy, and let me know in the comments below if you have any issues with the theme or what your favorite images are. I like Space Invaders, Star Wars, and Battle Zone the best.
313 downloads
-

Arcade64 No-Nag
By MadK9
This is the no nag for Arcade64.
Please only use this if you know about Arcade64 and how it works, there will be NO support for this no-nag. You also need to have setup Arcade 64 in advance as there are required files in the official release that are not added to this no-nag.
48 downloads
(0 reviews)0 comments
Updated
-
Arcade64 No-Nag 0.248
By MadK9
This is the no nag for Arcade64.
Please only use this if you know about Arcade64 and how it works, there will be NO support for this no-nag. You also need to have setup Arcade 64 in advance as there are required files in the official release that are not added to this no-nag.
If you are looking for Mame no-nag's then click here.
108 downloads
(0 reviews)0 comments
Updated
-
Archive Cache Manager
By fraganator
A LaunchBox plugin which caches extracted ROM archives, letting you play games faster. Also allows launching individual files from archives, and loading preferred file types from an archive.
New in v2.16
New M3U name option - "Disc 1 Filename" Always use the filename of the first disc of a multi-disc game for the m3u file, regardless of which disc was launched Allows better support for The Bezel Project config files, which use config files based on the ROM name New batch caching option to pause on caching errors (default is to skip and continue) Minor config window tweaks Description
When a compressed ROM (zip, 7z, rar, gz, chd, rvz, etc.) is first extracted, it is stored in the archive cache. The next time it is played, the game is loaded directly from the cache, virtually eliminating wait time.
As the cache size approaches the maximum size, the oldest played games are deleted from the cache, making room for new games.
Features
Skip the extraction wait time for recently played games. Configurable cache size and location. Configurable minimum archive size (don't cache small archives). Option to extract all discs in a multi-disc game, and generate M3U file. Option to copy ROM files to cache without extraction. Option to keep select ROMs cached and ready to play. Select and play individual ROMs from a merged ROM archive. Batch cache feature for extracting or copying multiple games to cache at once. Filename and extension priorities per emulator and platform (cue, bin, iso, etc). Support for additional archive formats (chd, rvz, etc) Support for Xbox iso to xiso conversion Badge to indicate cached games Example Use Cases
Why use Archive Cache Manager? Here's some example use cases.
ROMs located on NAS or external storage, where disk read or transfer time is slow. ROM library maintained as accurately ripped/dumped collections, where specialised compression formats not an option. Extract and play archives from location other than LaunchBox\ThirdParty\7-Zip\Temp, such as platform specific folder (for RetroArch Content Directory settings). Playing ripped PS2 games with PCSX2 where the disc image is bin/cue format, avoiding the "CDVD plugin failed to open" error message. Playing zipped MSU versions of games, where need to launch the rom file instead of the cue file from the archive. The library contains GoodMerged sets, and you want a quick way to play individual ROMs. Installation
Download the latest release from https://forums.launchbox-app.com/files/file/234-archive-cache-manager/ or https://github.com/fraganator/archive-cache-manager/releases Unblock the download if necessary (right-click file -> Properties -> Unblock) Extract this archive to your LaunchBox\Plugins folder, then run LaunchBox / BigBox. Within LaunchBox, ensure the emulator or emulator platform has the "Extract ROM archives before running" option checked. Uninstallation
Quit LaunchBox / BigBox, then navigate to the LaunchBox\Plugins folder and delete ArchiveCacheManager. Delete the archive cache folder (default is LaunchBox\ArchiveCache). Usage
Extracting and Caching
Archive Cache Manager runs transparently to the user. All that is required is the emulator or emulator platform has the "Extract ROM archives before running" option checked. Extraction and cache management is carried out automatically when a game is launched.
Cache and extraction behaviour can be modified in plugin's configuration window.
Multi-Disc Games
To use the multi-disc cache feature, check the "Multi-disc Support" option in the Archive Cache Manager config window. The next time a multi-disc game is launched, all the discs from the game will be extracted to the cache and a corresponding M3U file generated.
If the emulator \ platform supports M3U files (as configured in LaunchBox), the generated M3U file will be used when launching the game. Otherwise a single disc will be launched, and swapping between cached discs can be done manually in the emulator.
Batch Caching Games
Multiple games can be cached at once using the Batch Cache Games window. Select one or more games in LaunchBox, then right-click a game and choose the "Batch Cache Games..." option.
A window will popup displaying the list of games, and begin checking the extracted ROM sizes. Once the checks are complete, click the Cache Games button to begin caching.
Games are cached according to the plugin's emulator and platform settings. A game may be extracted, copied, or no action taken if it doesn't match a caching rule, or it's already cached.
Each game's caching progress will be displayed in the Status column, and a progress bar at the bottom of the game list shows the overall caching progress. If an error occurs during caching, it will be flagged in the Status column and caching will skip to the next game. If the "Pause Caching On Error" is checked, an error message is displayed with the option to continue or stop.
Tip: For games stored on a NAS or an external drive, use Batch Cache Games to cache a selection of them locally. Enable the plugin's Always Bypass LaunchBox Path Check option to allow the cached game to be launched directly, even if the network or external drive is disconnected!
Selecting and Playing Individual ROMs From an Archive
To play an individual ROM from an archive containing multiple ROMs (different regions, hacks, or discs), right-click it and choose "Select ROM In Archive...".
A window will popup with a full listing of the archive contents. Select the desired ROM file, then click Play. That ROM will now launch with the configured emulator.
The next time the game is launched via the normal Play option, the previous ROM selection will be automatically applied. To select another ROM, use the same "Select ROM In Archive..." menu.
The same menu is also available in BigBox, though currently only supports keyboard input.
Keeping Games Cached
Games can be marked 'Keep' so they stay cached and ready to play. To keep a game cached, open the plugin configuration window from the Tools->Archive Cache Manager menu. From there a list of games in the cache is shown. Check the Keep box next to the game, then click OK.
Badge
The plugin includes a badge to indicate if a game is currently in the cache. It is available under the Badges->Plugin Badges->Enable Archive Cached menu. There are additional Simple White and Neon style badges, which can be found in the LaunchBox\Plugins\ArchiveCacheManager\Badges folder. Copy your preferred icon to the LaunchBox\Images\Badges folder and rename it Archive Cached.png.
Configuration
Configuration can be accessed from the Tools->Archive Cache Manager menu. An overview of each of the configuration screens and options is below.
Cache Settings
This page shows a summary of the cache storage and currently cached items, and provides options for cache configuration.
Configure Cache
Clicking the Configure Cache... button opens the cache configuration window.
Configure Cache - Cache Path
This is the path of the cache on disk. The path can be absolute or relative, where relative paths are to the LaunchBox root folder.
Default: ArchiveCache
If the cache path is set to an invalid location (LaunchBox root for example), an error message will be displayed when clicking OK.
If the cache path is set to an existing path that already contains files or folders, a warning will be displayed when clicking OK. Click Yes to proceed, or No to go back and change the path.
Configure Cache - Cache Size
This is the maximum cache size on disk in megabytes. The oldest played games will be deleted from the cache when it reaches this size.
Default: 20,000 MB (20 GB)
Configure Cache - Minimum Archive Size
This is the minimum size in megabytes of an uncompressed archive before it will be added to the cache. Archives smaller than this won't be added to the cache.
Default: 100 MB
Keep
A Keep flag can be applied to a cached item. When set, the item will be excluded from cache management and not be removed from the cache. This is useful for less frequently played games which need to load without waiting (very large games, party games, favourites, children's games, etc).
Default: Disabled
Open In Explorer
Clicking the Open In Explorer button will open the configured cache path in Windows Explorer. This button is disabled if the cache path does not exist.
Refresh
Refreshes the cache summary and list of cached items from disk.
Delete
Clicking on the Delete button will remove the selected items from the cache (including items with the Keep setting).
Delete All
Clicking on the Delete All button will delete everything from the cache (including items with the Keep setting).
Extraction Settings
This page provides settings for archive extraction and launch behviour. Each row in the table applies to the specified emulator \ platform pair. If a game is launched which doesn't match an emulator \ platform, the settings in All \ All will be used.
Emulator \ Platform
The specific emulator and platform for the settings to be applied to. Add a new emulator and platform row using the Add... button. Remove an emulator \ platform row using the Delete button.
When a new row is added its settings will be copied from the All \ All entry, except for Priority which will be blank.
Priority
Files from an archive can be prioritized in the case where an emulator requires a certain filename or file type. This setting defines the filename or extension priority for the specified emulator and platform combination.
The priorities are a comma delimited list, where the highest priority is the first entry, the next highest priority is the second entry, and so on. If a match is not found in the archive when a game is loaded, the priority in All \ All is used.
A wildcard (*) can be used to perform partial filename matches. Examples include:
bin, iso - Files ending with bin, then files ending in iso, then all other files. eboot.bin - Files named eboot.bin, then all other files. *(*E*)*[!].*, *(*U*)*[!].*, *[!].* - GoodMerged style, prioritizing European 'good' ROM dumps, then USA 'good' ROM dumps, then other region 'good' ROM dumps, then all other files. Note that the priority is applied to all archives, even if they are not cached.
The fallback All \ All priority is the basis for the contents of the multi-disc M3U file generation. Be careful removing entries such as cue, unless a specific emulator \ platform is used to handle cue and similar file types.
Default:
All \ All | mds, gdi, cue, eboot.bin PCSX2 \ Sony Playstation 2 | bin, iso Action
The action to take when processing a ROM file.
Extract - Extract an archive to the cache. Non-archive files will be passed directly to the emulator. Copy - Copy the game file to the cache. Archive files will copied, but not extracted. Extract or Copy - If the game file is an archive, extract it to the cache. Otherwise copy the game file to the cache. Default: Extract
Launch Path
The path within the cache to launch the game from. Useful for managing common settings in RetroArch which are based on the game's folder.
Default - The archive folder in the cache, which is in the form <Filename> - <MD5 Hash> Title - The game's title set in LaunchBox (e.g. Final Fantasy VII) Platform - The game's platform set in LaunchBox (e.g. Sony Playstation) Emulator - The emulator title set in LaunchBox (e.g. RetroArch) Games will always be extracted \ copied to the <Filename> - <MD5 Hash> location. If the Launch Path is set to something other than Default, the corresponding folder will be created within the cache, and NTFS hardlinks will be created which point to the extracted \ copied files.
Default: Default
Multi-Disc
Check this option to enable multi-disc support. When enabled, the following actions occur when playing a multi-disc game:
All discs from a multi-disc game will be extracted \ copied and added to the archive cache. M3U files will be generated, with the name based on the M3U Name setting. The M3U contents will list the absolute path to one cached file per disc, where the file is chosen based on the emulator \ platform file priority, or the special All \ All priority. If the emulator \ platform supports M3U files, the generated M3U file will be used when launching the game. Default: Enabled
M3U Name
The name of the M3U file created when launching a multi-disc game, and Multi-Disc is enabled. The M3U file name is used by some emulators to create a save file and match settings.
Game ID - The unique ID for a game, generated by LaunchBox. This is the same M3U naming convention used by LaunchBox (e.g. 2828d969-4362-49d5-b080-c2b7cc6f7d59.m3u) Title + Version - The game's title and version combined, with (Disc N) removed from the version (e.g. Final Fantasy VII (Europe).m3u) Disc 1 Filename - Use the filename of the first disc as the name of the M3U, regardless of which disc was launched (e.g. Final Fantasy VII (Europe) (Disc 1).m3u). Allows for The Bezel Project support, while maintaining a consistent name for emulators to manage save files across multiple discs. Default: Game ID
Smart Extract
Check this option to enable smart extraction, which will only extract a single file from an archive if a number of rules are met. See the Smart Extract Settings section for details.
Default: Enabled
chdman
Check this option to extract a chd file to cue+bin files using chdman. The executable chdman.exe must be copied to the folder LaunchBox\Plugins\ArchiveCacheManager\Extractors.
Default Disabled
DolphinTool
Check this option to extract rvz, wia, and gcz files to iso files using DolphinTool. The executable DolphinTool.exe must be copied to the folder LaunchBox\Plugins\ArchiveCacheManager\Extractors.
Default Disabled
extract-xiso
Check this option to extract and convert full iso files to Xbox iso files using extract-xiso. Supports both zipped and stand-alone iso files. The executable extract-xiso.exe must be copied to the folder LaunchBox\Plugins\ArchiveCacheManager\Extractors.
Default Disabled
Smart Extract Settings
When enabled, the Smart Extract option will check if it's possible to extract only a single file from an archive. For merged archives containing multiple ROM versions and hacks, this avoids the need to extract a potentially large number of files to play a single game.
Smart Extract will extract and launch a single file from an archive if the following conditions are met:
All of the file types in an archive are the same, excluding files with Metadata Extensions.
OR
All of the file types in an archive are Stand-alone ROMs, excluding files with Metadata Extensions.
The file to extract will be (in priority order):
The individual file selected through the "Select ROM in Archive..." right-click menu. The first file which matches a configured Priority. The first file in the archive. Stand-alone ROM Extensions
A comma delimited list of file extensions which can run stand-alone (no dependencies on other files).
Default: gb, gbc, gba, agb, nes, fds, smc, sfc, n64, z64, v64, ndd, md, smd, gen, iso, chd, gg, gcm, 32x, bin
Metadata Extensions
A comma delimited list of file extensions which indicate ROM metadata, and aren't required to play a ROM file.
Default: nfo, txt, dat, xml, json
Plugin Settings
Always Bypass LaunchBox Path Check
When enabled, bypasses LaunchBox's check that a game's application path (ROM file) exists before launch. If a game is cached and the source ROM storage is slow or unavailable, the game will still launch immediately.
The bypass check happens automatically if the extract action is Copy, or the file is not zip, 7z, or rar.
Default: Disabled
Check For Updates On Startup
Enable this option to check for plugin updates when LaunchBox starts up. This is a simple version check of the latest release on github, and nothing is automatically downloaded or installed. If a new update is found a message box will appear shortly after LaunchBox is started, with the option to open the download page in a browser.
Default: On first run, a message box will appear asking the user if they'd like to enable the update check.
Source Code
This plugin is open source, and can be found on github: https://github.com/fraganator/archive-cache-manager
1,243 downloads
-
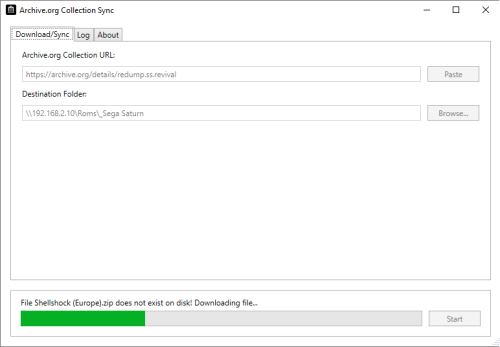
Archive.org Collection Sync
By Jason Carr
Easily download/sync any collection from archive.org to your local computer. Automatically scans for any existing files and checks MD5 checksums to make sure that all downloads are correct.
To download, simply paste the archive.org URL into the top field, put the destination folder into the second, and click Start.
To pause/abort a running download, simply close the window. To resume that download later, re-open the app, choose the same URL and folder, and then click Start. Existing files with the correct checksum will not be re-downloaded.
Requires the .NET Framework 4.7.2. Licensed under the MIT License.
Source code is available here: https://github.com/jasonunbrokensoftware/ArchiveOrgCollectionSync
1,207 downloads
-

Auto Play N' Quit - AHK Script by IzzIsHOr
By izzishor
I've been fiddling around with trying to make BigBox run a game and then switch it with another if no play is detected...
I tried looking at Arcade EIP, however... it seemed too complicated to configure for me at 4 a.m. last night, so I got ChatGPT out, and tried to come up with a AHK script that does the following:
Launches a game from a BigBox playlist Waits 3 minutes in-game, to show it's attract mode Brings RetroArch to the foreground Closes RetroArch Beeps Once Brings BigBox to foreground Holds "Down Arrow Key" to scroll trough games LOOPS the script again (game changes every 3 minutes) Script can be closed at any time by pressing the "START" button for me that's Joy8
-------------------------------------------------------------------------------------------------------------------------------
How I activate the script personally is,
Created a New Playlist with games I'd like to scroll trough (named it Attract mode) Edited the metadata of a game (I chose 1941 because it's top of list) Under Additional Apps I've added the AHK script Set it to Automatically Run Before Main Application Everytime I run 1941 it starts the script and scrolls trough random games until you press "START"
I have been testing it for a full day, it never once failed if you have it set up like me.
IMPORTANT!
It will not work "out of the box" without modifications if you're running anything else than RetroArch as an emulator, and a BigBox Theme that has vertical scrolling, also BigBox must have its default keyboard binds.
31 downloads
- bigbox autoplay game
- bigbox ahk script
- (and 3 more)
-

AutoHideMouseCursor
By goblindriver
I found a great, simple and free app that hides your mouse cursor after a specified amount of time.
I have the application start when I start Windows and have specified a 5 second interval.
Its perfect for Big Box and HTPC users.
credit to: http://softwareok.com/ for an elegant solution.
288 downloads
(1 review)0 comments
Updated
-
Autoplay Attract Mode
By skizzosjt
This was inspired by "Play N Quit" and I wanted to create an improved version that would work for anyone regardless of settings in Big Box
Description: This is an AHK script that will automatically launch and close selected games for an in game playable take on Attract Mode. In between each game being selected, it will randomly scroll through your game wheel. Please note at this time it will only work in a single game wheel (it's not smart enough to know how to go into different platforms/playlists) and though can be easily configured for different emulators, it can only be configured for one at a time. Once the script is running you can easily start playing whatever game is currently being ran by hitting the designated hotkey to stop the script and proceed with your gaming session!
Here are the improvements:
Takes into consideration whether or not Startup/Shutdown screens are enabled Takes into consideration whether or not Game Details View is skipped Can work with any emulator Uses a random number for the game wheel selection to change Can set a max value for this random number Randomizes direction for the game wheel to move Will work with a vertical or horizontal game wheel Removed all the extra non-functional lines
How to use:
In the header section of the script there are detailed comments directing users what a handful of variables are doing and how to set them
GameDetails - Use a value of 1 if you have Game Details View enabled. Use a value of 0 (or anything but 1) if you have Game Details View disabled GameWheelOrientation - Use "V" (must be in quotes) for vertical game wheels (ie up and down) and use "H" for horizontal game wheels (left and right) GameRunTime - Enter the number of minutes each game should run before closing and choosing the next game MaxGames - the maximum random number to be generated. Tip: make this at or smaller than the total qty of games in the platform/playlist. (if you make it same or greater as total qty it is possible for the random number to select the same game twice in a row) EmulatorEXE - Enter the file name with extension of the emulator (must be in quotes) Exit Hotkey - last line in script is a hotkey to terminate the script. Use this at any time the script is running to stop it
Default values:
GameDetails - 0 (disabled) GameWheelOrientation - "V" (vertical) GameRunTime - 3 (minutes for game to run) MaxGames - 150 (max number for wheel to move to select new game) EmulatorEXE - "retroarch.exe" (emulator's executable file name with extension) Exit Hotkey - Joy8 (commonly the "start" button on joypads)
How to use (continued):
Place the script file in a desired location In LaunchBox, edit a game entry In the game's Additional Apps, add the script file as the Additional App Select for the Additional App to start automatically at game launch Now when this game is launched, this script will start the Autoplay Attract Mode Alternative launching method:
Alternatively, you could add a hotkey to the script that would start it If so place this hotkey at the spot designed in the script, specifically it is line 28 For ex: +Home:: The above example starting hotkey would be shift+home keys Recommended to add the script to startup programs in LaunchBox if using the start with hotkey method. Do this instead of adding it to a game as an Additional App This is due to the script will instead launch automatically at start of LaunchBox/Big Box. But it will not execute the main part of the script until the hotkey is pressed This may be a better method for some to start/stop the script depending on your use case
Leave any feedback in this thread! Cheers!
35 downloads
-
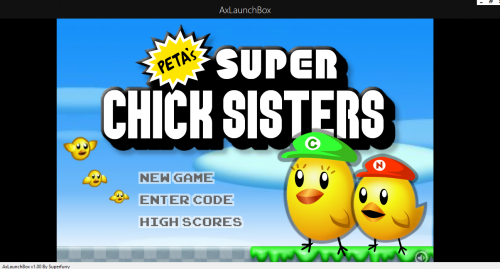
AxLaunchBox (Launchbox Plugin)
By superfurry
AxLaunchBox
A way to launch shockwave flash games on launchbox
1.Extract all files into launchbox plugin folder
2.Start new platform as flash , and point emulator to dummy.exe(optional)
3.Launch by right clicking on flash game and launch with AxLaunchBox
4. Enjoy
Superfurry
213 downloads
(0 reviews)0 comments
Updated
-
Batch file to Auto-Generate .m3us
By fromlostdays
The new m3u auto generator for Launchbox is a great tool, but it also got me wondering if I couldn't create m3u files for every one of my Sony Playstation titles (including single disk games) and would that work in Retroarch? Something just appeals to me about the uniform file extension on import in Launchbox, and of course, if I wanted to launch games outside of the Launchbox environment I'd need some static m3us. I also wanted to have m3us with relative paths to the cue files, for simplicity sake.
So I asked on Stack Overflow and, not long after, some genuis had posted a working batch script. I figured I'd share it. I also tested whether or not single cue m3us would work in Retroarch, and it turns out they do.
Important:
Your games directory should look like this:
Main Directory/[Game Name]/[whatever name].cue
e.g Sony Playstation/Chrono Cross/disk 1.cue, disk 2.cue
The bat file should be run from the main directory The bat file will name the m3u after the directory the cue files are in and place it in that same directory The bat file will create m3us in every subdirectory which holds at least 1 cue file (it doesn't single out multidisk games as it is now, so be aware of that) The bat file should work with any system provided it has the above directory set up and utilizes cue files The m3us list relative paths to the cue files, not absolute paths. So continuing the above example, I ran the file in my "Sony Playstation" directory, and within the "Chrono Cross" directory an m3u file was generated and listed relative paths to all the cue files in that directory and was automatically named "Chrono Cross.m3u" (after the folder name, not the cue file(s) names or anything else in the folder).
Lastly, the Stock Overflow user wrote a batch script for both NTFS and FAT hard drives. Apparently the code is different for each. I personally have not tested the FAT version as my drive is NTFS. If anyone wants to check the code, the user also left a thorough explanation that is absolutely unreadable to me. See here: https://stackoverflow.com/questions/60049048/need-a-batch-file-to-create-and-name-m3us-in-subdirectories
Hope it helps!
302 downloads
-
BBS4LB
i made a batch file to launch cgterm to connect to the title of the .exe (commodore4ever bbs.exe)
when run it will extract cgterm in to temp folder then connect you to the bbs of your choice.
when you exit it will deletc the temp folder.
you need to add them one by one into LB the first one you make for platform type in BBS
then on you second one go to the BBS tab in LB and start adding them this saves you from having to fill out the BBS platform everytime.
ive made 17 BBS Launchers and can make more if you wish.
i also will release the batch file (.bat) setup and the program i used to pack it into a .exe. if people want it to make there own.
22 downloads
- bbs
- bulletin board system
- (and 3 more)
(0 reviews)0 comments
Updated
-
(0 reviews)
0 comments
Submitted
-
BezelLauncher
By JoeViking245
What is it?
Use this plugin to display bezels for emulators that don't natively support them.
What does it do?
It displays a bezel and resizes the emulator window to fit within the bezels transparent area.
What's required to make this plugin work?
LaunchBox v13.3 (or newer), the plugin file, bezel images and some minor setup. No more. No less. (See Setting up)
Do I need to provide my own bezel images?
Yes. (See Setting up for where to place them)
Will it work with game specific bezels?
Yes.
Will this work with all emulators?
Yes, with exception. RetroArch and MAME emulators will not show in the list of emulators and cannot be used with this plugin.
The emulators that have been tested so far all work. Some adjustments may be necessary. (see Emulator Settings)
Will this work with storefront games or Windows games?
No.
Can I use my existing RocketLauncher bezel configuration files?You can use the existing platform.png and platform.ini files from RL. These existing files should be located under:
/RocketLauncher/Media/Bezels/platform_name/_default/something.ini (and something.png)
(See Setting up [step #3])
What are the .ini files for?
The .ini (configuration) files tell the plugin how to resize and move the emulator window to fit within the bezel. (See .ini (configuration) Files for more info and Testing for creating and saving them)
Can this plugin add shaders as well?
No. Yes. See Using Shaders (new v2.1.0)
Disclaimer
This works on my test PC. I didn’t test it on my cab because I didn’t want to change my emulator settings to not use fullscreen (see Emulator Settings). Outside of RetroArch and MAME, I don’t use bezels, so didn’t want to mess-up-a-good-thing.
There are no guarantees, express or implied… blah blah blah blah blah blah blah.
There is no risk. This plugin makes no changes to LaunchBox or your emulators. If you decide this isn’t for you, simply undo any fullscreen changes you made and (with LB/BB not running) delete the BezelLauncher folder.
Special Thanks
Special thanks to @MadK9 for the idea, direction and help with testing! Without him, I would have never contemplated starting this project. Also a big thanks to @Sbaby for testing un-tested emulators with the plugin.
Installing
With LaunchBox/BigBox not running...
Download the plugin .zip file "Unblock" the file Right-click the file, select Properties, check the box "Unblock", click OK. Or better yet, just use 7-zip to open the file Copy the contents (a folder called "BezelLauncher") into your \LaunchBox\Plugins\ folder Start LaunchBox
Setting up
Start BezelLauncher Setup from the LaunchBox Tools menu, then click Close This will create the \Plugins\BezelLauncher\Bezels\platform_name\ subfolders Copy your bezel images into their respective platform_name subfolders See Bezel Images for more information (optional) If you have existing RL platform_name.ini files, copy those alongside the image files See .ini (configuration) Files for more information Restart BezelLauncher Setup Select a platform Choose an emulator you wish to use for that platform. Check Disabled to enable it Click Test Adjust (Move/resize) the orange frame to fit within the view area of the bezel (See Testing) Click Shaders to enable, adjust and change shader (see Using Shaders) (new v2.1.0) Click Save [to save the .ini file] Click Save on the main setup screen to add the emulator to the list of Enabled platform emulators Repeat for other platforms and emulators you wish to add You must click "Save" for each emulator you've enabled, separately.
Maintenance
After adding/removing platforms or emulators
Run BezelLauncher Setup Click Refresh Continue with Setting up, step #5
Testing
To configure the placement of the emulator window within the bezel (Requires an existing bezel image):
Run BezelLauncher Setup Select a platform and an emulator Enable it (if it's not already) Click Test
Move and resize the frame
Click [and hold] the left or right side of the frame to move it around Click [and hold] the bottom right corner to resize Use the on-screen buttons to fine-tune the adjustments The on-screen display will show information about the emulator window.
(You can click and drag the OSD to move it around as needed)
x, y = upper left monitor-coordinates of the emulator window w, h = width and height of the emulator window x, y = lower right monitor-coordinates of the emulator window
If any of the values are red, they are off the screen The OUTSIDE edge of the frame is the emulator window extents After adjusting, click Save. This will overwrite any existing configuration file.
Using Shaders (new v2.1.0)
First you need some shaders. Place the .png images in the /Bezels/Shaders/ folder (Scanline.png 'shader' is included) Start BezelLauncher Setup Select your platform and emulator and click Test Click Shaders Check the box to turn shader on Use the slider to adjust the shader Adjust the opacity down to lighten the shader Use the drop-down box to select a different shader Click Save to save your settings
Parameters
Depending on the emulator and the bezel, you may need to check 1 or more of the following parameters:
(h) hideStuff
Check this if you see the desktop behind bezel while the game is loading. This adds a black background during the startup process.
(s) startupSleeper
“Hide stuff” for a little longer during startup (3 seconds)
(l) longerSleep
Same as above (4 seconds)
(g) hideGameStartup
Check this if LB Game Startup screen is showing behind the bezel at game startup
When selecting a platform, if the plugin detects an emulator that has been tested, “suggested” parameters will be shown. Your mileage may vary.
Emulator Settings
For the plugin to move/resize the emulators’ window, you will need to disable fullscreen in the emulator(s). This may be as easy as removing "-f" or "-fullscreen" from the Default Command-line Parameters (depending on the emulator).
Beyond that, of the emulators I've tested, the only one that needs to have its Default Command-line Parameters altered is SuperModel. You will need to manually set the resolution.
Start BezelLauncher Setup Select your Super Model 3 platform and Enable it Click Test and after adjusting the frame to where you want it, make note of the W(idth) and H(eight) #'s shown in the OSD. Save and Close. (Be sure to click Save on the main Setup screen to save Enabled as well.) Edit your SuperModel emulator (in LaunchBox) and set the Default Command-line Parameters to "-res=W,H" (no quotes, no spaces and replacing W & H with the #'s noted above) Example: -res=1420,1076
Bezel Images
When you run BezelLauncher Setup for the 1st time, the plugin creates subfolders for each of your eligible platforms. They are created in:
\LaunchBox\Plugins\BezelLauncher\Bezels\[platform_name]\
The platform image file needs to be in the [platform_name] folder and must be named the exact same as the platform.
\BezelLauncher\Bezels\Sony PSP\Sony PSP.png
Game-specific bezel files
Game-specific bezel folders (or files) can be named after the games ROM filename or the games Title.
Using the games Title:
If the Title has 'invalid file name characters', those characters will need to be replaced with _ (underscore). The exact same way LaunchBox does with its image files (but without the -01 suffix).
Example: Title = Disney-Pixar's Toy Story 2: Buzz Lightyear to the Rescue!
Bezel = Disney-Pixar_s Toy Story 2_ Buzz Lightyear to the Rescue!.png
NOTE: Additional Apps game Titles are (i.e.) "Play USA Version...". So the bezel would be "Play USA Version....png". Same rules apply with 'invalid file name characters'.
Invalid characters are:
< (less than) > (greater than) : (colon) " (double quote) / (forward slash) \ (backslash) | (vertical bar or pipe) ? (question mark) * (asterisk) ' (single quote) Not technically invalid (post-DOS), but consistent with LaunchBox character replacement
Storing game-specific bezels:
Option 1:
Place your game bezel images directly inside their respective \[platform_name]\ folder. Game-specific image files must be named the exact same as the games ROM file or the games Title (accounting for invalid characters).
example:
\BezelLauncher\Bezels\Sony PSP\After Burner - Black Falcon (USA) (En,Fr,Es,It,Nl) (PSP) (PSN).png
Option 2:
Place your game-specific bezel image folders under the \[platform_name]\ folder. The subfolder must be named the exact same as the games ROM file or Title (barring invalid characters). The .png and .ini files in the subfolder can be any filename. example:
\BezelLauncher\Bezels\Sony PSP\After Burner - Black Falcon (USA) (En,Fr,Es,It,Nl) (PSP) (PSN)\thisIsAnyFileName.png See Launching different game versions for information about bezel requirements for games that are combined as Additional Apps.
ScummVM
Setting up ScummVM for use with this plugin:
In LaunchBox, Edit games using ScummVM. In the ScummVM section, have both checkboxes un-checked. (Fullscreen and Aspect Correction). This cannot be done using the Bulk Edit Wizard, so will need to be done on a per-game basis. One-at-a-time.
If it's not displaying correctly with just the above, try the (optional) following:
Navigate to /LaunchBox/Third Party/SummVM/ and start ScummVM.exe. On the Graphics tab, set Graphics Mode to opengl. Leave the other 2 as default and the check box's un-checked. Click OK and Exit. ScummVM Bezel Files:
To use bezels with games using LB's integrated ScummVM, you will need to set them up manually. It will not appear in BezelLauncher Setup.
Navigate to the plugins Bezels subfolder and add your platform folder. i.e. \LaunchBox\Plugins\BezelLauncher\Bezels\ScummVM\ Add your platform default png and ini files to this folder. i.e. ScummVM.png ScummVM.ini Game specific bezels for ScummVM must be named the same as the Game Data Folder.
i.e. D:\LaunchBox\Games\ScummVM\King's Quest 1 - Quest for the Crown\[game files]
use: "King's Quest 1 - Quest for the Crown.png"
DOSBox
The integrated version of DOSBox is NOT supported by this plugin. I couldn’t get it to cooperate 100% of the time. So going with plan “B”.
To use DOSBox with this plugin, you will need to install and set up DOSBox-X.
Setting up DOSBox for use with this plugin:
Note: BezelLauncher Setup will NOT show your DOSBox platform ('MS-DOS') as an available platform. So don't bother looking for it.
Download DOSBox-X
DOSBox-X releases can be found here: https://github.com/joncampbell123/dosbox-x/releases
Download the vsbuild-win64 version. (direct link for the download file) Create a new folder under \LaunchBox\ThirdParty\ and name it DOSBox-X Extract the contents of the downloads "\bin\x64\Release\" folder into the new folder Be sure to unblock the zip file before extracting (unless you’re using 7-Zip) Configuring DOSBox-X
In Windows Explorer, navigate to \LaunchBox\ThirdParty\DOSBox-X\. Make a copy of dosbox-x.conf. Rename the copy to [something like] "BL-dosbox-x.conf" Right-click the new 'BL-dosbox-x.conf' file and select edit (Notepad++ works great for this. But any text editor (Notepad) will work) Look for the following keys and change their Values as shown: (starting on approximately line 78)
fullresolution = 1400x1080
windowresolution = 1400x1080
windowposition = 260,0
output = ttf
showmenu = false
"1400x1080" (2 locations) is the dimension of the transparent area of your bezel. Adjust as necessary.
From your MS-DOS.ini file, use [Right X]-[Left X] for the 1st value (1400) and [Right Y]-[Left Y] for the 2nd (1080)
"260,0" is the upper-left coordinate of the transparent area. Use the Left-X value for the 1st number and Left-Y for the 2nd.
Save the changes and close the editor.
Configure games to use DOSBox-X
The following assumes your MS-DOS platform games are already setup to use the integrated version of DOSBox.
In LaunchBox, select all your DOSBox games and press Ctrl+E to start the Bulk Edit Wizard. (Select 1 game in the MS-DOS platform, then press Ctrl+A to select all) On the 2nd screen select the Field Custom DOSBox Version EXE Path for Value, Browse to and select dosbox-x.exe Click Next, Next Click “Yes, I would like to make more changes” select the Field DOSBox Configuration File for Value, Browse to and select the new file you created (BL-dosbox-x.conf) Click Next. Next (again). Click "No, I would not like to make more changes"
MS-DOS Bezel Files:
This assumes your DOSBox platform is called "MS-DOS".
In the Bezels subfolder under the plugin folder, create a new folder called 'MS-DOS'. In \LaunchBox\Plugins\BezelLauncher\Bezels\MS-DOS\, add your bezel files (MS-DOS.png and MS-DOS.ini). Game specific bezels for DOSBox need to be named the same as the Game Data Folder
i.e. D:\LaunchBox\Games\MS-DOS\Cosmos Cosmic Adventure\COSMO1.EXE
use "Cosmos Cosmic Adventure.png"
.ini (configuration) Files
The .ini files contain the monitors' coordinates for placing the emulator window.
The Upper Left x,y coordinate and the Lower Right x,y coordinate
Example:
Upper Left X Coordinate=240
Upper Left Y Coordinate=100
Lower Right X Coordinate=1680
Lower Right Y Coordinate=1080
The platform ini file must be named the exact same as the platform. If copied from RocketLauncher, you may need to rename it (removing any under_scores).
i.e. \BezelLauncher\Bezels\Sony PSP\Sony PSP.ini
For game-specific ini files, if they are located in a subfolder below /[platform_name]/ (see Bezel Images, Option 2, above), they can have any filename. If they are inside the /[platform_name]/ folder (Option 1), then they must be named the exact same as the games ROM file or Title.
If a game-specific .ini file doesn’t exist, the plugin will use the games platform.ini file.
Launching different game versions
Also known as Additional Apps, when right-clicking a game and selecting Play Version, the Additional App is not required to have its own bezel files. If the Additional App doesn't have its own bezel, the plugin will look for the Default Games' bezel. If neither of those exist, it will use the platforms’ bezel.
This eliminates the need to have a separate set of bezel files for each version of the game. Useful since they most likely all use the same image. This only works for games that are Additional Apps.
Plugin Folder Structure
As always, any thoughts, views, opinions, [constructive] criticism, comments and suggestions are welcome.
359 downloads
-
BezelMaster : Use your bezel in standalone emulator and improve bezel game matching
By Nixx
So, this addon do two things, first it improve bezel matching, i will go in detail later, but to make it simple you will probably have a lot of game that had default bezel that will now show game specific bezel.
Second, if you launch a game on a standalone emulator, it will get the bezel from retroarch and copy it into reshade-shaders\Textures\bezel.png in your emulator folder, so you can use the game specific bezel with it.
Outside reshade, if you have your bezel working with retroarch, nothing to configure, it will just work.
Some pic (screen ratio can be a little off since i wanted to take the screenshot windowed) :
So, how to install ?
Step 1 - Make sure your bezel works with Retroarch within launchbox.
Step 2 - Install Reshade on your game emulator : https://reshade.me/
Pro tip, the last canari version of citra now support Vulkan backend, it make it easier to work with reshade.
Step 3 : Install a shader that can use this bezel.png.
Two solution : You can use the "Hud_Tech.fx" file insiide the zip, move it to reshade-shaders\Shaders and activate the shader.
Or you can use the shader Layer.fx
Activate the Hud_Tech module (code is not from me, got it from : https://reshade.me/forum/shader-presentation/3504-hud-image-overlay-shader )
Feel free to improve it.
How does the improved bezel matching works ?
For the Bezel project in retroarch, you have to use a name that strictly use the same as the config file registered for the bezel, often the nointro NTSC version.
So, i added two things, first, if it don't find a specialized bezel, it will look for your other game with the same Launchbox Database id and check if for those you have a bezel. (usefull for exemple when you have both the original rom and a modded one)
Second, i toke the time to register in a json file a long list that match launchbox id to the bezel config file, so if your game file don't match, it will use that to try to get a match.
Extra tip :
Use the official app to update your bezel, the launchbox one don't works well for me : https://github.com/thebezelproject/BezelProject-Windows
If you need the source : https://github.com/nixxou/BezelMaster/
111 downloads
-
Big Box Auto Play
By Fry
https://bigboxautoplay.readthedocs.io/en/latest/index.html
BigBoxAutoPlay
BigBoxAutoPlay is a plug-in for BigBox that can automatically launch into a game when BigBox starts up
Installation
Download the latest version of the plugin Copy BigBoxAutoPlay.dll and Prism.dll into the LaunchBox\Plugins folder
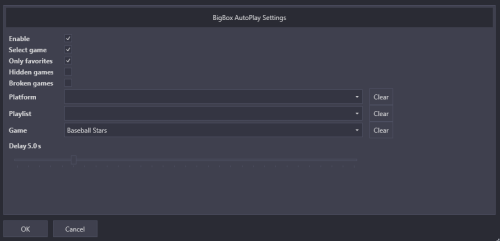
Settings
A new menu item is added to LaunchBox under Tools > Configure BigBox AutoPlay.
Enable
Check the box to automatically play a game when BigBox starts. Uncheck the box to disable the auto-play plugin.
Select game
Check the box to have launch box select the game in the UI before launching it. This should allow the marquee to display properly for the selected game.
Only favorites
Check the box to filter the randomly selected game to only include favorites
Hidden games
Check the box to include hidden games
Broken games
Check the box to include broken games
Platform
Optional. To filter the randomly selected game to only games in the selected platform.
Playlist
Optional. To filter the randomly selected game to only games in the selected playlist.
Game
Optional. To specify a specific game to auto-play. This list is filtered based on the selected platform and/or playlist.
Delay
Specify the number of seconds to delay before launching the game. When a startup video is used with BigBox, this delay can help the auto played game from launching behind BigBox by giving BigBox a chance to fully initialize before launching the game.
Link to GitHub repo
https://github.com/AtomFry/BigBoxAutoPlay
117 downloads
-

Big Box Voice Search
By Fry
BigBoxVoiceSearch
BigBoxVoiceSearch is a plug-in for BigBox that enables searching for games using your voice and a microphone via microsoft's speech recognition. To make use of this plug-in, the plug-in components must be installed to the LaunchBox plugins folder and a few lines of XAML code must be added to the themes where you wish to use it.
Demo
Installation
1. Download the latest version of BigBoxVoiceSearch.zip from the LaunchBox forums or from this github repositories Releases
2. Extract BigBoxVoiceSearch.zip to a folder. Inside the BigBoxVoiceSearch folder is a folder called LaunchBox. Inside the LaunchBox folder is a folder called Plugins. Copy the plugins folder
3. Go to your LaunchBox installation folder and paste the copied folder
4. To verify the installation - confirm the following files exist in your LaunchBox\Plugins folder
- BigBoxVoiceSearch.dll
- System.Speech.dll
5. You can delete the downloaded zip file and extracted folder once the files have been copied into your LaunchBox plugins folder
Adding the voice search element to a theme
In order to use the voice recognition function, a few lines of XAML must be added to the views of the themes that you would like to use this with. Since it's easy to make simple mistakes while tinkering with XAML, it's strongly recommended to make a copy of whatever theme you plan to use this with and make your changes to a copy of the theme so that you can revert to the original theme if mistakes are made. Inside your copied theme there is a views folder. Inside the views folder are xaml files that correspond to the views that you use in BigBox. Select the view(s) for which you wish to include voice searching functionality and edit them in a text editor like notepad or visual studio.
XMLNS
Each view starts with a UserControl element. The user control element will include several lines that start with xmlns. Add the following line to the user control element along with the other xmlns lines.
xmlns:BigBoxVoiceSearch="clr-namespace:BigBoxVoiceSearch.View;assembly=BigBoxVoiceSearch" Examples of adding the voice search user control to a theme
Once the above XMLNS line has been added to a views user control element, you can add the BigBoxVoiceSearch:MainWindowView anywhere inside the theme that you would like it to appear. There are a few properties that you can set on the voice search control to specify how it should behave. First, here are some examples of how it would look to add the voice search control inside a theme:
<!-- Trigger voice recognition with page up, the control is always displayed --> <BigBoxVoiceSearch:MainWindowView ActivationMode="PageUp" ShowInitializing="true" ShowInitializingFailed="true" ShowInactive="true" ShowActive="true" ShowRecognizing="true"/>
<!-- Trigger voice recognition with page down, the control is only displayed while recognizing --> <BigBoxVoiceSearch:MainWindowView ActivationMode="PageDown" ShowInitializing="false" ShowInitializingFailed="false" ShowInactive="false" ShowActive="false" ShowRecognizing="true"/>
<!-- Activate the user control with Up - you will need to press enter to trigger the voice search, the control is always displayed --> <BigBoxVoiceSearch:MainWindowView ActivationMode="Up" ShowInitializing="true" ShowInitializingFailed="true" ShowInactive="true" ShowActive="true" ShowRecognizing="true"/>
<!-- Trigger voice recognition with page up, the control is always displayed, override default images with theme specific images --> <BigBoxVoiceSearch:MainWindowView ActivationMode="PageUp" ShowInitializing="true" InitializingImagePath="Plugins\BigBoxVoiceSearch\Media\MySpecialTheme\Initializing.png" ShowInitializingFailed="true" InitializingFailedImagePath="Plugins\BigBoxVoiceSearch\Media\MySpecialTheme\InitializingFailed.png" ShowInactive="true" InactiveImagePath="Plugins\BigBoxVoiceSearch\Media\MySpecialTheme\Inactive.png" ShowRecognizing="true" RecognizingImagePath="Plugins\BigBoxVoiceSearch\Media\MySpecialTheme\Recognizing.png"/>
ActivationMode
By specifying the ActivationMode property on the voice search user control, you can control how the voice search control is activated and how the voice search is triggered with the following options:
Off The plug-in is effectively disabled No button will activate the user control or trigger speech recognition Up The up button will activate the user control The down button will deactivate the user control Once activated, press enter to start speech recognition Down The down button will activate the user control The up button will deactivate the user control Once activated, press enter to start speech recognition Left The left button will activate the user control The right button will deactivate the user control Once activated, press enter to start speech recognition Right The right button will activate the user control The left button will deactivate the user control Once activated, press enter to start speech recognition PageUp The page up button will trigger voice recognition immediately You do not need to press enter after pressing Page Up You do not need to press any button to deactivate the user control PageDown The page down button will trigger voice recognition immediately You do not need to press enter after pressing Page Down You do not need to press any button to deactivate the user control VisibilityMode
The VisibilityMode property from previous versions has been replaced with individual boolean properties ShowInitializing, ShowInitializingFailed, ShowInactive, ShowActive, and ShowRecognizing.
ShowInitializing
The ShowInitializing property accepts the values "true" or "false" to indicate whether the user control should be displayed while initializing. When the view is loaded, there is an intialization period where the titles in the launchbox game library are parsed to create the speech recognition grammar. Setting this property to true can give a visual indication that the speech recognition functionality is not yet ready to use. This property defaults to false if not specified on the UserControl.
ShowInitializingFailed
The ShowInitializingFailed property accepts the values "true" or "false" to indicate whether the user control should be displayed if initialization fails. Failures could occur while the user control is initializing if there is no default audio device for the speech recognition engine to use. Setting this property to true can give the indication that speech recognition was not setup successfully and is therefore disabled. If errors are encountered, check the log.txt file in the LaunchBox\Plugins\BigBoxVoiceSearch folder for any error details. This property defaults to false if not specified on the UserControl.
ShowInactive
The ShowInactive property accepts the values "true" or "false" to indicate whether the user control should be displayed while it is inactive. The user control will be inactive after initialization completes successfully. Setting this property to true can give the indication that speech recognition is setup and available to use. The property defaults to false if not specified on the UserControl.
ShowActive
The ShowActive property accepts the values "true" or "false" to indicate whether the user control should be displayed while it is active. The user control is put in an active state when you press Up, Down, Left, or Right and the ActivationMode property is set to Up, Down, Left, or Right. Setting this property to true can give the indication that the speech recognition user control is active and will perform a search of enter is pressed. The property defaults to false if not specified on the UserControl.
ShowRecognizing
The ShowRecognizing property accepts the values "true" or "false" to indicates whether the usr control should be displayed while recognizing speech. The user control recognizes speech when you press Page Up or Page Down and the ActivationMode is set to PageUp or PageDown or when you press Enter while the speech recognition user control is active (if ActivationMode set to Up, Down, Left, or Right). The property defaults to false if not specified on the UserControl.
Default image paths
If no custom image paths are specified on the user control, the plugin will look for images with the following path to display in various states:
| State | Default image path | |--------------------|-----------------------------------------------------------------------------| | Initializing | ..\LaunchBox\Plugins\BigBoxVoiceSearch\Media\Default\Initializing.png | | InitializingFailed | ..\LaunchBox\Plugins\BigBoxVoiceSearch\Media\Default\InitializingFailed.png | | Inactive | ..\LaunchBox\Plugins\BigBoxVoiceSearch\Media\Default\Inactive.png | | Active | ..\LaunchBox\Plugins\BigBoxVoiceSearch\Media\Default\Active.png | | Recognizing | ..\LaunchBox\Plugins\BigBoxVoiceSearch\Media\Default\Recognizing.png |
Custom image paths
Images displayed by the user control can be overridden or customized by specifying a relative path to the image file on the user control with the following properties:
- InitializingImagePath
- InitializingFailedImagePath
- InactiveImagePath
- ActiveImagePath
- RecognizingImagePath
Settings
When BigBox loads for the first time, a settings file will be created that will allow you specify how the plugin should behave. Currently there is only one setting to configure
{ "VoiceSearchTimeoutInSeconds": 5 } VoiceSearchTimeoutInSeconds
Specify the number of seconds that the voice search should stay open before it stops listening
Link to GitHub repo
https://github.com/AtomFry/BigBoxVoiceSearch
114 downloads
-
BigBox Daily Reboot
By superrob3000
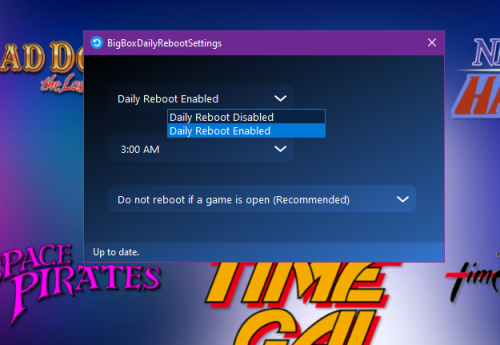
Plugin that adds automated daily reboot support to BigBox (to prevent any slowdowns or errors when running for days). Daily reboot setup is done directly from LaunchBox. Once enabled, your PC will reboot every day at the chosen time if BigBox is running. The plugin is also smart enough to skip the reboot if you are playing a game at the chosen reboot time.
Tutorial and Demo:
Installation:
Copy BigBoxDailyReboot.dll to your LaunchBox/Plugins folder. Open LaunchBox and choose Tools->BigBox Daily Reboot Settings Set daily reboots to Enabled and choose a reboot time. If your PC is not already booting directly into BigBox, create a shortcut to LaunchBox/BigBox.exe and place the shortcut into your Windows startup folder (to get to the startup folder choose Run from the Windows Start menu, type shell:startup in the command box, and hit OK).
Release History:
1.00:
- Initial release.
1.01:
- Improved detection of games being open at reboot time (Steam games were sometimes not being correctly reported as closed).
- Added optional debug log file.
1.02:
- Added version info to the settings screen.
64 downloads
-
BigBox PlatformCategoryPlaylist Selector
By Benuno
2022-03-23 10-33-23.mp4 A plugin for BigBox that makes it possible to have a playlist/platform carousel inside any game view/theme via simple .xaml edit of any game view. With this plugin you no longer have to leave the game view as you can select every playlist/platform from there!
Installation:
Globally: Put the BigBoxPCPSelector.dll file into Launchbox/Plugins folder.
Per Theme: Put the BigBoxPCPSelector.dll file into Theme's Plugin folder.
Theme's Game View files: Edit WallView/TextGame/HorizontalGame View's files by adding the plugin to the user control
<UserControl Name="Canvas" ClipToBounds="True" xmlns:PD="clr-namespace:BigBoxPCPSelector.View;assembly=BigBoxPCPSelector" .... /> and after that add the Platform Selector somwhere between the <Canvas> tags as below. These are currently the values you have to give the plugin to work. (Stuff like Position adjustment will be added soon)
<PD:PlatformSelector Panel.ZIndex="900" ItemFontSize="20" ItemFontWeight="Normal" ItemForegroundBrush="White" ItemBackgroundBrush="Transparent" SelectedFontSize="30" SelectedFontWeight="ExtraBold" SelectedForegroundBrush="Black" SelectedBackgroundBrush="Transparent"/> Controls:
Esc: Activate Plugin Wheel
Left/Right: Move carousel index
Up: Switch between playlists and platforms
Down: Deactivate Plugin Wheel
Esc 2x: Escape Menu like default
Enter: Confirm Playlist/Platform selection
Contribute:
Feel free to improve the plugin at https://github.com/Benuno/BigBoxPCPSelector! Any support is appreciated .
Thanks to @Fry for the help/initial code structure!
69 downloads

.thumb.png.0143038bf35d857bbdebee35c3dc47b2.png)